一、创建项目
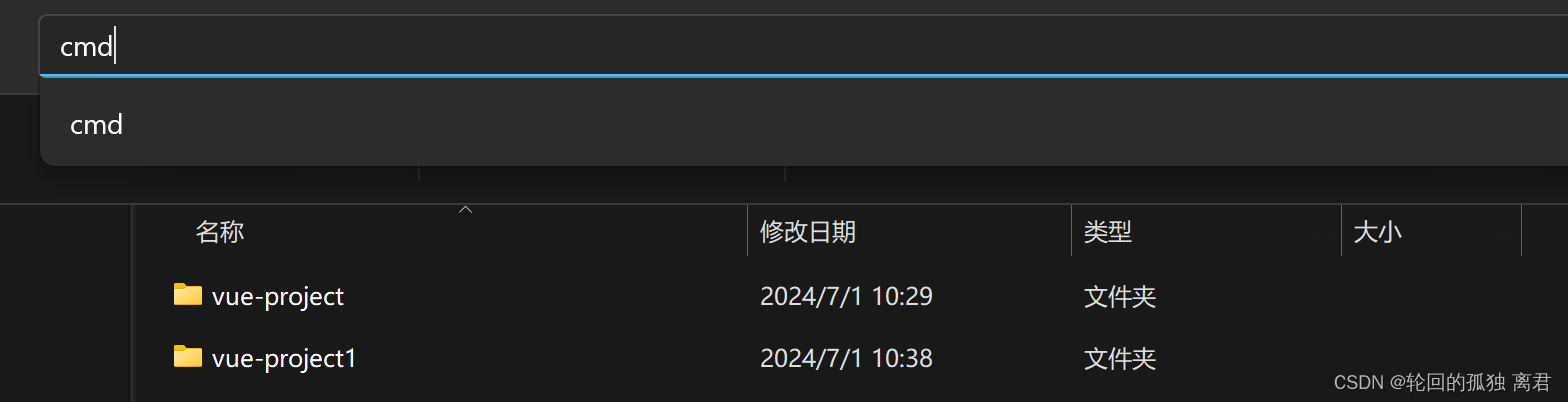
1.以管理员权限进入文件cmd
可以先试试直接在文件导航栏输入cmd会省事一些
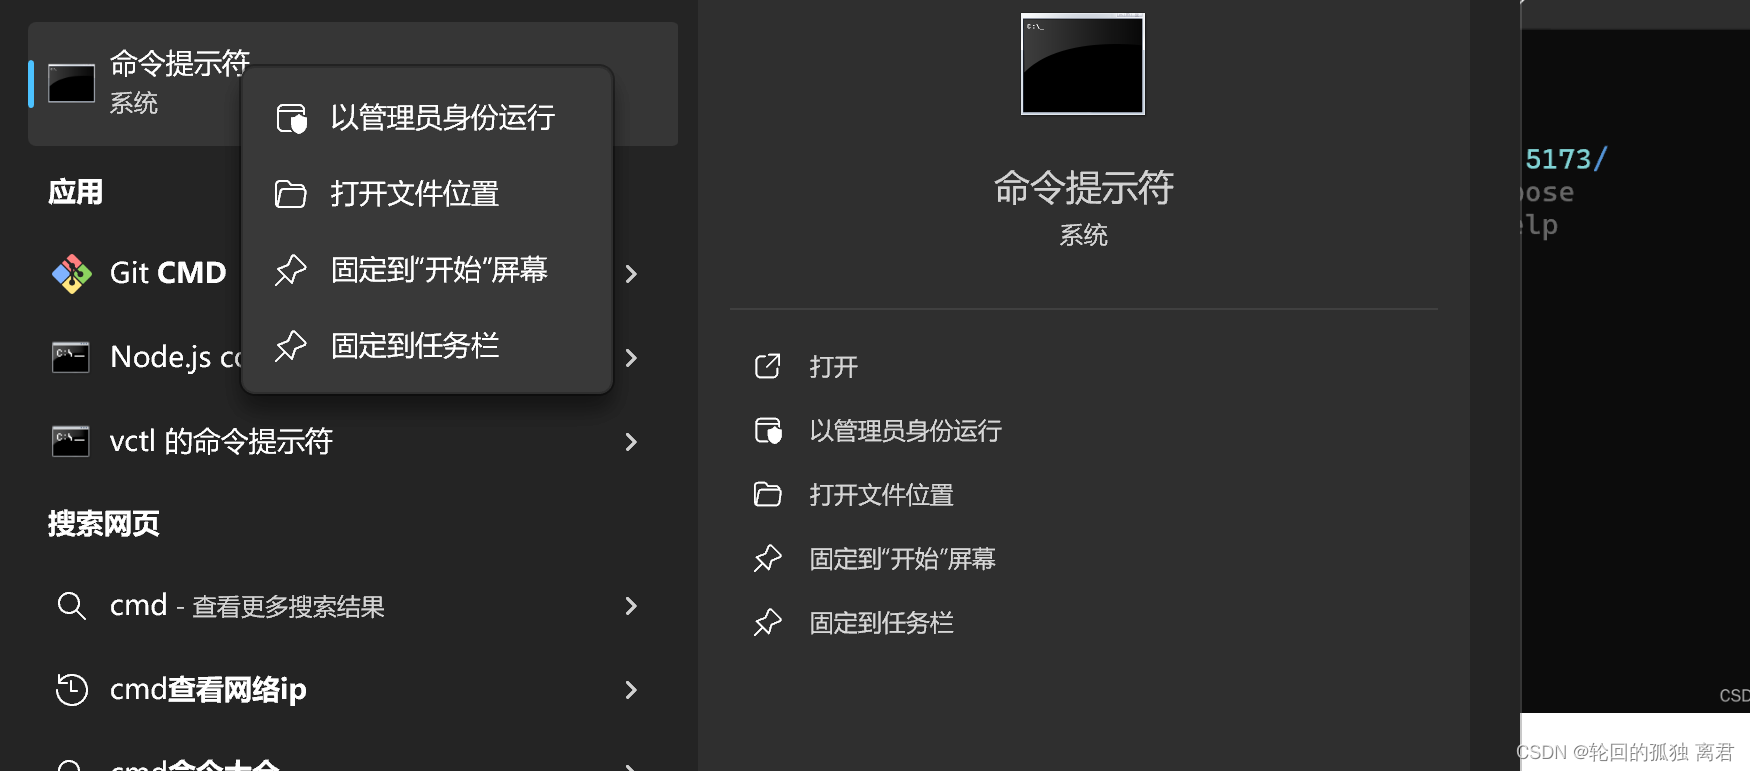
1.1 管理员权限
在搜索栏搜索终端(或者cmd)找到终端后右键以管理员权限运行
输入你的盘
D:
cd 位置
想用HbuilderX的内部终端,请使用管理员权限运行HbuilderX
2.输入npm init vue@latest
3.输入项目名称,不要中文
4.按左右选择是否,请根据个人需要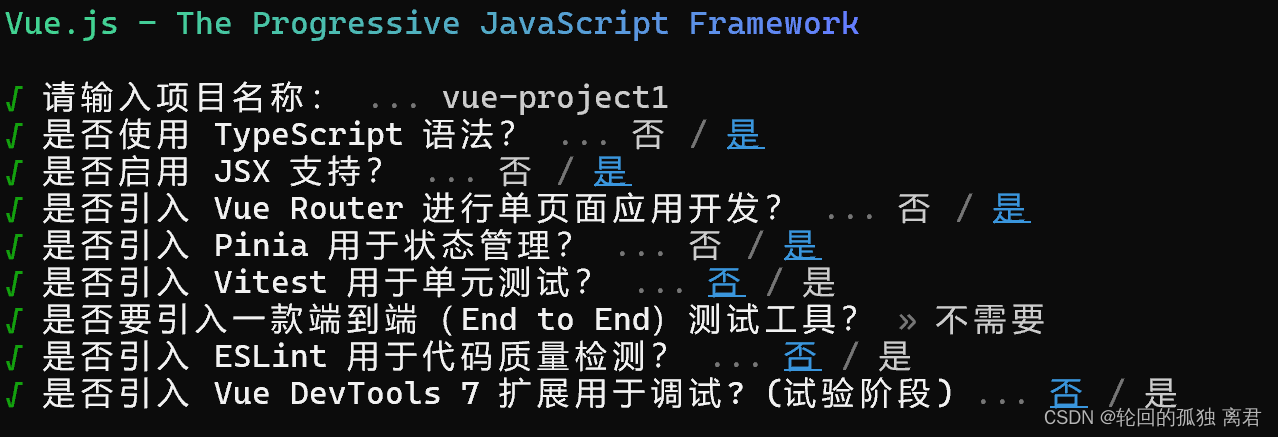
5.按顺序输入:
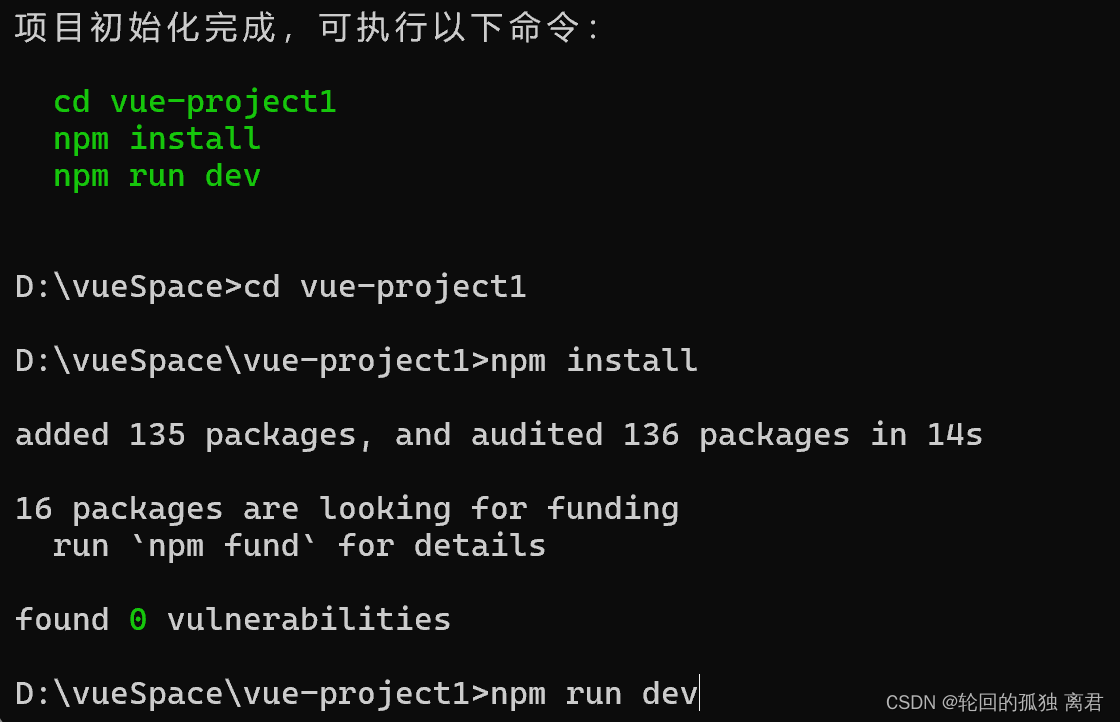
npm run dev用于产生链接,相当于Tomcat
在HbuilderX中可以选择运行,就不需要每次都打开cmd了
6.按住Ctrl+左键链接
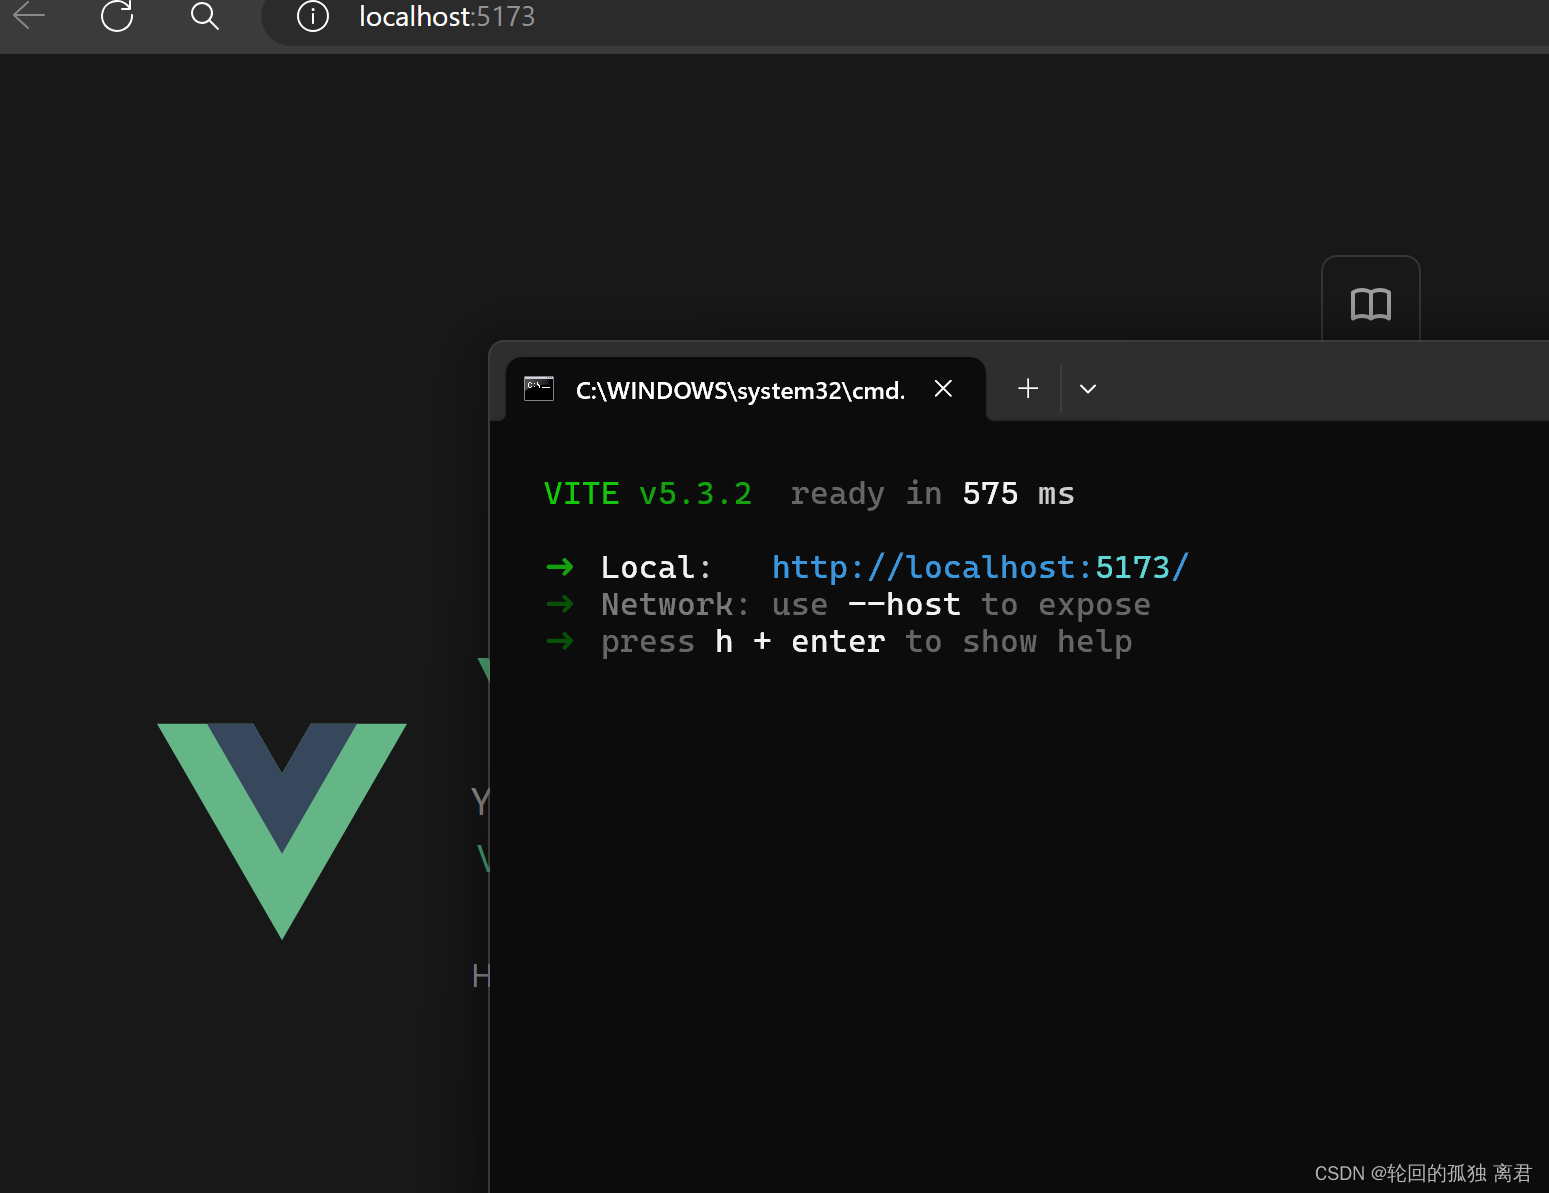
出现这个则已完成
中途出现错误通常是路径有中文名或者没给管理员权限
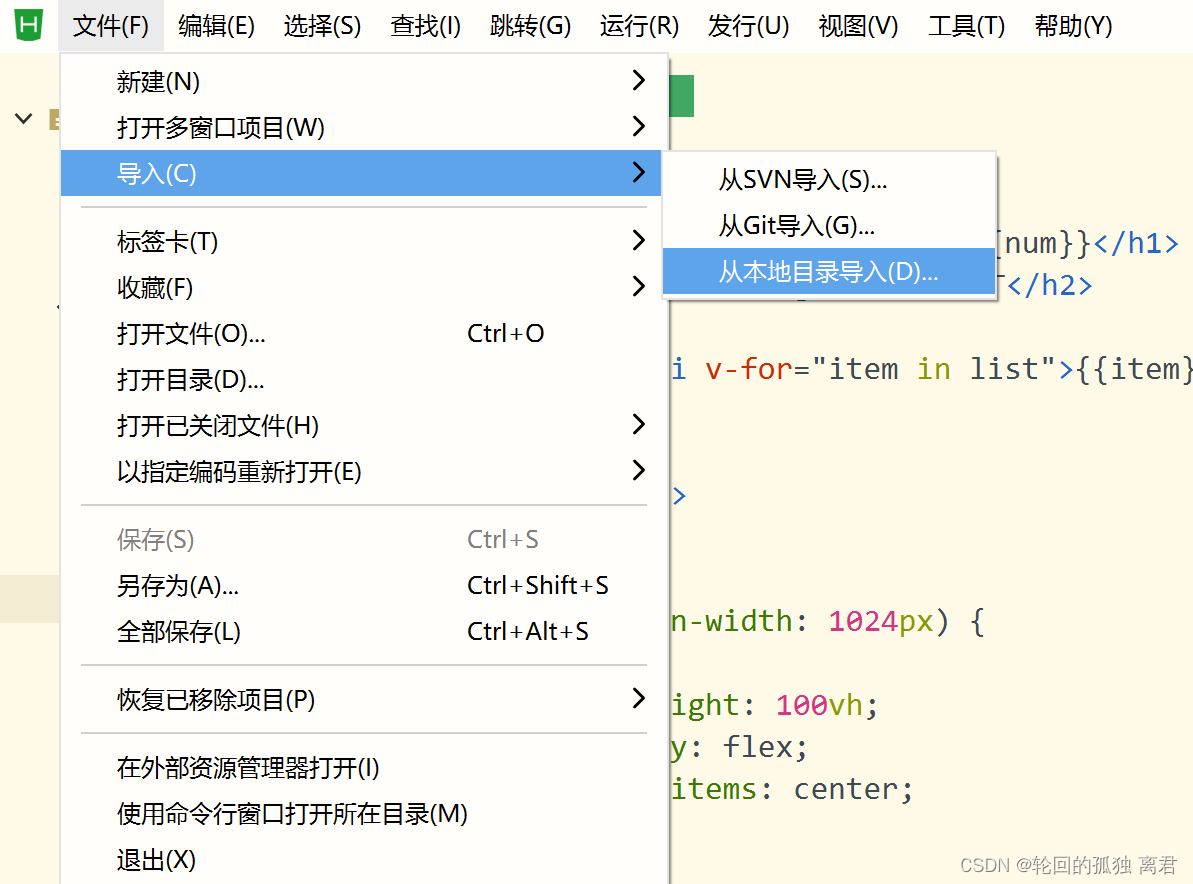
7. 导入项目(需要导入到创建的项目级文件,否则无法运行)
二、在views文件夹中使用可变的script setup 实现页面可变(父子联动)
<template>
	<div class="about">
		<h1 @click="clickme()">{{num}}</h1>
		<h2 v-if="flag">真是个天才</h2>
		<ul>
			<li v-for="item in list">{{item}}</li>
		</ul>
	</div>
	<!-- 默认导出 -->
	<TheWelcome message='message'></TheWelcome>
	<!-- 不加冒号则使用"="右边的值,加了则使用本文档定义的值 -->
</template>

<style>
	@media (min-width: 1024px) {
		.about {
			min-height: 100vh;
			display: flex;
			align-items: center;
		}
	}
</style>

<script setup>
	import {
		reactive,
		ref
	} from 'vue';//会自动加入后续自己写的
	import TheWelcome from '../components/TheWelcome.vue'
	// const list = ref([1,2,3])//简单类型可以用ref,但数组通常是复杂类型的,应使用reactive
	const list = reactive([1, 2, 3])
	const message = '你好'
	let flag = ref(true)
	let num = ref(1) //相当于正常的定义1,只是属于类
	const clickme = () => {
		console.log(num)
		num.value++ //在.value中重新赋值
		flag.value = !flag.value
	}
</script>
2.2 新建son1.vue
<template>
	<div id="son1">
		<h1>{{message}}</h1>
	</div>
</template>

<script setup>//需要setup帮助

	const args = defineProps({
		message:String
	})
</script>

<style>
</style>
<template>
<div class="about">
<h1 @click="clickme()">{{num}}</h1>
<h2 v-if="flag">真是个天才</h2>
<ul>
<li v-for="item in list">{{item}}</li>
</ul>
</div>
<!-- 默认导出 -->
<TheWelcome :message='message'></TheWelcome>
<!-- 不加冒号则使用"="右边的值,加了则使用本文档script定义的值 -->
<son1 :message='message'></son1>
</template>
<style>
@media (min-width: 1024px) {
.about {
min-height: 100vh;
display: flex;
align-items: center;
}
}
</style>
<script setup>
import {
reactive,
ref
} from 'vue';//会自动加入后续自己写的
import TheWelcome from '../components/TheWelcome.vue'
import son1 from '../components/son1.vue'//在improt后先用{}占位,from后面会出现提示,再改名为son1
// const list = ref([1,2,3])//简单类型可以用ref,但数组通常是复杂类型的,应使用reactive
const list = reactive([1, 2, 3])
const message = '你好'
let flag = ref(true)
let num = ref(1) //相当于正常的定义1,只是属于类
const clickme = () => {
console.log(num)
num.value++ //在.value中重新赋值
flag.value = !flag.value
}
</script><!-- TheWelcome.vue-->
<script setup lang="ts">
import WelcomeItem from './WelcomeItem.vue'
import DocumentationIcon from './icons/IconDocumentation.vue'
import ToolingIcon from './icons/IconTooling.vue'
import EcosystemIcon from './icons/IconEcosystem.vue'
import CommunityIcon from './icons/IconCommunity.vue'
import SupportIcon from './icons/IconSupport.vue'
// 在此处定义message
const p = defineProps({
message:String
})
</script>
<template>
<WelcomeItem>
<template #icon>
<DocumentationIcon />
</template>
<template #heading>Documentation</template>
Vue’s
<a href="https://vuejs.org/" target="_blank" rel="noopener">official documentation</a>
provides you with all information you need to get started.
</WelcomeItem>
<h1 message=''>{{message}}</h1>
<!-- 在此处加入新的标签 -->
<WelcomeItem>
<template #icon>
<ToolingIcon />
</template>
<template #heading>Tooling</template>
This project is served and bundled with
<a href="https://vitejs.dev/guide/features.html" target="_blank" rel="noopener">Vite</a>. The
recommended IDE setup is
<a href="https://code.visualstudio.com/" target="_blank" rel="noopener">VSCode</a> +
<a href="https://github.com/johnsoncodehk/volar" target="_blank" rel="noopener">Volar</a>. If
you need to test your components and web pages, check out
<a href="https://www.cypress.io/" target="_blank" rel="noopener">Cypress</a> and
<a href="https://on.cypress.io/component" target="_blank" rel="noopener"
>Cypress Component Testing</a
>.
<br />
More instructions are available in <code>README.md</code>.
</WelcomeItem>
<WelcomeItem>
<template #icon>
<EcosystemIcon />
</template>
<template #heading>Ecosystem</template>
Get official tools and libraries for your project:
<a href="https://pinia.vuejs.org/" target="_blank" rel="noopener">Pinia</a>,
<a href="https://router.vuejs.org/" target="_blank" rel="noopener">Vue Router</a>,
<a href="https://test-utils.vuejs.org/" target="_blank" rel="noopener">Vue Test Utils</a>, and
<a href="https://github.com/vuejs/devtools" target="_blank" rel="noopener">Vue Dev Tools</a>. If
you need more resources, we suggest paying
<a href="https://github.com/vuejs/awesome-vue" target="_blank" rel="noopener">Awesome Vue</a>
a visit.
</WelcomeItem>
<WelcomeItem>
<template #icon>
<CommunityIcon />
</template>
<template #heading>Community</template>
Got stuck? Ask your question on
<a href="https://chat.vuejs.org" target="_blank" rel="noopener">Vue Land</a>, our official
Discord server, or
<a href="https://stackoverflow.com/questions/tagged/vue.js" target="_blank" rel="noopener"
>StackOverflow</a
>. You should also subscribe to
<a href="https://news.vuejs.org" target="_blank" rel="noopener">our mailing list</a> and follow
the official
<a href="https://twitter.com/vuejs" target="_blank" rel="noopener">@vuejs</a>
twitter account for latest news in the Vue world.
</WelcomeItem>
<WelcomeItem>
<template #icon>
<SupportIcon />
</template>
<template #heading>Support Vue</template>
As an independent project, Vue relies on community backing for its sustainability. You can help
us by
<a href="https://vuejs.org/sponsor/" target="_blank" rel="noopener">becoming a sponsor</a>.
</WelcomeItem>
</template>
2.3 提交给父组件
<template>
	<div id="son1">
		<h1>{{message}}</h1>
		<button @click="sendMsg()">提交给父组件</button>
	</div>
</template>

<script setup>//需要setup帮助
	const emit = defineEmits(['get-message'])//发给父组件,名称
	const sendMsg=()=>{
		emit('get-message','123456')//发给父组件key,value
	}
	const args = defineProps({
		message:String
	})
</script>

<style>
</style>
<template>
<div class="about">
<h1 @click="clickme()">{{num}}</h1>
<h2 v-if="flag">真是个天才</h2>
<ul>
<li v-for="item in list">{{item}}</li>
</ul>
</div>
<!-- 默认导出 -->
<!-- <TheWelcome :message='message'></TheWelcome> -->
<!-- 不加冒号则使用"="右边的值,加了则使用本文档script定义的值 -->
<!-- 使用@表明接收,名称需要与son1中定义的一致,getMssage在此script中定义 -->
<son1 :message='message' @get-message='getMessage'></son1>
</template>
<style>
@media (min-width: 1024px) {
.about {
min-height: 100vh;
display: flex;
align-items: center;
}
}
</style>
<script setup>
import {
reactive,
ref
} from 'vue';//会自动加入后续自己写的
import TheWelcome from '../components/TheWelcome.vue'
import son1 from '../components/son1.vue'//在improt后先用{}占位,from后面会出现提示,再改名为son1
// const list = ref([1,2,3])//简单类型可以用ref,但数组通常是复杂类型的,应使用reactive
const getMessage =(msg)=>{
alert(msg)
}
const list = reactive([1, 2, 3])
const message = '你好'
let flag = ref(true)
let num = ref(1) //相当于正常的定义1,只是属于类
const clickme = () => {
console.log(num)
num.value++ //在.value中重新赋值
flag.value = !flag.value
}
</script>