1 NVIDIA驱动安装
ref link: https://blog.csdn.net/weixin_37926734/article/details/123033286

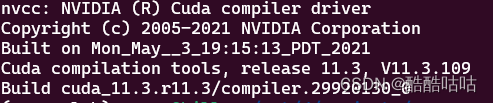
2 cuda安装
ref link: https://blog.csdn.net/qq_63379469/article/details/123319269
进去网站 https://developer.nvidia.com/cuda-toolkit-archive 选择想要安装的cuda版本

安装过程:
(1)分别选择continue与输入accept
(2)最重要的是在选择CUDA Installer时,要把Driver这一项取消掉([]中是空的表示没有选择安装这项,[x]表示有安装这项),因为第一步已经安装过NVIDIA驱动了
(3)在zshrc或者bashrc中添加cuda bin和lib的path
###########cuda################
export PATH="/usr/local/cuda-11.1/bin:$PATH"
export LD_LIBRARY_PATH="/usr/local/cuda-11.1/lib64:$LD_LIBRARY_PATH"
3 安装anaconda
第一步:下载 https://www.anaconda.com/download
# 第二步:安装
./Anaconda3-2024.02-1-Linux-x86_64.sh

# 第三步:修改bashrc或者zshrc的快捷命令,注意替换username。这样在终端输出aconda就会进入conda环境,而不用频繁注释bashrc中的代码
function aconda {
# >>> conda initialize >>>
# !! Contents within this block are managed by 'conda init' !!
    __conda_setup="$('/home/username/anaconda3/bin/conda' 'shell.bash' 'hook' 2> /dev/null)"
    if [ $? -eq 0 ]; then
        eval "$__conda_setup"
    else
        if [ -f "/home/username/anaconda3/etc/profile.d/conda.sh" ]; then
            . "/home/username/anaconda3/etc/profile.d/conda.sh"
        else
            export PATH="/home/username/anaconda3/bin:$PATH"
        fi
    fi
    unset __conda_setup
# <<< conda initialize <<<
}

# 第四步:修改源
# 删除以前的镜像,恢复默认状态
conda config --remove-key channels

# 添加源
conda config --add channels http://mirrors.tuna.tsinghua.edu.cn/anaconda/pkgs/main
conda config --add channels http://mirrors.tuna.tsinghua.edu.cn/anaconda/pkgs/free
conda config --add channels http://mirrors.tuna.tsinghua.edu.cn/anaconda/pkgs/r
conda config --add channels http://mirrors.tuna.tsinghua.edu.cn/anaconda/pkgs/pro
conda config --add channels http://mirrors.tuna.tsinghua.edu.cn/anaconda/pkgs/msys2

# 显示检索路径
conda config --set show_channel_urls yes
# 显示镜像通道
conda config --show channels
4 配置deep learning环境:以maptracker为例
查看maptracker readme,可以看到
pip install torch==1.9.0+cu111 torchvision==0.10.0+cu111 torchaudio==0.9.0 -f https://download.pytorch.org/whl/torch_stable.html
其中对于cuda的要求的11.1版本,所以需要按照这个版本要求安装下cuda,同时记得在bashrc中修改cuda bin、lib的path
pytorch和cuda版本对应关系:https://pytorch.org/get-started/previous-versions/
然后安装其他依赖
# Install mmcv-series
pip install mmcv-full==1.6.0
pip install mmdet==2.28.2
pip install mmsegmentation==0.30.0
git clone https://github.com/open-mmlab/mmdetection3d.git
cd mmdetection3d
git checkout v1.0.0rc6
pip install -e .


pip install -r requirements.txt