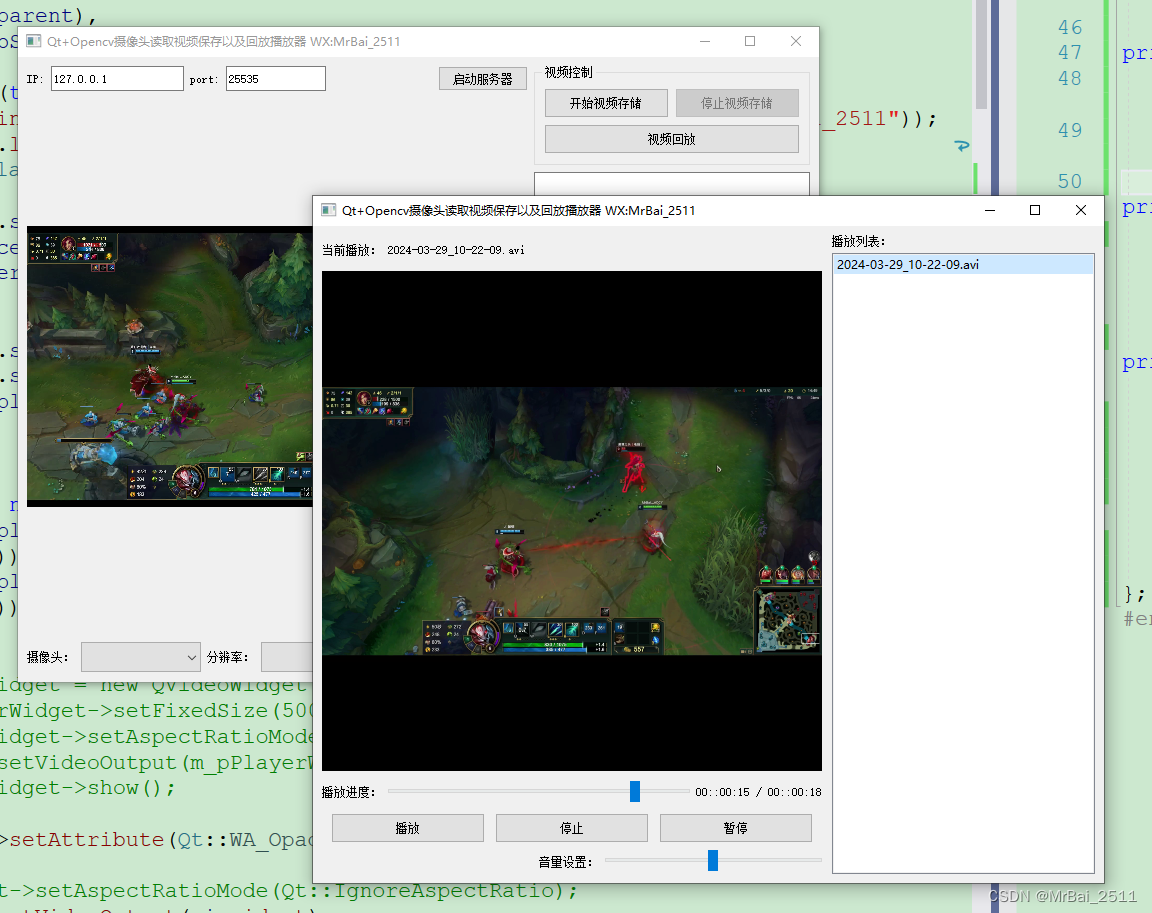
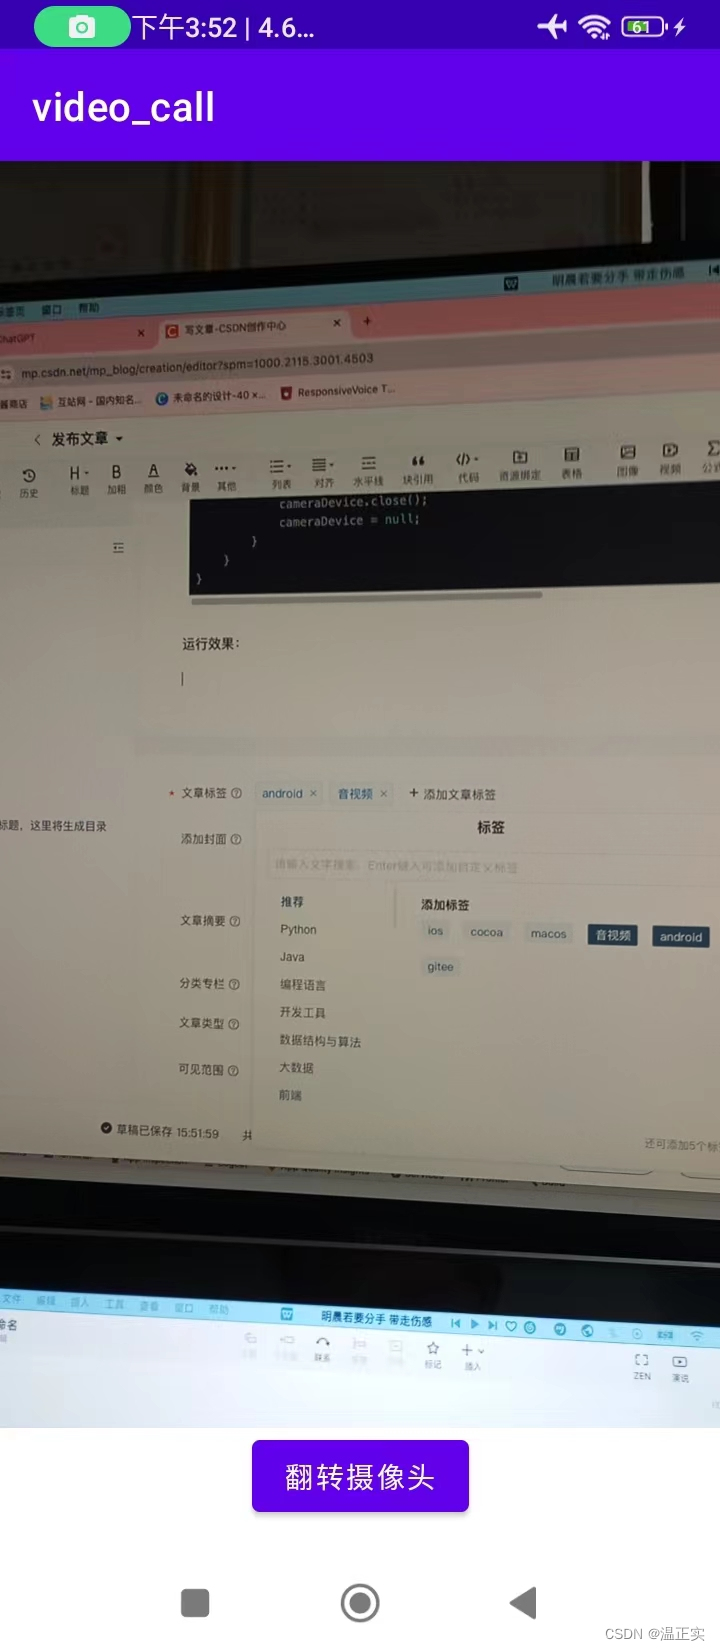
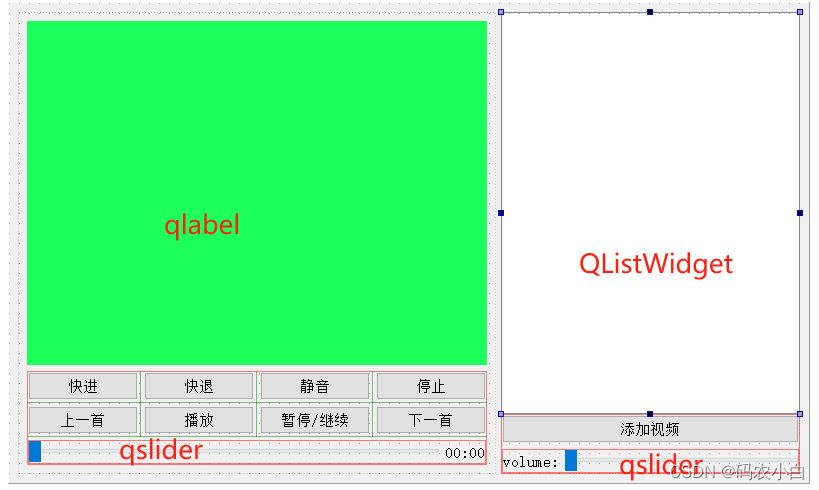
1、效果图

2、camerathread.h
#ifndef CAMERATHREAD_H
#define CAMERATHREAD_H
#include <QObject>
#include <QThread>
#include <QDebug>
#include <QImage>
#include <unistd.h>
#include <iostream>
#include <QDateTime>
#include <opencv2/opencv.hpp>
using namespace std;
using namespace cv;
class CameraThread :public QThread
{
Q_OBJECT
public:
static CameraThread *camerathread;
static CameraThread *getInstance();
void run();
bool getIsRun() const;
void setIsRun(bool value);
int getFrame_width() const;
int getFrame_height() const;
void detecCarDaw(Mat &frame,CascadeClassifier &cascade,double scale);
bool getIsStop() const;
void setIsStop(bool value);
bool getIsRecord() const;
void setIsRecord(bool value);
VideoWriter getWriter() const;
bool getIsPersistent() const;
void setIsPersistent(bool value);
bool getIsRun_s() const;
void setIsRun_s(bool value);
signals:
void sendQImage(Mat frame);
private:
CameraThread();
CascadeClassifier cascade;
VideoCapture cap;
Mat frame;
VideoWriter writer;
bool isRun;
int frame_width;
int frame_height;
int recordNum;
bool isRun_s;
bool isStop;
bool isRecord;
bool isPersistent;
};
#endif
3、camerathread.cpp
#include "camerathread.h"
CameraThread * CameraThread::camerathread =nullptr;
CameraThread * CameraThread::getInstance()
{
if(CameraThread::camerathread ==nullptr)
{
CameraThread::camerathread =new CameraThread ();
}
return CameraThread::camerathread;
}
CameraThread::CameraThread()
{
this->isRun =true;
cap.open(0);
this->frame_width = static_cast<int>(cap.get(CAP_PROP_FRAME_WIDTH));
this->frame_height = static_cast<int>(cap.get(CAP_PROP_FRAME_HEIGHT));
int fourcc = VideoWriter::fourcc('X', 'V', 'I', 'D');
Size frameSize(frame_width, frame_height);
this->isRun_s=false;
this->isStop=false;
this->isRecord=false;
this->isPersistent=false;
this->recordNum=0;
}
bool CameraThread::getIsStop() const
{
return isStop;
}
void CameraThread::setIsStop(bool value)
{
isStop = value;
}
bool CameraThread::getIsRecord() const
{
return isRecord;
}
void CameraThread::setIsRecord(bool value)
{
isRecord = value;
if(this->isRecord == false && writer.isOpened())
{
qDebug()<<"手动关闭"<<endl;
writer.release();
this->recordNum =0;
}
}
VideoWriter CameraThread::getWriter() const
{
return writer;
}
bool CameraThread::getIsPersistent() const
{
return isPersistent;
}
void CameraThread::setIsPersistent(bool value)
{
isPersistent = value;
}
bool CameraThread::getIsRun_s() const
{
return isRun_s;
}
void CameraThread::setIsRun_s(bool value)
{
isRun_s = value;
}
void CameraThread::detecCarDaw(Mat &frame, CascadeClassifier &cascade, double scale)
{
Mat gray;
cvtColor(frame,gray,CV_BGR2GRAY);
Mat smalling(cvRound(frame.rows/scale),cvRound(frame.cols/scale),CV_8UC1);
resize(gray,smalling,smalling.size(),0,0,INTER_LINEAR);
equalizeHist(smalling,smalling);
vector<Rect>cars;
cascade.detectMultiScale(smalling,cars,1.1,2,0|CV_HAAR_SCALE_IMAGE,Size(30,30));
vector<Rect>::const_iterator iter;
for(iter =cars.begin();iter!=cars.end();iter++)
{
rectangle(
frame,
cvPoint(cvRound(iter->x*scale),cvRound(iter->y*scale)),
cvPoint(cvRound((iter->x+iter->width)*scale),cvRound((iter->y+iter->height)*scale)),
Scalar(0,255,0),
2,
8
);
}
}
int CameraThread::getFrame_height() const
{
return frame_height;
}
int CameraThread::getFrame_width() const
{
return frame_width;
}
bool CameraThread::getIsRun() const
{
return isRun;
}
void CameraThread::setIsRun(bool value)
{
isRun = value;
}
void CameraThread::run()
{
cascade.load("D:/OpenCV/cars.xml");
while(this->isRun ==true)
{
if(cap.read(frame))
{
cvtColor(frame,frame,CV_BGR2RGB);
detecCarDaw(frame,cascade,2);
emit sendQImage(frame);
if(this->isStop ==false)
{
if(this->isRun_s == true)
{
if(cap.read(frame))
{
if(this->isRecord==true)
{
if(this->recordNum ==0)
{
QDateTime current_date_time =QDateTime::currentDateTime();
QString current_date =current_date_time.toString("yyyy-MM-dd-hh-mm-ss");
QString filename ="D:/Qtsoft/videoDemo/data/"+current_date+".avi";
qDebug()<<"filename="<<filename;
writer.open(filename.toStdString().c_str(),CV_FOURCC('M','J','P','G'),30.0,Size(frame.cols,frame.rows),true);
}
if(!writer.isOpened())
{
qDebug()<<"录制路径失败!!!"<<endl;
}
else
{
if(this->recordNum<300)
{
writer<<frame;
this->recordNum++;
}
else
{
qDebug()<<"已经到300帧结束录制";
writer.release();
this->recordNum =0;
if(this->isPersistent==true)
{
this->isRecord =true;
}else if(this->isPersistent ==false)
{
this->isRecord =false;
}
}
}
}
cvtColor(frame,frame,CV_BGR2RGB);
}
msleep(10);
}
}
}
}
}
4、mainwindow.h
#ifndef MAINWINDOW_H
#define MAINWINDOW_H
#include <QMainWindow>
#include "camerathread.h"
namespace Ui {
class MainWindow;
}
class MainWindow : public QMainWindow
{
Q_OBJECT
public:
explicit MainWindow(QWidget *parent = nullptr);
~MainWindow();
void paintEvent(QPaintEvent * Eevent);
private:
Ui::MainWindow *ui;
CameraThread *ct;
QImage image;
Mat frame;
private slots:
void isChecked(Mat frame);
void on_pushButton_clicked();
void on_checkBox_clicked(bool checked);
};
#endif
5、mainwindow.cpp
#include "mainwindow.h"
#include "ui_mainwindow.h"
MainWindow::MainWindow(QWidget *parent) :
QMainWindow(parent),
ui(new Ui::MainWindow)
{
ui->setupUi(this);
this->ct =CameraThread::getInstance();
connect(this->ct,SIGNAL(sendQImage(Mat)),this,SLOT(isChecked(Mat)),Qt::BlockingQueuedConnection);
this->ct->start();
waitKey(40);
}
MainWindow::~MainWindow()
{
delete ui;
}
void MainWindow::paintEvent(QPaintEvent *Eevent)
{
ui->label->setPixmap(QPixmap::fromImage(this->image));
QImage q_image = QImage(frame.data,frame.cols,frame.rows,QImage::Format_RGB888);
ui->label->setPixmap(QPixmap::fromImage(q_image));
ui->label->setScaledContents(true);
}
void MainWindow::isChecked(Mat frame)
{
this->image =QImage(frame.data,frame.cols,frame.rows,QImage::Format_RGB888);
this->image = this->image.scaled(ui->label->width(),ui->label->height());
this->frame = frame.clone();
this->update();
}
void MainWindow::on_pushButton_clicked()
{
if(this->ct->getWriter().isOpened())
{
qDebug()<<"已经有录制项目:请先结束录制,再操作";
return;
}
this->ct->setIsRun_s(true);
this->ct->setIsRecord(true);
}
void MainWindow::on_checkBox_clicked(bool checked)
{
if(checked==true)
{
this->ct->setIsRecord(true);
this->ct->setIsPersistent(true);
}else if(checked==false)
{
this->ct->setIsPersistent(false);
}
}
6、main.cpp
#include "mainwindow.h"
#include <QApplication>

int main(int argc, char *argv[])
{
    QApplication a(argc, argv);
    MainWindow w;
    w.show();


    return a.exec();
}