开篇
本文的目的是创建一个使用typescript的vue3项目,并使用pinia来管理状态。
详细步骤
创建项目
- 创建vue3项目,并使用vite作为打包工具
npm create vite@latest vue3_pinia
// 选择vue,随后选择typesript
- 进入项目,并按照依赖包
cd vue3_pinia
npm i
- 安装pinia
npm i pinia
配置Pinia
- 在src下新建stores文件夹,并在stores文件夹下新建index.ts文件
- 在src/main.ts中引入pinia,并进行配置
import { createApp } from 'vue'
import './style.css'
import App from './App.vue'
// 引入pinia
import { createPinia } from 'pinia'

// 创建pinia实例
const pinia = createPinia()

createApp(App).use(pinia).mount('#app')
- 在store/index.ts中写入一些基本的数据用于测试
import { defineStore } from "pinia";

export const useExampleStore = defineStore('example', {
    state: () => {
        return {
            count: 3
        }
    },

    getters: {
        // 判断是否是偶数
        isEven: state => state.count % 2 === 0,
        // 求平方
        isSquare: state => state.count * state.count
    },
    actions: {
        increment() {
            this.count++
        }
    }
})
读取Store中的数据
- 在src/components下新建PiniaDemo.vue组件,并引入useExampleStore 得到store实例,从而渲染stores中的数据
<script setup lang="ts">
import { useExampleStore } from '../stores/index';

const store = useExampleStore();
</script>

<template>
    <div>
        <p>Count: {{ store.count }}</p>
        <p>isEven: {{ store.isEven }}</p>
        <p>Square: {{ store.isSquare }}</p>
        <button @click="store.increment">+1</button>
    </div>
</template>

<style scoped>
    div {
        border: 1px solid gray;
        width: 200px;
        height: 200px;
    }
</style>
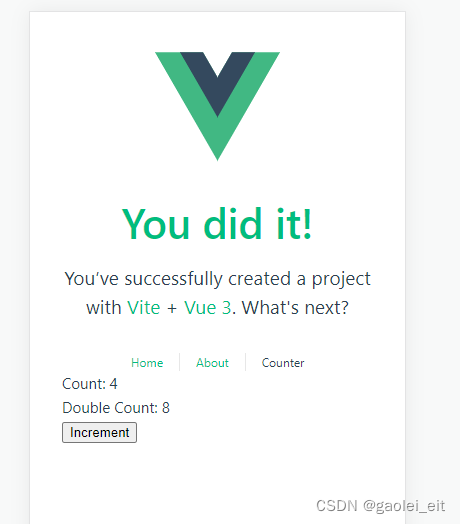
在App.vue中,引入PiniaDemo.vue组件,此时,页面上的效果如下:

此时点击按钮,发现已经生效了的

肯定你也发现了,渲染的还是,都是store.xxx,这非常不方便!所以,在PiniaDemo.vue中使用解构的方式来获取这些值,并渲染
<script setup lang="ts">
import { useExampleStore } from '../stores/index';
import { storeToRefs } from 'pinia'

const store = useExampleStore();

// 注意,解构的时候,要使用这个方法,不然解构出来的值就不是响应式了
const { count, isEven, isSquare } = storeToRefs(store);
const { increment } = store;
</script>

<template>
    <div>
        <p>Count: {{ count }}</p>
        <p>isEven: {{ isEven }}</p>
        <p>Square: {{ isSquare }}</p>
        <button @click="increment">+1</button>
    </div>
</template>

<style scoped>
    div {
        border: 1px solid gray;
        width: 200px;
        height: 200px;
    }
</style>
- 当然,我们也可以一次性修改多条state中的数据, 现在在index.ts的state中,新增一个数据
    state: () => {
        return {
            count: 3,
            pet: 'cat'
        }
    },
- 在PiniaDemo.vue中增加change按钮,并一次性修改count和pet两个数据(注意:$patch的两种用法都列出来啦!)
<script setup lang="ts">
import { useExampleStore } from '../stores/index';
import { storeToRefs } from 'pinia'

const store = useExampleStore();

// 注意,解构的时候,要使用这个方法,不然解构出来的值就不是响应式了
const { count, isEven, isSquare, pet } = storeToRefs(store);
const { increment } = store;

// $patch的第一种用法
// const patchClickEvent = () => {
//     store.$patch(store => {
//         store.count += 2;
//         store.pet = store.pet === 'cat' ? 'dog' : 'cat'
//     })
// }

//$patch的第2种用法
const patchClickEvent = () => {
    store.$patch({
        count: store.count+2,
        pet: store.pet === 'cat' ? 'dog' : 'cat'
    })
}
</script>

<template>
    <div>
        <p>Count: {{ count }}</p>
        <p>isEven: {{ isEven }}</p>
        <p>Square: {{ isSquare }}</p>
        <p>pet: {{  pet }}</p>
        <button @click="increment">+1</button>
        <!-- 其他改变数据的方式之$patch, 可一次修改多条-->
         <button @click="patchClickEvent">change</button>
    </div>
</template>
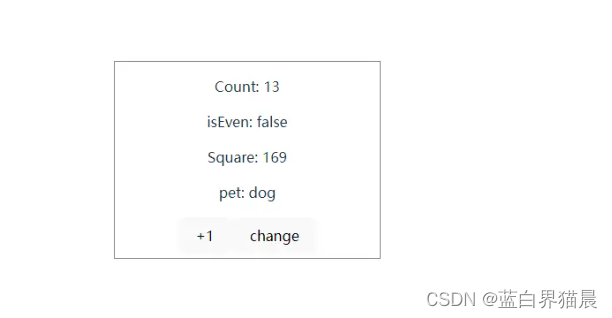
- 点击按钮,此时效果如下
不同store文件间的通信
- 在stores下新建pet.ts文件,并构建基本的代码,可以看到,这里代码比较简单,只定义了一个数组类型的petList数据
import { defineStore } from 'pinia'

export const usePetStore = defineStore('pet', {
    state: () => {
        return {
            petList: ['cat', 'dog', 'rabbit']
        }
    }
})
- 在stores/index.ts中引入usePetStore,并定义一个getPetList方法,获取petList的值(此处为了方便,我直接给出index.ts所有的代码
import { defineStore } from "pinia";
import { usePetStore } from './pet'

export const useExampleStore = defineStore('example', {
    state: () => {
        return {
            count: 3,
            pet: 'cat'
        }
    },

    getters: {
        // 判断是否是偶数
        isEven: state => state.count % 2 === 0,
        // 求平方
        isSquare: state => state.count * state.count
    },
    actions: {
        increment() {
            this.count++
        },

        getPetList() {
            return usePetStore().petList
        }
    }
})
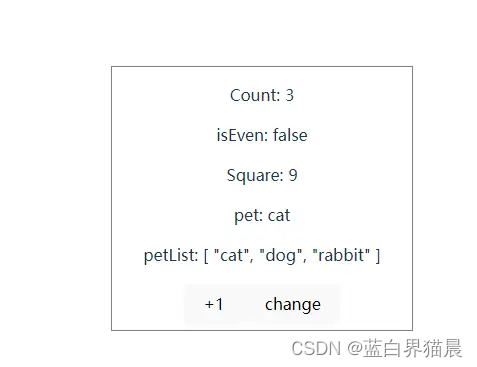
- 在PiniaDemo.vue中使用getPetList()方法渲染petList数组
<p>petList: {{ getPetList() }}</p>
...
const { increment, getPetList } = store;
- 此时,效果如下
注
以上便是Pinia的一些使用方式了,希望能对您起到抛砖引玉的参考作用。