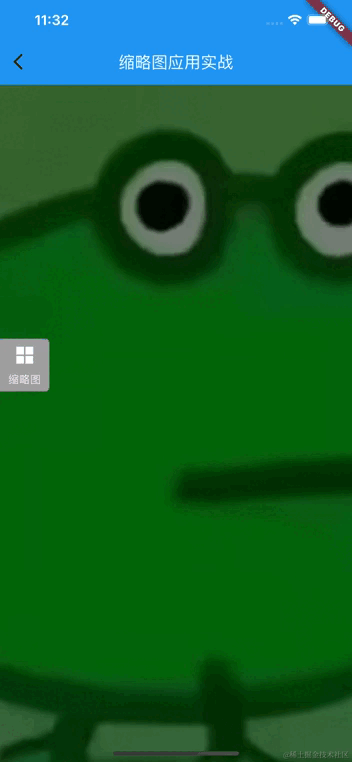
单张图片的实现代码
<!DOCTYPE html>
<html lang="en">
<head>
<meta charset="UTF-8">
<meta name="viewport" content="width=device-width, initial-scale=1.0">
<title>Document</title>
<style>
* {
margin: 0;
padding: 0;
}
.image-container {
position: relative;
display: inline-block;
}
.image {
display: block;
width: 500px;
height: auto;
}
.mask {
position: absolute;
width: 100px;
height: 100px;
background-color: rgba(0, 0, 0, .5);
cursor: move;
opacity: 0;
top: 0;
left: 0;
}
.large-image {
opacity: 0;
position: absolute;
width: 200px;
height: 200px;
background-repeat: no-repeat;
z-index: 1001;
pointer-events: none;
}
</style>
</head>
<body>
<div class="image-container">
<img alt="Image" class="image">
<div class="mask"></div>
<div class="large-image"></div>
</div>
<script>
let container = document.querySelector('.image-container')
let mask = document.querySelector(".mask");
let image = document.querySelector(".image");
let largeImage = document.querySelector(".large-image");
let list = 'https://cdn.pixabay.com/photo/2018/02/08/10/22/desk-3139127_1280.jpg'
image.src = list
container.onmousemove = function (event) {
// 显示遮罩和放大的图片
mask.style.opacity = 1;
largeImage.style.opacity = 1;
// 获取图片的宽高
let imageRect = image.getBoundingClientRect();
let maskWidth = mask.offsetWidth;
let maskHeight = mask.offsetHeight;
// 获取鼠标相对于图片的位置
let mouseX = event.clientX - imageRect.left;
let mouseY = event.clientY - imageRect.top;
// 设置遮罩的宽高
mask.style.width = imageRect.width / 5 + 'px';
mask.style.height = imageRect.width / 5 + 'px';
// 设置放大的图片的宽高
largeImage.style.width = imageRect.width / 2 + 'px';
largeImage.style.height = imageRect.width / 2 + 'px';
// 确保鼠标在图片内部
if (
mouseX < 0 ||
mouseY < 0 ||
mouseX > imageRect.width ||
mouseY > imageRect.height
) {
mask.style.opacity = 0;
largeImage.style.opacity = 0;
return;
}
// 计算遮罩的位置
let viewX = Math.max(0, Math.min(imageRect.width - maskWidth, mouseX - maskWidth / 2));
let viewY = Math.max(0, Math.min(imageRect.height - maskHeight, mouseY - maskHeight / 2));
mask.style.left = viewX + "px";
mask.style.top = viewY + "px";
// 计算放大图片的位置
let zoomFactor = window.devicePixelRatio != 1 ? window.devicePixelRatio : 2; // 调整放大倍数
let backgroundPosX = -viewX * zoomFactor;
let backgroundPosY = -viewY * zoomFactor;
// 设置放大图片的位置
largeImage.style.left = event.pageX + 10 + "px";
largeImage.style.top = event.pageY + 10 + "px";
largeImage.style.backgroundImage = `url('${image.src}')`;
largeImage.style.backgroundPosition = `${backgroundPosX}px ${backgroundPosY}px`;
largeImage.style.backgroundSize = `${imageRect.width * zoomFactor}px ${imageRect.height * zoomFactor
}px`;
}
container.onmouseleave = function () {
// 隐藏遮罩和放大的图片
mask.style.opacity = 0;
largeImage.style.opacity = 0;
};
</script>
</body>
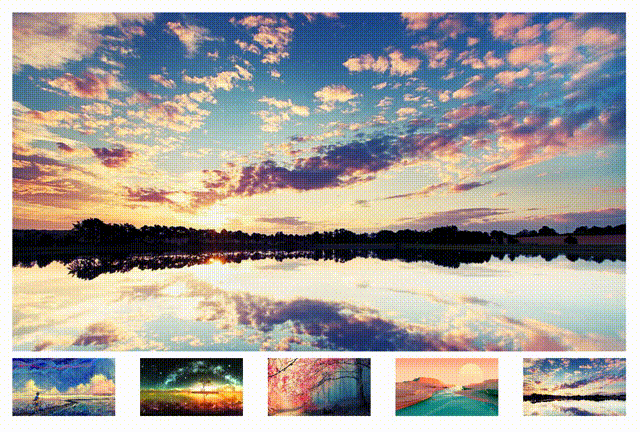
</html>多张图片的实现代码
<!DOCTYPE html>
<html lang="en">

<head>
  <meta charset="UTF-8">
  <meta name="viewport" content="width=device-width, initial-scale=1.0">
  <title>Document</title>

  <style>
    .container {
      display: flex;
      padding: 100px;
      height: 600px;
    }

    .left-dom {
      border: 1px solid #222;
      width: 40%;
      display: flex;
      flex-direction: column;
    }

    .current-img {
      position: absolute;
      width: 100%;
      /* 图片宽度填满父容器 */
      height: 100%;
      /* 图片高度填满父容器 */
      object-fit: cover;
      /* 让图片按比例缩放填满容器 */
    }

    .mask {
      width: 200px;
      height: 200px;
      background-color: rgba(2, 2, 2, 0.4);
      position: absolute;
      z-index: 2;
      opacity: 0;
    }

    .top-img-list {
      flex: 1;
      position: relative;
    }

    .botm-img-list {
      border-top: 1px solid #222;
      width: 100%;
      padding: 10px;
      box-sizing: border-box;
    }


    .right-dom {
      flex: 1;
    }

    .botm-img-list>img {
      width: 100px;
      height: 100px;
      cursor: pointer;
      margin-right: 20px;
      border: 2px solid transparent;
      box-sizing: border-box;
    }

    .active {
      border: 2px solid red !important;
    }

    .botm-img-list>img:last-of-type {
      margin-right: 0px;
    }

    .right-dom {
      position: relative;
      background-repeat: no-repeat;
    }
  </style>
</head>

<body>
  <div class="container">
    <div class="left-dom">
      <div class="top-img-list">
        <img class="current-img" />
        <div class="mask"></div>
      </div>
      <div class="botm-img-list"></div>
    </div>
    <div class="right-dom"></div>
  </div>
  <script>
    const list = [
      "https://www.2008php.com/2011_Website_appreciate/2011-03-06/20110306201755.jpg",
      "https://www.2008php.com/2011_Website_appreciate/11-03-06/20110306201933.jpg"
    ]
    const botmDom = document.querySelector('.botm-img-list');
    const curImg = document.querySelector('.current-img');

    var imgWidth = null, imgHeight = null;

    function getImgSize(src) {
      // 创建一个新的Image对象
      const img = new Image();

      // 设置Image对象的src为图片的URL
      img.src = src; // 替换成你的图片URL
      return new Promise((resolve, reject) => {
        // 等待图片加载完成
        img.onload = function () {
          resolve({
            width: this.width,
            height: this.height
          })
        };
      })
    }

    function setSize(src) {
      const res = getImgSize(src).then(res => {
        imgWidth = res.width;
        imgHeight = res.height;
      })
    }

    function clearActive() {
      const activeImg = document.querySelectorAll('.active')
      for (let i = 0; i < activeImg.length; i++) {
        activeImg[i].classList.remove('active');
      }
    }

    list.forEach((v, i) => {
      const img = document.createElement('img');
      img.src = v;
      if (i === 0) img.classList.add('active');
      botmDom.append(img);
      img.addEventListener('click', e => {
        curImg.src = v;
        clearActive();
        img.classList.add('active');
        rightDom.style.backgroundImage = 'url(' + v + ')';
        setSize(v);
      })
    })

    const topDom = document.querySelector('.top-img-list');
    const rightDom = document.querySelector('.right-dom');
    const mask = document.querySelector('.mask');
    topDom.addEventListener('mouseleave', e => {
      mask.style.opacity = 0;
      rightDom.style.opacity = 0;
    })
    topDom.addEventListener('mousemove', e => {
      mask.style.opacity = 1;
      rightDom.style.opacity = 1;
      var left = e.clientX - mask.offsetWidth;
      var top = e.clientY - mask.offsetHeight;

      const maxHeight = topDom.offsetHeight - mask.offsetHeight
      const maxWidth = topDom.offsetWidth - mask.offsetWidth
      if (left < 0) left = 0
      else if (left > maxWidth) left = maxWidth
      mask.style.left = left + 'px';
      rightDom.style.backgroundPositionX = -left / maxWidth * (imgWidth - rightDom.offsetWidth) + 'px';

      if (top < 0) top = 0
      else if (top > maxHeight) top = maxHeight
      mask.style.top = top + 'px';
      rightDom.style.backgroundPositionY = -top / maxHeight * (imgHeight - rightDom.offsetHeight) + 'px';
    })

    curImg.src = list[0]
    rightDom.style.backgroundImage = 'url(' + list[0] + ')';
    setSize(list[0]);
  </script>
</body>

</html>