一、官方原代码
#!/usr/bin/env python3
#
# Copyright (c) 2020, NVIDIA CORPORATION. All rights reserved.
#
# Permission is hereby granted, free of charge, to any person obtaining a
# copy of this software and associated documentation files (the "Software"),
# to deal in the Software without restriction, including without limitation
# the rights to use, copy, modify, merge, publish, distribute, sublicense,
# and/or sell copies of the Software, and to permit persons to whom the
# Software is furnished to do so, subject to the following conditions:
#
# The above copyright notice and this permission notice shall be included in
# all copies or substantial portions of the Software.
#
# THE SOFTWARE IS PROVIDED "AS IS", WITHOUT WARRANTY OF ANY KIND, EXPRESS OR
# IMPLIED, INCLUDING BUT NOT LIMITED TO THE WARRANTIES OF MERCHANTABILITY,
# FITNESS FOR A PARTICULAR PURPOSE AND NONINFRINGEMENT.  IN NO EVENT SHALL
# THE AUTHORS OR COPYRIGHT HOLDERS BE LIABLE FOR ANY CLAIM, DAMAGES OR OTHER
# LIABILITY, WHETHER IN AN ACTION OF CONTRACT, TORT OR OTHERWISE, ARISING
# FROM, OUT OF OR IN CONNECTION WITH THE SOFTWARE OR THE USE OR OTHER
# DEALINGS IN THE SOFTWARE.
#

import sys
import argparse

from jetson_inference import imageNet
from jetson_utils import videoSource, videoOutput, cudaFont, Log

# parse the command line
parser = argparse.ArgumentParser(description="Classify a live camera stream using an image recognition DNN.",
                                 formatter_class=argparse.RawTextHelpFormatter,
                                 epilog=imageNet.Usage() + videoSource.Usage() + videoOutput.Usage() + Log.Usage())

parser.add_argument("input", type=str, default="", nargs='?', help="URI of the input stream")
parser.add_argument("output", type=str, default="", nargs='?', help="URI of the output stream")
parser.add_argument("--network", type=str, default="googlenet", help="pre-trained model to load (see below for options)")
parser.add_argument("--topK", type=int, default=1, help="show the topK number of class predictions (default: 1)")

try:
	args = parser.parse_known_args()[0]
except:
	print("")
	parser.print_help()
	sys.exit(0)


# load the recognition network
net = imageNet(args.network, sys.argv)

# note: to hard-code the paths to load a model, the following API can be used:
#
# net = imageNet(model="model/resnet18.onnx", labels="model/labels.txt",
#                 input_blob="input_0", output_blob="output_0")

# create video sources & outputs
input = videoSource(args.input, argv=sys.argv)
output = videoOutput(args.output, argv=sys.argv)
font = cudaFont()

# process frames until EOS or the user exits
while True:
    # capture the next image
    img = input.Capture()

    if img is None: # timeout
        continue

    # classify the image and get the topK predictions
    # if you only want the top class, you can simply run:
    #   class_id, confidence = net.Classify(img)
    predictions = net.Classify(img, topK=args.topK)

    # draw predicted class labels
    for n, (classID, confidence) in enumerate(predictions):
        classLabel = net.GetClassLabel(classID)
        confidence *= 100.0

        print(f"imagenet:  {confidence:05.2f}% class #{classID} ({classLabel})")

        font.OverlayText(img, text=f"{confidence:05.2f}% {classLabel}",
                         x=5, y=5 + n * (font.GetSize() + 5),
                         color=font.White, background=font.Gray40)

    # render the image
    output.Render(img)

    # update the title bar
    output.SetStatus("{:s} | Network {:.0f} FPS".format(net.GetNetworkName(), net.GetNetworkFPS()))

    # print out performance info
    net.PrintProfilerTimes()

    # exit on input/output EOS
    if not input.IsStreaming() or not output.IsStreaming():
        break
二、代码解析
代码增加中文注释
#!/usr/bin/env python3
#
# 版权所有 (c) 2020, NVIDIA CORPORATION. 保留所有权利。
#
# 特此免费授予获得此软件和相关文档文件(“软件”)副本的任何人,允许他们在不受限制的情况下处理软件,
# 包括但不限于使用、复制、修改、合并、发布、分发、再许可和/或出售软件副本,并允许提供软件的人
# 这样做,条件如下:
#
# 上述版权声明和本许可声明应包含在软件的所有副本或主要部分中。
#
# 本软件按“原样”提供,不提供任何形式的明示或暗示保证,包括但不限于适销性、
# 适用于特定目的和不侵权的保证。在任何情况下,作者或版权持有人均不对因使用本软件或其他交易,
# 或因使用本软件或其他交易而产生的任何索赔、损害或其他责任负责,无论是在合同诉讼、侵权诉讼还是其他诉讼中。
#

import sys
import argparse

from jetson_inference import imageNet
from jetson_utils import videoSource, videoOutput, cudaFont, Log

# 解析命令行参数
parser = argparse.ArgumentParser(
    description="使用图像识别DNN对实时摄像头流进行分类。",
    formatter_class=argparse.RawTextHelpFormatter,
    epilog=imageNet.Usage() + videoSource.Usage() + videoOutput.Usage() + Log.Usage()
)

parser.add_argument("input", type=str, default="", nargs='?', help="输入流的URI")
parser.add_argument("output", type=str, default="", nargs='?', help="输出流的URI")
parser.add_argument("--network", type=str, default="googlenet", help="要加载的预训练模型(参见下方选项)")
parser.add_argument("--topK", type=int, default=1, help="显示前K个类别预测(默认:1)")

try:
    args = parser.parse_known_args()[0]
except:
    print("")
    parser.print_help()
    sys.exit(0)

# 加载识别网络
net = imageNet(args.network, sys.argv)

# 注意:要硬编码加载模型的路径,可以使用以下API:
# net = imageNet(model="model/resnet18.onnx", labels="model/labels.txt",
#                input_blob="input_0", output_blob="output_0")

# 创建视频源和输出
input = videoSource(args.input, argv=sys.argv)
output = videoOutput(args.output, argv=sys.argv)
font = cudaFont()

# 处理帧直到输入结束或用户退出
while True:
    # 捕获下一帧图像
    img = input.Capture()

    if img is None:  # 超时
        continue

    # 对图像进行分类并获取前K个预测
    # 如果只需要最顶层的类别,可以简单地运行:
    #   class_id, confidence = net.Classify(img)
    predictions = net.Classify(img, topK=args.topK)

    # 绘制预测的类别标签
    for n, (classID, confidence) in enumerate(predictions):
        classLabel = net.GetClassLabel(classID)
        confidence *= 100.0

        print(f"imagenet:  {confidence:05.2f}% class #{classID} ({classLabel})")

        font.OverlayText(
            img,
            text=f"{confidence:05.2f}% {classLabel}",
            x=5, y=5 + n * (font.GetSize() + 5),
            color=font.White, background=font.Gray40
        )

    # 渲染图像
    output.Render(img)

    # 更新标题栏
    output.SetStatus("{:s} | Network {:.0f} FPS".format(net.GetNetworkName(), net.GetNetworkFPS()))

    # 打印性能信息
    net.PrintProfilerTimes()

    # 输入/输出流结束时退出
    if not input.IsStreaming() or not output.IsStreaming():
        break
这段Python代码是一个使用NVIDIA的Jetson平台进行图像分类的示例程序。代码解析如下:
头部版权声明和许可信息
这部分代码声明了版权信息和软件许可,允许免费使用、复制和分发软件。
导入模块
import sys
import argparse
from jetson_inference import imageNet
from jetson_utils import videoSource, videoOutput, cudaFont, Log
sys: 处理系统特定的参数和功能。argparse: 解析命令行参数。jetson_inference和jetson_utils模块用于加载和处理图像分类模型、视频源、视频输出、绘制字体和日志记录。
解析命令行参数
parser = argparse.ArgumentParser(description="Classify a live camera stream using an image recognition DNN.",
                                 formatter_class=argparse.RawTextHelpFormatter,
                                 epilog=imageNet.Usage() + videoSource.Usage() + videoOutput.Usage() + Log.Usage())

parser.add_argument("input", type=str, default="", nargs='?', help="URI of the input stream")
parser.add_argument("output", type=str, default="", nargs='?', help="URI of the output stream")
parser.add_argument("--network", type=str, default="googlenet", help="pre-trained model to load (see below for options)")
parser.add_argument("--topK", type=int, default=1, help="show the topK number of class predictions (default: 1)")

try:
	args = parser.parse_known_args()[0]
except:
	print("")
	parser.print_help()
	sys.exit(0)
- 使用
argparse模块定义和解析命令行参数,包括输入和输出流的URI、使用的预训练模型和显示前K个预测结果的数量。 - 尝试解析命令行参数,如果解析失败,则显示帮助信息并退出程序。
加载图像分类网络
net = imageNet(args.network, sys.argv)
- 使用
imageNet类加载预训练的神经网络模型。
创建视频源和视频输出
input = videoSource(args.input, argv=sys.argv)
output = videoOutput(args.output, argv=sys.argv)
font = cudaFont()
- 使用
videoSource类创建视频输入流。 - 使用
videoOutput类创建视频输出流。 - 使用
cudaFont类创建用于绘制文本的字体。
处理视频帧
while True:
# capture the next image
img = input.Capture()
if img is None: # timeout
continue
# classify the image and get the topK predictions
predictions = net.Classify(img, topK=args.topK)
# draw predicted class labels
for n, (classID, confidence) in enumerate(predictions):
classLabel = net.GetClassLabel(classID)
confidence *= 100.0
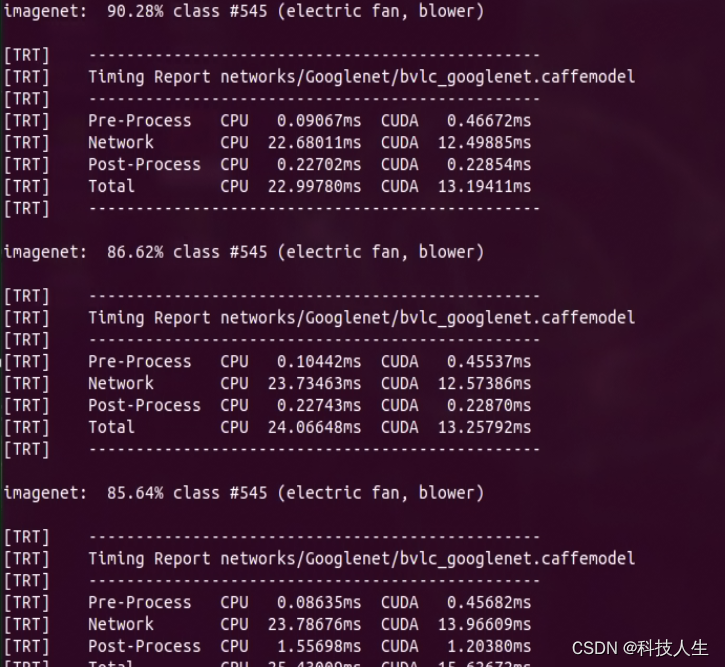
print(f"imagenet: {confidence:05.2f}% class #{classID} ({classLabel})")
font.OverlayText(img, text=f"{confidence:05.2f}% {classLabel}",
x=5, y=5 + n * (font.GetSize() + 5),
color=font.White, background=font.Gray40)
# render the image
output.Render(img)
# update the title bar
output.SetStatus("{:s} | Network {:.0f} FPS".format(net.GetNetworkName(), net.GetNetworkFPS()))
# print out performance info
net.PrintProfilerTimes()
# exit on input/output EOS
if not input.IsStreaming() or not output.IsStreaming():
break
- 使用
input.Capture()捕获下一帧图像。 - 如果捕获失败,则继续下一次循环。
- 使用
net.Classify()对图像进行分类,并获取前K个预测结果。 - 使用
font.OverlayText()在图像上绘制预测的类别标签和置信度。 - 使用
output.Render()渲染图像。 - 使用
output.SetStatus()更新输出窗口的标题栏,显示网络名称和帧率。 - 使用
net.PrintProfilerTimes()打印性能信息。 - 如果输入或输出流停止,则退出循环。
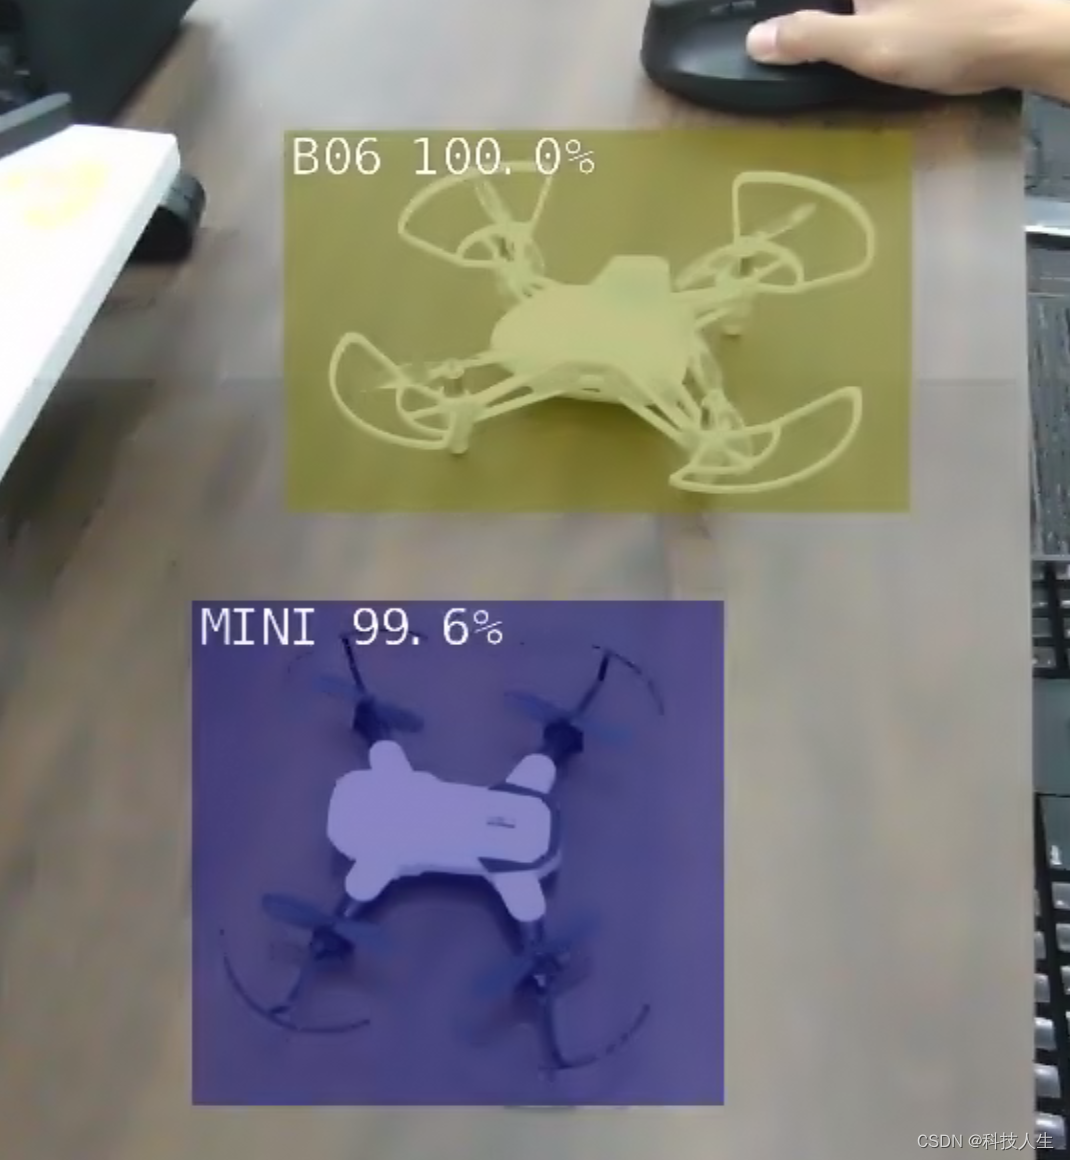
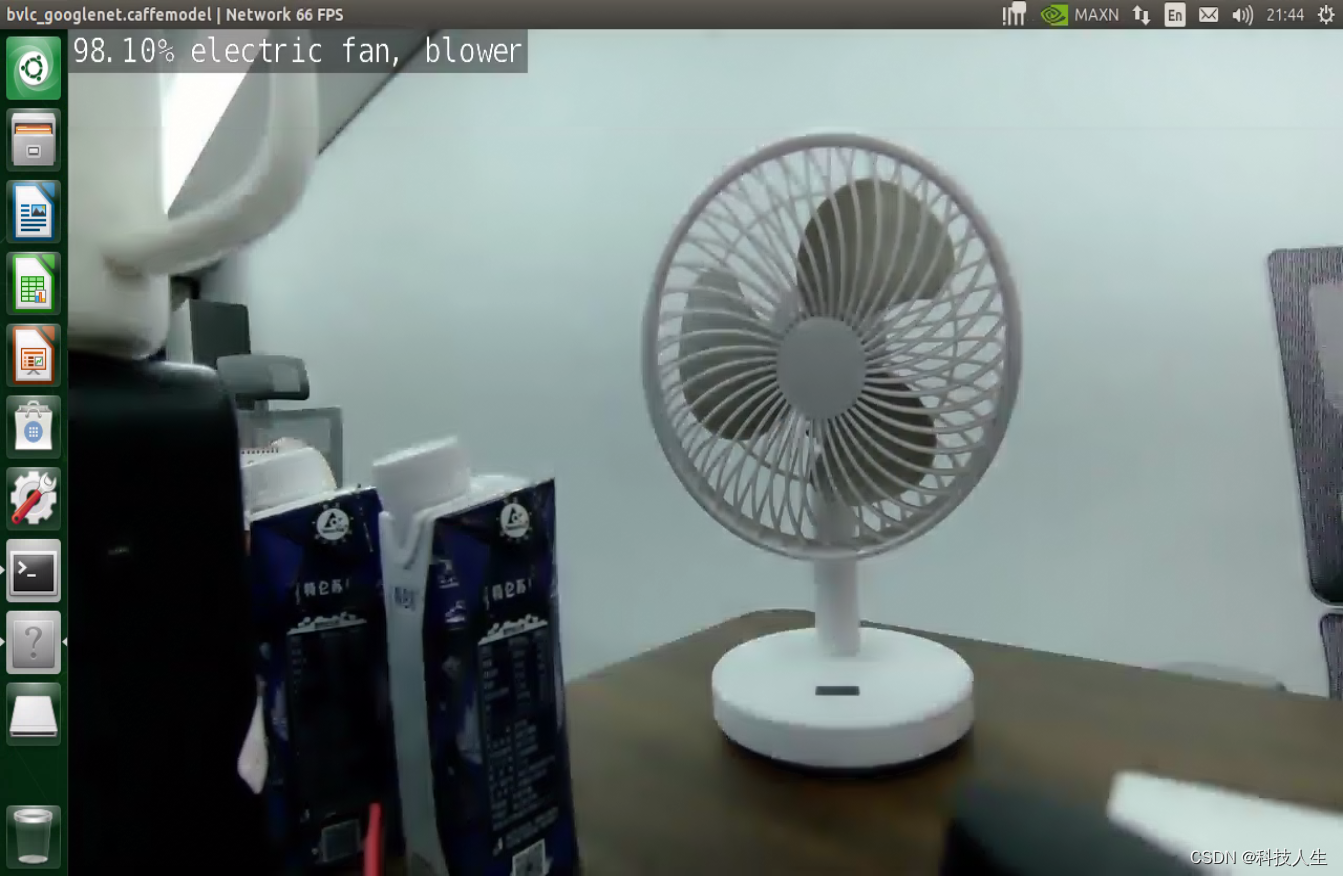
总体来说,这段代码实现了一个实时图像分类系统,使用Jetson平台的预训练模型对视频流中的每一帧进行分类,并在输出视频中叠加预测结果。
# 三、imageNet类有哪些对象和方法
`imageNet`类是Jetson Inference库的一部分,用于处理图像分类任务。以下是`imageNet`类的主要对象和方法:

## 对象属性
- `NetworkType`: 预定义的网络类型枚举。
- `model`: 加载的模型文件路径。
- `labels`: 加载的标签文件路径。
- `input_blob`: 输入层名称。
- `output_blob`: 输出层名称。

## 主要方法

1. **`__init__`**:
   ```python
   def __init__(self, network="googlenet", argv=[], model=None, labels=None, input_blob="input_0", output_blob="output_0"):
- 初始化图像分类网络。
- 参数包括网络类型、命令行参数、模型文件路径、标签文件路径、输入层名称和输出层名称。
Classify:def Classify(self, img, topK=1):- 对给定的图像进行分类。
- 返回预测结果的列表,每个结果包括类别ID和置信度。
GetClassLabel:def GetClassLabel(self, classID):- 返回指定类别ID的标签。
GetNetworkName:def GetNetworkName(self):- 返回网络的名称。
GetNetworkFPS:def GetNetworkFPS(self):- 返回网络处理帧率(FPS)。
PrintProfilerTimes:def PrintProfilerTimes(self):- 打印网络的性能分析信息。
Usage:@staticmethod def Usage():- 返回类的用法说明,通常用于命令行帮助信息。
使用示例
以下是如何使用imageNet类的简单示例:
from jetson_inference import imageNet
from jetson_utils import loadImage

# 初始化图像分类网络
net = imageNet("googlenet")

# 加载图像
img = loadImage("example.jpg")

# 对图像进行分类
class_id, confidence = net.Classify(img)

# 获取类别标签
class_label = net.GetClassLabel(class_id)

print(f"Image is classified as {class_label} with {confidence * 100:.2f}% confidence")
这个示例展示了如何初始化一个imageNet对象,加载一张图像,并对其进行分类,最后打印分类结果和置信度。
三、使用示例
python3 imagenet.py /dev/video0 display://0 --network=googlenet
四、训练自己的分类模型
以下是包含中文注释的SSD训练代码示例:
1. 安装TAO Toolkit
确保在具有NVIDIA GPU的系统上安装了Docker和NVIDIA Container Toolkit。
2. 拉取TAO Toolkit Docker容器
docker pull nvcr.io/nvidia/tao/tao-toolkit-tf:v3.21.11-tf1.15.5-py3
3. 准备数据
准备训练和验证数据,数据应按照Kitti或Pascal VOC格式组织,包含图像文件和对应的标注文件。
4. 创建SSD配置文件
以下是SSD配置文件的示例,并包含中文注释:
random_seed: 42  # 随机种子,用于确保实验的可重复性
dataset_config {
  data_sources: {
    label_directory_path: "/path/to/labels"  # 训练数据的标签路径
    image_directory_path: "/path/to/images"  # 训练数据的图像路径
  }
  validation_data_sources: {
    label_directory_path: "/path/to/val_labels"  # 验证数据的标签路径
    image_directory_path: "/path/to/val_images"  # 验证数据的图像路径
  }
}
model_config {
  pretrained_model_file: "/path/to/pretrained/model"  # 预训练模型文件路径
  num_layers: 18  # 模型的层数
  all_proposals: 200  # 所有提议框的数量
}
train_config {
  batch_size: 8  # 批次大小
  learning_rate: 0.001  # 学习率
  num_epochs: 80  # 训练轮数
  augmentations: {
    horizontal_flip: true  # 是否进行水平翻转数据增强
    vertical_flip: false  # 是否进行垂直翻转数据增强
  }
}
5. 运行训练
使用以下命令运行训练任务,并包含中文注释:
docker run --gpus all -v /path/to/your/data:/data -v /path/to/your/config:/config -v /path/to/your/output:/output nvcr.io/nvidia/tao/tao-toolkit-tf:v3.21.11-tf1.15.5-py3 ssd train \
  -e /config/ssd_config.yaml \  # 配置文件路径
  -r /output/experiment_dir \  # 实验输出目录
  -k $API_KEY  # TAO Toolkit的API密钥
--gpus all: 使用所有可用的GPU。-v /path/to/your/data:/data: 将本地数据目录挂载到容器内的/data路径。-v /path/to/your/config:/config: 将本地配置文件目录挂载到容器内的/config路径。-v /path/to/your/output:/output: 将本地输出目录挂载到容器内的/output路径。-e /config/ssd_config.yaml: 指定配置文件。-r /output/experiment_dir: 指定实验输出目录。-k $API_KEY: 指定TAO Toolkit的API密钥。
6. 导出模型
训练完成后,使用以下命令导出模型,并包含中文注释:
docker run --gpus all -v /path/to/your/output:/output nvcr.io/nvidia/tao/tao-toolkit-tf:v3.21.11-tf1.15.5-py3 ssd export \
  -m /output/experiment_dir/model.tlt \  # 输入的TAO模型路径
  -o /output/experiment_dir/model.etlt \  # 输出的ETLT模型路径
  -k $API_KEY  # TAO Toolkit的API密钥
总结
通过TAO Toolkit,你可以方便地对SSD目标检测模型进行训练。准备数据、配置训练参数并运行训练命令,可以帮助你快速训练自定义的目标检测模型并进行部署。详细的指南和更多高级功能可以参考TAO Toolkit的官方文档。
这样,代码和配置文件中都增加了中文注释,便于理解和使用。