目录
日志输出的重要性不言而喻,不仅可以观测执行过程,更重要的是在发生bug时可以快速的定位到问题所在, Pytest 是出色的测试框架,但它不会自动显示 print 语句或日志的输出,这在尝试调试失败的测试或了解流程时可能会成为问题。同时也是支持设置日志级别,记录日志的到指定的文件
自定义日志记录器和内置的日志记录器
日志记录器的重要性在于可以随时设置不同级别的日志,python内置的日志记录器分类了5类的日志级别。标识日志的严重级别:
- - 未设置 NOTSET(0):此级别捕获所有消息,无论其严重性如何。
- - 调试 Debug(10):此级别用于任何可以帮助识别潜在问题的内容,例如变量值或程序执行的步骤。
- - 信息 Infor(20):此级别用于确认事情是否按预期工作。
- - 警告 Warning (30):此级别表示发生了意外情况,或者在不久的将来可能会出现一些问题(例如“磁盘空间不足”)。但是,该软件仍按预期工作。
- - 错误 Error(40):此级别表示存在更严重的问题,导致软件无法执行某项功能。
- - 严重 Critical(50):此级别表示一个非常严重的错误,可能会阻止程序继续运行。
自定义记录器允许您更方便地定义和处理这些级别,从而进一步提高记录过程的精度和控制。
基于以上的目标,本文旨在学习在python中设置 pytest 日志记录的过程。因此我们将探讨如何在 Pytest 中输出日志、如何禁用日志以及如何在单个测试级别更改日志级别。
项目代码
项目目录树
temperature_convertor
├── requirements.txt
├── src
│   ├── __init__.py
│   ├── __pycache__
│   │   ├── __init__.cpython-310.pyc
│   │   └── custom_logger.cpython-310.pyc
│   ├── custom_logger.py
│   └── temp_convertor.py
└── tests
    ├── __init__.py
    └── test_temp_convertor.py
运行环境:
% which python3
/usr/local/bin/python3
macOS 14.0
自定义日志记录器
我们使用了一个自定义记录器,配置为在级别显示日志消息。DEBUG,通过创建自己的记录器,您可以控制记录器的行为,从而可以自定义它以满足您的特定要求。
src/custom_logger.py#!/usr/bin/env python
# -*- coding: utf-8 -*-
# This module is ***
# @Time : 2024/6/9 10:25
# @Author :
# function :
# @File : custom_logger.py
import logging
from enum import Enum
class LogLevel(Enum):
DEBUG = logging.DEBUG
INFO = logging.INFO
WARNING = logging.WARNING
ERROR = logging.ERROR
CRITICAL = logging.CRITICAL
def console_logger(name:str, level:LogLevel) -> logging.Logger:
logger = logging.getLogger(f"__{name}__")
logger.setLevel(level.value)
# Create a console handler and set its level
console_handler = logging.StreamHandler()
console_handler.setLevel(level.value)
# Set the formatter for the console handler
formatter = logging.Formatter(
"%(asctime)s - %(name)s - %(levelname)s - %(message)s",
datefmt="%m/%d/%Y %I:%M:%S%p",
)
console_handler.setFormatter(formatter)
# Add the console handler to the logger
logger.addHandler(console_handler)
return logger
函数源代码
这里通过温度的转换的的两个程序来调用设置的日志记录器。
src/temp_convertor.py#!/usr/bin/env python
# -*- coding: utf-8 -*-
# This module is ***
# @Time : 2024/6/9 10:25
# @Author :
# function :
# @File : temp_convertor.py
from src.custom_logger import console_logger, LogLevel
c_logger = console_logger(name="temp_convertor", level=LogLevel.DEBUG)
def fahrenheit_to_celsius(fahrenheit: float) -> float:
"""
将华式摄氏度转换成摄氏度
:param fahrenheit: 华式摄氏度
:return:摄氏度
"""
c_logger.debug(f"Coverting {fahrenheit}°F to Celsius.")
celsius = round((fahrenheit - 32) * 5 / 9, 2)
c_logger.info(f"Result: {celsius}°C")
return celsius
def celsius_to_fahrenheit(celsius:float) -> float:
"""
将摄氏度转换成华式摄氏度
:param celsius:
:return:
"""
c_logger.debug(f"Coverting {celsius}°F to fahrenheit.")
fahrenheit = round((celsius * 9 / 5) + 32, 2)
c_logger.info(f"Result: {fahrenheit}°C")
return fahrenheit
if __name__ == '__main__':
print(fahrenheit_to_celsius(100))
print(celsius_to_fahrenheit(100))
执行上述代码,检查代码基本逻辑正确

源代码没问题之后,编写一些单元测试来验证实用程序的功能。temp_convertor
tests/test_temp_convertor.py#!/usr/bin/env python
# -*- coding: utf-8 -*-
# This module is ***
# @Time : 2024/6/9 10:26
# @Author :
# function :
# @File : test_temp_convertor.py
from src.temp_convertor import fahrenheit_to_celsius, celsius_to_fahrenheit
def test_fahrenheit_to_celsius():
assert fahrenheit_to_celsius(90) == 32.22
def test_celsius_to_fahrenheit():
assert celsius_to_fahrenheit(19) == 66.2
pytest -s -v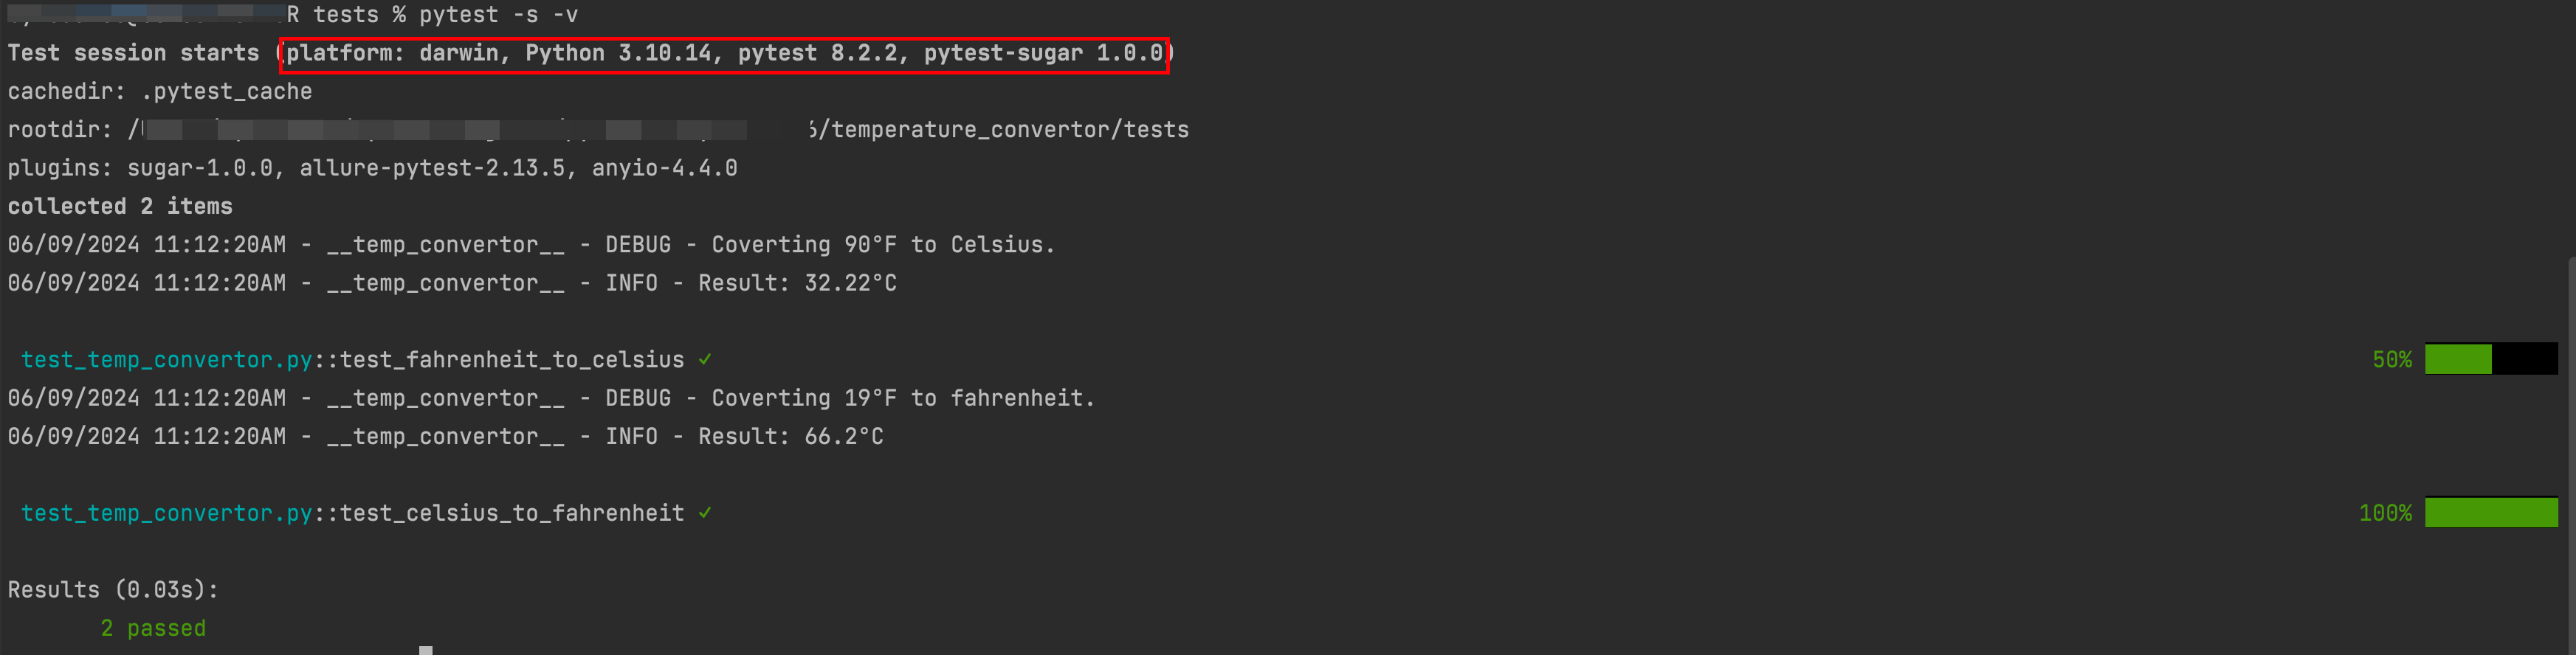
学以致用,之前的其他的文章介绍了pytest 插件,pytest-sugagr.
❓❓❓ 如果您想覆盖源代码中设置的记录器仅用于测试,怎么样?也许是不同的格式,不同的日志级别,甚至输出到文件?
pytest中定义和覆盖日志记录信息
Pytest 提供了多种方法来控制测试过程中的日志记录。其中一种方法是通过 CLI 定义和覆盖默认日志记录格式。
使用cli定义Logging
pytest允许通过命令行参数的方式自定义日志输出格式和时间格式,这种灵活性使您能够根据自己的具体需求调整日志显示方式。这里给出一个示例:
pytest -s -v --log-cli-level=INFO --log-format="%(asctime)s %(levelname)s %(message)s" --log-date-format=" %Y-%m-%d %H:%M"
在该命令中,log format设置日志消息本身的格式,而log date format则设置日志消息中时间戳的格式。
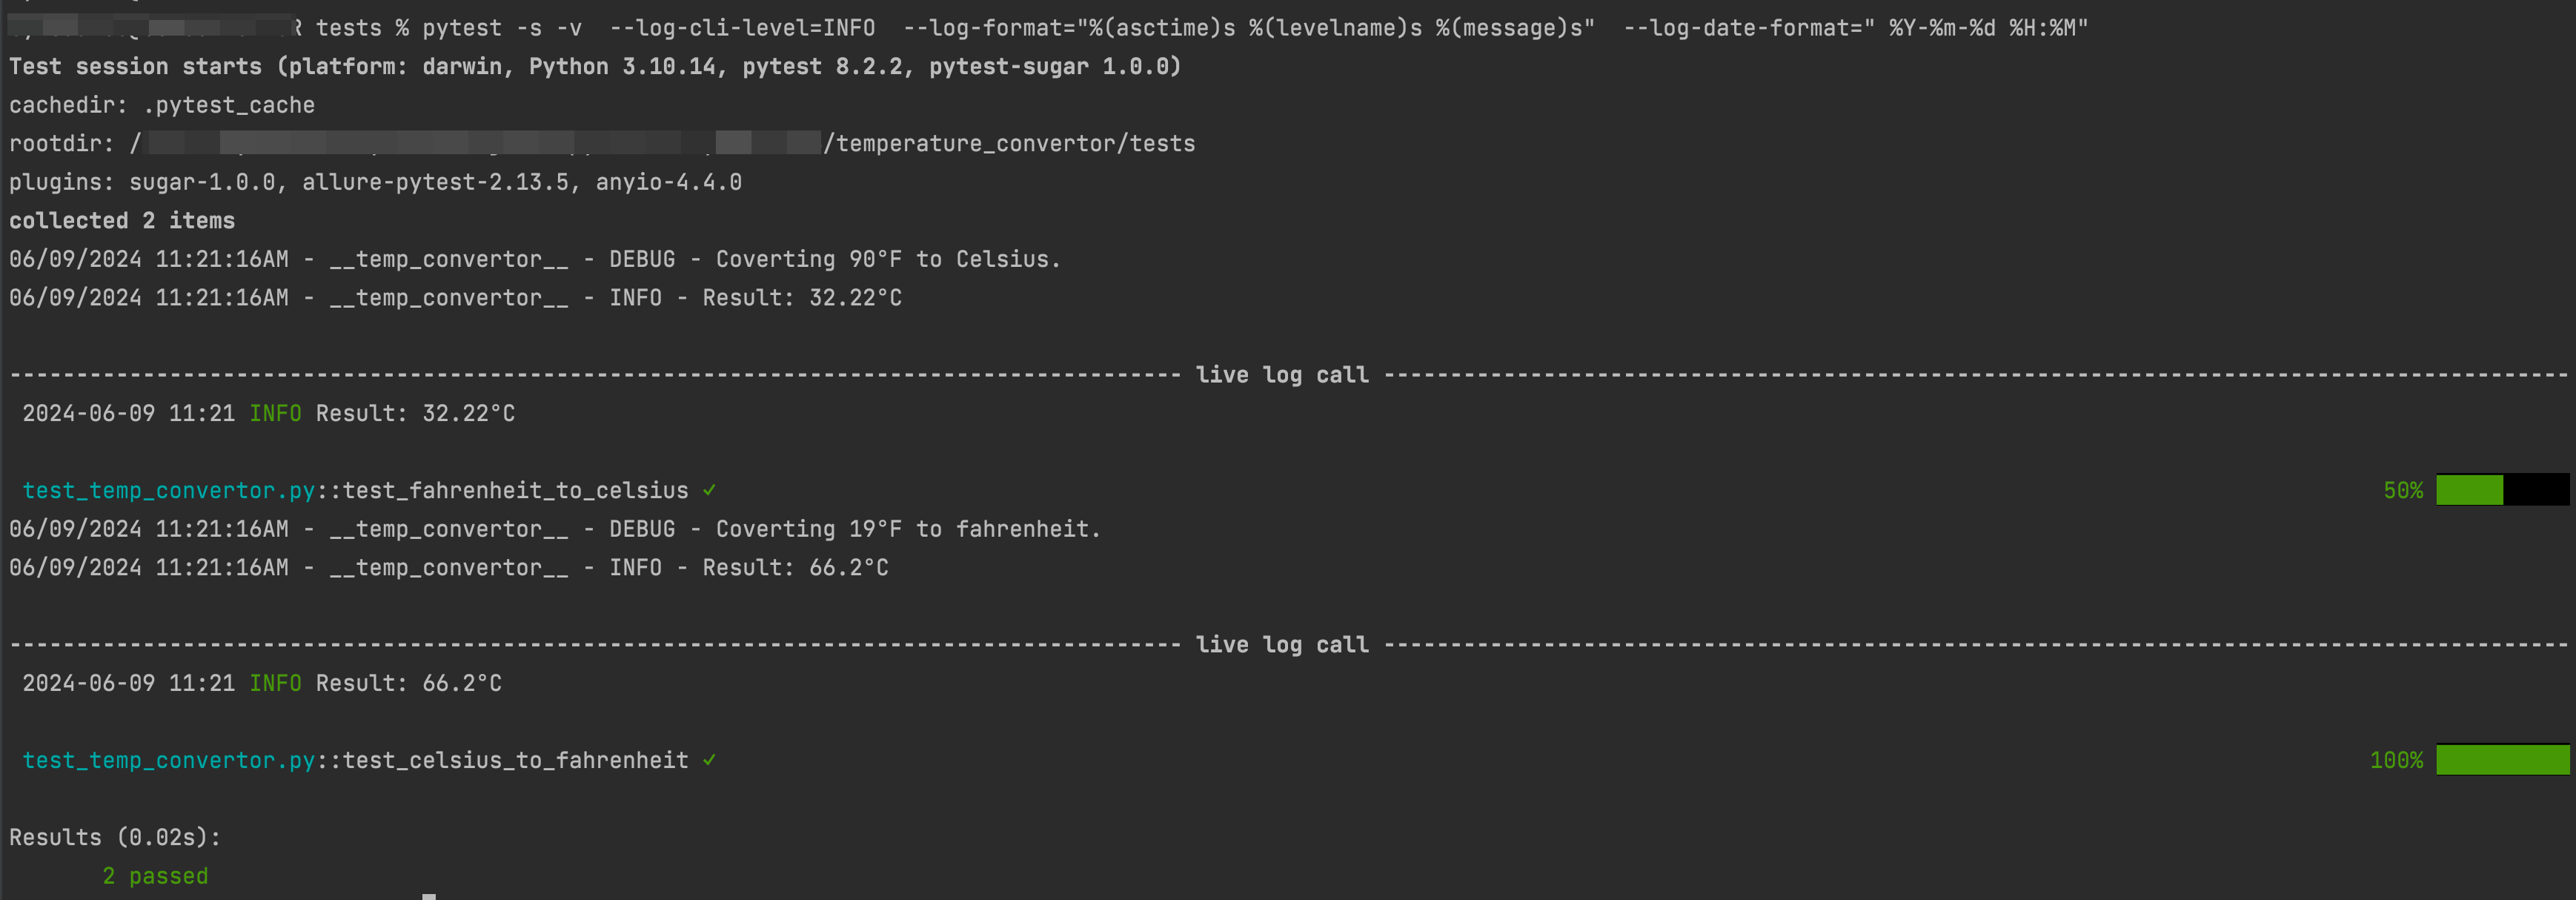
这里看到已经将日志格式和级别重写为 Info信息 几倍。
使用pytest.ini定义Logging
如果使用持久化的配置,可以在pytest.ini文件中设置日志参数。此文件允许您在默认情况下启用CLI日志记录,并指定默认日志级别。以下是pytest.ini配置的示例:
pytest.ini[pytest]
log_cli = true
log_cli_level = DEBUG
log_cli_format = %(asctime)s %(levelname)s %(message)s
log_cli_date_format = %Y-%m-%d %H:%M:%S
在这里的配置中,设置了几个参数如下所示:
- log_cli:启用到控制台的日志记录。
- log_cli_level:将日志级别设置为DEBUG。
- log_cli_format:设置记录消息的格式。
- log_cli_date_format:设置日志消息中时间戳的格式。
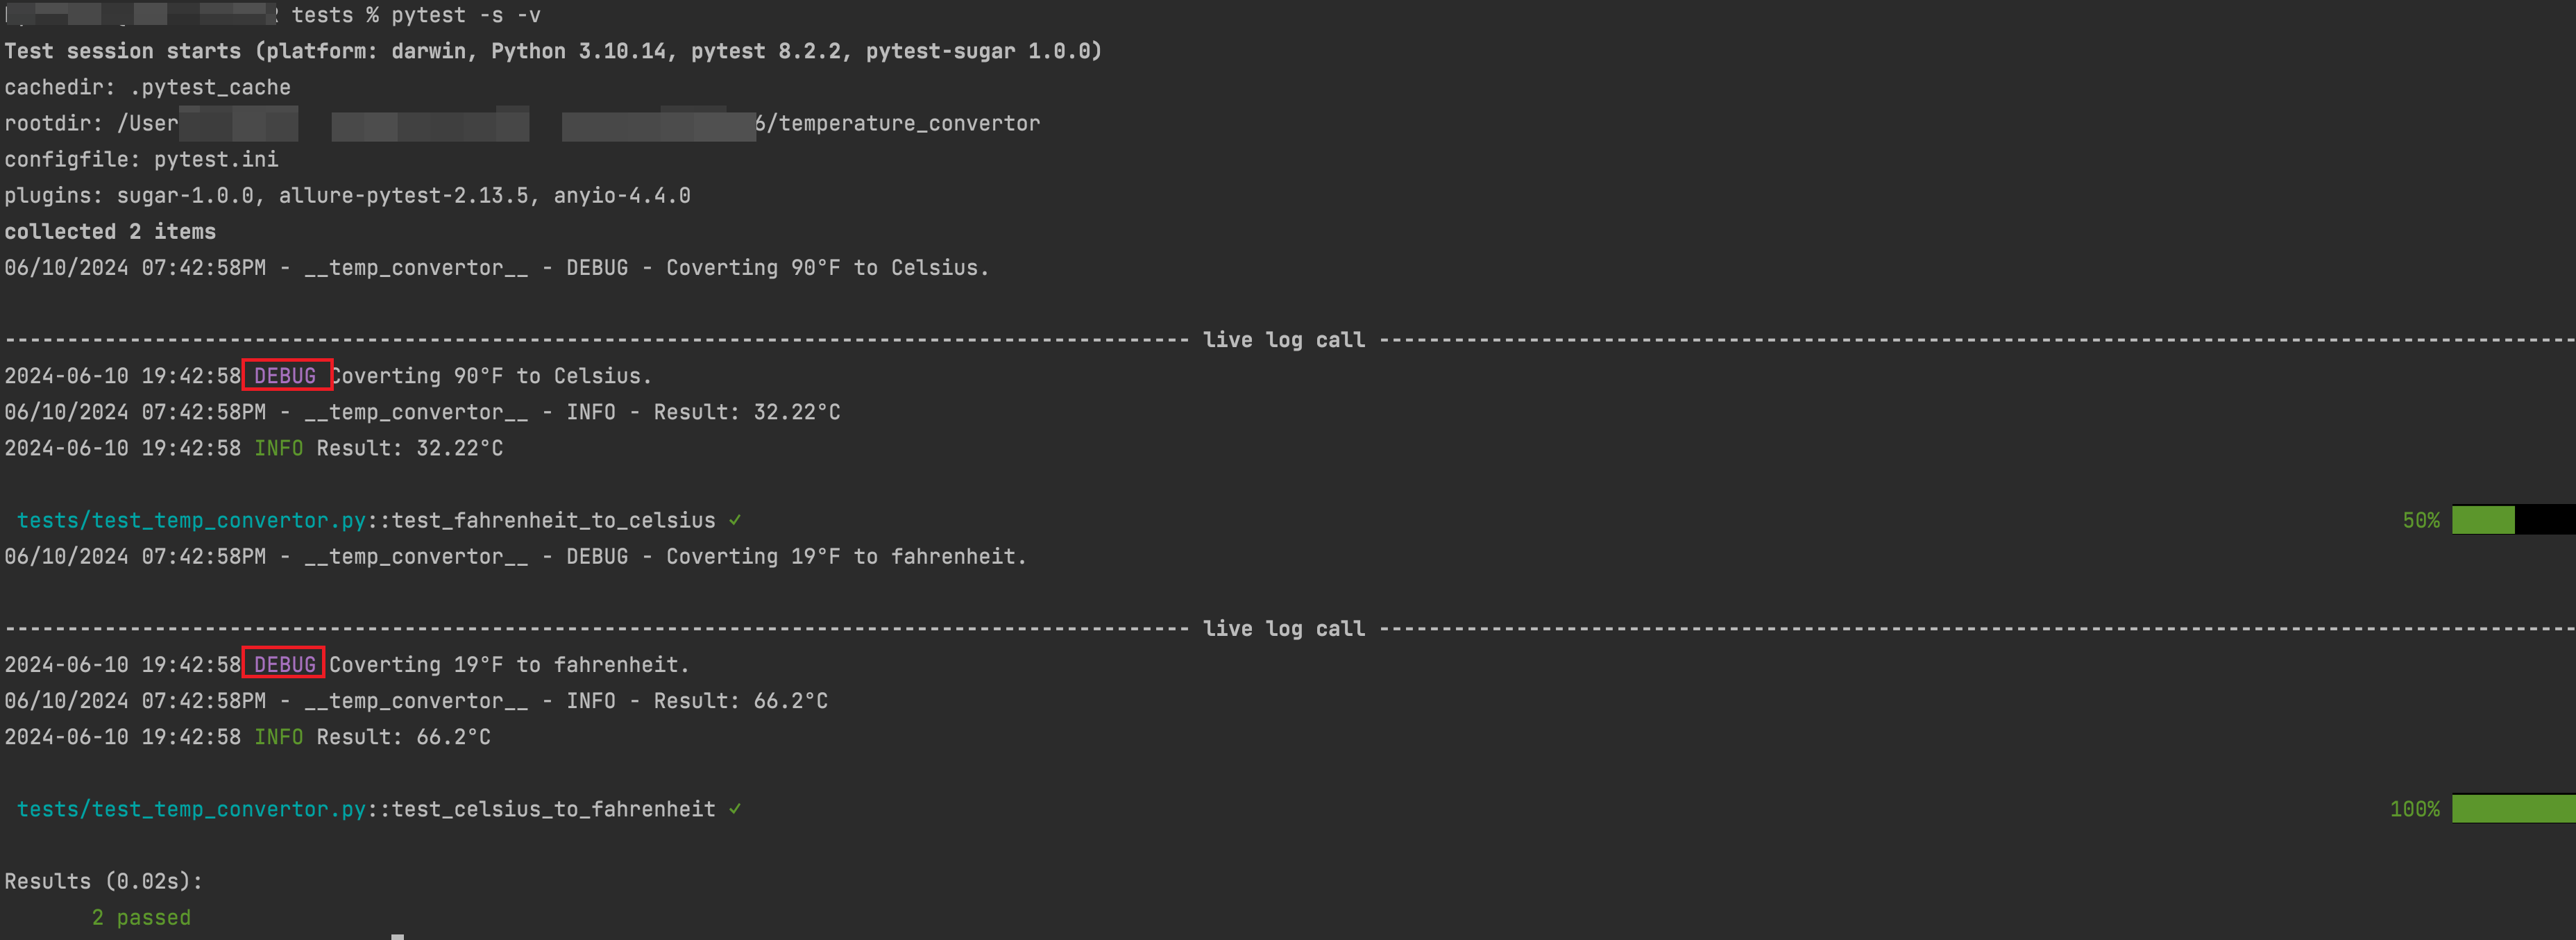
有关配置日志记录pytest.ini,当然也可以使用pyproject.tmol,tox.ini,setup.config,但是在Pytest中pytest.ini优先于其他几个配置文件,即使为空也是如此。
运行此操作,我们从关卡中获取每个测试的实时日志。DEBUG
上面定义了将日志输出到控制台,还可以将其写入文件供以后查询或查看执行信息。需要将文件处理器添加到配置文件中的【日志记录器 】,在Pytest.ini中
[pytest]
log_file = logs/temp_convertor_tests_run.log
log_file_date_format = %Y-%m-%d %H:%M:%S
log_file_format = %(asctime)s - %(name)s %(levelname)s %(message)s
log_file_level = DEBUG
执行pytest命令
pytest -s -v此时会在tests目录下生成一个log文件
logs/temp_convertor_tests_run.log
2024-06-10 19:49:12 - __temp_convertor__ DEBUG Coverting 90°F to Celsius.
2024-06-10 19:49:12 - __temp_convertor__ INFO Result: 32.22°C
2024-06-10 19:49:12 - __temp_convertor__ DEBUG Coverting 19°F to fahrenheit.
2024-06-10 19:49:12 - __temp_convertor__ INFO Result: 66.2°C
当然还有其他的诸如禁用日志的功能,但如果在测试中可能只有小概率会使用禁用日志的功能
pytest -s -v --show-capture=no修改单个测试级别的日志
某些时候,可能希望更改特定测试的日志级别,可能是为了调试该测试或减少日志输出中的干扰。Pytest 的夹具允许您执行此操作。
caplog该夹具可以用于控制测试中的日志并与之交互,使用caplog,实现临时修改日志级别、捕获日志信息进行断言,在测试用例中新增
def test_celsius_to_fahrenheit_caplog_ex(caplog):
    caplog.set_level(logging.DEBUG, logger="__temp_conertor__")

    assert celsius_to_fahrenheit(19) == 66.2
    print("printing caplong records...")
    for record in caplog.records:
        print(record.levelname, record.message)
再次执行
pytest -s -v
输出显示测试的日志级别设置为 INFO,并且可以使用 和 访问和打印日志消息。record.levelnamerecord.message .
在其他的文章中给出了配置控制台和记录到日志文件时,可以使用logger.config或pytest.ini来实现。logger.config是通过编程的方式设置日志记录器的配置,而pytest.ini是通过配置文件来设置pytest的全局选项,包括日志选项。
pytest.ini方式相对更简单和方便,因为它可以在一个地方集中管理所有的pytest配置,并且不需要在每个测试文件中重复设置日志配置。通过在pytest.ini文件中添加相应的日志配置选项,可以轻松地控制日志的输出级别、格式和文件路径等。
然而,如果你需要更细粒度的日志控制,或者需要在不同的测试用例中使用不同的日志配置,那么使用logger.config可能更合适。通过编程方式设置日志记录器,可以根据具体的需求动态地调整日志配置。
综上所述,如果你希望简单地配置日志并在整个项目中使用相同的日志设置,推荐使用pytest.ini。如果你需要更灵活的日志控制或在不同的测试用例中有不同的日志需求,可以考虑使用logger.config。最终的选择取决于你的具体需求和项目的特点。
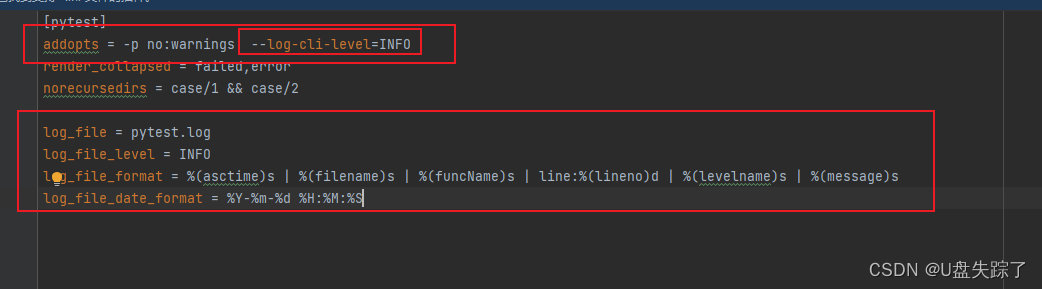
# pytest.ini
[pytest]
log_cli = True
log_cli_level = INFO
log_cli_format = %(asctime)s (%(levelname)s) | %(filename)s:%(lineno)s | %(message)s
log_cli_date_format = %Y-%m-%d %H:%M:%S
log_file = pytest_log.txt
log_file_level = INFO
log_file_date_format = %Y-%m-%d %H:%M:%S
log_file_format = %(asctime)s ( %(levelname)s ) %(filename)s:%(lineno)s | %(message)s在上述代码中,log_cli = True表示在执行过程中启动实时监测日志,log_cli_level指定了监测日志的等级显示,log_cli_format定义了输出日志的显示格式,log_cli_date_format指定了显示日志的时间格式。
log_file指定了存放日志文件的路径,log_file_level表示文件中显示的日志等级,log_file_date_format表示文件中显示的日志时间格式,log_file_format表示文件中显示的日志格式。
要使用上述配置,需要在测试用例文件中导入logging库,并在需要记录日志的地方使用logging模块的方法输出日志信息,例如:
def test_demo_ini():
import logging
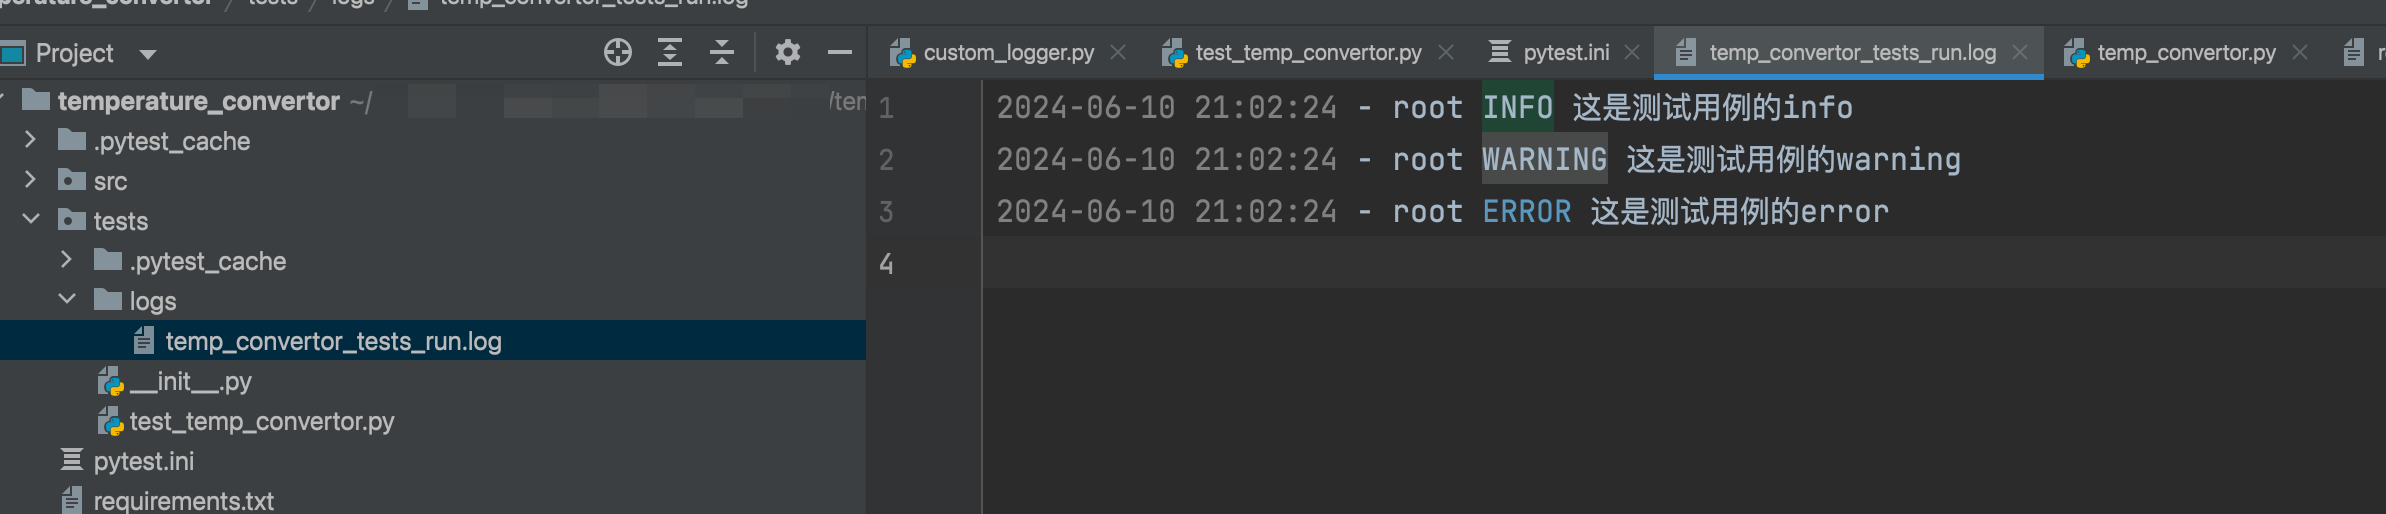
logging.info(f'这是测试用例的info')
logging.warning(f'这是测试用例的warning')
logging.error(f'这是测试用例的error')
assert 1控制台输出:

在temp_convertor_tests_run.log日志文件中