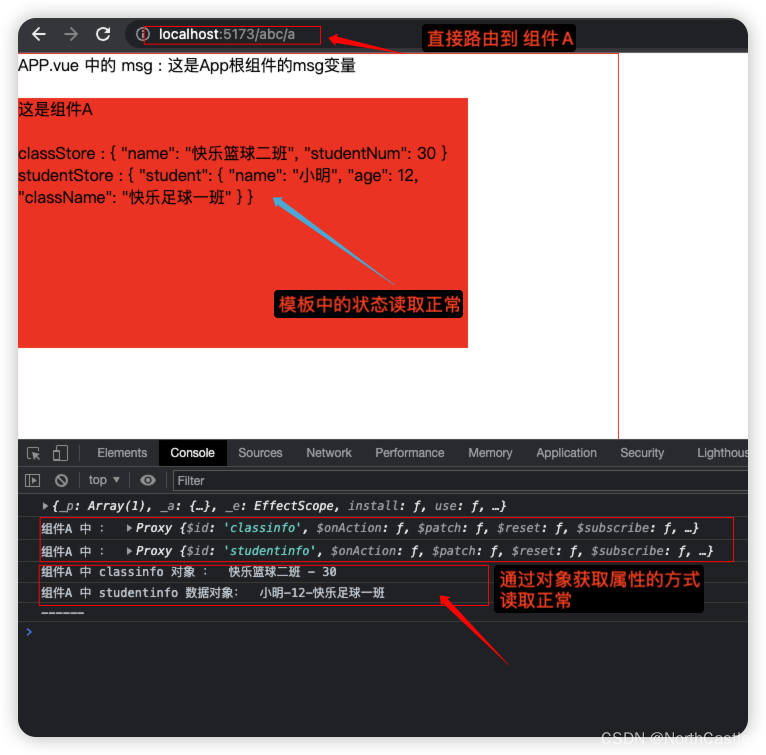
在 Pinia 中,你可以使用 $subscribe 方法来监听 store 中数据的变化。Pinia 的 $subscribe 方法允许你订阅 store 的 mutations,以便在数据变化时执行一些操作。你可以在 store 内部或组件中使用 $subscribe 方法。
示例
以下是一个完整的示例,展示如何在 Pinia 中创建一个 store 并监听其数据变化。
步骤 1:安装 Pinia
如果你还没有安装 Pinia,请先安装:
npm install pinia
步骤 2:创建 Pinia store
创建一个名为 store.js 的文件,并定义一个简单的 Pinia store:
// store.js
import { defineStore } from 'pinia';

export const useMainStore = defineStore('main', {
  state: () => ({
    counter: 0,
    name: 'Pinia Store'
  }),
  actions: {
    increment() {
      this.counter++;
    },
    setName(newName) {
      this.name = newName;
    }
  }
});
步骤 3:在组件中使用 Pinia 并监听数据变化
在组件中使用 Pinia store,并监听 store 的数据变化:
// App.vue
<template>
  <div>
    <p>Counter: {{ store.counter }}</p>
    <button @click="store.increment">Increment</button>
    <p>Name: {{ store.name }}</p>
    <input v-model="newName" placeholder="Enter new name">
    <button @click="changeName">Change Name</button>
  </div>
</template>

<script>
import { defineComponent, ref, onMounted } from 'vue';
import { useMainStore } from './store';
import { createPinia, PiniaPluginContext } from 'pinia';

export default defineComponent({
  name: 'App',
  setup() {
    const store = useMainStore();
    const newName = ref('');

    const changeName = () => {
      store.setName(newName.value);
    };

    // 监听 store 的数据变化
    store.$subscribe((mutation, state) => {
      console.log('Mutation:', mutation);
      console.log('New State:', state);
    });

    return {
      store,
      newName,
      changeName
    };
  }
});
</script>

<style>
/* 你的样式代码 */
</style>
步骤 4:在 main.js 中配置 Pinia
确保在你的 main.js 中配置 Pinia:
// main.js
import { createApp } from 'vue';
import { createPinia } from 'pinia';
import App from './App.vue';

const app = createApp(App);
const pinia = createPinia();

app.use(pinia);
app.mount('#app');
解释
- 定义 Pinia Store:在
store.js文件中定义一个名为useMainStore的 Pinia store,包含state和actions。 - 在组件中使用 Store:在
App.vue中使用useMainStore来访问和修改 store 中的数据。 - 监听 Store 的数据变化:使用
$subscribe方法订阅 store 的 mutations,当 store 中的数据发生变化时,会触发回调函数。 - 配置 Pinia:在
main.js中创建并配置 Pinia。
通过这种方式,你可以在 Pinia 中监听 store 数据的变化,并在数据发生变化时执行一些操作。