| k8s集群 | ||
| k8s集群node01 | 192.168.246.11 | |
| k8s集群node02 | 192.168.246.12 | |
| k8s集群master | 192.168.246.10 | |
| k8s集群nginx+keepalive | |
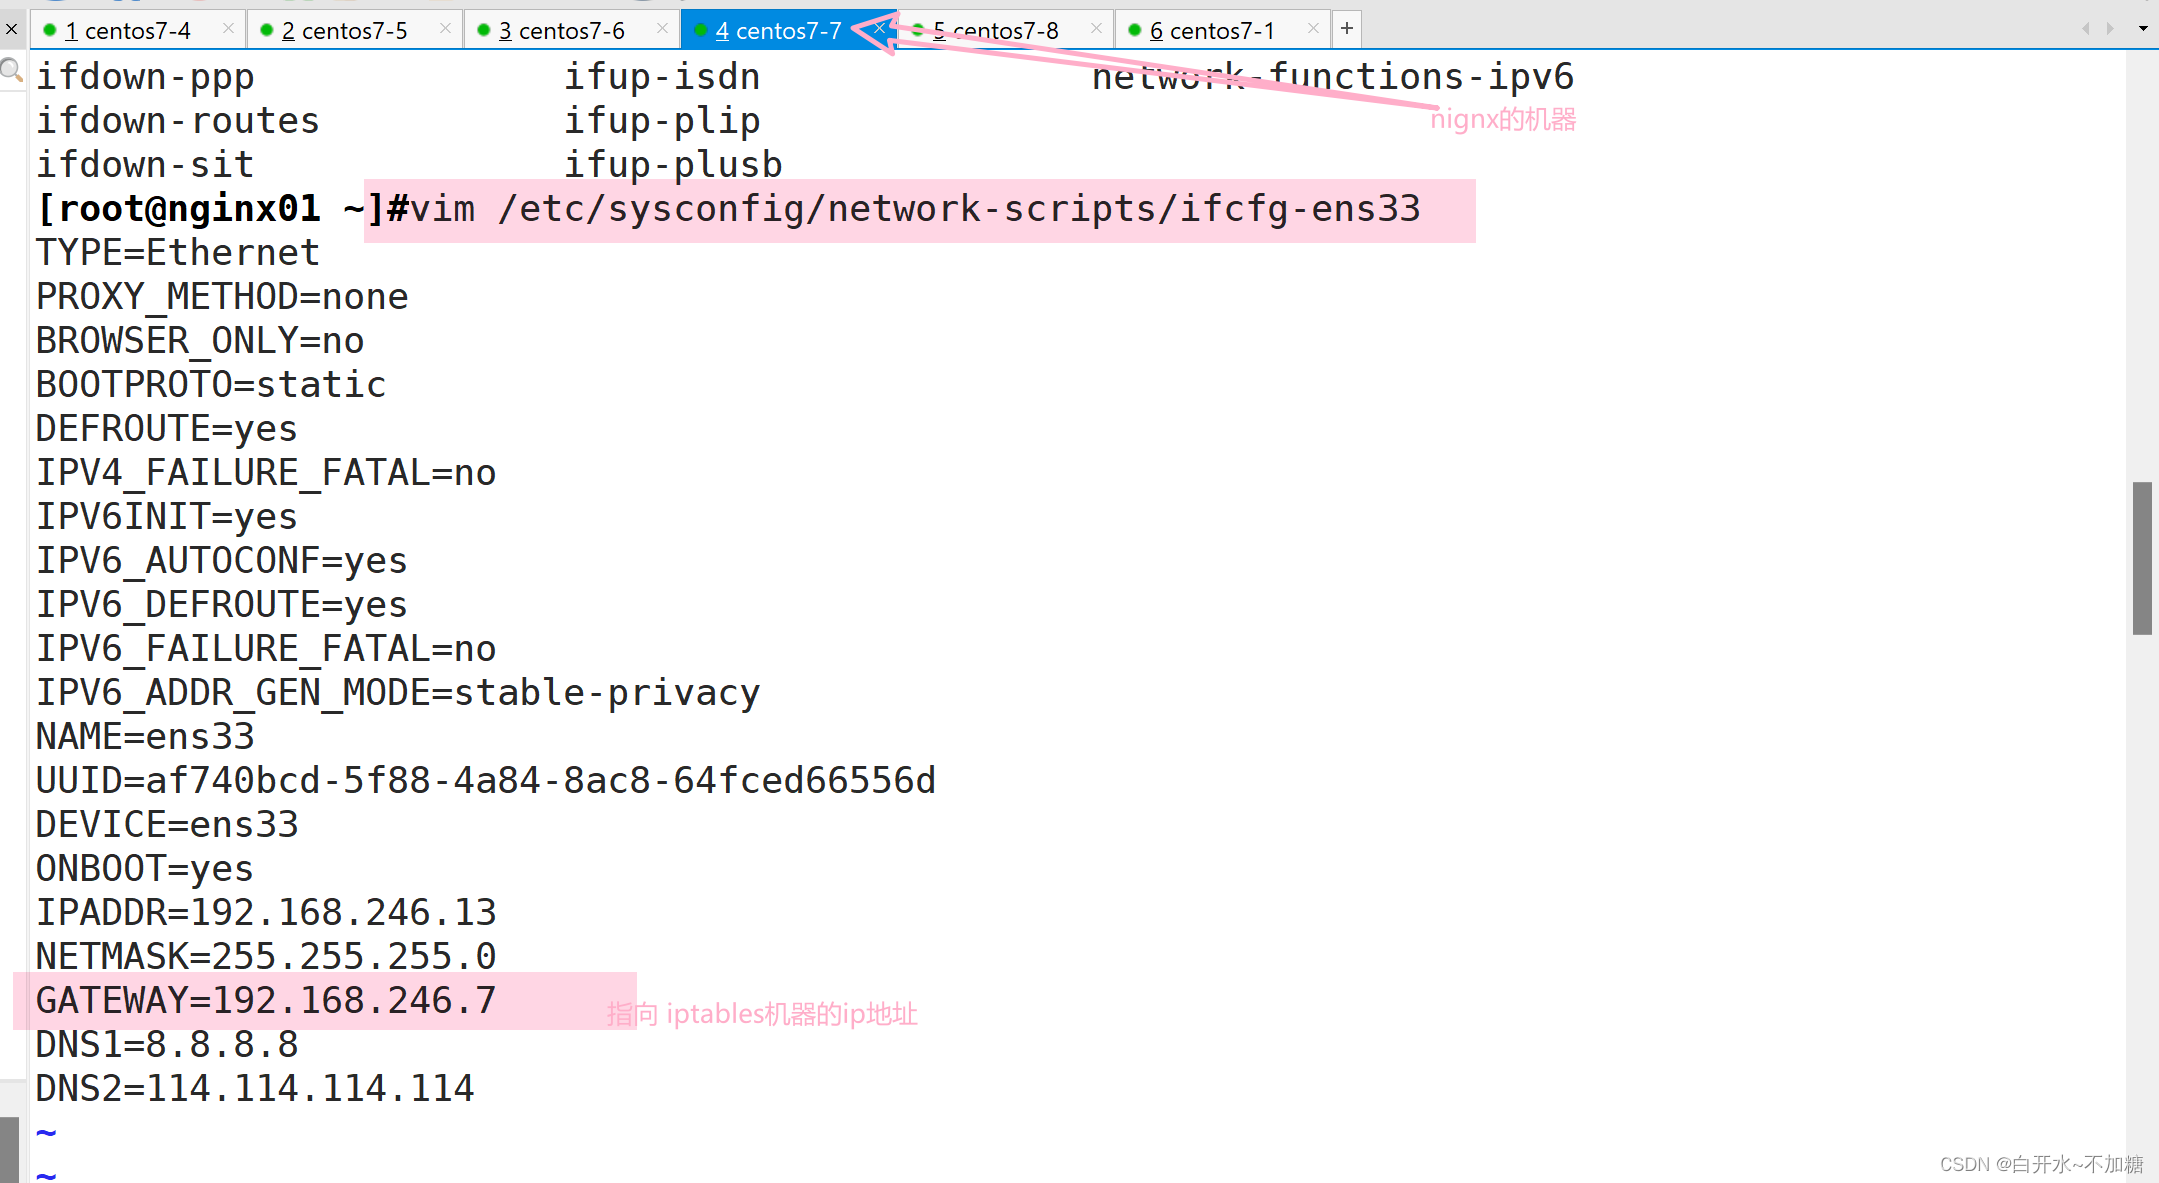
| 负载均衡nginx+keepalive01(master) | 192.168.246.13 |
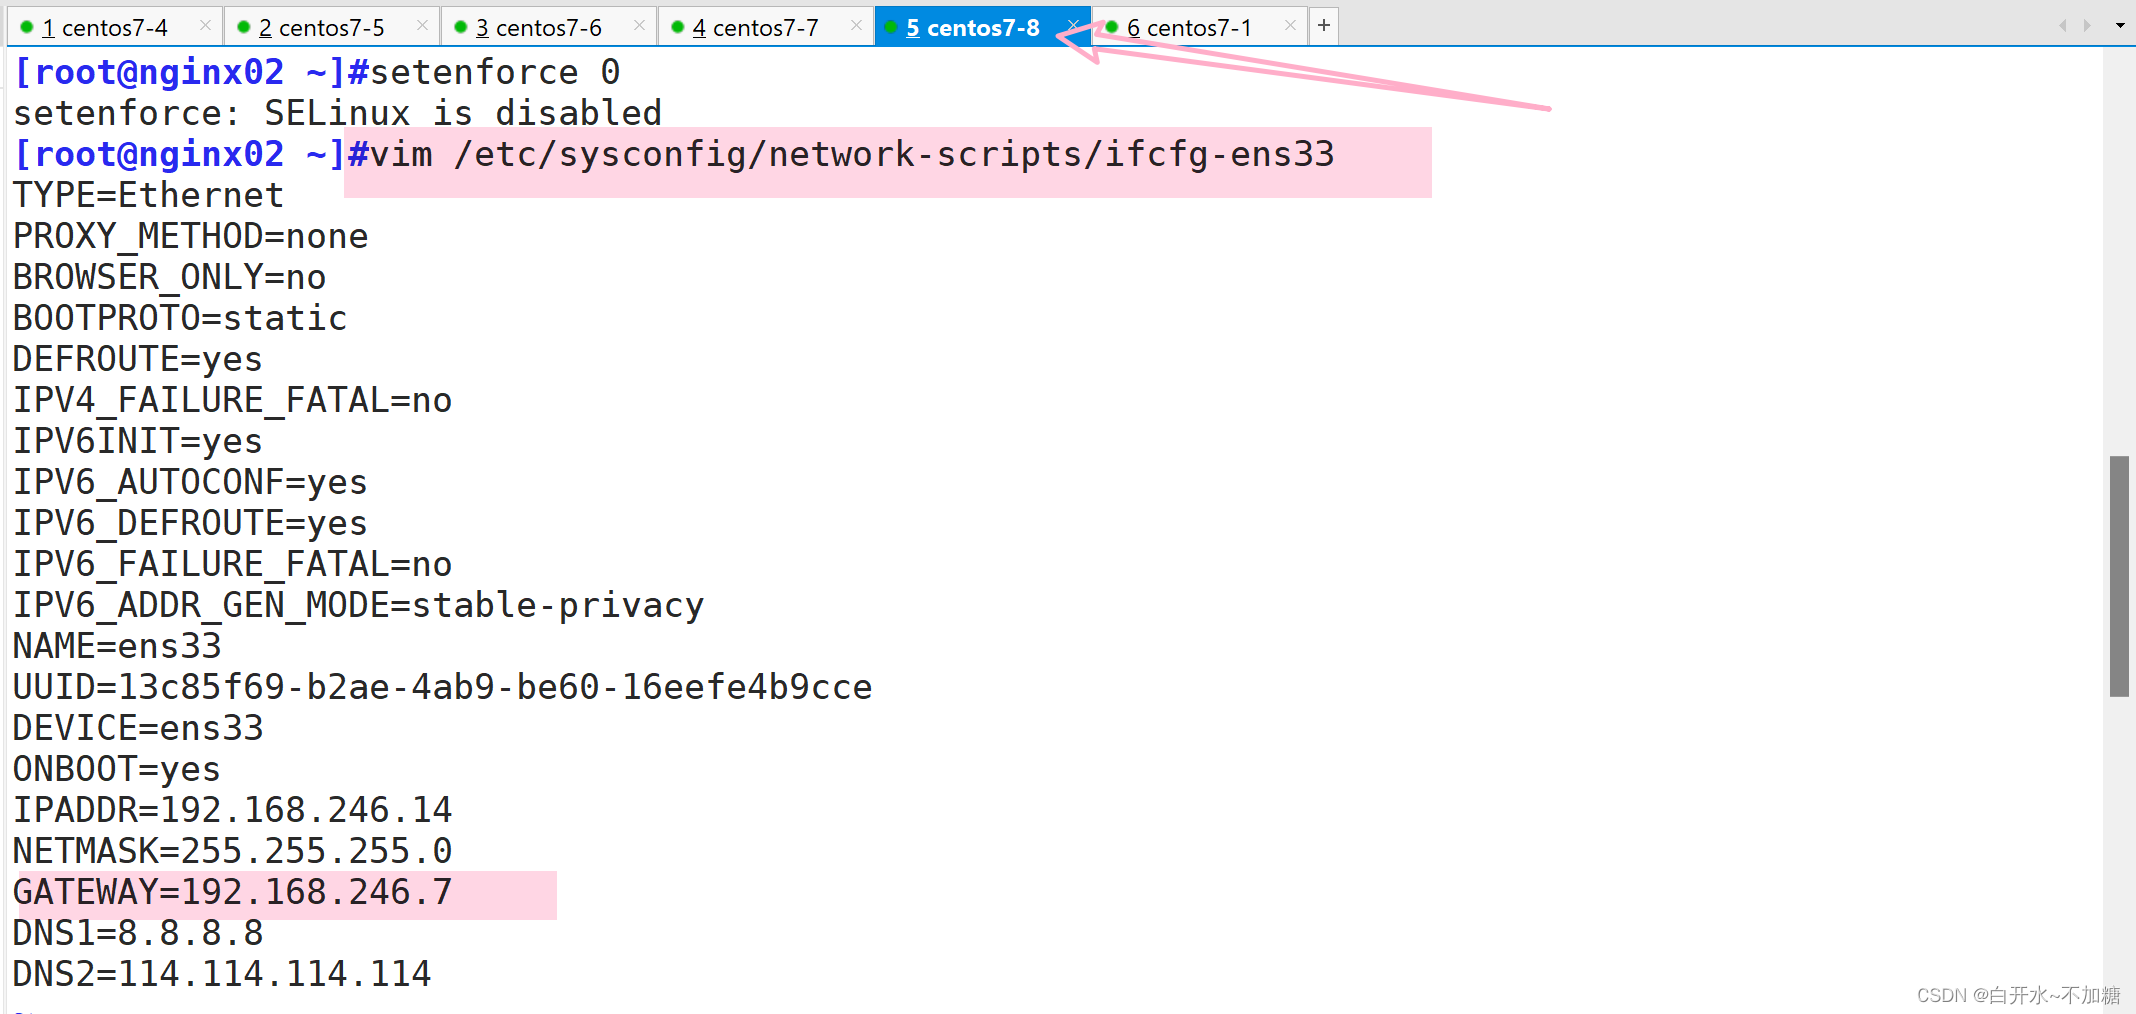
| 负载均衡nginx+keepalive02(backup) | 192.168.246.14 |
| VIP 192.168.246.100 | |
一、Kubernetes 区域可采用 Kubeadm 方式进行安装
 二、
二、
要求在 Kubernetes 环境中,通过yaml文件的方式,创建2个Nginx Pod分别放置在两个不同的节点上,Pod使用hostPath类型的存储卷挂载,节点本地目录共享使用 /data,2个Pod副本测试页面二者要不同,以做区分,测试页面可自己定义。
2.1创建yaml文件
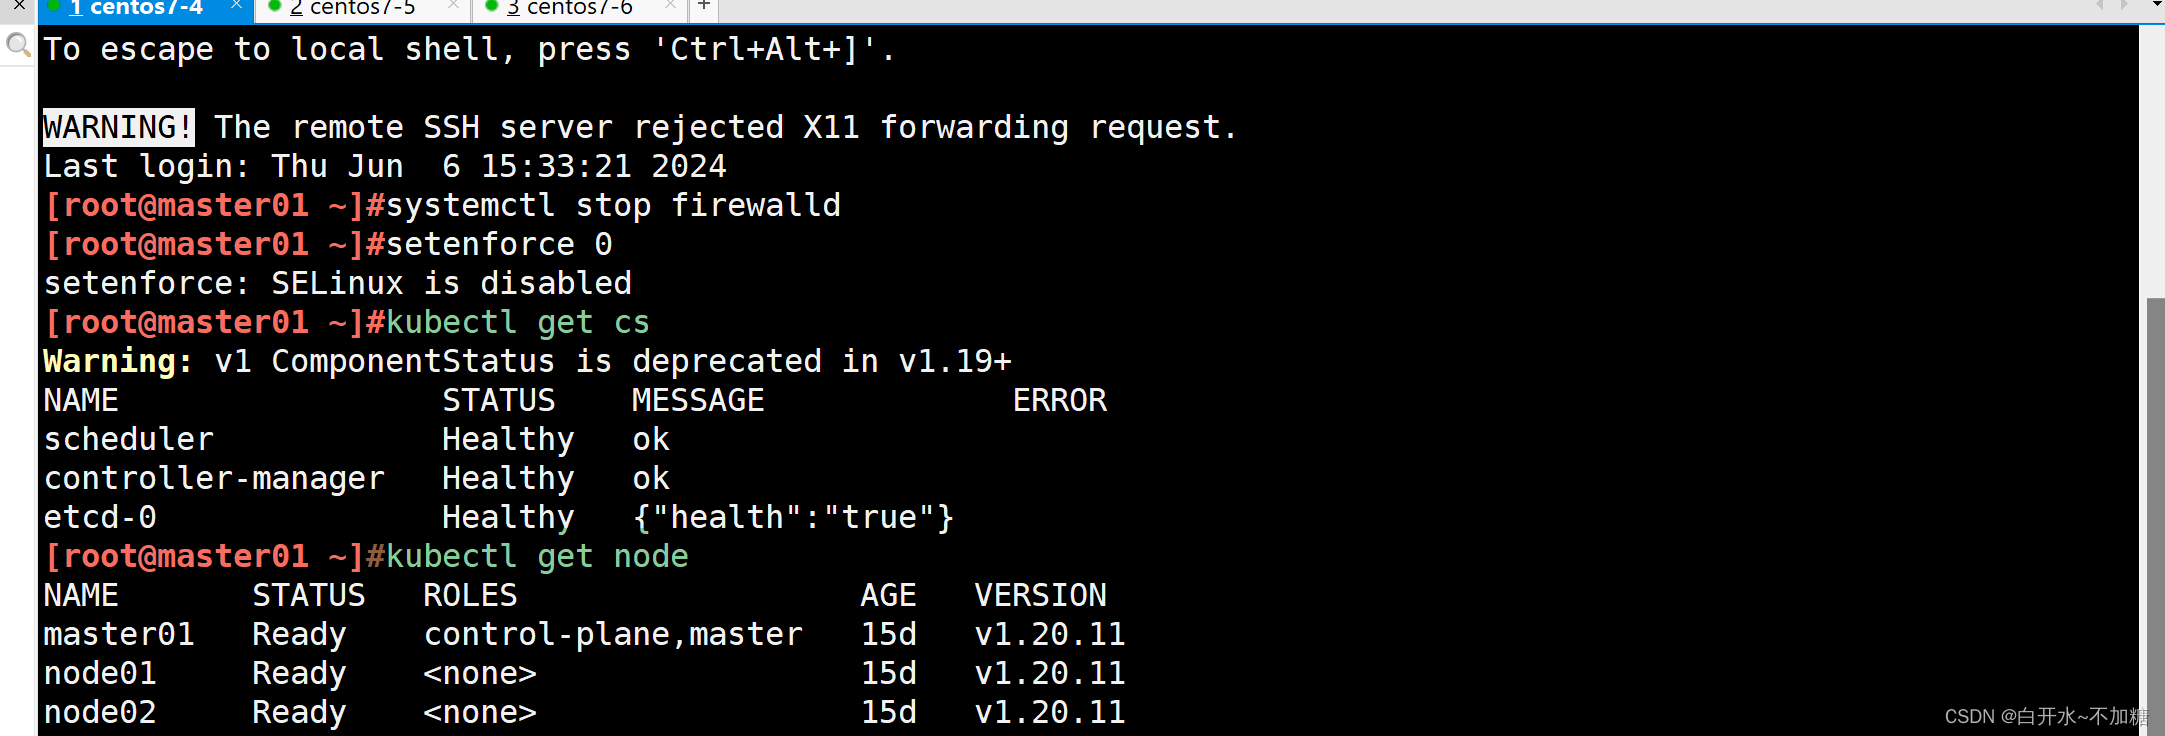
[root@master01 ~]#kubectl run mynginx --image=nginx:1.14 --port=80 --dry-run=client -o yaml > nginx-pod.yaml
[root@master01 ~]#cd /opt
[root@master01 opt]#mkdir /opt/kaoshi
[root@master01 opt]#cd
[root@master01 ~]#mv nginx-pod.yaml /opt/kaoshi/
[root@master01 ~]#cd /opt/kaoshi/
[root@master01 kaoshi]#ls
nginx-pod.yaml
[root@master01 kaoshi]#vim nginx-pod.yaml
apiVersion: v1
kind: Pod
metadata:
labels:
run: nginx
name: nginx01
spec:
nodeName: node01
containers:
- image: nginx
name: nginx
ports:
- containerPort: 80
volumeMounts:
- name: node01-html
mountPath: /usr/share/nginx/html
readOnly: false
volumes:
- name: node01-html
hostPath:
path: /data
type: DirectoryOrCreate
---
apiVersion: v1
kind: Pod
metadata:
labels:
run: nginx
name: nginx02
spec:
nodeName: node02
containers:
- image: nginx
name: nginx
ports:
- containerPort: 80
volumeMounts:
- name: node02-html
mountPath: /usr/share/nginx/html
readOnly: false
volumes:
- name: node02-html
hostPath:
path: /data
type: DirectoryOrCreate2.2使用yaml文件创建自主式Pod资源
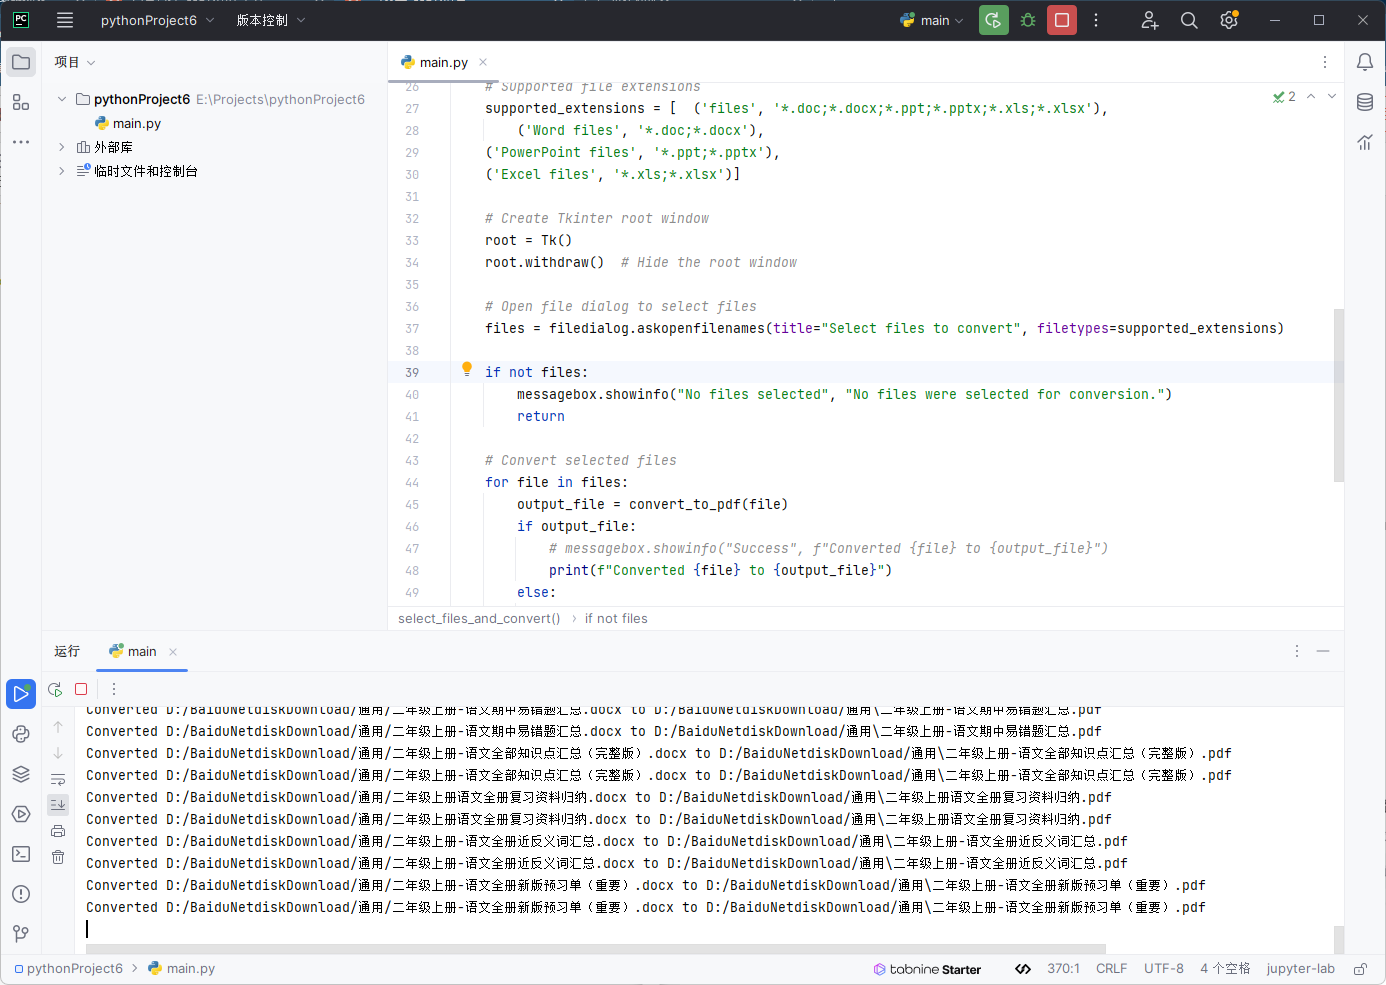
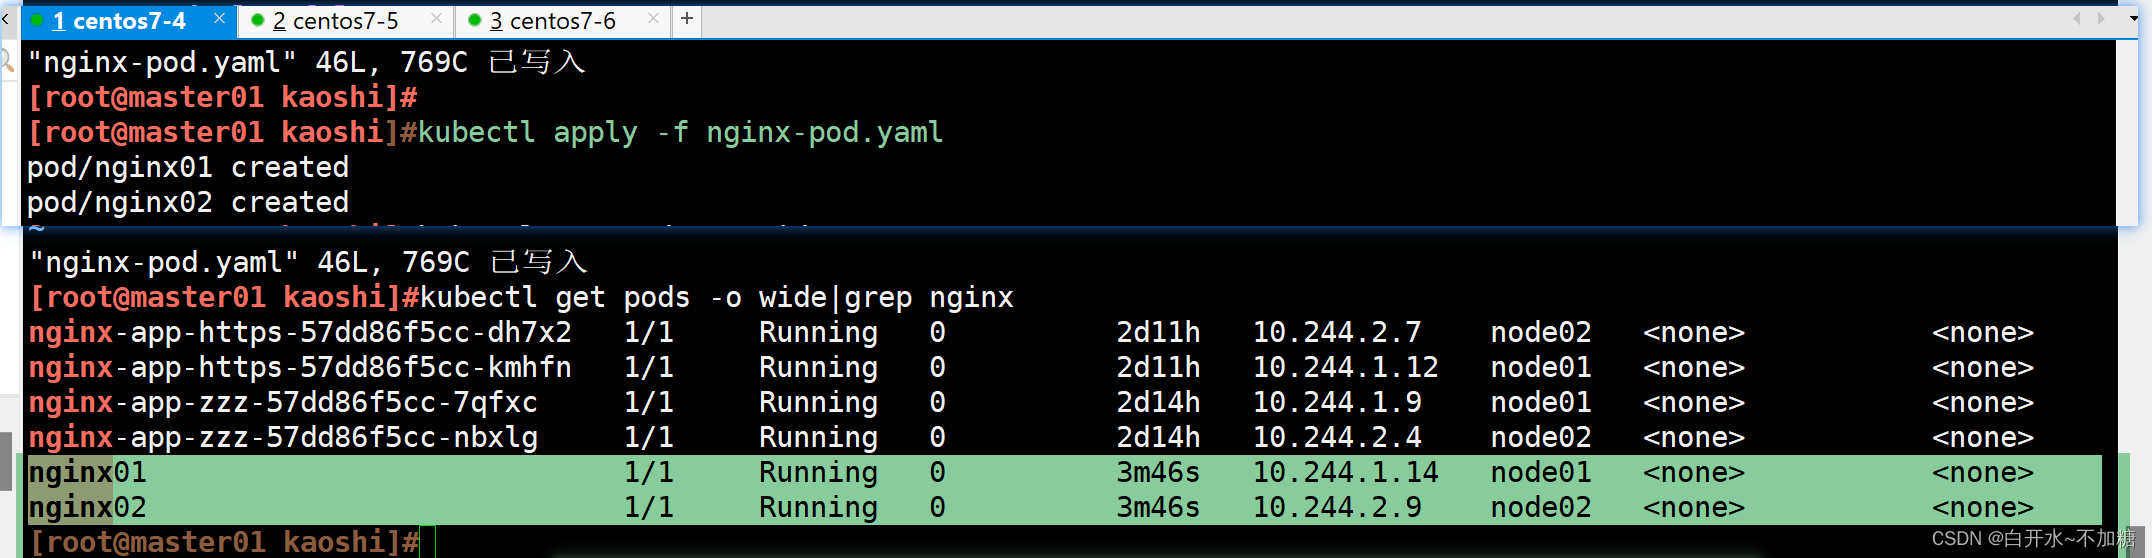
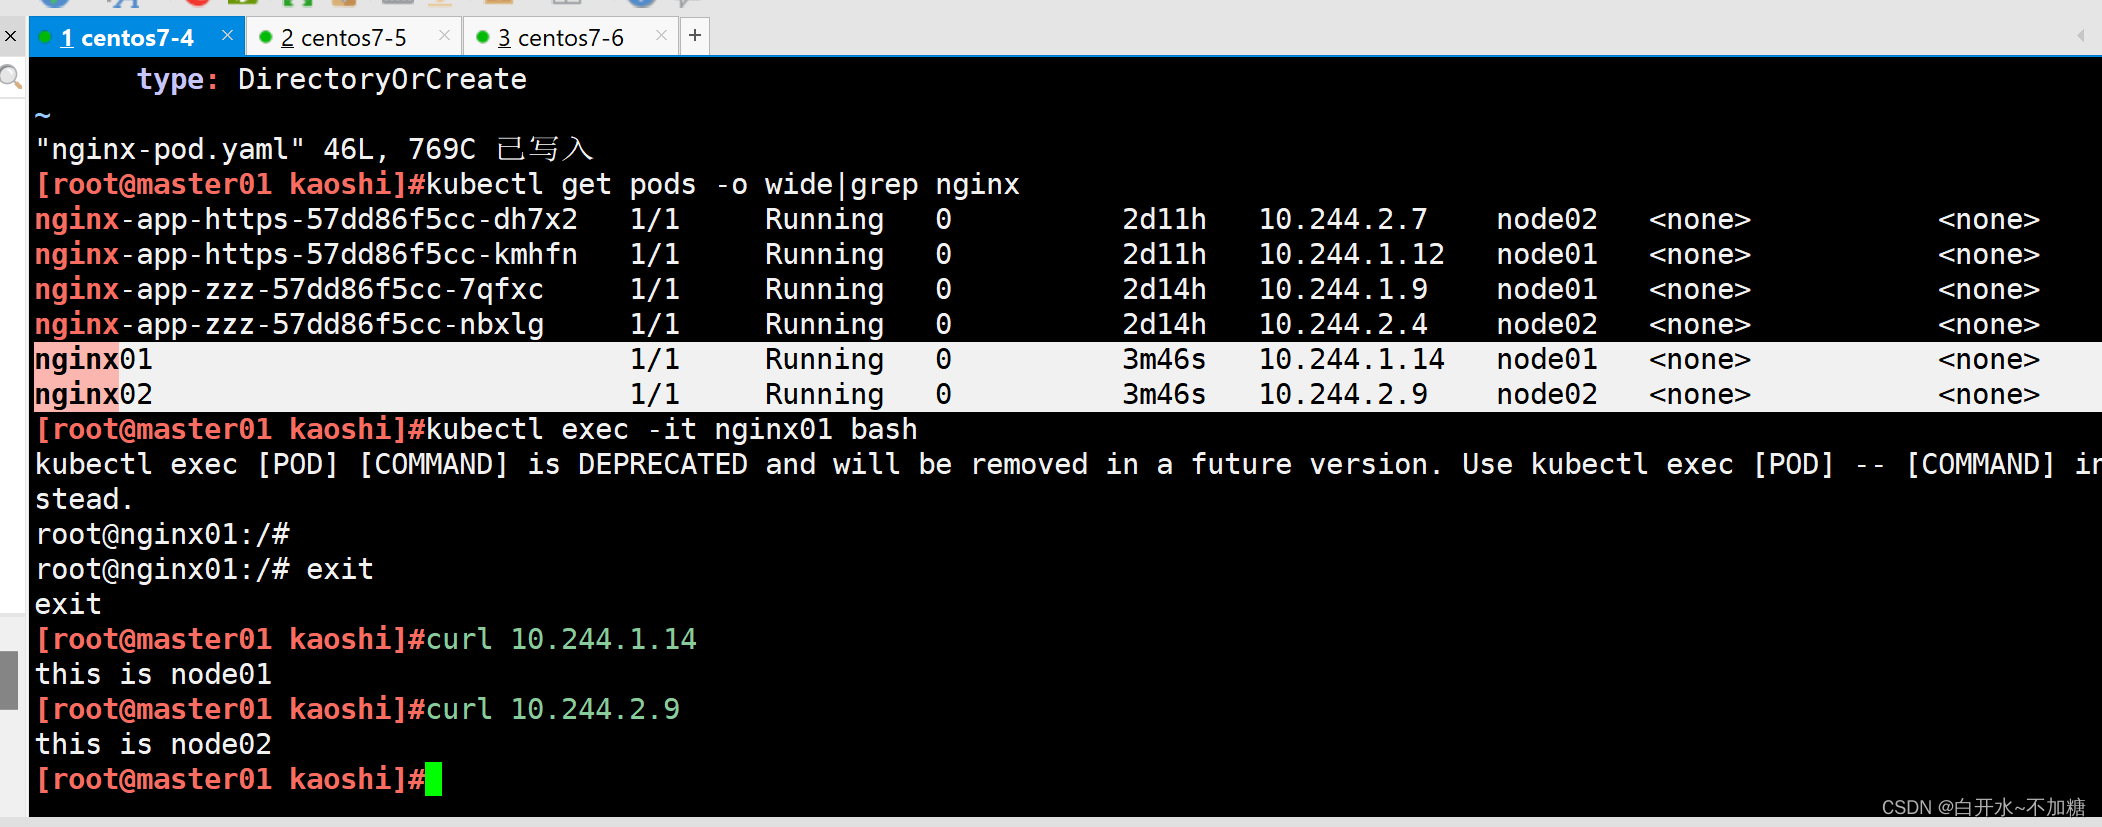
[root@master01 kaoshi]#kubectl apply -f nginx-pod.yaml
pod/nginx01 created
pod/nginx02 created
查看调度
#查看创建的两个pod,被调度到了不同的node节点
[root@master01 kaoshi]#kubectl get pods -o wide|grep nginx
nginx01                            1/1     Running   0          3m46s   10.244.1.14   node01   <none>           <none>
nginx02                            1/1     Running   0          3m46s   10.244.2.9    node02   <none>           <none>
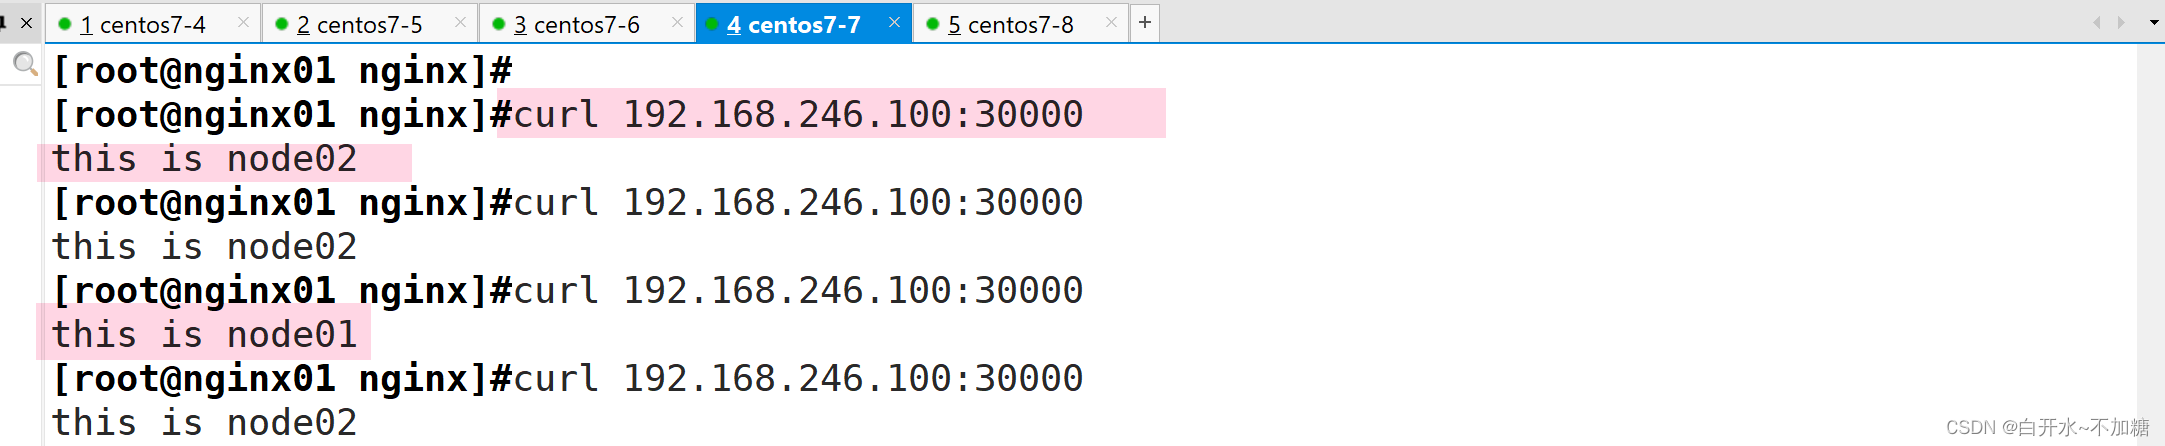
2.3两个node节点的存储卷,写入不同的html文件内容
2.4验证访问网页
三、编写service对应的yaml文件,使用NodePort类型和TCP 30000端口将Nginx服务发布出去。
3.1编写service对应的yaml文件
[root@master01 kaoshi]#vim pod-nginx-service.yaml
apiVersion: v1
kind: Service
metadata:
  labels:
    run: nginx
  name: nginx-service
spec:
  type: NodePort
  ports:
    - protocol: TCP
      port: 80
      targetPort: 80
      nodePort: 30000
  selector:
    run: nginx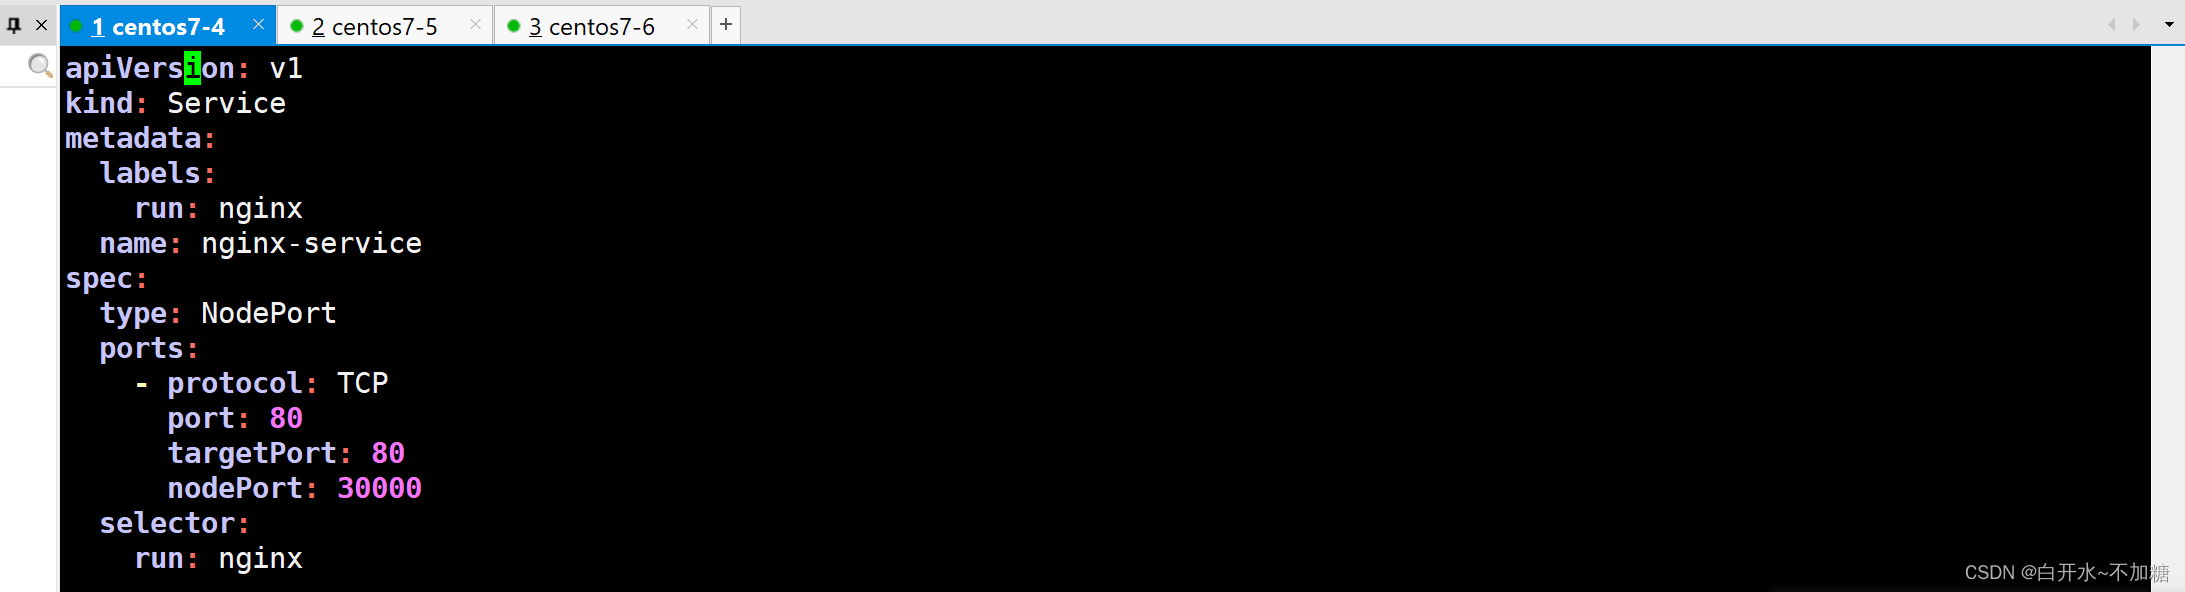
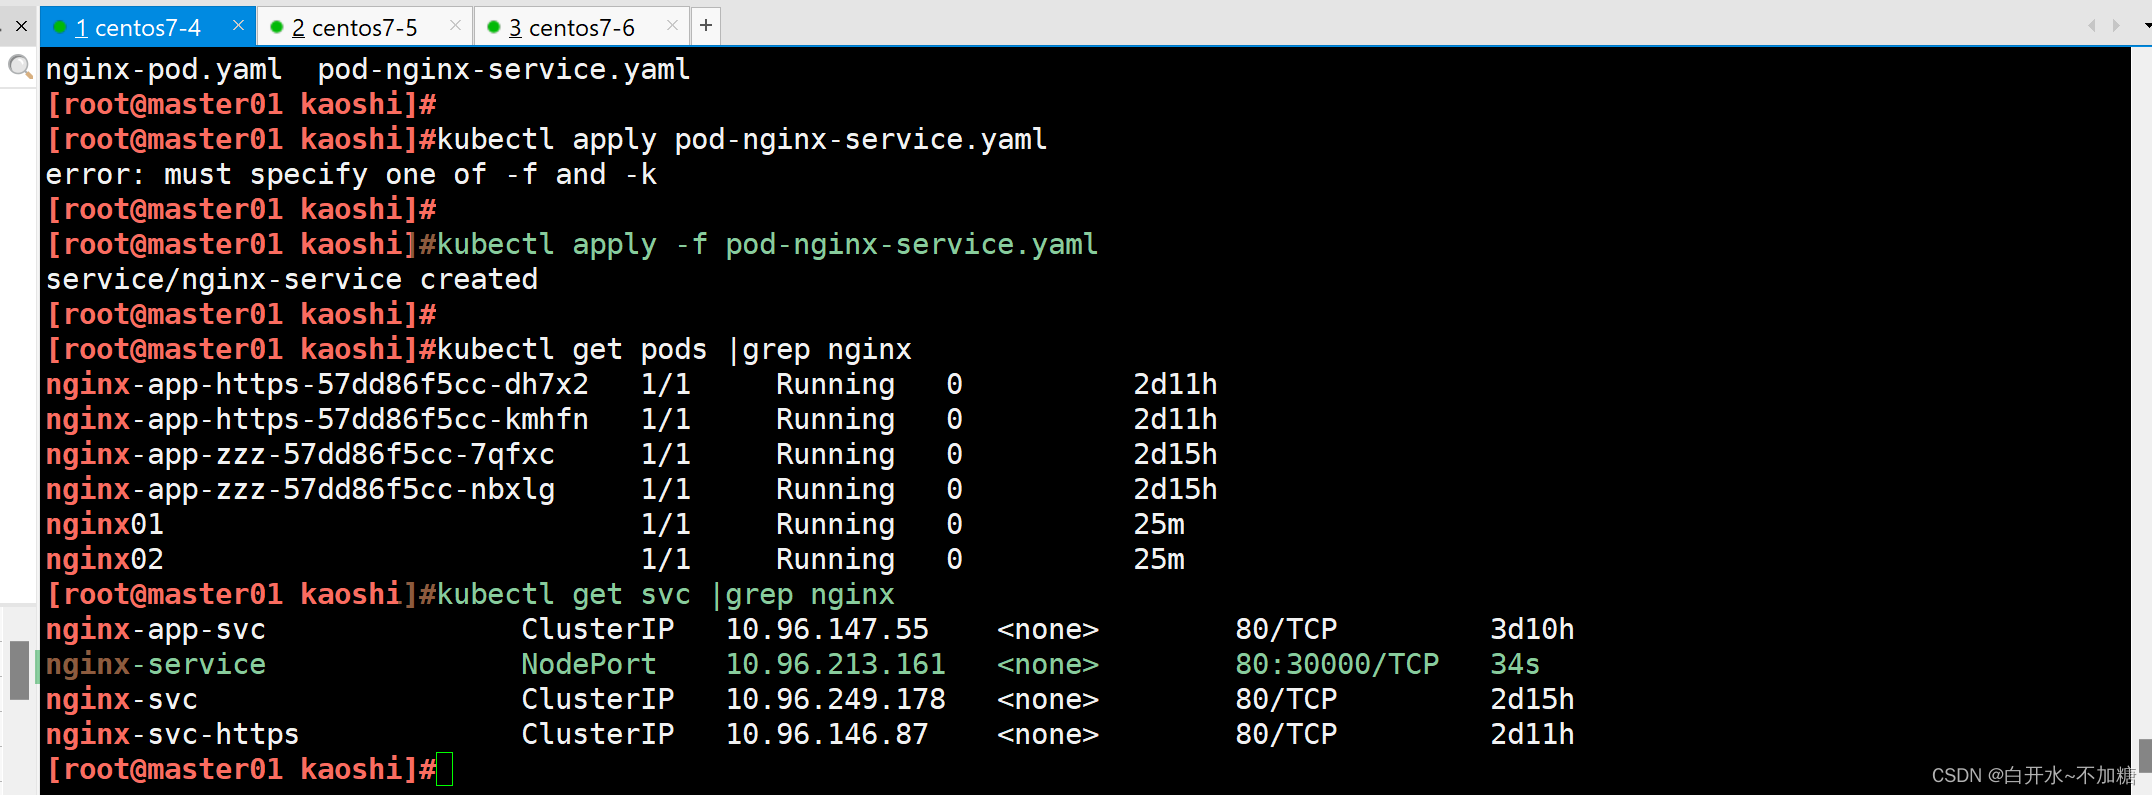
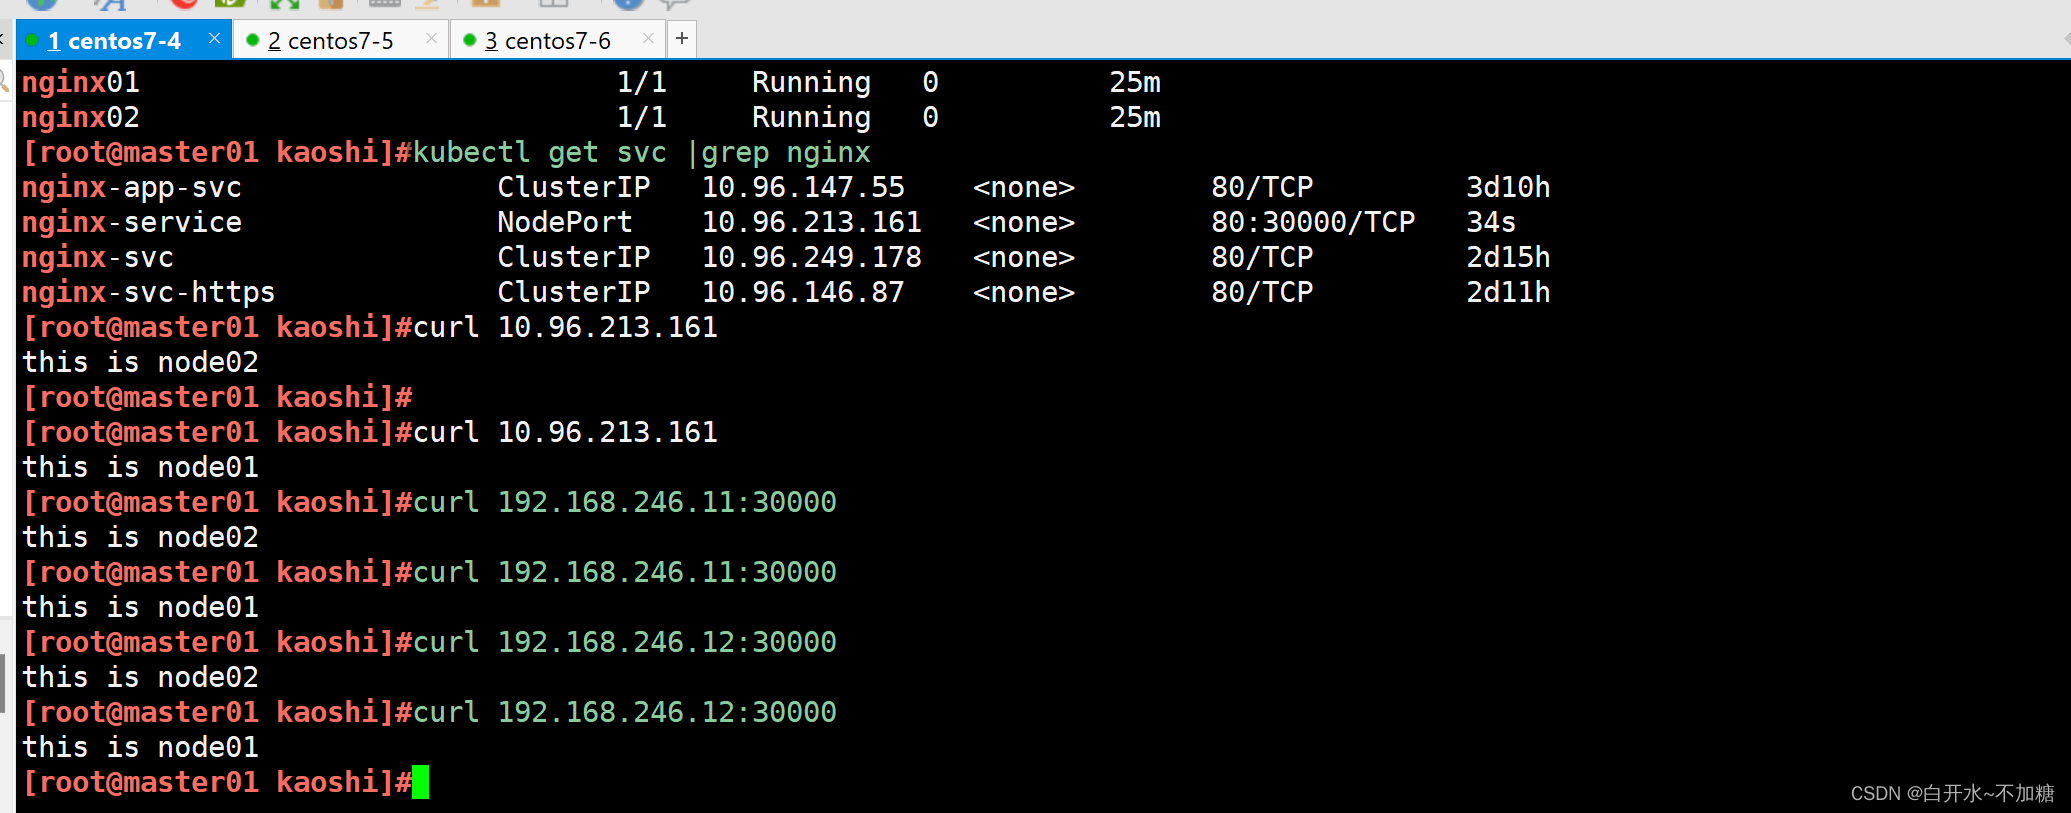
3.2访问测试
四、
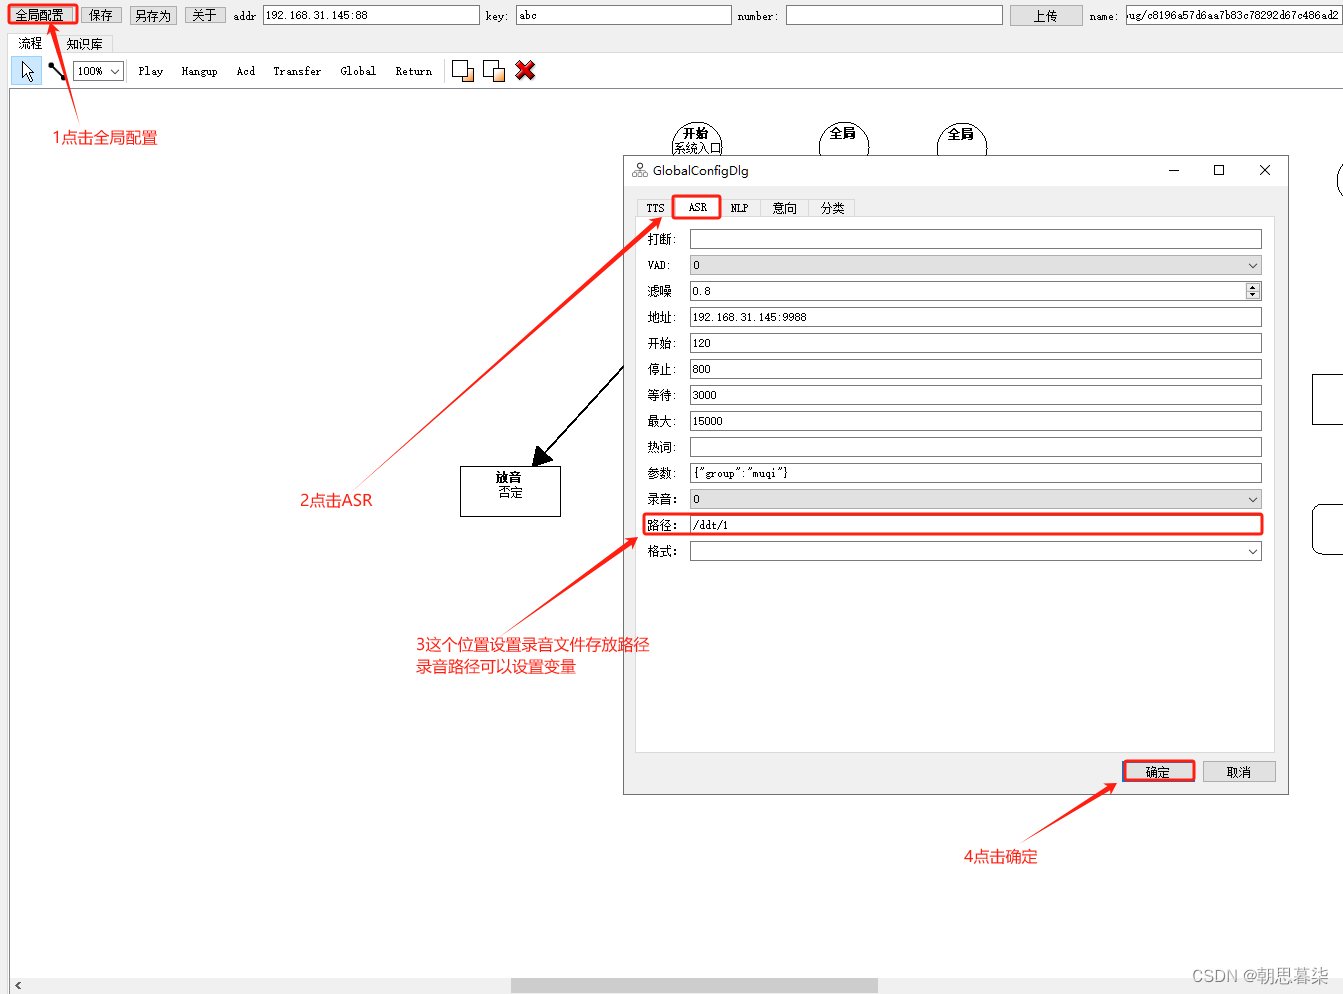
负载均衡区域配置Keepalived+Nginx,实现负载均衡高可用,通过VIP 192.168.10.100和自定义的端口号即可访问K8S发布出来的服务。
4.1安装nginx服务
cat > /etc/yum.repos.d/nginx.repo << 'EOF'
[nginx]
name=nginx repo
baseurl=http://nginx.org/packages/centos/7/$basearch/
gpgcheck=0
EOF
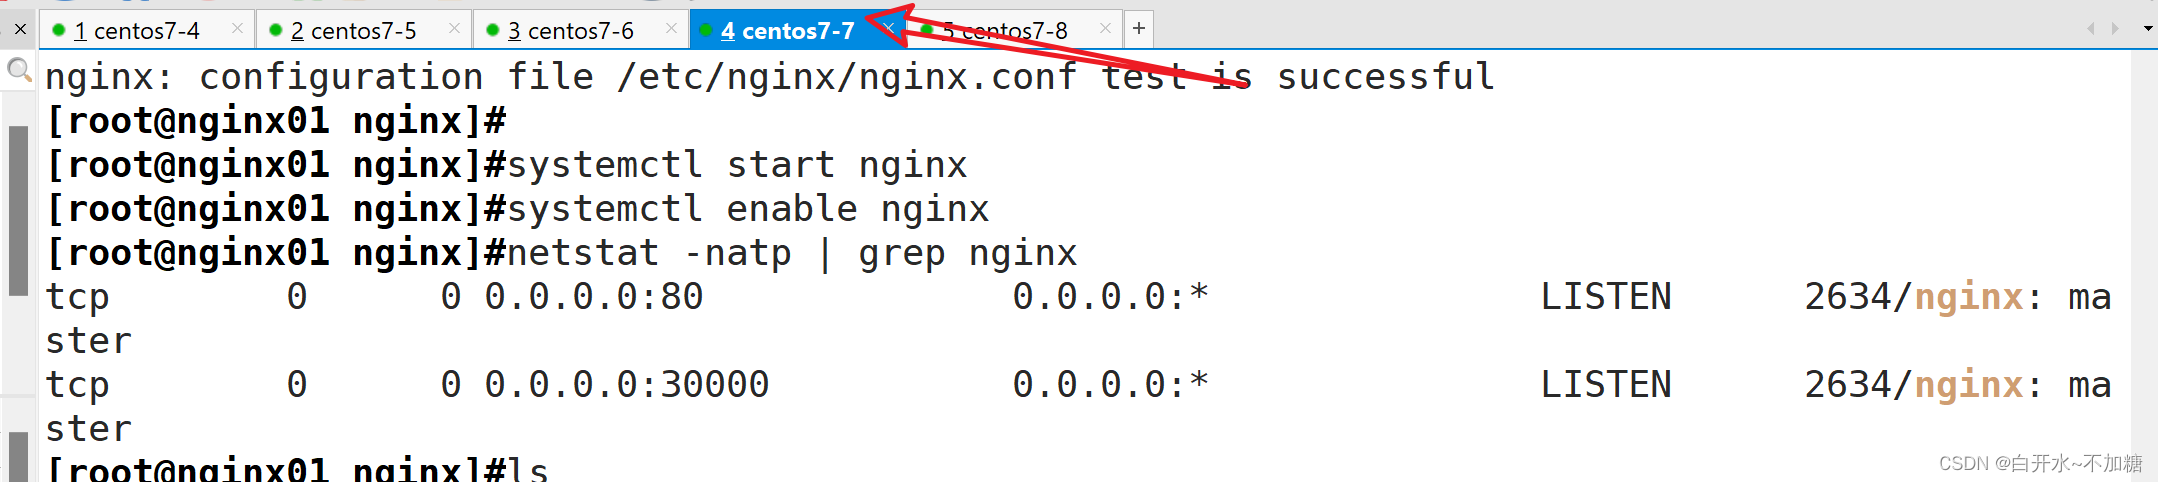
yum install nginx -y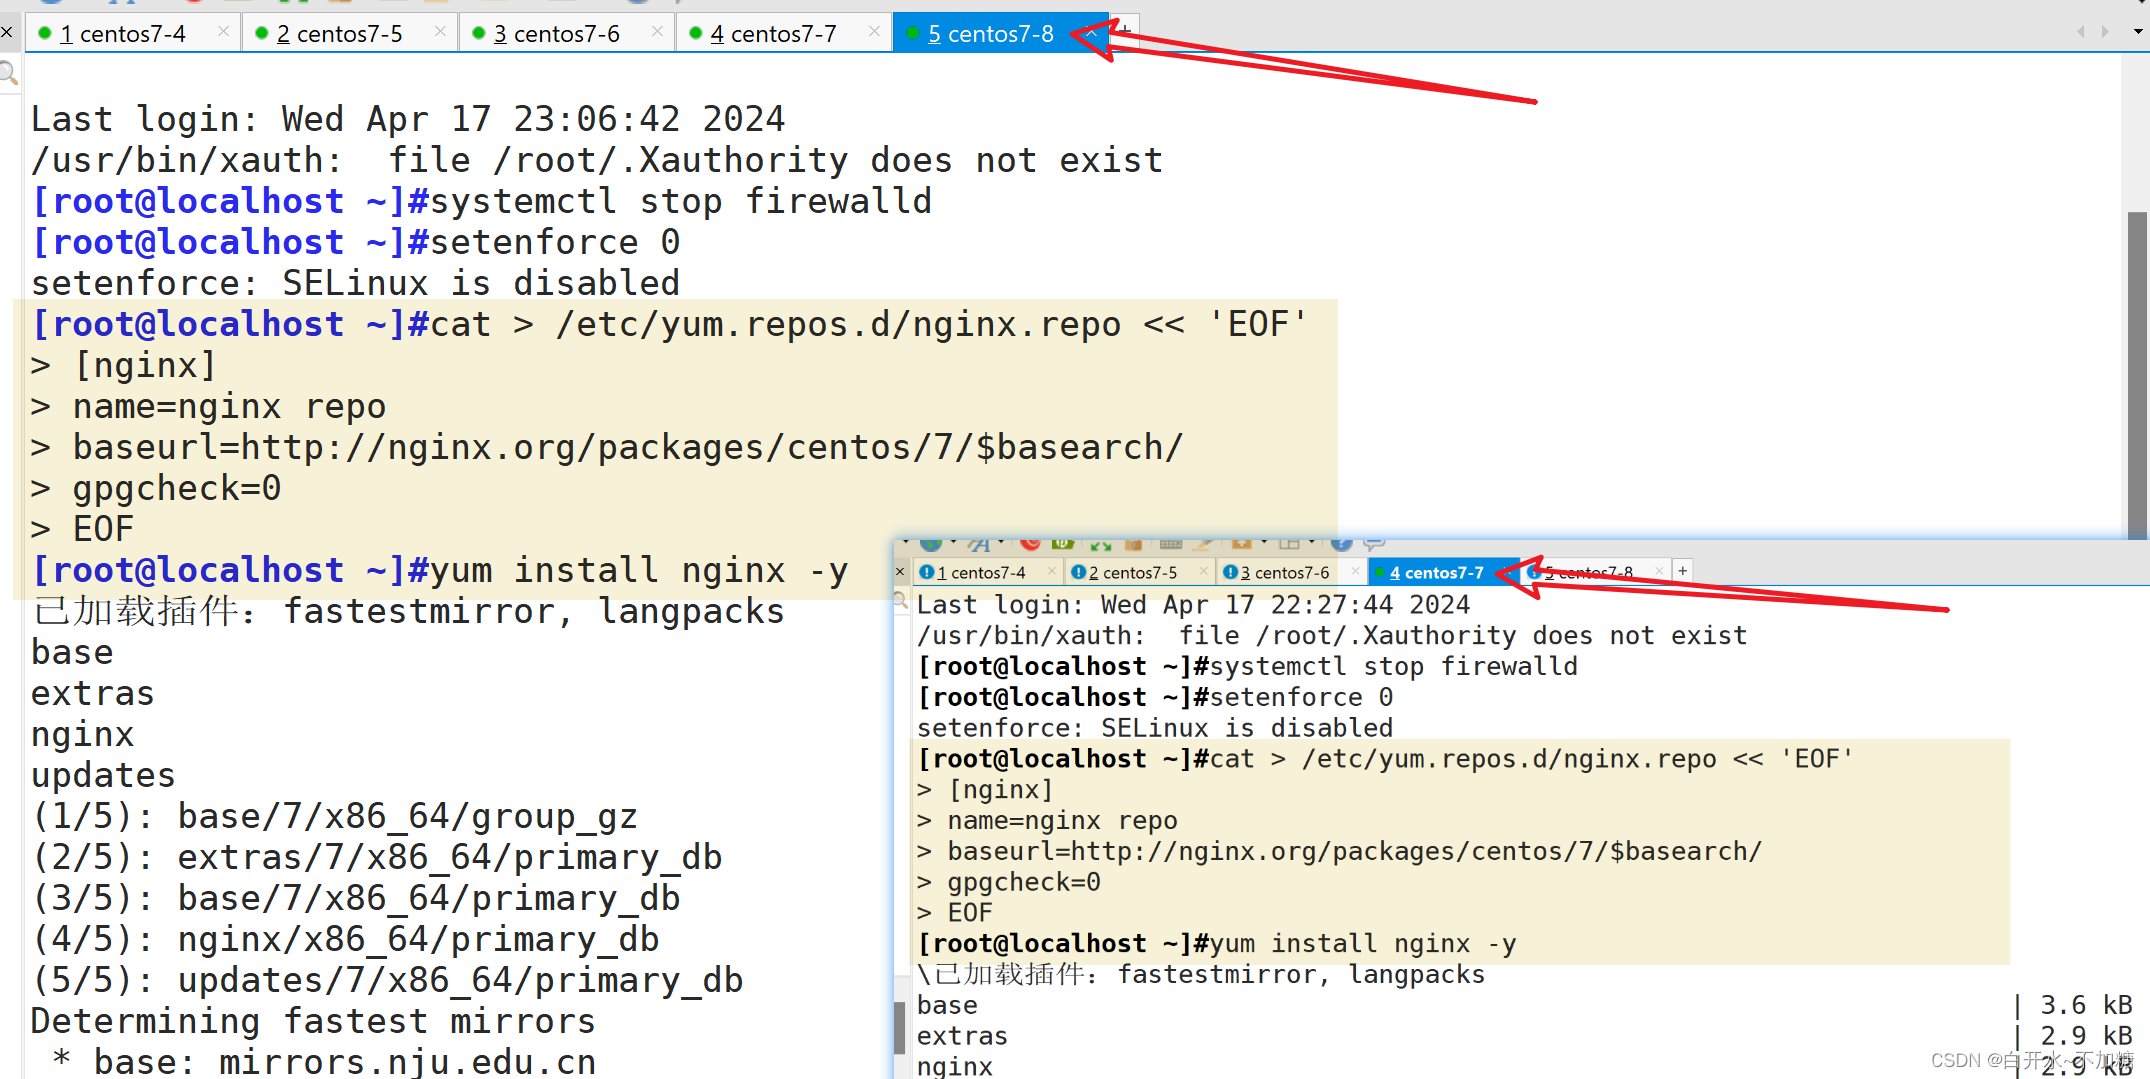
stream {
    log_format  main  '$remote_addr $upstream_addr - [$time_local] $status $upstream_bytes_sen
t';

        access_log  /var/log/nginx/k8s-access.log  main;

    upstream k8s-nodes {
        server 192.168.246.11:30000;
        server 192.168.246.12:30000;
    }
    server {
        listen 30000;
        proxy_pass k8s-nodes;
    }
}
nginx -t
systemctl start nginx
systemctl enable nginx
netstat -natp | grep nginx
4.2安装keepalived服务
yum install keepalived -y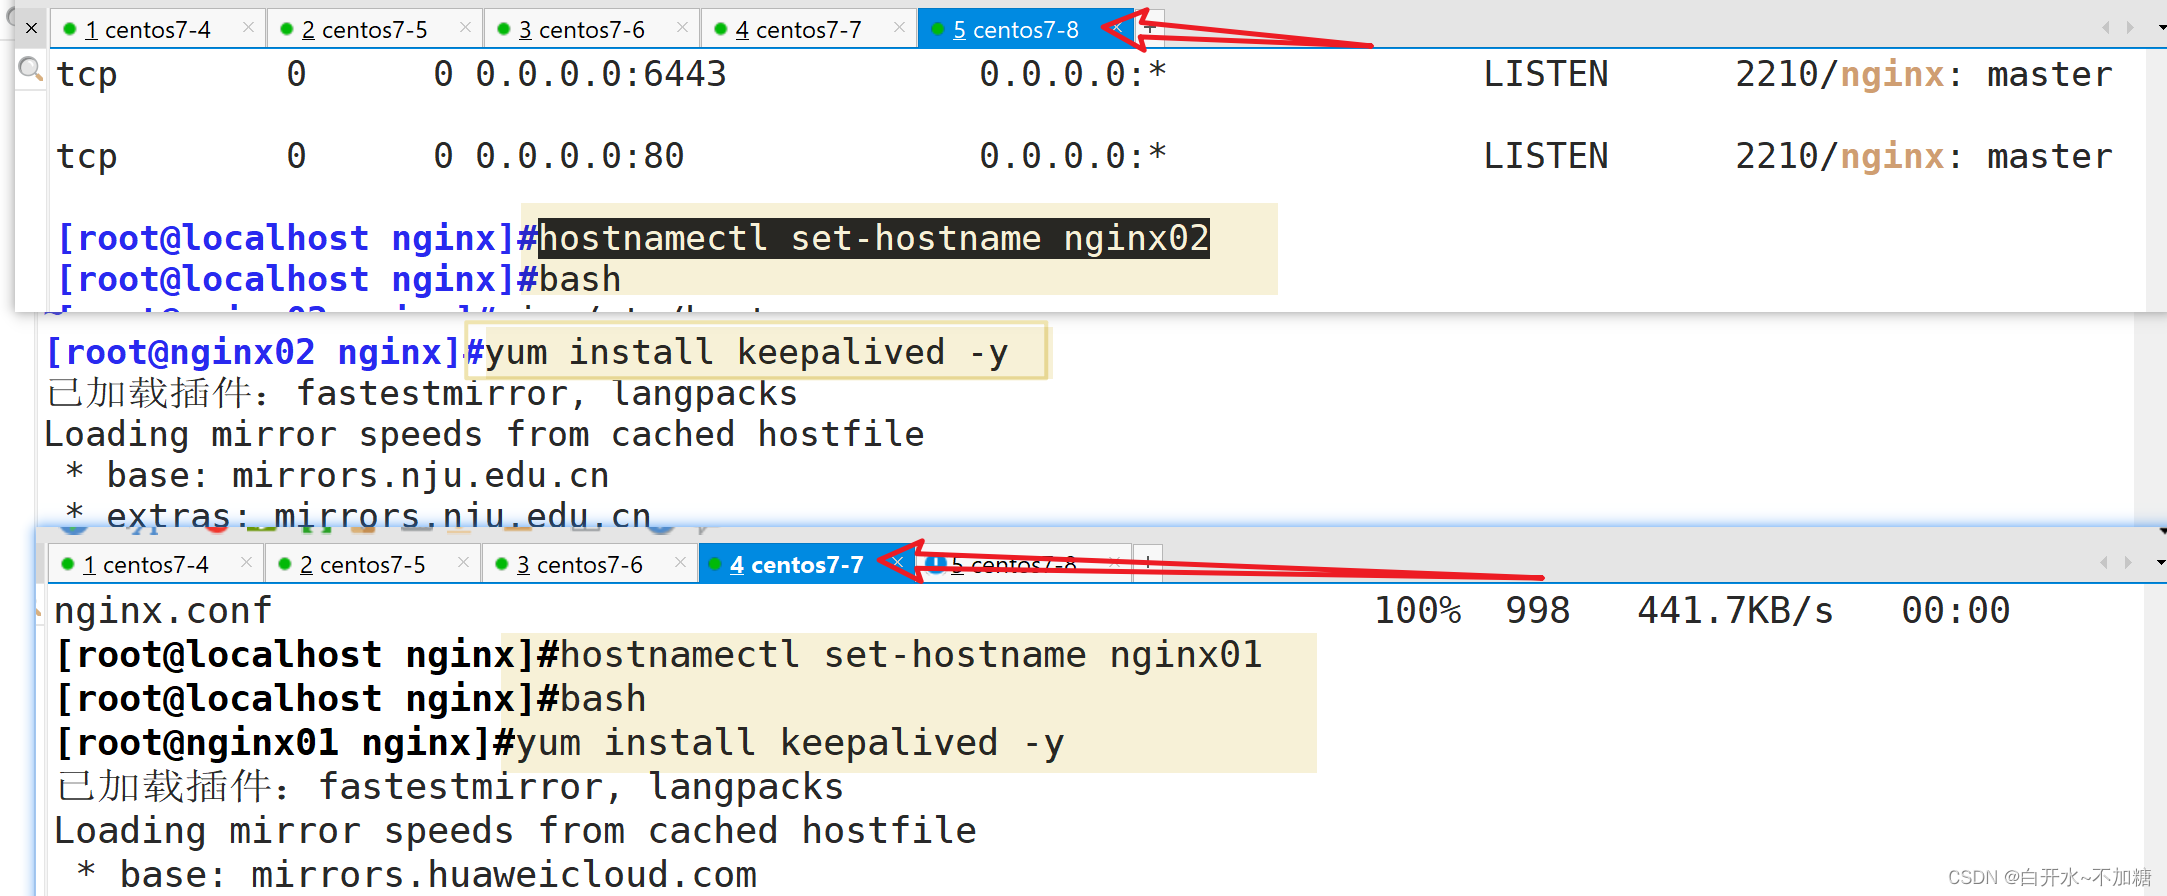
4.3修改配置文件
master节点
! Configuration File for keepalived

global_defs {                     # 接收邮件地址
   notification_email {
     acassen@firewall.loc
     failover@firewall.loc
     sysadmin@firewall.loc
   }
   notification_email_from Alexandre.Cassen@firewall.loc     # 邮件发送地址
   smtp_server 127.0.0.1    #修改
   smtp_connect_timeout 30
   router_id NGINX_MASTER  # #nginx01节点的为NGINX_MASTER,nginx02节点的为NGINX_BACKUP
}
   vrrp_script check_nginx {              #添加一个周期性执行的脚本
     script "/etc/nginx/check_nginx.sh"   #指定检查nginx存活的脚本路径
}

vrrp_instance VI_1 {
    state MASTER              #nginx01节点的为 MASTER,nginx02节点的为 BACKUP
    interface ens33           #指定网卡名称 ens33
    virtual_router_id 51      #指定vrid,两个节点要一致
    priority 100              #nginx01节点的为 100,nginx02节点的为 80
    advert_int 1
    authentication {
        auth_type PASS
        auth_pass 1111
    }
virtual_ipaddress {           #指定虚拟ip地址
        192.168.246.100/24
    }

    track_script {                   #指定vrrp_script配置的脚本
        check_nginx
    }
}
#!/bin/bash
killall -0 nginx
if [ $? -ne 0 ];then
systemctl stop keepalived
fi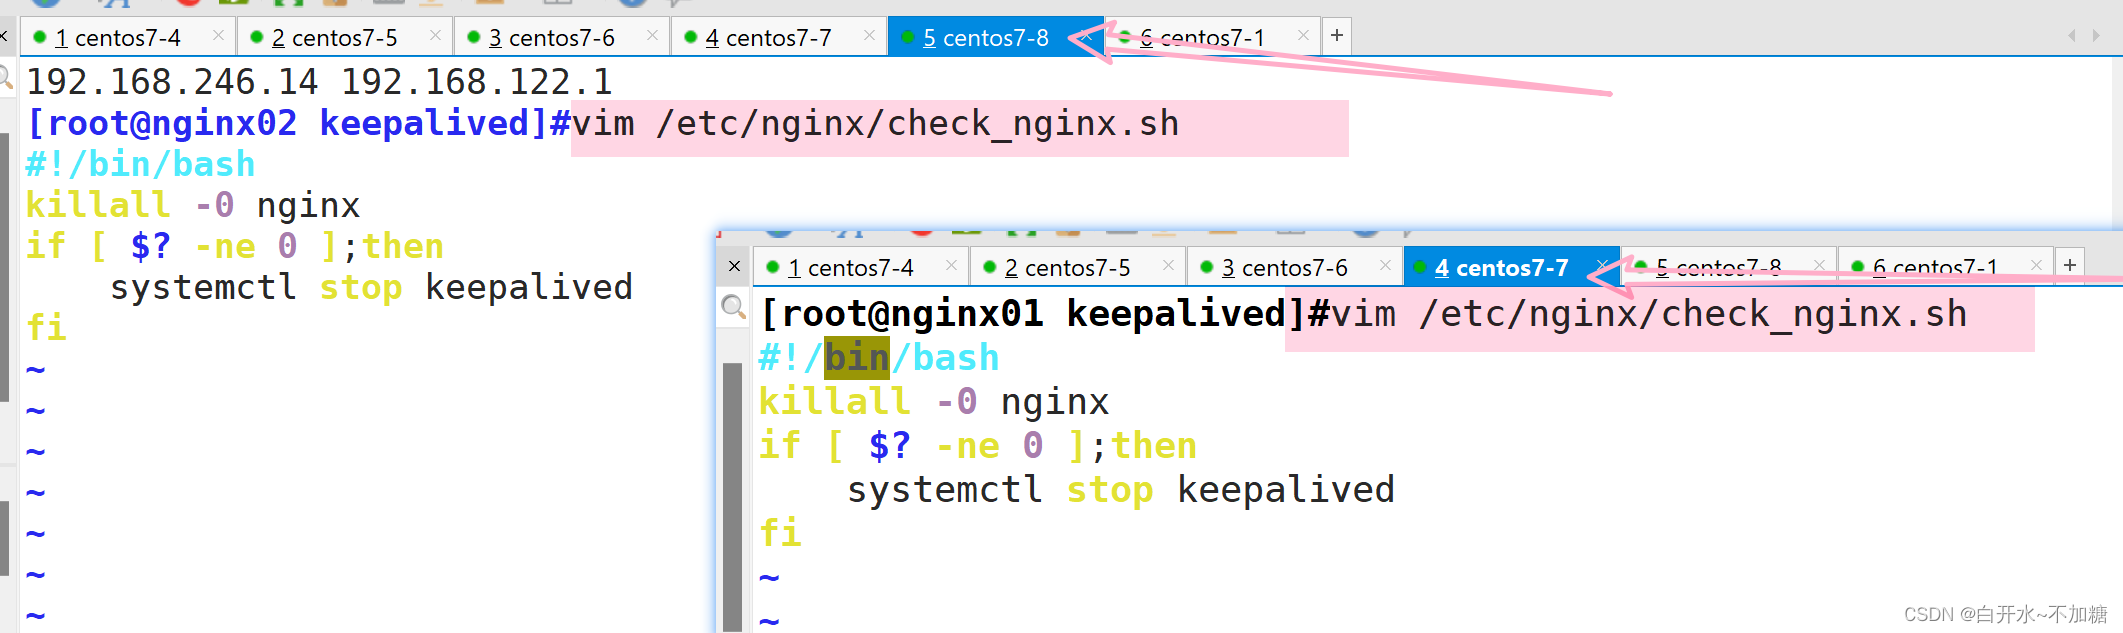
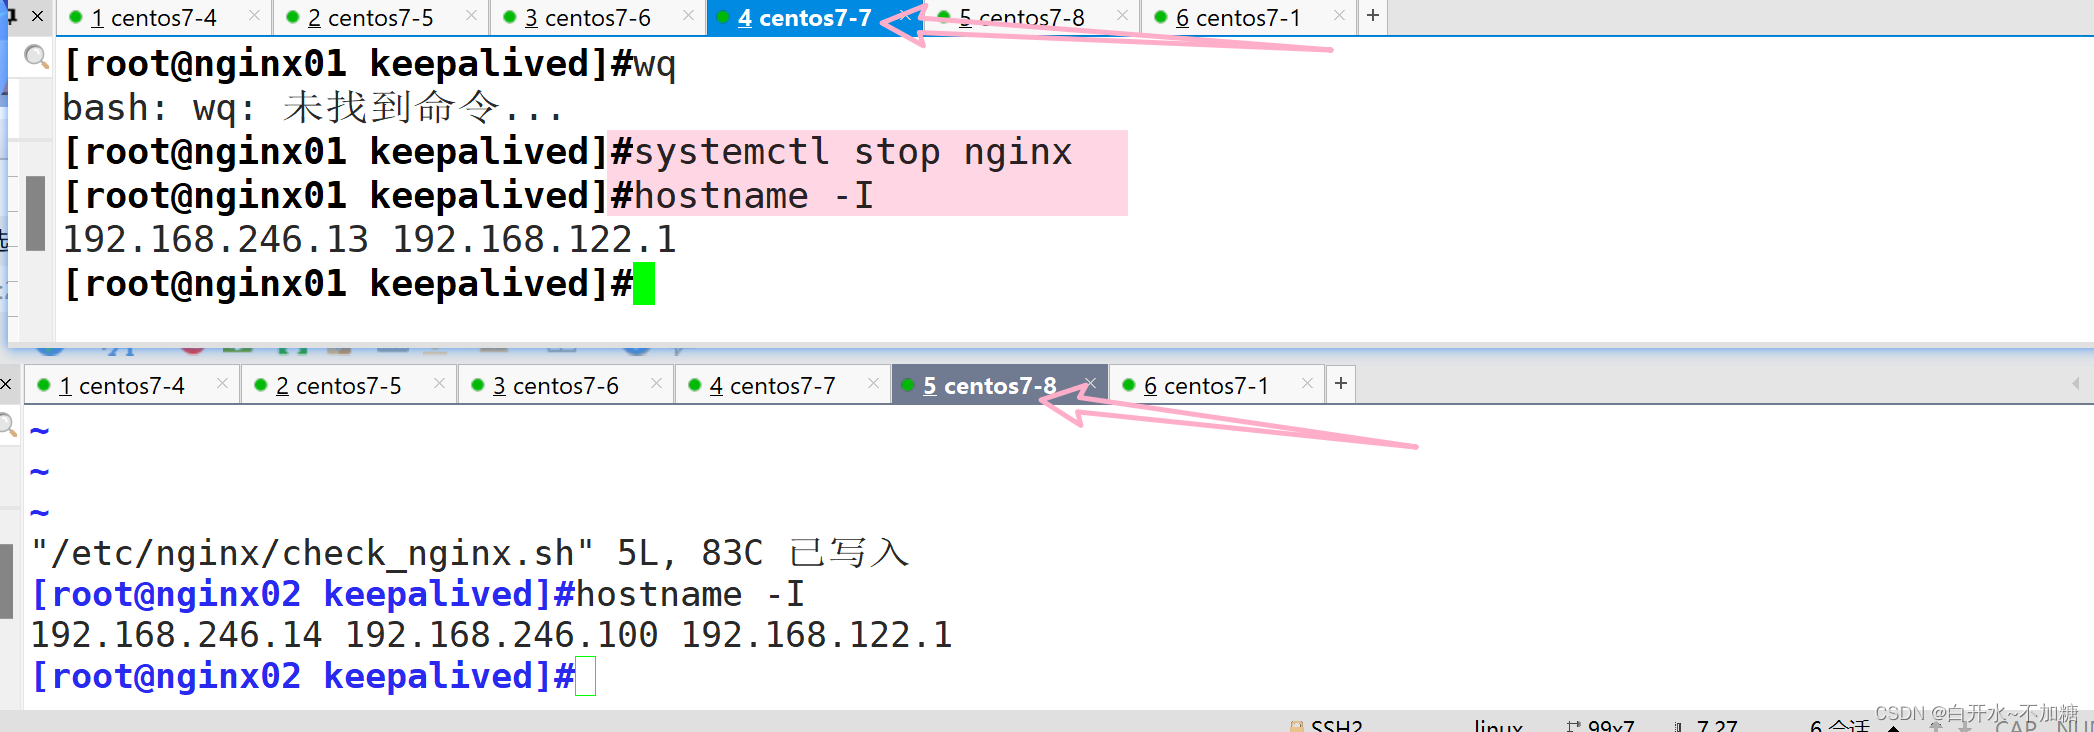
chmod +x /etc/nginx/check_nginx.sh#重启服务
systemctl restart keepalived.service
systemctl enable keepalived.service
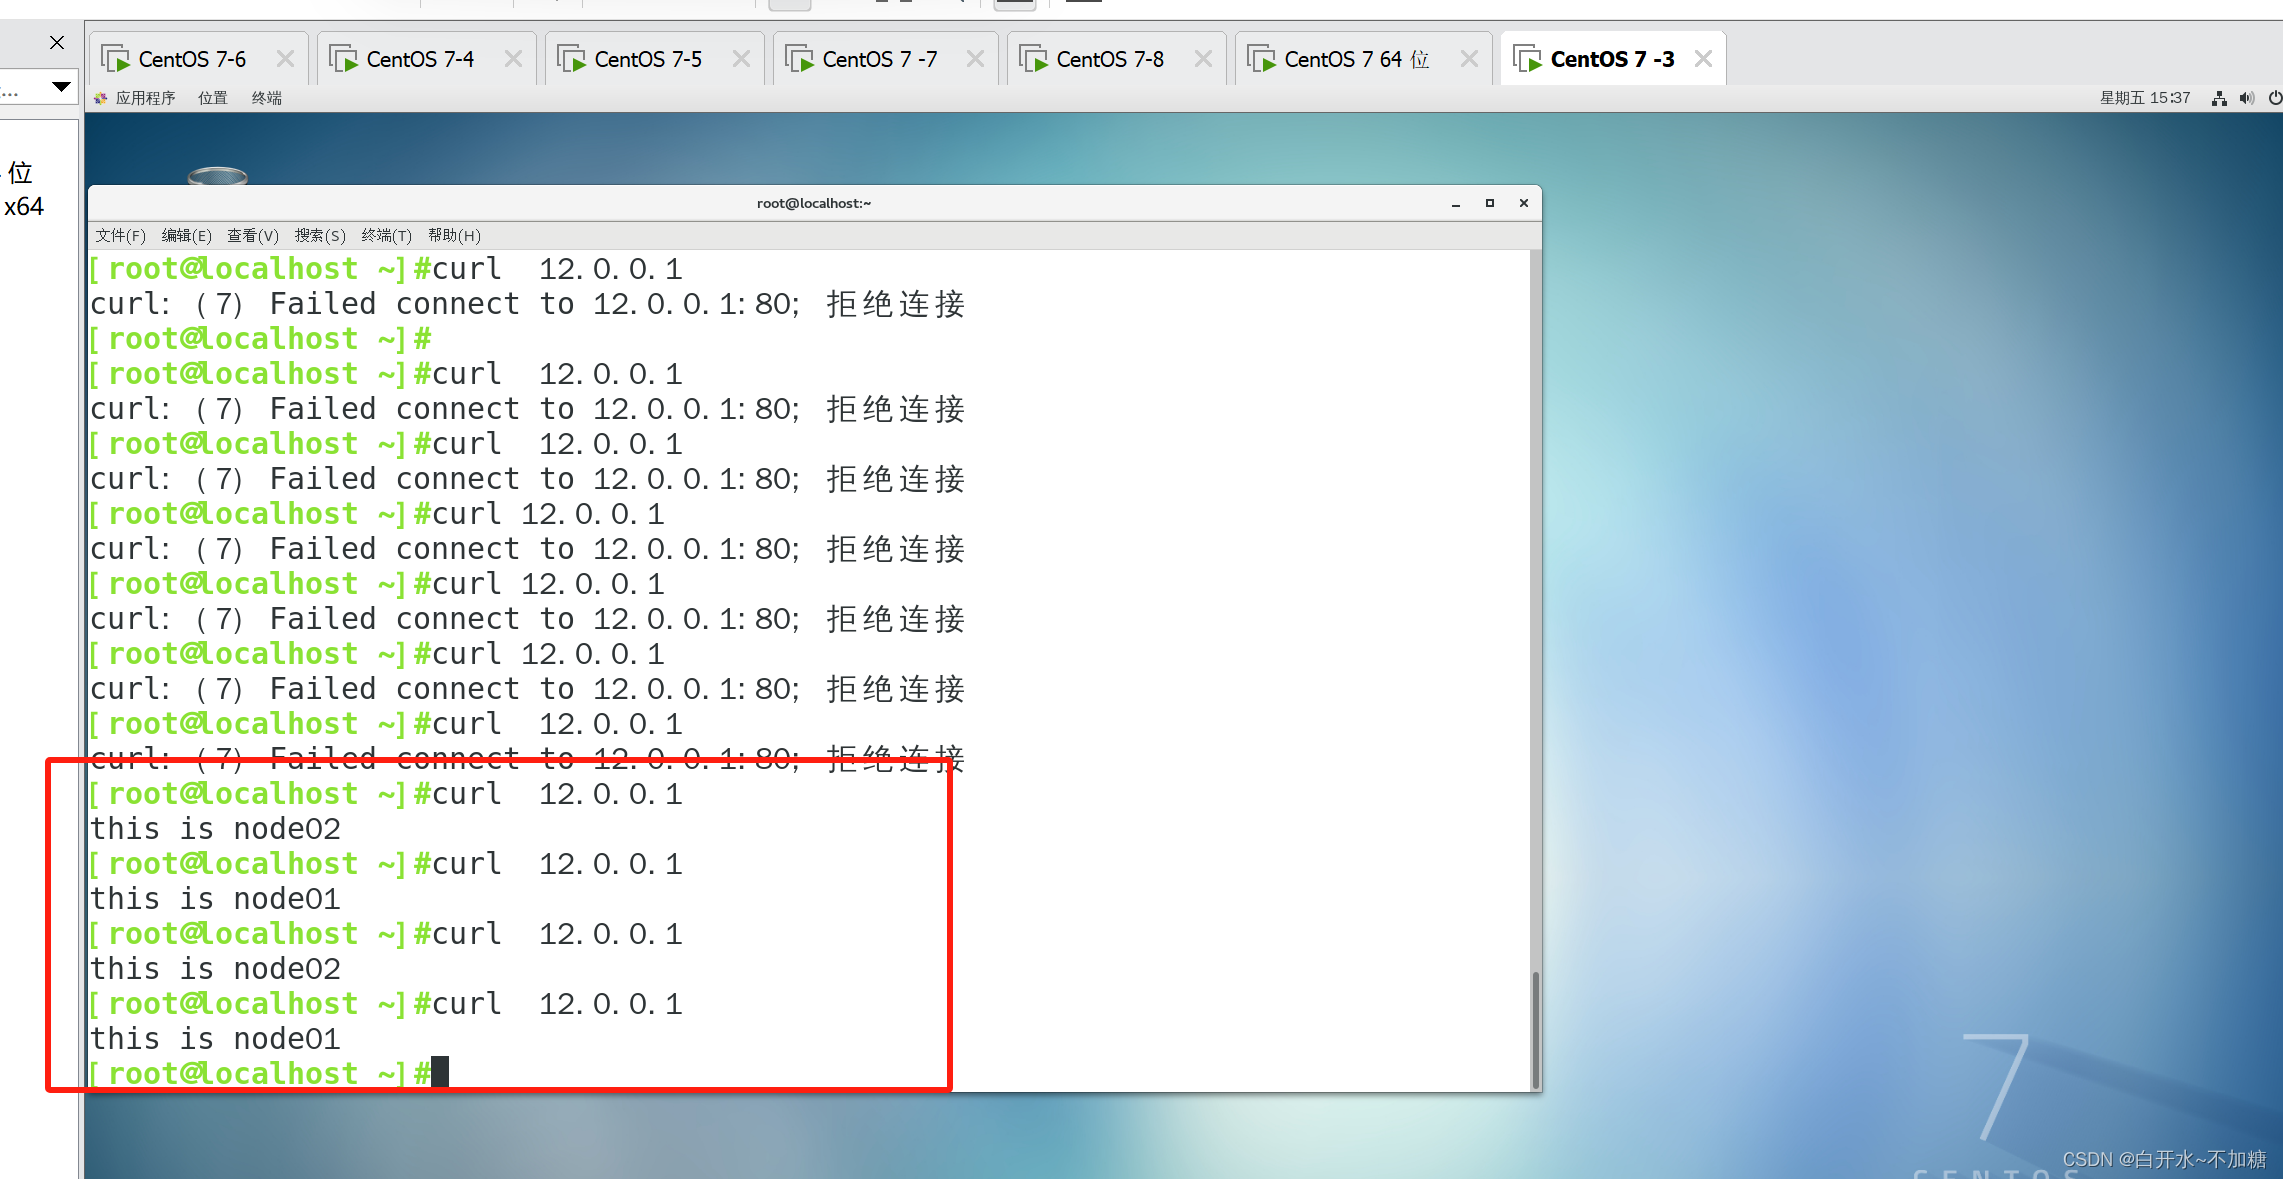
4.4访问检测
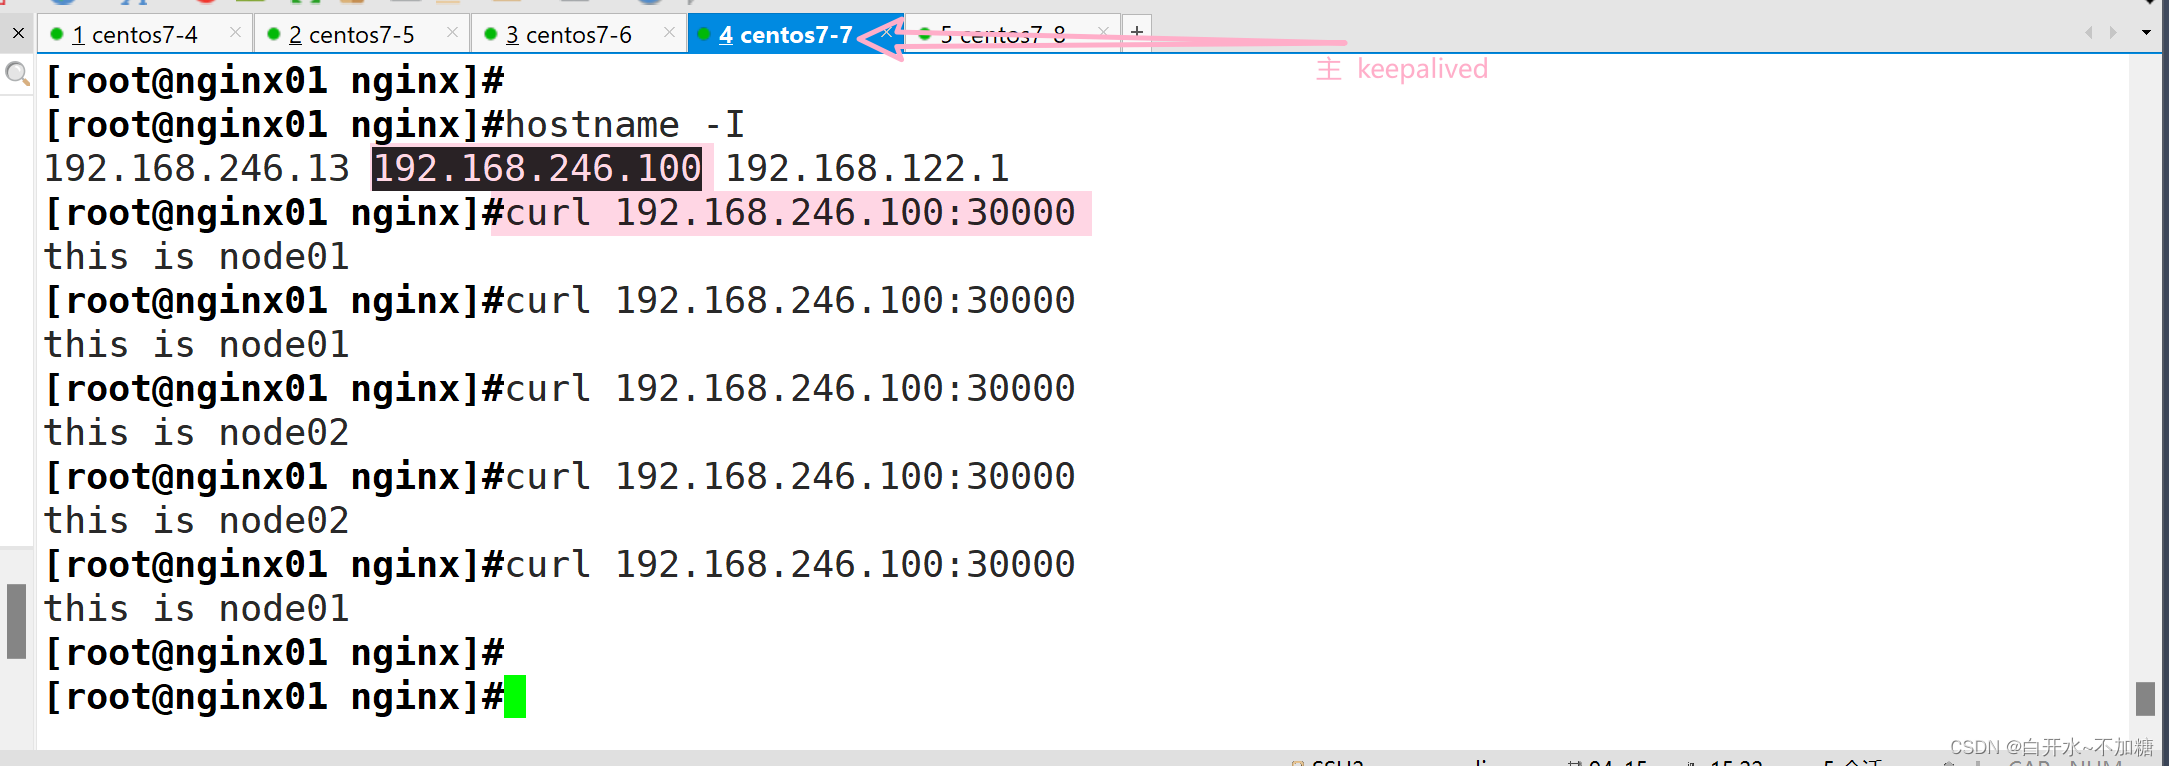
4.5检测下是否高可用
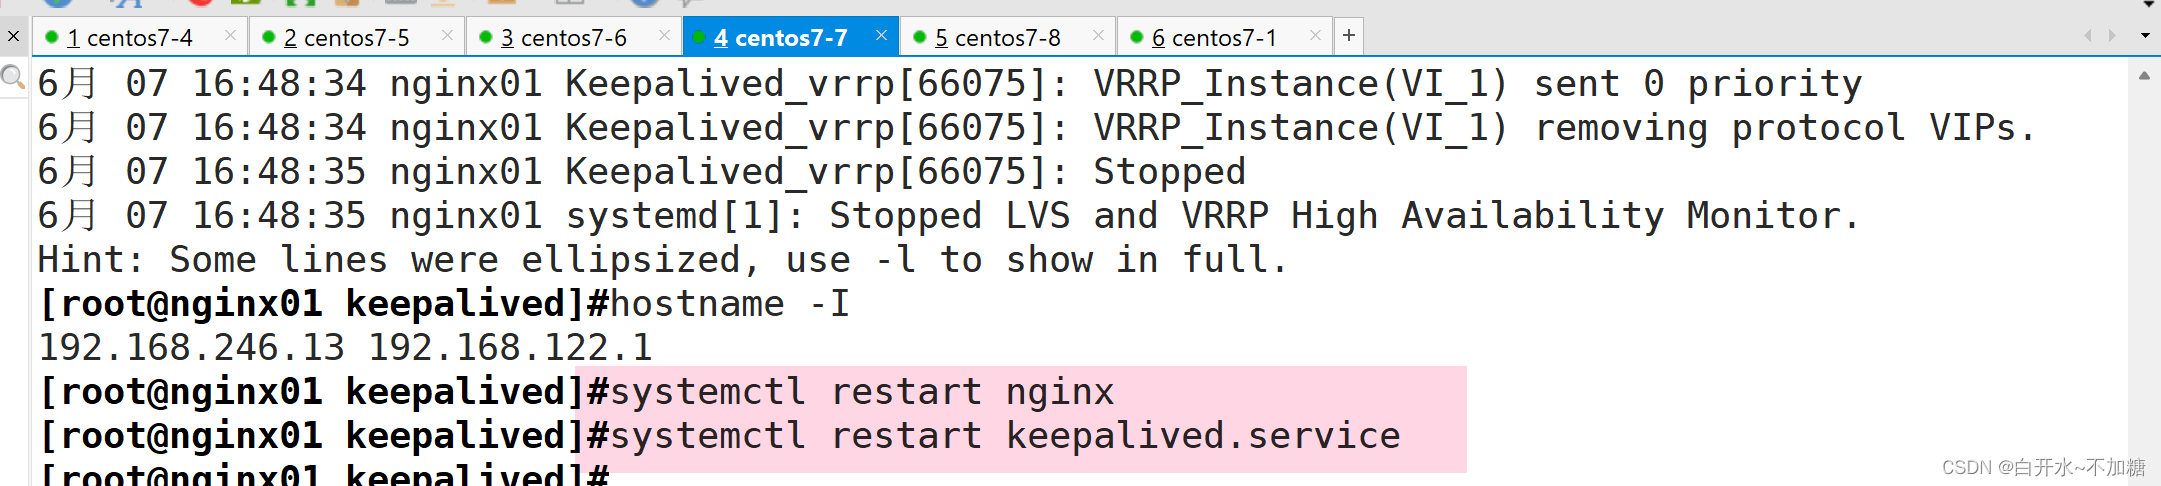

虚拟ip又回到主7-7上面了
五、
iptables防火墙服务器,设置双网卡,并且配置SNAT和DNAT转换实现外网客户端可以通过12.0.0.1访问内网的Web服务。
| iptables防火墙服务器 | 192.168.246.7 |
5.1防火墙服务器配置双网卡
5.1.1添加网卡
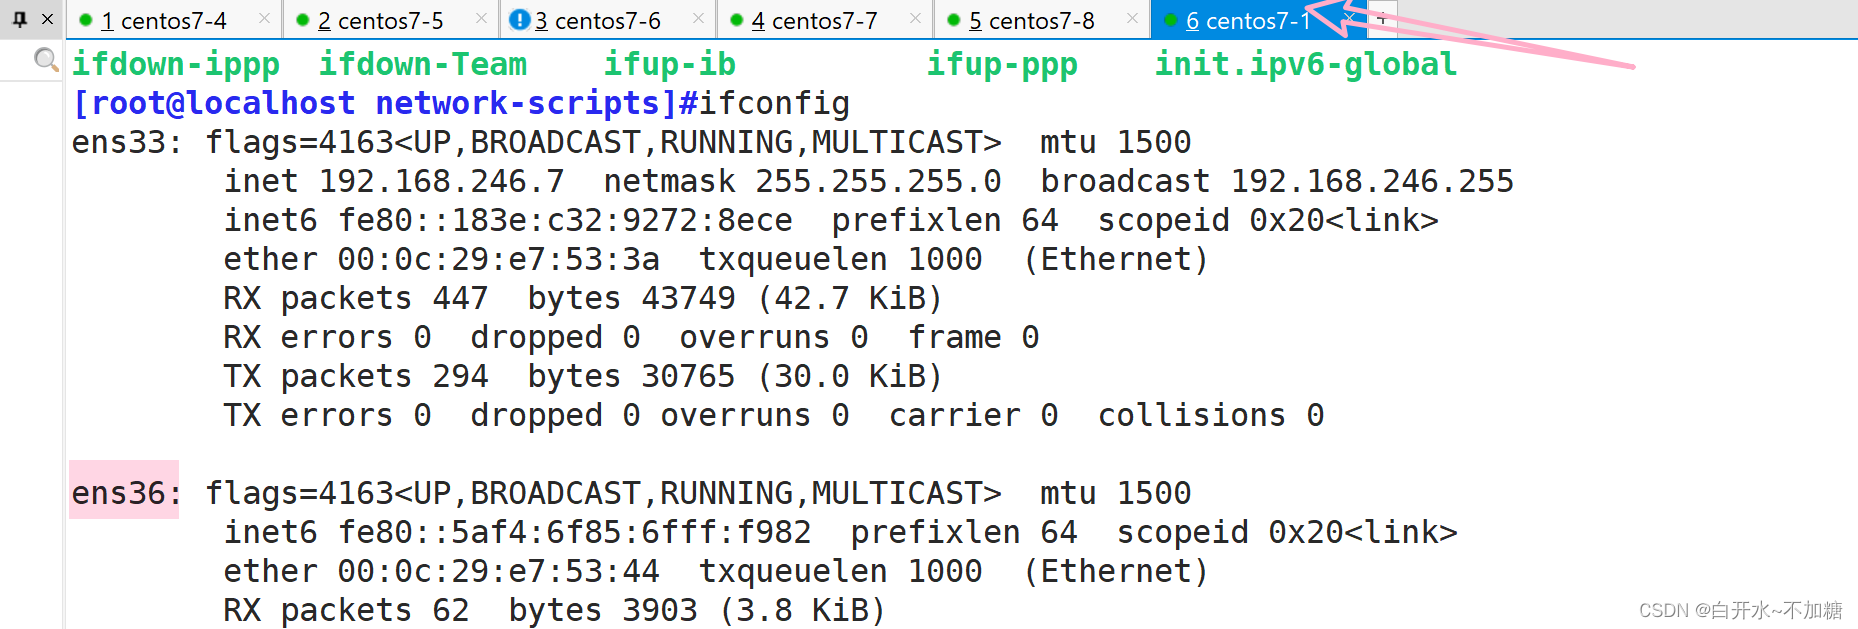
5.1.2修改地址
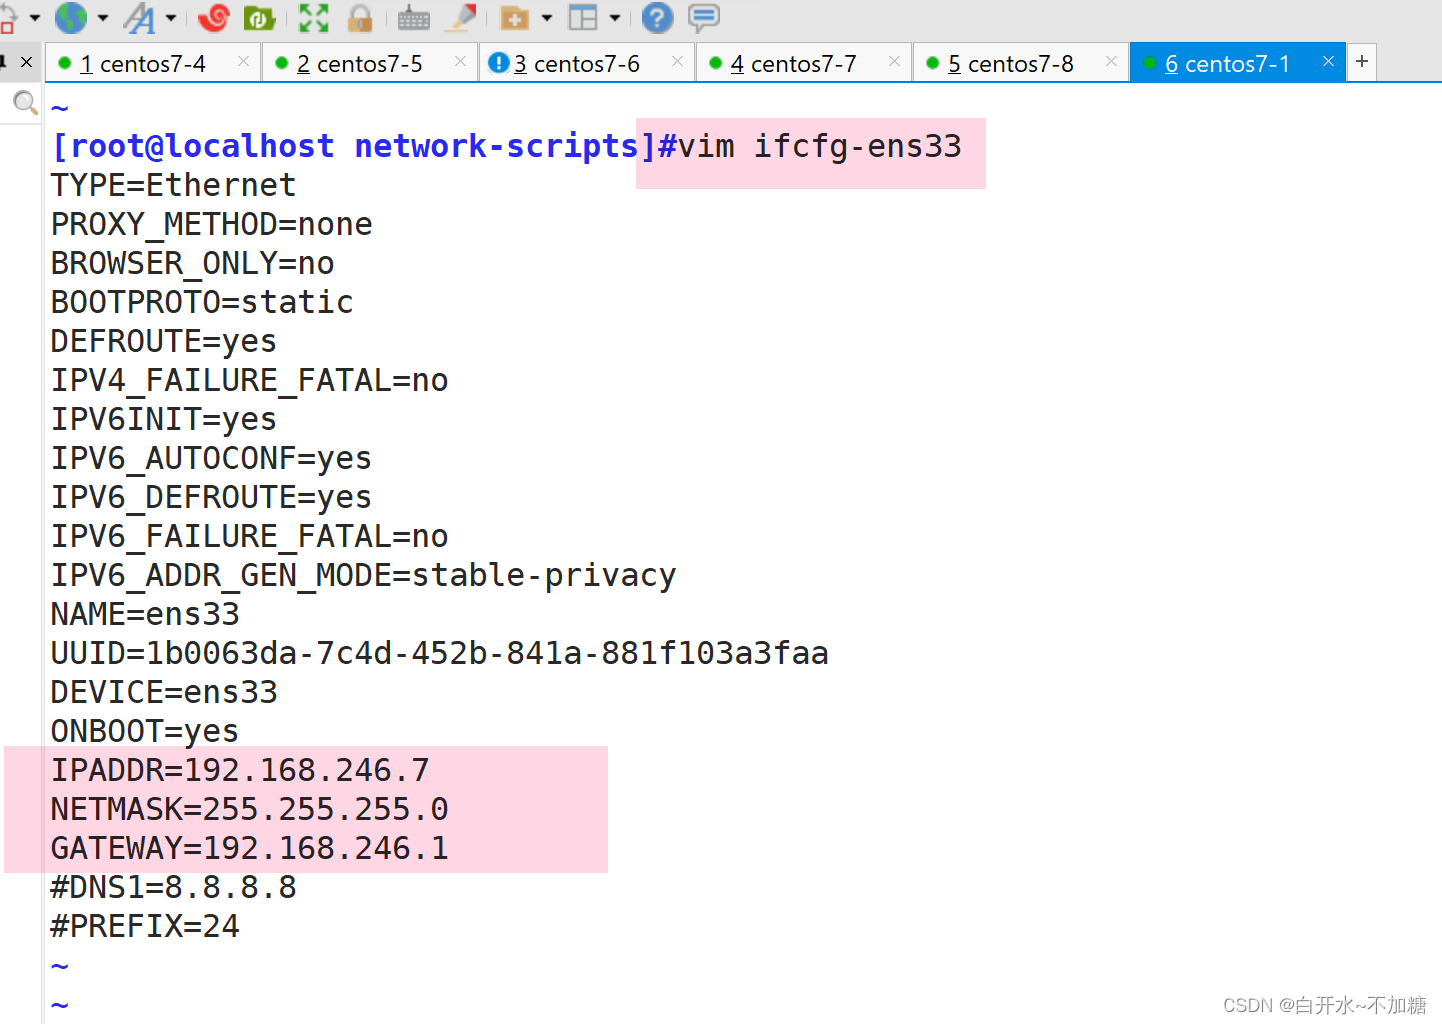

systemctl restart network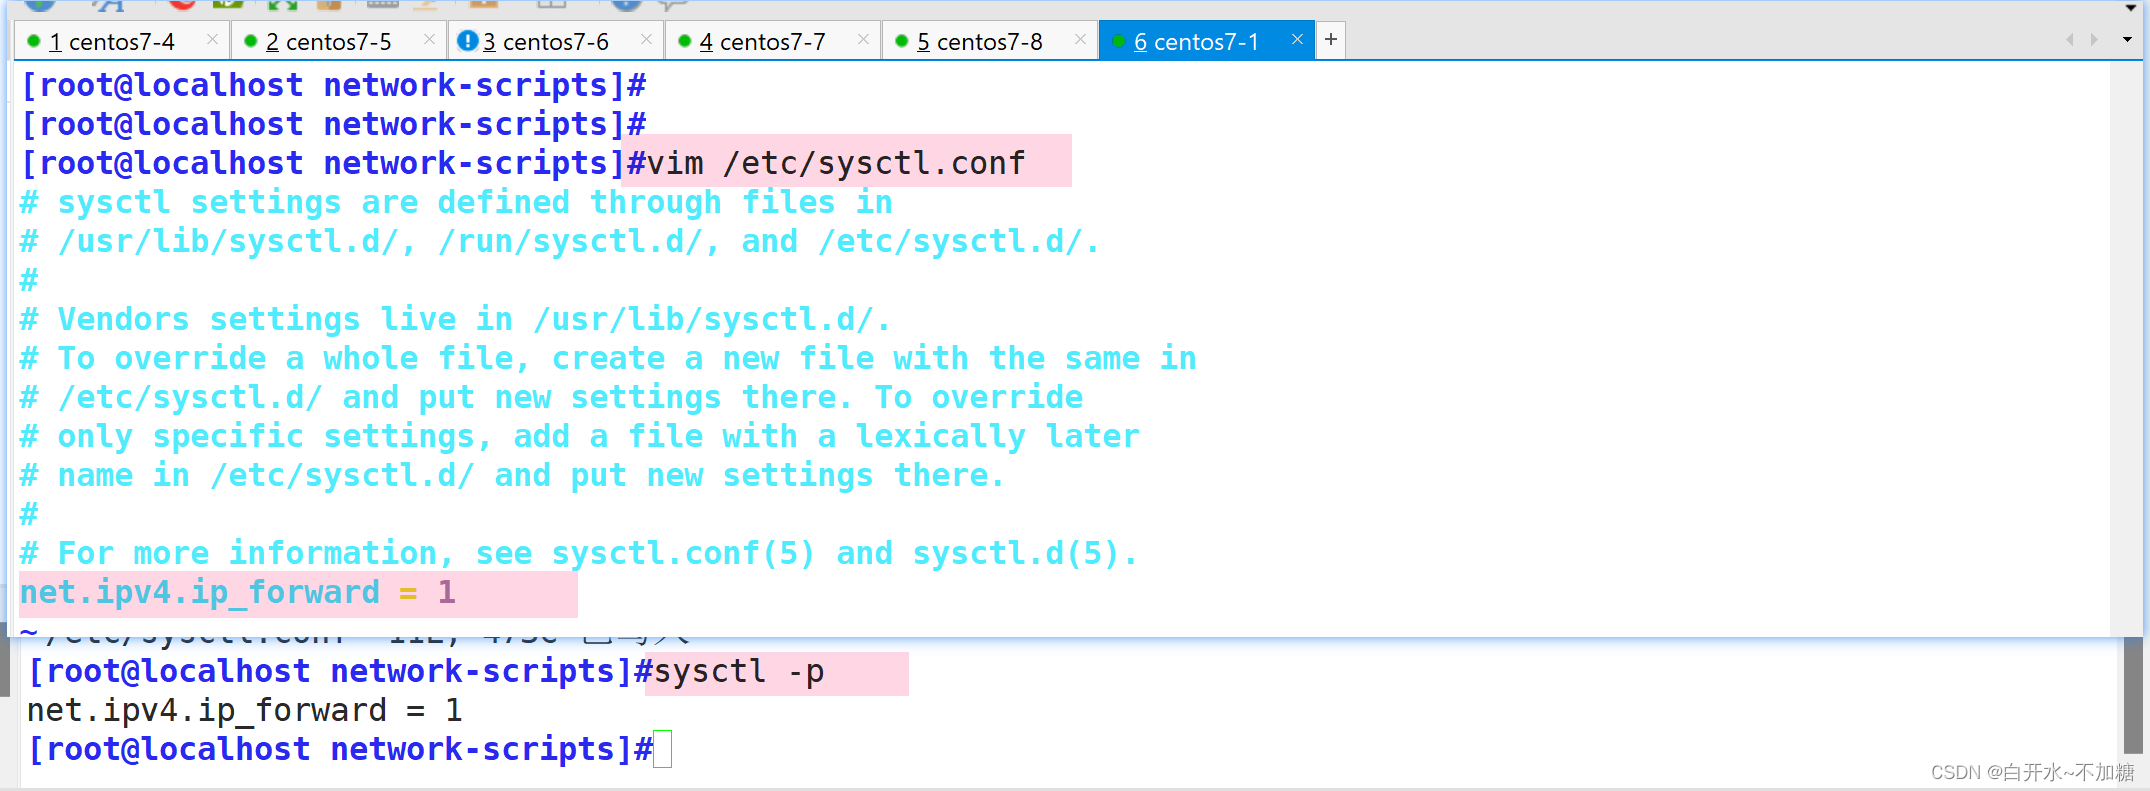
[root@localhost network-scripts]#iptables -t nat -A POSTROUTING -o ens36 -s 192.168.246.0/24 -j SNAT --to 12.0.0.1
[root@localhost network-scripts]#iptables -t nat -A PREROUTING -i ens36 -d 12.0.0.1 -p tcp --dport 80 -j DNAT --to 192.168.246.100:30000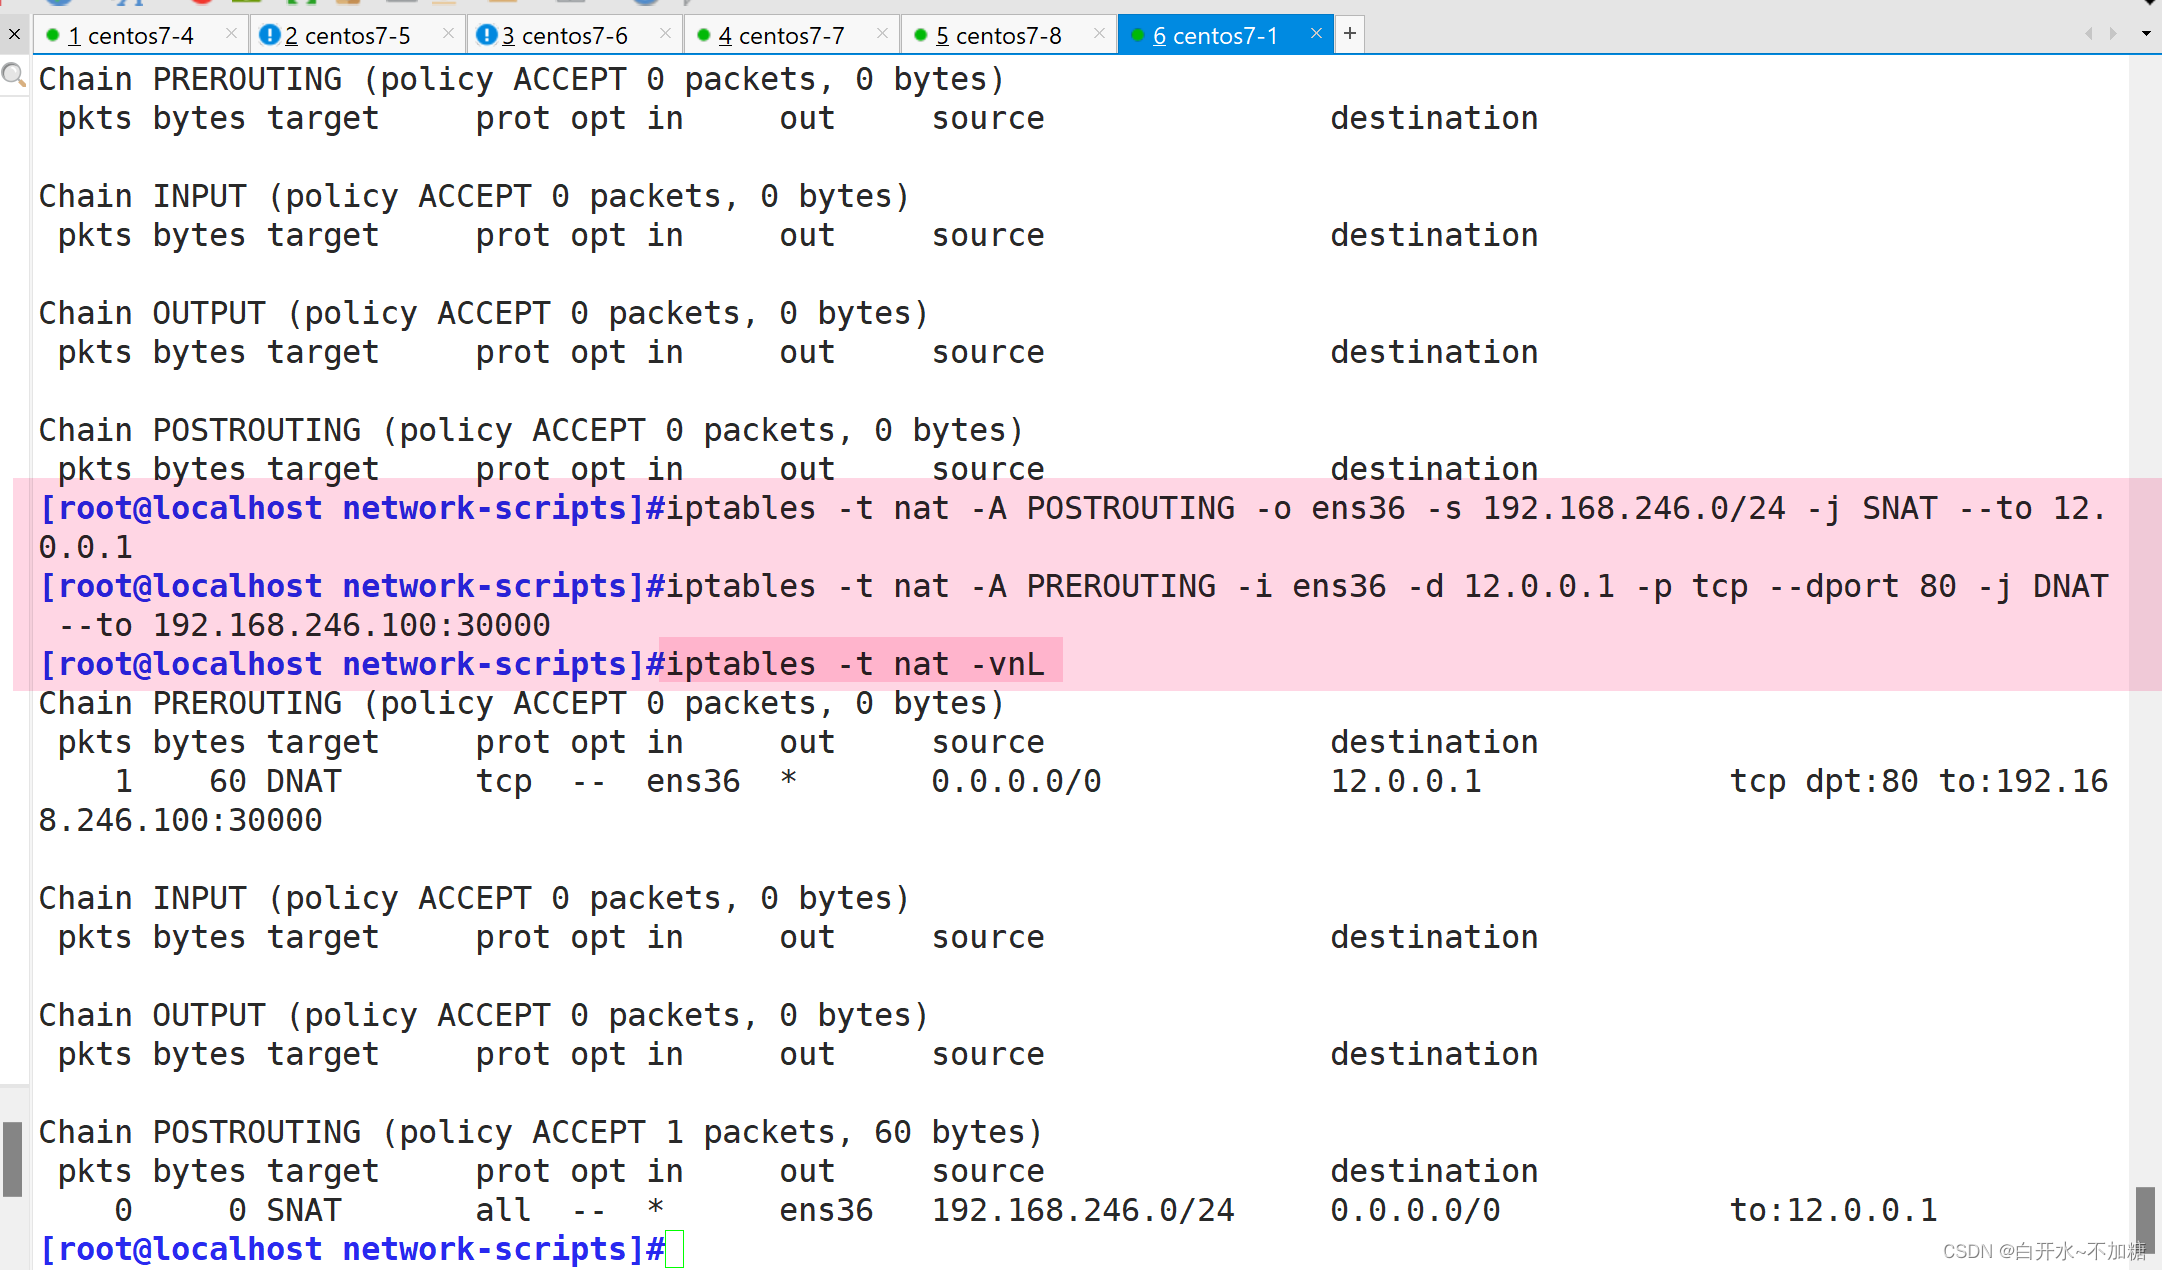
客户端:
| iptables防火墙服务器 | 12.0.0.12 |
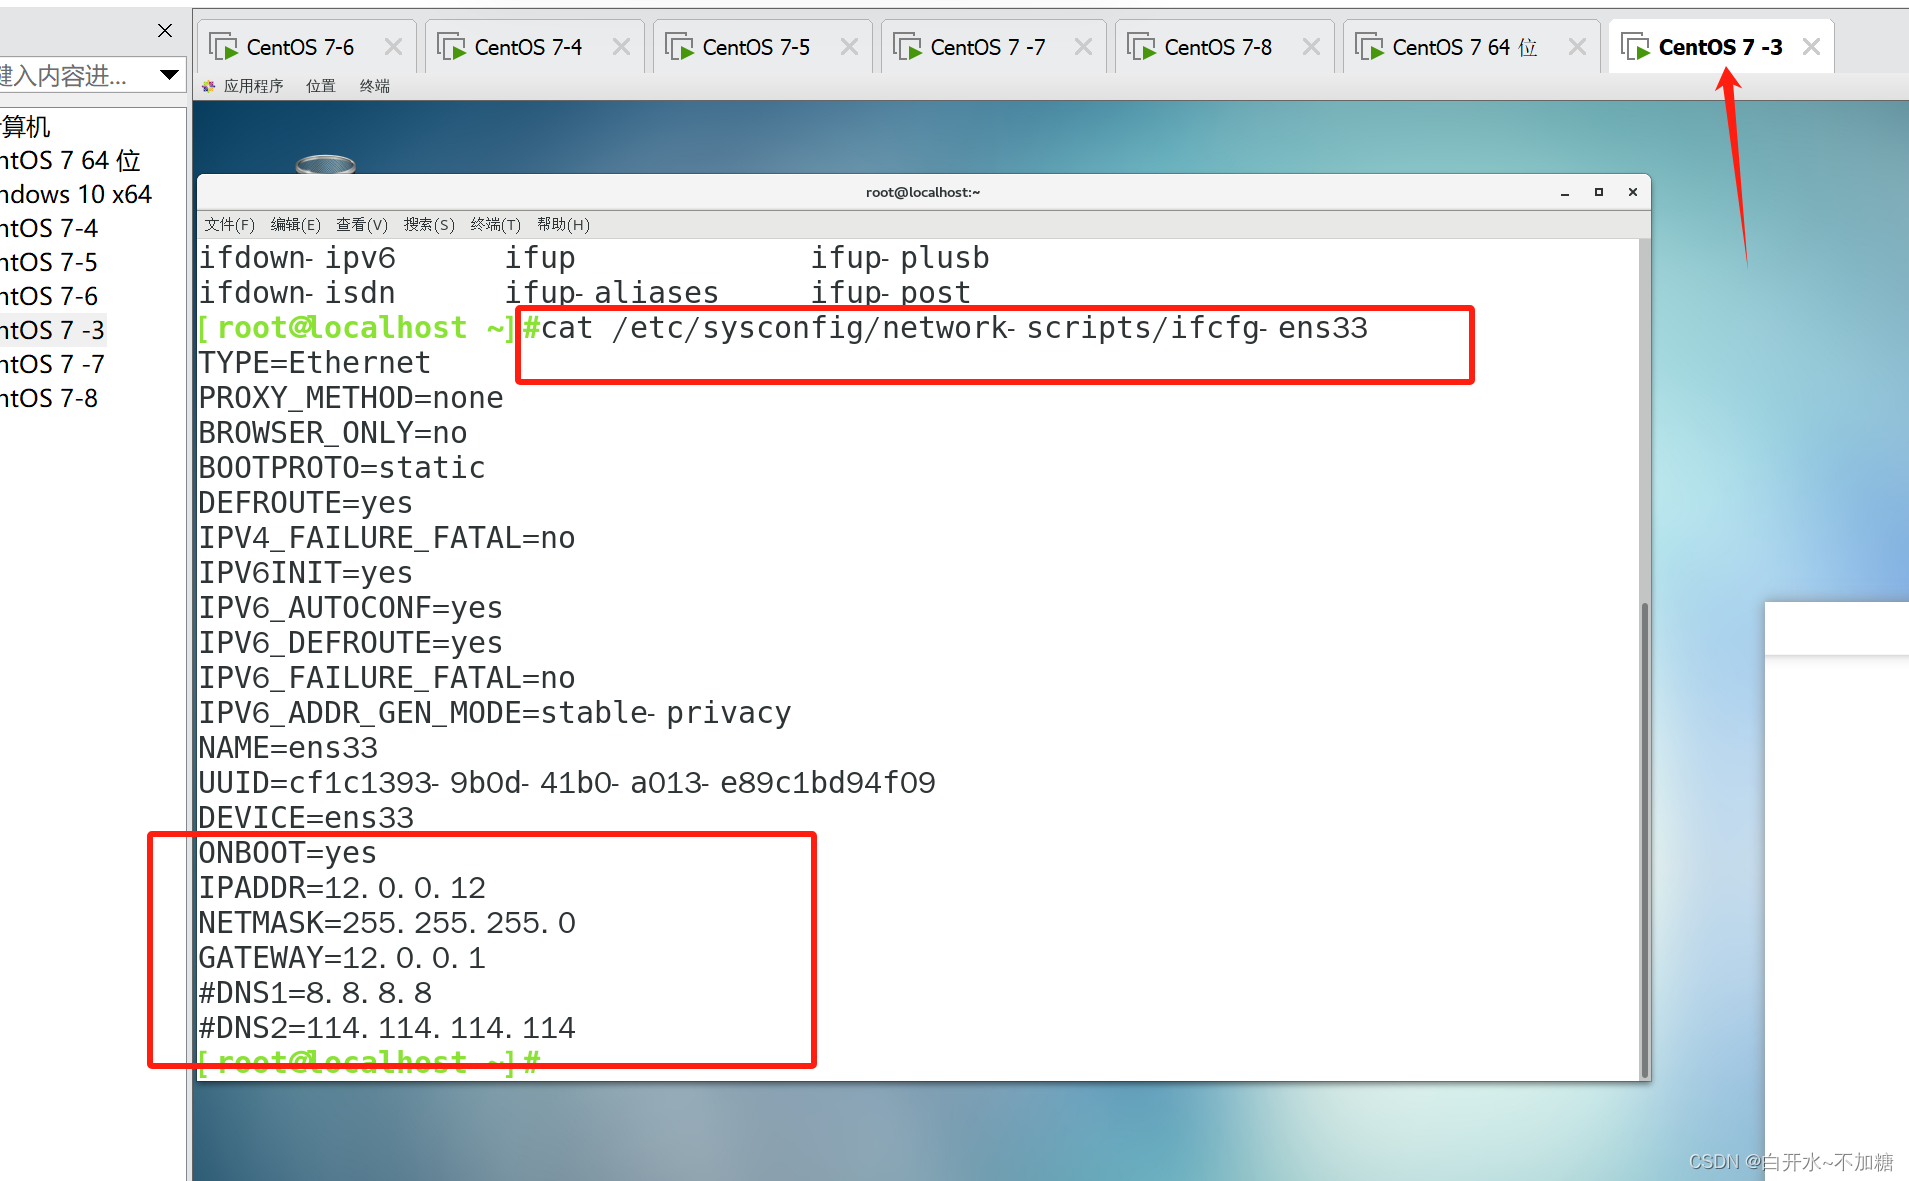
systemctl restart network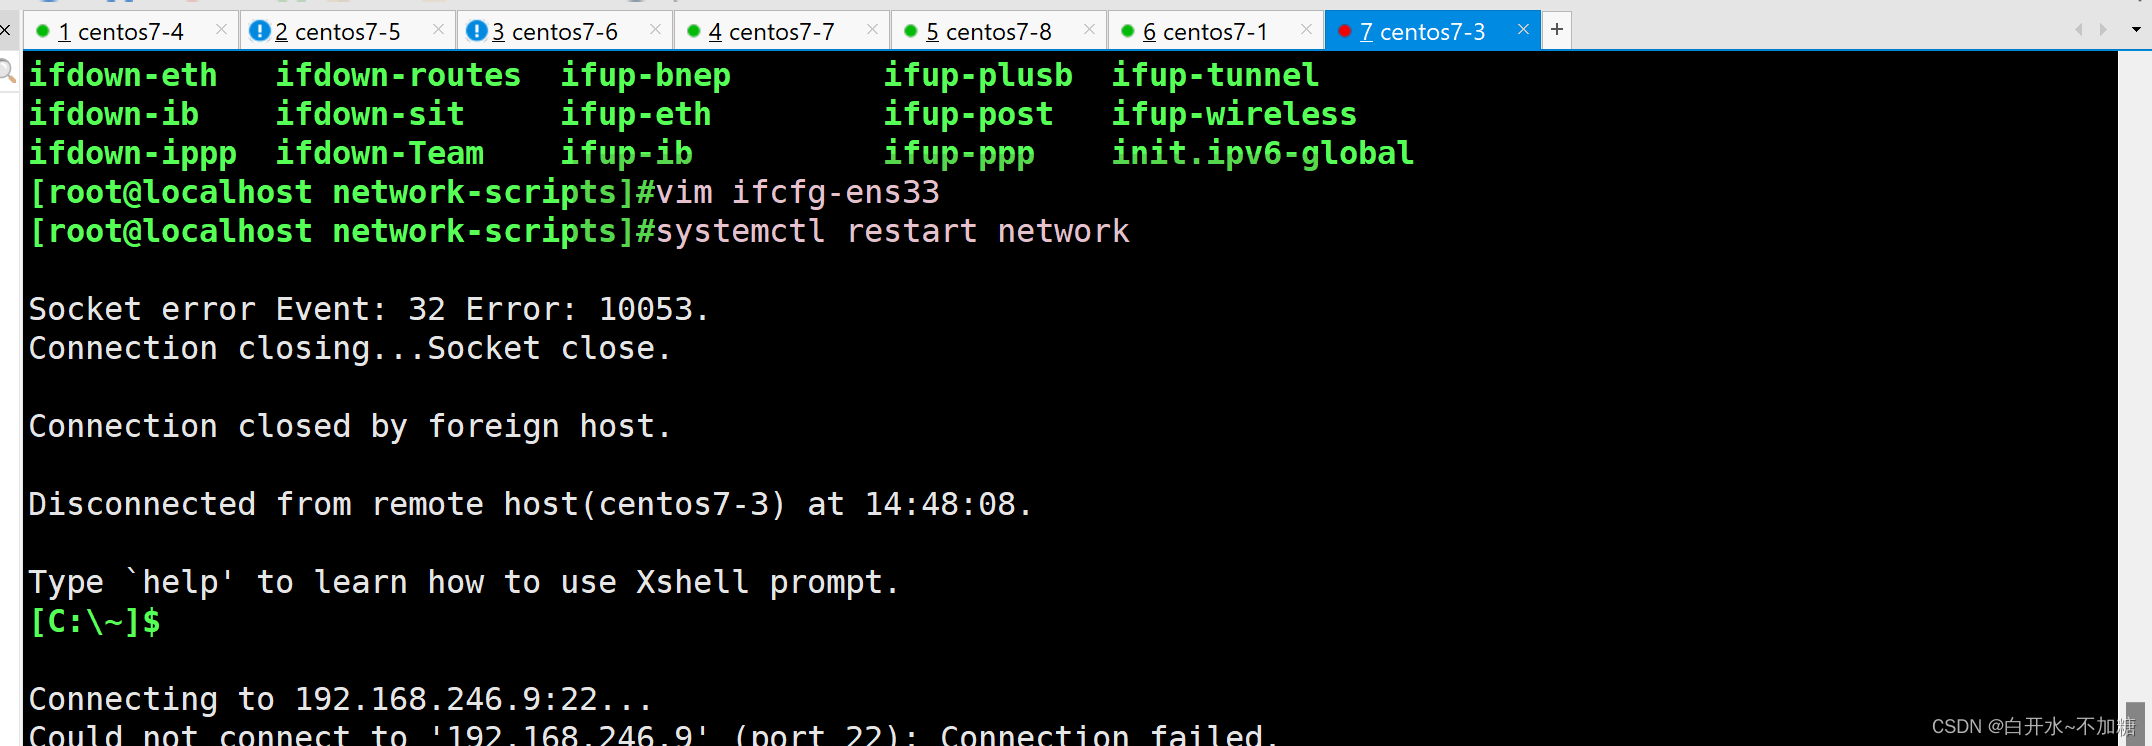
访问测试


![[经验] 白怎么写好看-如何优美地书写白色字体 #微信#笔记#媒体](https://img-home.csdnimg.cn/images/20230724024159.png?origin_url=https%3A%2F%2Fwww.hao123rr.com%2Fzb_users%2Fcache%2Fly_autoimg%2F%25E7%2599%25BD%25E6%2580%258E%25E4%25B9%2588%25E5%2586%2599%25E5%25A5%25BD%25E7%259C%258B-%25E5%25A6%2582%25E4%25BD%2595%25E4%25BC%2598%25E7%25BE%258E%25E5%259C%25B0%25E4%25B9%25A6%25E5%2586%2599%25E7%2599%25BD%25E8%2589%25B2%25E5%25AD%2597%25E4%25BD%2593.jpg&pos_id=H57BsgYx)