参考文档 : <HarmonyOS第一课>ArkTS开发语言介绍
ForEach 渲染控制文档 : https://developer.huawei.com/consumer/cn/doc/harmonyos-guides-V2/arkts-rendering-control-foreach-0000001524537153-V2
一、ArkTS UI 渲染控制
1、if else 条件渲染
在 @Component 自定义组件 中的 build 函数中 ,
可以 使用 if else 条件控制语句 , 控制 UI 渲染 ,
根据不同的条件 为 同一个 UI 组件 动态设置不同的 渲染样式 ;
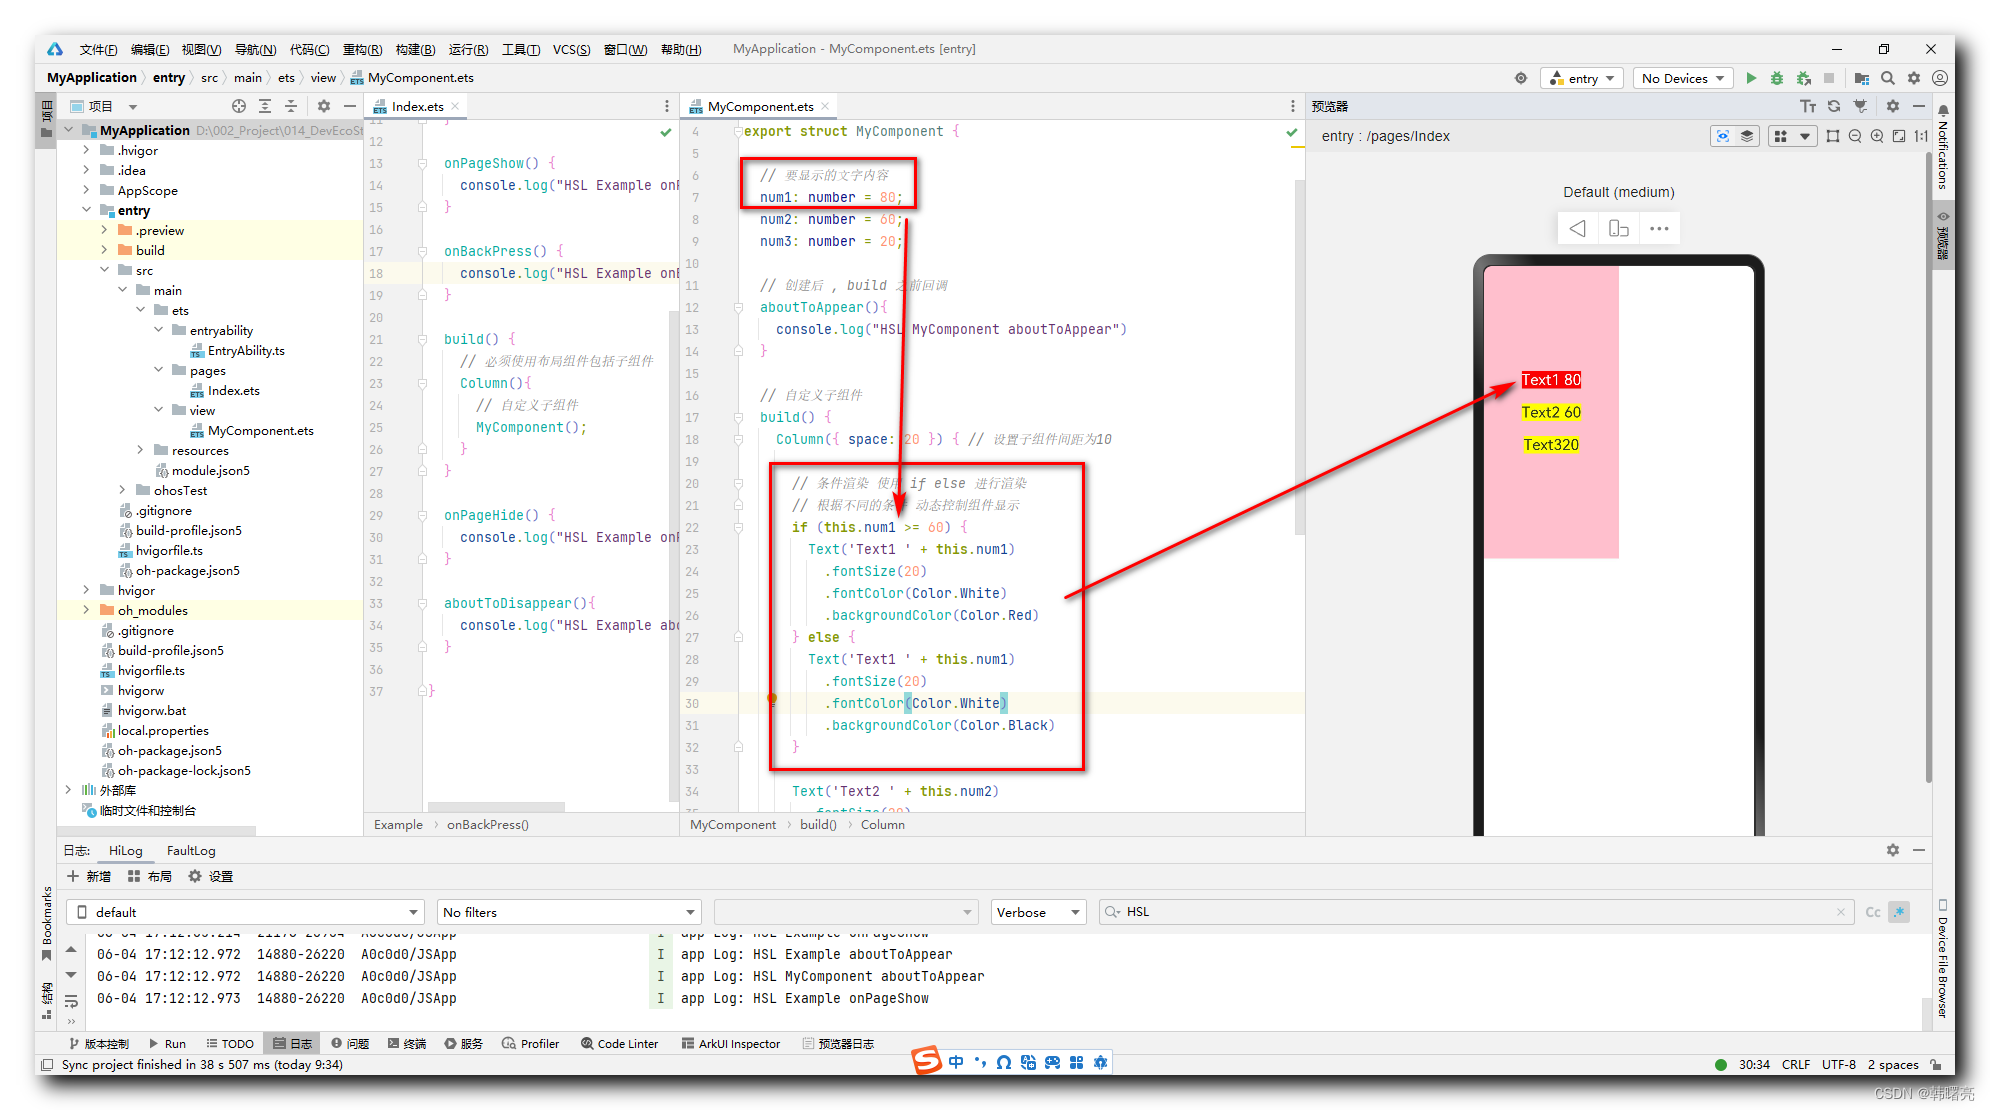
在下面的代码中 , 根据 自定义组件 的 this.num1 成员变量的值 , 决定 Text 组件的渲染样式 ,
- 如果 this.num1 值大于等于 60 , 将 Text 组件背景 设置为 红色 ;
- 否则 , 将 Text 组件背景设置为 黑色 ;
  build() {
    Column({ space: 20 }) { // 设置子组件间距为10

      // 条件渲染 使用 if else 进行渲染
      // 根据不同的条件 动态控制组件显示
      if (this.num1 >= 60) {
        Text('Text1 ' + this.num1)
          .fontSize(20)
          .fontColor(Color.White)
          .backgroundColor(Color.Red)
      } else {
        Text('Text1 ' + this.num1)
          .fontSize(20)
          .fontColor(Color.White)
          .backgroundColor(Color.Black)
      }
	}// Column
}// build
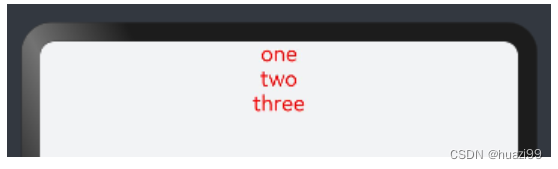
展示效果 :
完整代码 , 在本博客的 绑定资源 中下载 ;
2、ForEach 循环渲染
ArkTS 提供了 ForEach 语句 , 进行循环渲染 ;
在 UI 渲染函数 build 函数中 ,
调用 ForEach 函数 , 进行循环渲染 ,
可以根据一个数组数据源 , 执行循环操作 , 渲染出多个 UI 组件 ;
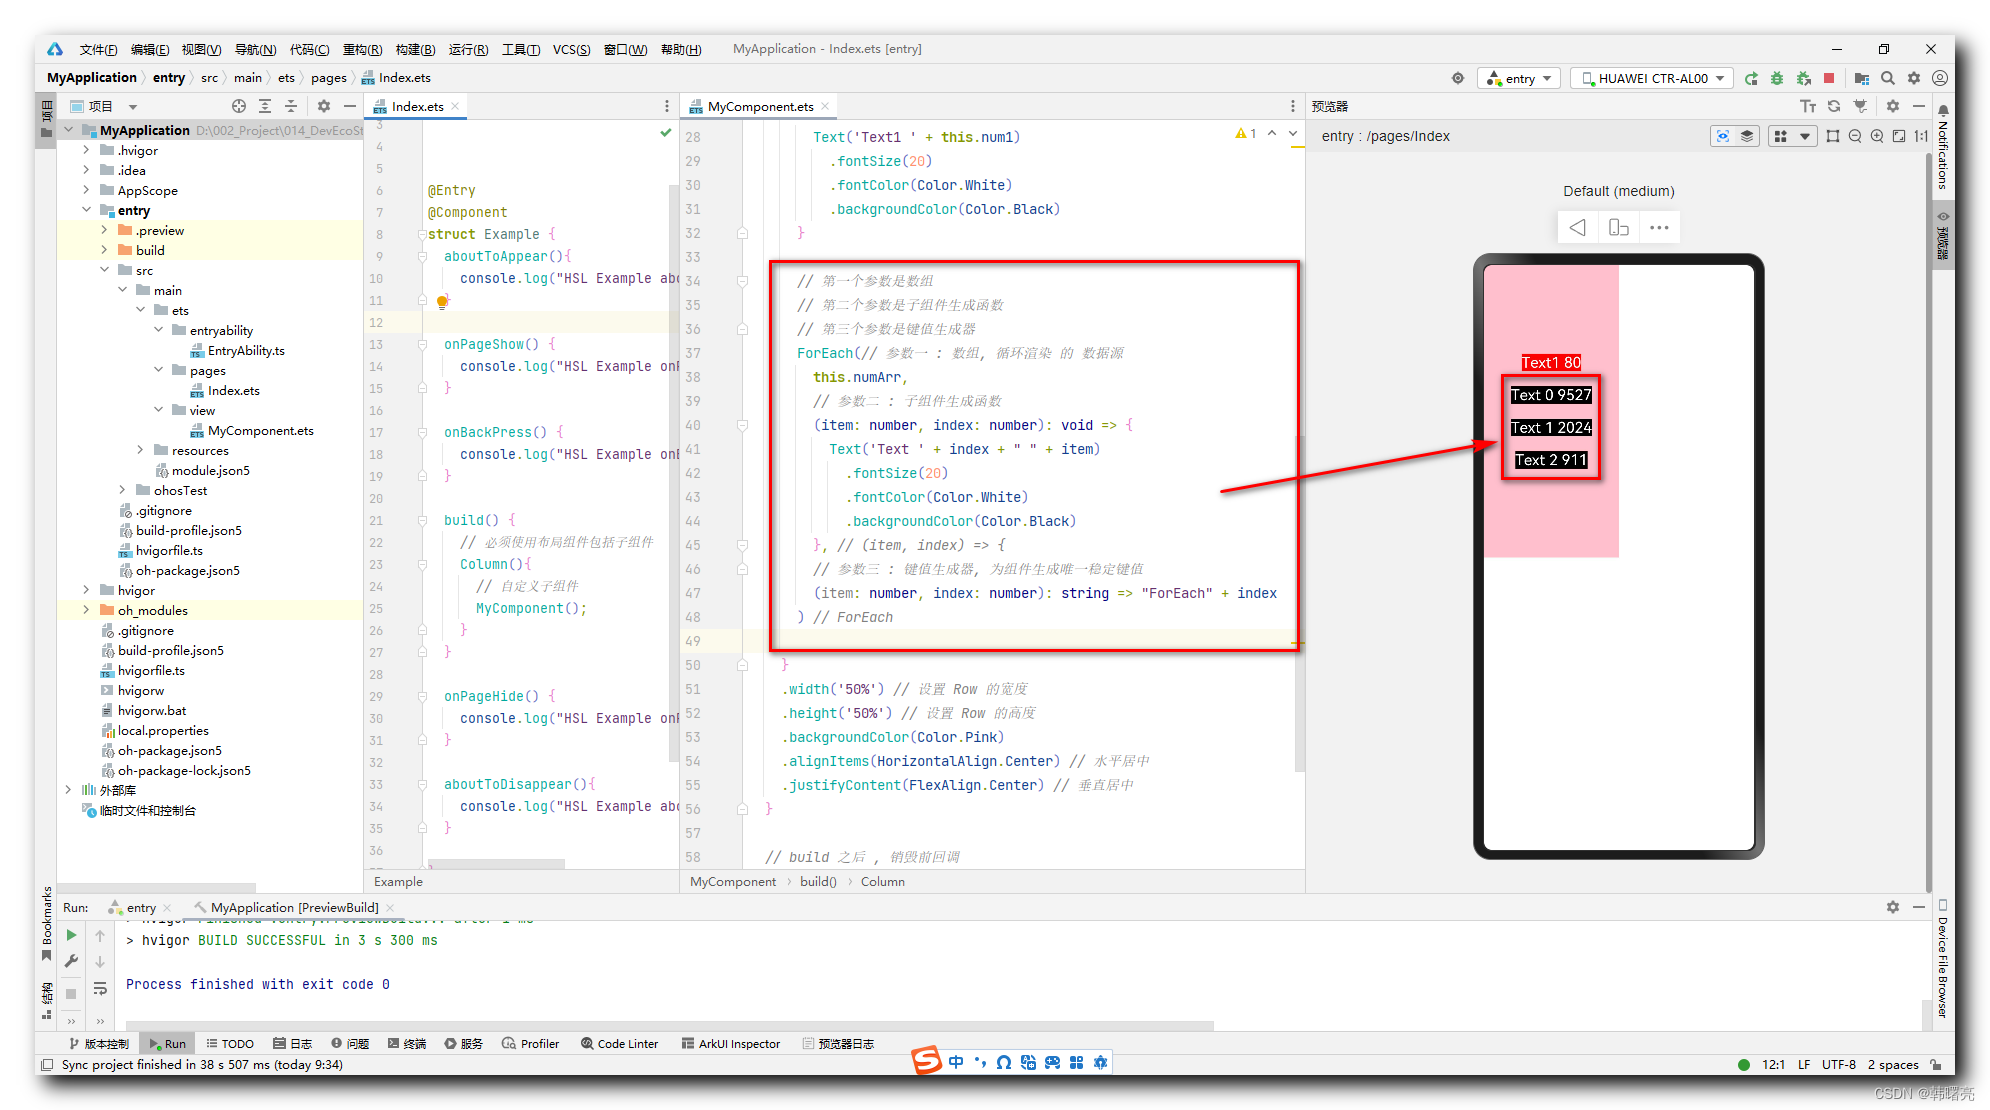
在 ForEach 函数中 , 传入三个参数 , 函数原型如下 :
ForEach(
  arr: any[],
  itemGenerator: (item: any, index?: number) => void,
  keyGenerator?: (item: any, index?: number) => string
)
arr参数一 : 任意类型的数组 , 该数组是 循环渲染 的 数据源 , 根据该数组中的每个元素生成 UI 组件 ;itemGenerator参数二 : 组件生成函数 , 是一个 Lambda 表达式函数 , 函数类型是(item: any, index?: number) => void,- Lambda 表达式 的 第一个参数 item: any 是数组元素 ,
- Lambda 表达式 的 第二个参数是 index?: number 数组元素的索引 ;
- Lambda 表达式 返回值 是 void , 不返回任何返回值 , 在函数中只需要创建 UI 组件即可 , 创建的 UI 组件会自动添加到父容器中 ;
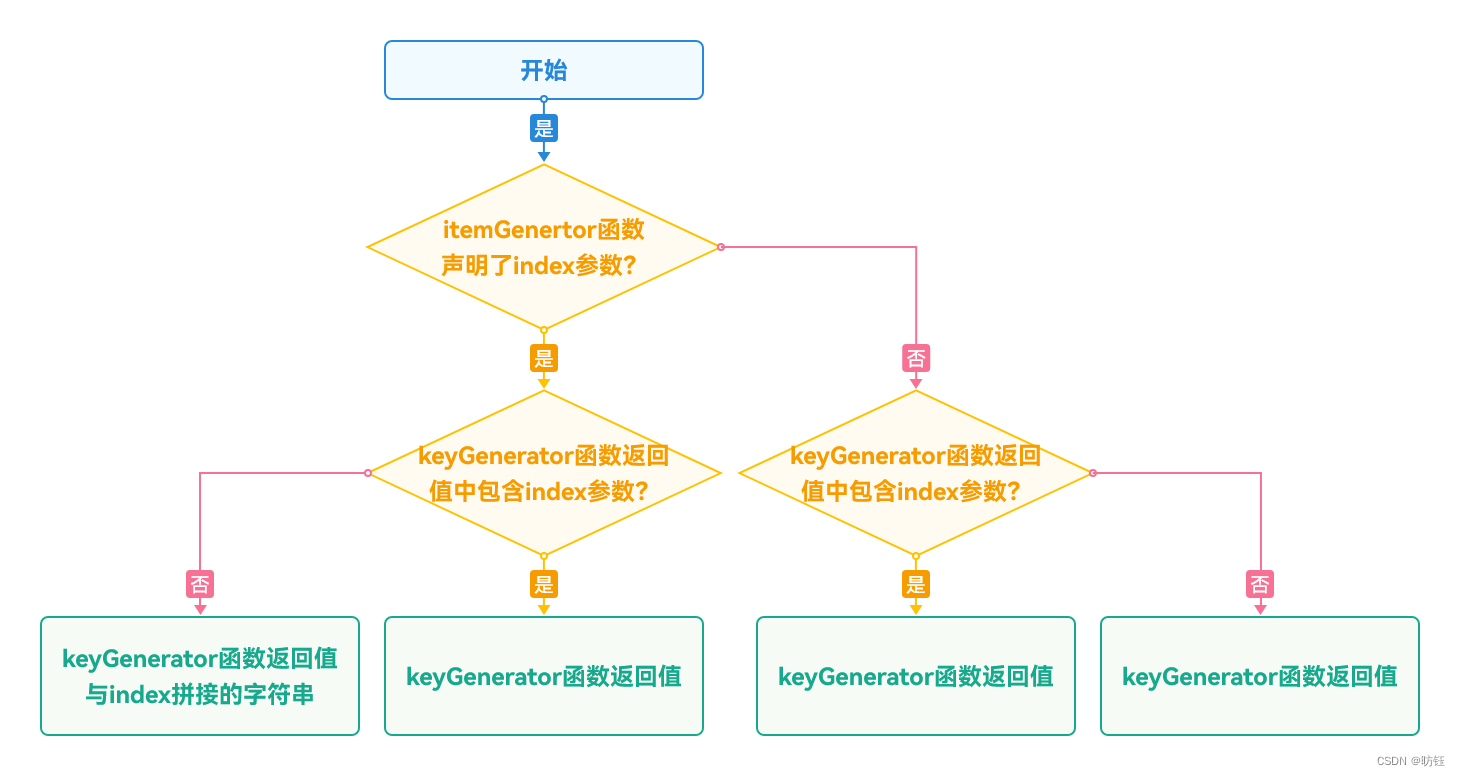
keyGenerator参数三 : 键值生成函数 , 是一个 Lambda 表达式函数 , 函数类型是(item: any, index?: number) => string;- Lambda 表达式 的 第一个参数 item: any 是数组元素 ,
- Lambda 表达式 的 第二个参数是 index?: number 数组元素的索引 ;
- Lambda 表达式 返回值 是 string 字符串类型 ;
特别注意 : 最后一个函数参数 生成的键值 , 必须是 不重复的 , 否则会导致 ForEach 循环渲染失败 , 如果生成的 键值相同 , 则后面键值相同的组件不会被添加到 UI 布局中 ;
循环渲染示例代码 :
  // 循环渲染数据源
  numArr: number[] = [9527, 2024, 911];

  // 自定义子组件
  build() {
    Column({ space: 20 }) { // 设置子组件间距为10

	  // 省略若干代码 ...

      // 第一个参数是数组
      // 第二个参数是子组件生成函数
      // 第三个参数是键值生成器
      ForEach(// 参数一 : 数组, 循环渲染 的 数据源
        this.numArr,
        // 参数二 : 子组件生成函数
        (item: number, index: number): void => {
          Text('Text ' + index + " " + item)
            .fontSize(20)
            .fontColor(Color.White)
            .backgroundColor(Color.Black)
        }, // (item, index) => {
        // 参数三 : 键值生成器, 为组件生成唯一稳定键值
        (item: number, index: number): string => "ForEach" + index
      ) // ForEach
	}
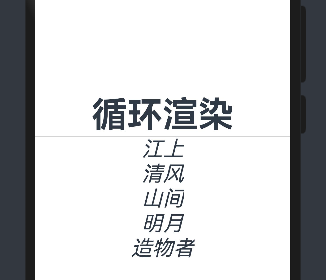
Previewer 显示效果 : 在 ForEach 循环中 , 每循环一个数组元素 , 就生成一个 Text 组件 , 将 数组元素值 显示到 Text 组件的文本中 ;

二、完整代码示例
1、自定义组件代码
import hilog from '@ohos.hilog'

@Component
export struct MyComponent {
  // 要显示的文字内容
  num1: number = 80;

  // 循环渲染数据源
  numArr: number[] = [9527, 2024, 911];

  // 创建后 , build 之前回调
  aboutToAppear() {
    console.log("HSL MyComponent aboutToAppear")
  }

  // 自定义子组件
  build() {
    Column({ space: 20 }) { // 设置子组件间距为10

      // 条件渲染 使用 if else 进行渲染
      // 根据不同的条件 动态控制组件显示
      if (this.num1 >= 60) {
        Text('Text1 ' + this.num1)
          .fontSize(20)
          .fontColor(Color.White)
          .backgroundColor(Color.Red)
      } else {
        Text('Text1 ' + this.num1)
          .fontSize(20)
          .fontColor(Color.White)
          .backgroundColor(Color.Black)
      }

      // 第一个参数是数组
      // 第二个参数是子组件生成函数
      // 第三个参数是键值生成器
      ForEach(// 参数一 : 数组, 循环渲染 的 数据源
        this.numArr,
        // 参数二 : 子组件生成函数
        (item: number, index: number): void => {
          Text('Text ' + index + " " + item)
            .fontSize(20)
            .fontColor(Color.White)
            .backgroundColor(Color.Black)
        }, // (item, index) => {
        // 参数三 : 键值生成器, 为组件生成唯一稳定键值
        (item: number, index: number): string => "ForEach" + index
      ) // ForEach

    }
    .width('50%') // 设置 Row 的宽度
    .height('50%') // 设置 Row 的高度
    .backgroundColor(Color.Pink)
    .alignItems(HorizontalAlign.Center) // 水平居中
    .justifyContent(FlexAlign.Center) // 垂直居中
  }

  // build 之后 , 销毁前回调
  aboutToDisappear() {
    console.log("HSL MyComponent aboutToDisappear")
  }
}
2、主界面代码
// 导入外部自定义子组件
import {MyComponent} from '../view/MyComponent';


@Entry
@Component
struct Example {
  aboutToAppear(){
    console.log("HSL Example aboutToAppear")
  }

  onPageShow() {
    console.log("HSL Example onPageShow")
  }

  onBackPress() {
    console.log("HSL Example onBackPress")
  }

  build() {
    // 必须使用布局组件包括子组件
    Column(){
      // 自定义子组件
      MyComponent();
    }
  }

  onPageHide() {
    console.log("HSL Example onPageHide")
  }

  aboutToDisappear(){
    console.log("HSL Example aboutToDisappear")
  }

}
3、执行结果


![[ue5]建模场景学习笔记(3)——利用noisebrush实现沙漠沙丘和风刃效果](https://img-blog.csdnimg.cn/direct/5a918030fc924eedaae1201c162a599f.png)