在前几篇教程中,我们探讨了 sklearn
的基础、高级功能,异常检测与降维,时间序列分析与自然语言处理,以及模型部署与优化。本篇教程将专注于集成学习和模型解释,这两者在提高模型性能和理解模型行为方面非常重要。
集成学习
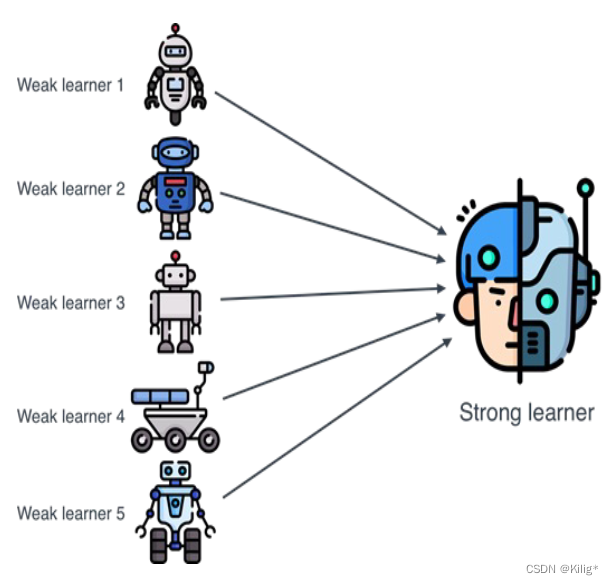
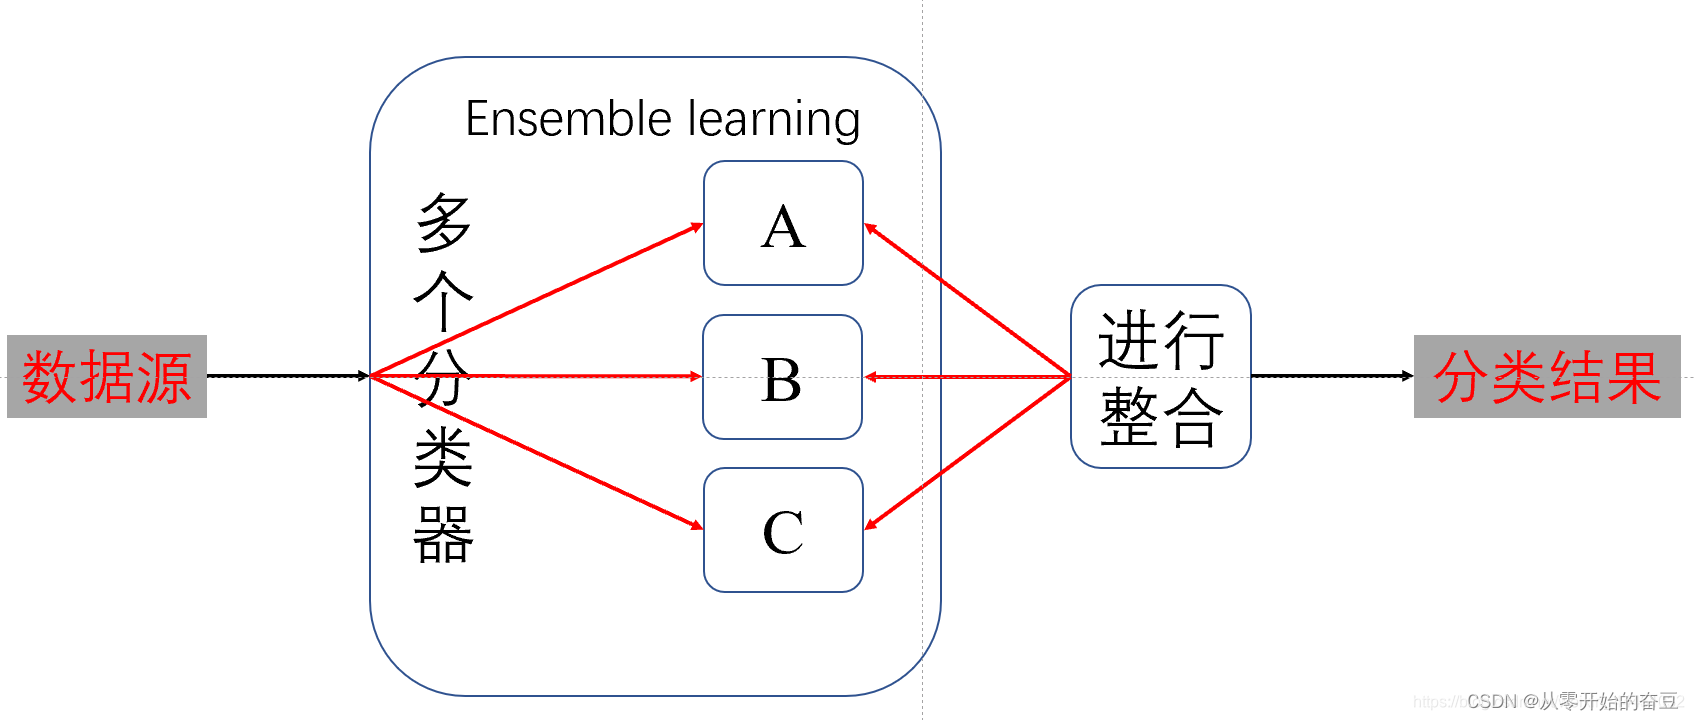
集成学习通过结合多个基学习器来提高模型的性能和稳定性。常用的集成学习方法包括袋装法(Bagging)、提升法(Boosting)和堆叠法(Stacking)。
袋装法(Bagging)
袋装法通过在训练集中进行随机采样并训练多个模型,然后对这些模型的预测结果进行平均或投票,以提高整体性能和减少过拟合。随机森林(Random Forest)是最常用的袋装法算法之一。
随机森林
from sklearn.datasets import load_iris
from sklearn.model_selection import train_test_split
from sklearn.ensemble import RandomForestClassifier
from sklearn.metrics import accuracy_score, classification_report
# 加载数据集
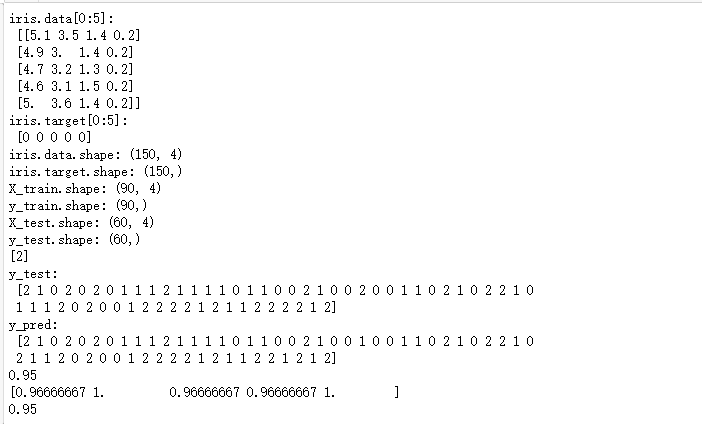
iris = load_iris()
X, y = iris.data, iris.target
# 划分数据集
X_train, X_test, y_train, y_test = train_test_split(X, y, test_size=0.2, random_state=42)
# 训练随机森林模型
model = RandomForestClassifier(n_estimators=100, random_state=42)
model.fit(X_train, y_train)
# 预测
y_pred = model.predict(X_test)
# 评估
accuracy = accuracy_score(y_test, y_pred)
print(f"Accuracy: {accuracy}")
print(classification_report(y_test, y_pred))
提升法(Boosting)
提升法通过逐步训练多个弱学习器,每个学习器都试图纠正前一个学习器的错误,以提高整体性能。常用的提升法算法包括 AdaBoost 和梯度提升(Gradient Boosting)。
梯度提升
from sklearn.ensemble import GradientBoostingClassifier

# 训练梯度提升模型
model = GradientBoostingClassifier(n_estimators=100, learning_rate=0.1, random_state=42)
model.fit(X_train, y_train)

# 预测
y_pred = model.predict(X_test)

# 评估
accuracy = accuracy_score(y_test, y_pred)
print(f"Accuracy: {accuracy}")
print(classification_report(y_test, y_pred))
堆叠法(Stacking)
堆叠法通过组合多个基学习器的预测结果作为元学习器(meta-learner)的输入,元学习器最终给出预测结果。
堆叠分类器
from sklearn.ensemble import StackingClassifier
from sklearn.linear_model import LogisticRegression
from sklearn.svm import SVC

# 定义基学习器
base_learners = [
    ('rf', RandomForestClassifier(n_estimators=100, random_state=42)),
    ('gb', GradientBoostingClassifier(n_estimators=100, learning_rate=0.1, random_state=42))
]

# 定义元学习器
meta_learner = LogisticRegression()

# 训练堆叠分类器
stacking_clf = StackingClassifier(estimators=base_learners, final_estimator=meta_learner)
stacking_clf.fit(X_train, y_train)

# 预测
y_pred = stacking_clf.predict(X_test)

# 评估
accuracy = accuracy_score(y_test, y_pred)
print(f"Accuracy: {accuracy}")
print(classification_report(y_test, y_pred))
模型解释
模型解释是理解和解释机器学习模型输出的过程。对于复杂的模型,模型解释可以帮助识别重要特征、检测潜在的偏差和提高模型的透明度。常用的方法包括特征重要性分析、部分依赖图(Partial Dependence Plot)和 SHAP(SHapley Additive exPlanations)值。
特征重要性分析
特征重要性分析可以帮助理解模型认为哪些特征是最重要的。
import matplotlib.pyplot as plt
import numpy as np

# 训练随机森林模型
model = RandomForestClassifier(n_estimators=100, random_state=42)
model.fit(X_train, y_train)

# 获取特征重要性
importances = model.feature_importances_
indices = np.argsort(importances)[::-1]

# 可视化特征重要性
plt.figure()
plt.title("Feature importances")
plt.bar(range(X_train.shape[1]), importances[indices], color="r", align="center")
plt.xticks(range(X_train.shape[1]), iris.feature_names, rotation=90)
plt.xlim([-1, X_train.shape[1]])
plt.show()
部分依赖图(PDP)
部分依赖图显示一个或两个特征对预测结果的影响。
from sklearn.inspection import plot_partial_dependence

# 训练梯度提升模型
model = GradientBoostingClassifier(n_estimators=100, learning_rate=0.1, random_state=42)
model.fit(X_train, y_train)

# 绘制部分依赖图
features = [0, 1, (0, 1)]
plot_partial_dependence(model, X_train, features, feature_names=iris.feature_names, grid_resolution=50)
plt.show()
SHAP 值
SHAP 值提供了一种一致且可解释的方法来分配特征对预测结果的贡献。
import shap

# 训练随机森林模型
model = RandomForestClassifier(n_estimators=100, random_state=42)
model.fit(X_train, y_train)

# 创建 SHAP 解释器
explainer = shap.TreeExplainer(model)
shap_values = explainer.shap_values(X_test)

# 可视化 SHAP 值
shap.summary_plot(shap_values, X_test, feature_names=iris.feature_names)
综合示例项目:集成学习与模型解释
步骤1:训练集成模型
from sklearn.datasets import load_wine
from sklearn.model_selection import train_test_split
from sklearn.ensemble import StackingClassifier, RandomForestClassifier, GradientBoostingClassifier
from sklearn.linear_model import LogisticRegression
from sklearn.metrics import accuracy_score, classification_report

# 加载数据集
wine = load_wine()
X, y = wine.data, wine.target

# 划分数据集
X_train, X_test, y_train, y_test = train_test_split(X, y, test_size=0.2, random_state=42)

# 定义基学习器
base_learners = [
    ('rf', RandomForestClassifier(n_estimators=100, random_state=42)),
    ('gb', GradientBoostingClassifier(n_estimators=100, learning_rate=0.1, random_state=42))
]

# 定义元学习器
meta_learner = LogisticRegression()

# 训练堆叠分类器
stacking_clf = StackingClassifier(estimators=base_learners, final_estimator=meta_learner)
stacking_clf.fit(X_train, y_train)

# 预测
y_pred = stacking_clf.predict(X_test)

# 评估
accuracy = accuracy_score(y_test, y_pred)
print(f"Accuracy: {accuracy}")
print(classification_report(y_test, y_pred, target_names=wine.target_names))
步骤2:解释模型
特征重要性分析
import matplotlib.pyplot as plt
import numpy as np

# 获取特征重要性
importances = stacking_clf.final_estimator_.coef_[0]
indices = np.argsort(importances)[::-1]

# 可视化特征重要性
plt.figure()
plt.title("Feature importances")
plt.bar(range(X_train.shape[1]), importances[indices], color="r", align="center")
plt.xticks(range(X_train.shape[1]), wine.feature_names, rotation=90)
plt.xlim([-1, X_train.shape[1]])
plt.show()
部分依赖图(PDP)
from sklearn.inspection import plot_partial_dependence

# 绘制部分依赖图
features = [0, 1, (0, 1)]
plot_partial_dependence(stacking_clf, X_train, features, feature_names=wine.feature_names, grid_resolution=50)
plt.show()
SHAP 值
import shap

# 创建 SHAP 解释器
explainer = shap.KernelExplainer(stacking_clf.predict, X_train)
shap_values = explainer.shap_values(X_test)

# 可视化 SHAP 值
shap.summary_plot(shap_values, X_test, feature_names=wine.feature_names)
总结
通过本篇专题教程,我们学习了 sklearn 中的集成学习和模型解释。集成学习包括袋装法、提升法和堆叠法,模型解释涵盖了特征重要性分析、部分依赖图和 SHAP 值。这些技术和方法可以帮助你构建更强大的模型,并更好地理解模型的行为,从而提高模型的可信度和可解释性。希望这些知识能在你的实际项目中有所帮助。


![【代码随想录】【算法训练营】【第29天】 [491]非递减子序列 [46]全排列 [47]全排列II](https://img-blog.csdnimg.cn/direct/1e728e6a54bd474495153d37a8dd54fa.png)