1. Elasticsearch安装
1)安装
服务器IP: 127.0.0.1.210/211/212
拷贝安装包到服务器上面
unzip elasticsearch-6.2.3.zip
mv elasticsearch-6.2.3 /usr/local/elasticsearch
由于root用户不能直接安装配置elasticsearch程序,所以需要新建linux用户
创建用户
useradd esuser
passwd esuser
chown -R esuser:esuser /usr/local/elasticsearch
mkdir -p /data/es/logs
mkdir -p /data/es/data
chown -R esuser:esuser /data/es
修改内核参数,需要切换到root用户下面
vi /etc/sysctl.conf
增加 vm.max_map_count=262144
执行立即生效命令
sysctl -p
2)配置
修改elasticsearch配置文件
su - esuser
cd /usr/local/elasticsearch
vi config/elasticsearch.yml
# 修改如下配置
cluster.name: zhisheng
# 分别为node-1,node-2,node-3
node.name: node-1
path.data: /data/es/data
path.logs: /data/es/logs
# 本机IP地址,分别为210,211,212
network.host: 127.0.0.1.210
http.port: 9200
discovery.zen.ping.unicast.hosts: ["127.0.0.1.210", "127.0.0.1.211", "127.0.0.1.212"]
修改jvm.options
vi config/jvm.options
-Xms8g
-Xmx8g
3)启停
启动:
su - esuser
cd /usr/local/elasticsearch
bin/elasticsearch -d
停止:
ps -ef | grep elasticsearch | awk '{print $2}' | xargs kill -9
2. ES-head插件安装
1)安装
服务器IP: 127.0.0.1.210
安装nodejs
cd /opt
tar -xvf node-v10.15.1-linux-x64.tar.xz
ln -s /opt/node-v10.15.1-linux-x64/bin/node /usr/local/bin/node
ln -s /opt/node-v10.15.1-linux-x64/bin/npm /usr/local/bin/npm
安装es-head插件
cd /opt
unzip elasticsearch-head-master.zip
2)配置
修改elasticsearch配置文件
如果ES已经启动,先停止
ps -ef | grep elasticsearch | awk '{print $2}' | xargs kill -9
vi config/elasticsearch.yml
# 增加新的参数,这样head插件可以访问es。设置参数的时候:后面要有空格
http.cors.enabled: true
http.cors.allow-origin: "*"
修改head插件配置文件
cd /opt/elasticsearch-head-master
vi Gruntfile.js
connect: {
server: {
options: {
hostname: 'node1',
port: 9100,
base: '.',
keepalive: true
}
}
}
3)启停
启动ES:
su - esuser
cd /usr/local/elasticsearch
bin/elasticsearch -d
启动head
cd /opt/elasticsearch-head-master
nohup sh grunt server &
4)访问
http://127.0.0.1.210:9100/
如果出现“未连接”,请修改localhost为127.0.0.1.210,然后单击“连接”按钮
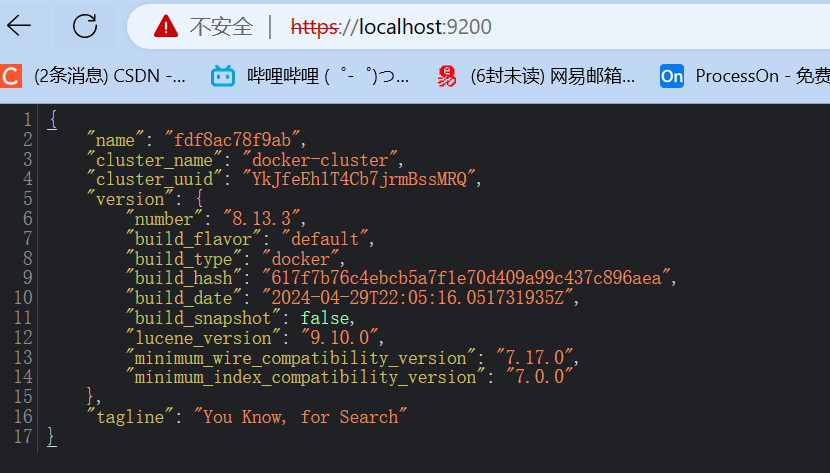
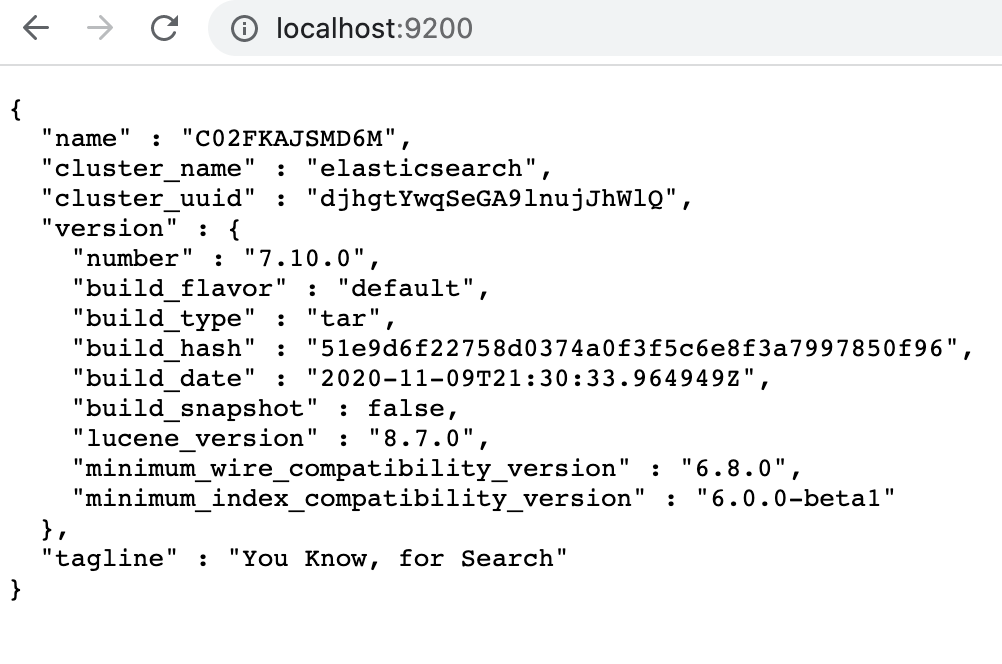
3. ES6.2.3未授权访问漏洞解决策略
1)安装http-basic.zip(安装包可找致胜平台管理组)
将下载的zip包上传到 /opt/elk/elasticsearch-6.3.2/plugins 目录
unzip http-basic.zip
2)修改插件配置文件
vim plugin-descriptor.properties
修改elasticsearch版本为6.2.3
3)修改es配置文件
cd /opt/elk/elasticsearch-6.2.3/config
vim elasticsearch.yml
添加以下内容
#ES开启http-basic配置
http.basic.enabled: true
http.basic.log: false
http.basic.username: “XXX”
http.basic.password: “XXXXX”
#ip白名单(可选)
http.basic.ipwhitelist: ip1,ip2.....
#ES开启安全密码认证
http.cors.enabled: true
http.cors.allow-origin: "*"
http.cors.allow-headers: Authorization,X-Requested-With,Content-Type,Content-Length
4)重启es


![PermissionError: [Errno 13] Permission denied: ‘xx.xlsx‘的解决办法](https://img-blog.csdnimg.cn/direct/4e9c7cc2548d4b9ca5703bfac8ce3c32.png)