摘要
即将来到运行时最重要的一部分。在上一章,我们实现了给组件添加事件。但我们会发现,这个事件只是组件单条线路的事件,做不到组件之间的交互。
比如,我想点击某个按钮让另外一个按钮的文字发生改变。 所以为了实现这样的效果,我们需要一个全局的模型。那,对于前端来说,就是window上需要有一个变量。我们设为ctx。
我们现在有一个redux管理的comList,用来表示所有组件的全部信息。同时,我们要在window上挂载一个和comList一模一样的一个对象。
同时我们要做到,当comList发生改变的时候更新ctx,ctx发生改变的时候更新视图。
这样的话,我们就可以在事件里面,更改ctx模型的值,从而做出组件之间的交互效果。
1.全局添加ctx
我们要在全局window上添加一个变量ctx,并且能做到redux更新的时候,更新这个ctx。所以来到store下的index.ts文件中,在更新的时候,去给ctx赋值。
const comReducer = (state: any = initialState, action: any) => {
  switch (action.type) {
    case 'changeNowCom': {
      return {...state, dragCom: action.value}
    }
    case 'changeComList': {
      window.ctx = JSON.parse(JSON.stringify(action.value))
      return {...state, comList: action.value}
    }
    case 'changeSelectCom': {
      return {...state, selectCom: action.value}
    }
    default: {
      return state
    }
  }
}
2.修改Button组件实现ctx更改视图
现在我们有了全局对象ctx,为了方便我们快速找到一个节点。我们在window上新增一个查找节点的方法:
const getNodeById = (comId: string): any => {
    const treeList = window.ctx || [];

    for (let i = 0; i < treeList.length; i++) {
        if (treeList[i].comId === comId) {
            return treeList[i]
        } else if (treeList[i].childList) {
            treeList.push(...(treeList[i].childList || []))
        }
    }
}

window.getNodeById = getNodeById;
现在来到我们的Button组件,我们之前Button组件的caption是从props里面拿到的。现在为了我们可以能够修改Button组件的状态,这个值让Button组件自己维护:
const [ caption, setCaption ] = useState(props.caption)
然后重要的来了,我们把setCaption这个属性给ctx中对应的节点绑定上:
  if(isRender()) {
    const buttonCtx = getNodeById(comId);
    if(buttonCtx) {
      buttonCtx.setCaption = setCaption;
    }
  }
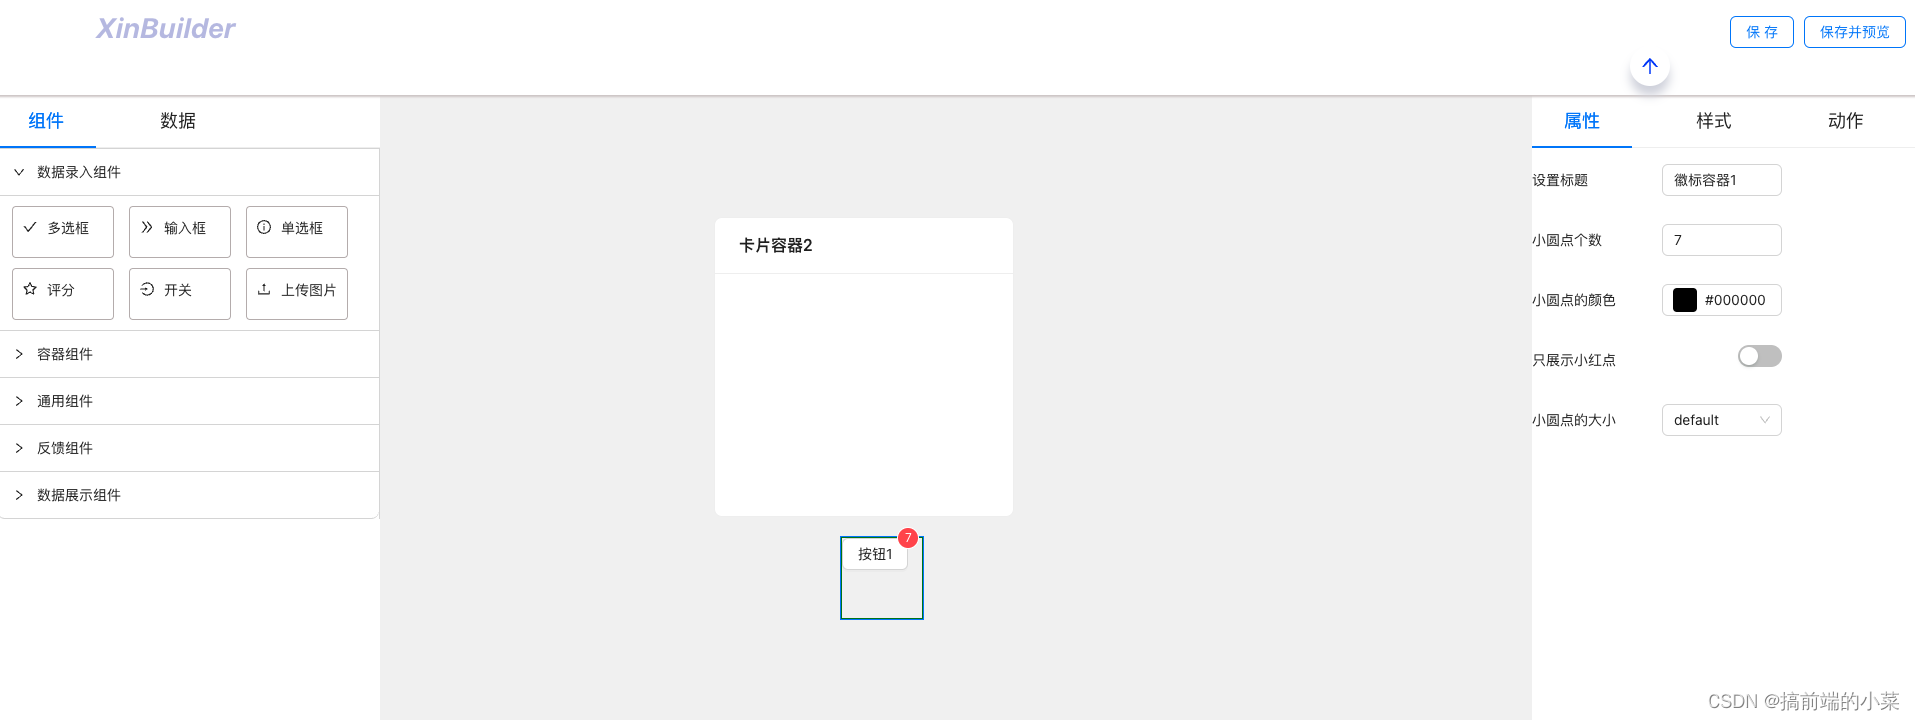
就这么简单,我们就实现了ctx和组件之间的映射关系。现在我们就可以来尝试一下,来到设计态。我们拖拽两个Button组件。

给其中一个按钮的onClick事件编写一段这样的代码:
window.getNodeById("comId_1714290466988")
.setCaption("newButton")
就是修改另一个按钮的caption。来到运行时就可以验证结果了。
最后我们整体来修改一下 Button组件:
  const { comStyle, onClick, comId } = props
  const [ caption, setCaption ] = useState(props.caption)
  const [ danger, setDanger ] = useState(props.danger)
  const [ disabled, setDisabled ] = useState(props.disabled)
  const [ ghost, setGhost ] = useState(props.ghost)
  const [ shape, setShape ] = useState(props.shape)
  const [ size, setSize ] = useState(props.size)
  const [ type, setType ] = useState(props.type)

  const IconComponent = require('@ant-design/icons')[type]

  if(isRender()) {
    const buttonCtx = window.getNodeById(comId);
    if(buttonCtx) {
      buttonCtx.setCaption = setCaption;
      buttonCtx.setDanger = setDanger;
      buttonCtx.setDisabled = setDisabled;
      buttonCtx.setGhost = setGhost;
      buttonCtx.setShape = setShape;
      buttonCtx.setSize = setSize;
      buttonCtx.setType = setType;
    }
  }
我们再来优化一下这段代码,将公共逻辑进行封装。做成一个自定义Hook。
const useStateByProps = (propName: string, props: any, comId: string) => {
  const [state, dispatch] = useState(props[propName])
  // eslint-disable-next-line @typescript-eslint/no-unused-expressions
  if(isRender()) {
    const Ctx = window.getNodeById(comId);
    Ctx['set' + propName.charAt(0).toLocaleUpperCase() + propName.slice(1)] = dispatch;
    return state
  }
}

  const caption = useStateByProps('caption', props, comId)
  const danger = useStateByProps('danger', props, comId)
  const disabled = useStateByProps('disabled', props, comId)
  const ghost = useStateByProps('ghost', props, comId)
  const shape = useStateByProps('shape', props, comId)
  const size = useStateByProps('size', props, comId)
  const type = useStateByProps('type', props, comId)
博主补充
到此,其实运行时比较核心的逻辑就已经完成了。读者可以把其他组件也像这样补充一下。
这部分代码提交在github上
https://github.com/TeacherXin/XinBuilder
commit: fix: 第二十三节:实现模型驱动组件的交互