Python构建学生信息管理系统:前端页面开发
在本系列博客的前几篇中,我们详细介绍了学生信息管理系统(SIMS)的需求分析、环境搭建、工程初始化、数据库设计、后端逻辑以及安全设计。在本文中,我们将专注于前端页面的开发,包括学生信息的展示、搜索以及增删改操作。
学生信息列表页面
首先,我们将创建一个学生信息列表页面,该页面将展示所有学生的信息,并提供搜索、添加、编辑和删除功能。
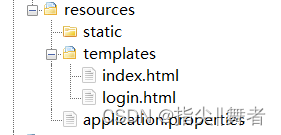
HTML模板(templates/students.html)
<!-- templates/students.html -->

<!DOCTYPE html>
<html lang="en">
<head>
    <meta charset="UTF-8">
    <title>Student List</title>
    <link rel="stylesheet" href="{{ url_for('static', filename='css/style.css') }}">
</head>
<body>
    <h1>Student List</h1>
    <input type="text" id="searchInput" placeholder="Search by name...">
    <button onclick="searchStudents()">Search</button>
    <table id="studentsTable">
        <thead>
            <tr>
                <th>ID</th>
                <th>First Name</th>
                <th>Last Name</th>
                <th>Class ID</th>
                <th>Email</th>
                <th>Actions</th>
            </tr>
        </thead>
        <tbody>
            <!-- 学生信息将通过JavaScript动态插入 -->
        </tbody>
    </table>
    <script src="{{ url_for('static', filename='js/students.js') }}"></script>
</body>
</html>
CSS样式(static/css/style.css)
/* static/css/style.css */

body {
    font-family: Arial, sans-serif;
}

table {
    width: 100%;
    border-collapse: collapse;
}

table, th, td {
    border: 1px solid #ddd;
}

th, td {
    padding: 10px;
    text-align: left;
}

th {
    background-color: #f2f2f2;
}

tr:nth-child(even) {
    background-color: #f9f9f9;
}

input[type="text"] {
    margin-bottom: 20px;
    padding: 10px;
    width: 200px;
}

button {
    padding: 10px 20px;
    cursor: pointer;
}
JavaScript逻辑(static/js/students.js)
// static/js/students.js
function fetchStudents() {
fetch('/students')
.then(response => response.json())
.then(data => {
const tableBody = document.getElementById('studentsTable').getElementsByTagName('tbody')[0];
tableBody.innerHTML = ''; // 清空表格
data.students.forEach(student => {
const row = tableBody.insertRow();
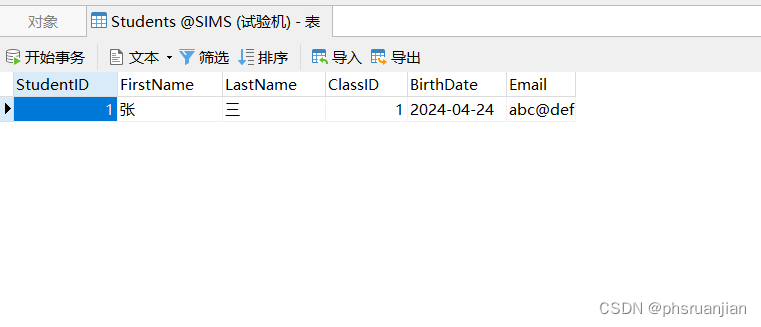
row.insertCell(0).textContent = student.StudentID;
row.insertCell(1).textContent = student.FirstName;
row.insertCell(2).textContent = student.LastName;
row.insertCell(3).textContent = student.ClassID;
row.insertCell(4).textContent = student.Email;
const actionsCell = row.insertCell(5);
actionsCell.innerHTML = `
<button οnclick="editStudent(${student.StudentID})">Edit</button>
<button οnclick="deleteStudent(${student.StudentID})">Delete</button>
`;
});
})
.catch(error => console.error('Error fetching students:', error));
}
function searchStudents() {
const searchTerm = document.getElementById('searchInput').value;
fetch(`/students?search=${searchTerm}`)
.then(response => response.json())
.then(data => {
const tableBody = document.getElementById('studentsTable').getElementsByTagName('tbody')[0];
tableBody.innerHTML = ''; // 清空表格
data.students.forEach(student => {
// 插入学生信息到表格
// 代码与 fetchStudents 函数中的类似
});
})
.catch(error => console.error('Error searching students:', error));
}
function editStudent(studentID) {
// 打开编辑学生信息的模态框或页面
// 可以通过JavaScript打开一个新的页面或模态框,并填充当前学生的信息
}
function deleteStudent(studentID) {
// 发送删除请求到服务器
fetch(`/students/${studentID}`, {
method: 'DELETE'
})
.then(response => {
if (response.ok) {
fetchStudents(); // 更新学生列表
} else {
alert('Error deleting student.');
}
})
.catch(error => console.error('Error deleting student:', error));
}
// 当文档加载完成时,获取学生列表
document.addEventListener('DOMContentLoaded', fetchStudents);
学生信息编辑页面
编辑页面将允许用户更新现有学生的信息。这个页面可以是模态框内的表单,也可以是一个新的页面。
HTML模板(templates/edit_student.html)
<!-- templates/edit_student.html -->

<!DOCTYPE html>
<html lang="en">
<head>
    <meta charset="UTF-8">
    <title>Edit Student</title>
    <!-- 引入CSS样式 -->
</head>
<body>
    <h1>Edit Student</h1>
    <form id="editStudentForm">
        <label for="firstName">First Name:</label>
        <input type="text" id="firstName" name="FirstName" required><br>

        <label for="lastName">Last Name:</label>
        <input type="text" id="lastName" name="LastName" required><br>

        <!-- 添加其他字段... -->

        <button type="submit">Save Changes</button>
    </form>
    <!-- 引入JavaScript逻辑 -->
</body>
</html>
结语
在本文中,我们介绍了学生信息管理系统前端页面的开发过程。通过使用HTML、CSS和JavaScript,我们实现了一个用户友好的界面,允许用户查看、搜索、添加、编辑和删除学生信息。
请注意,为了使前端代码正常工作,需要确保后端API已经正确实现,并且可以处理前端发送的请求。此外,实际部署时,还需要考虑诸如表单验证、错误处理、用户反馈等前端功能。
随着前端页面开发的完成,我们的SIMS项目已经初具雏形。在接下来的博文中,我们将进一步探讨如何将前端与后端结合起来,以及如何进行系统测试和部署。
敬请期待后续内容,一起见证SIMS的诞生与成长!


![[答疑]序列图怎么表达do...while循环](https://img-blog.csdnimg.cn/img_convert/d37574c26e77b3cddc55902a17260f86.png)