介绍一个QML的UI库,国人编写,作者也耍知乎。这个UI库确实好用,但是教程基本等于无,个人在使用中顺便记录一下学习内容。这玩意儿也有Pyside6的版本,有需要的可以查看PySide6-FluentUI-QML。
FluentUI库地址github.com/zhuzichu520/FluentUI

预览程序,可以在上面查看大部分组件
安装
浏览项目的Github页,注意有如下前置需求。
有缺少的可以在Qt目录下的MaintenanceTool.exe里进行安装。
- Qt Core, Qt Quick, Qt QML, Qt ShaderTool, Qt 5 Compatibility Module. (必备)
- Qt LinguistTool (optional,for translations)
- Tips: 在 Qt安装目录\版本\编译环境类型\bin 里
- 例如:F:\Qt\6.5.2\mingw_64\bin
- Qt Svg (optional, however essential for Qt 5)
确认前置条件满足后,开始安装,具体步骤参考:
FluentUI:如何在新项目中使用?_哔哩哔哩_bilibiliwww.bilibili.com/video/BV1ek4y1N7r8/编辑
这里要注意git clone有些坑,作者的库里有引用别的库的,clone过程使用如下
cd source
git clone --recursive https://github.com/zhuzichu520/FluentUI.git
cd FluentUI
完成后的FluentUI源码目录
注意检查完成后的framelesshelper与zxing-cpp可能是空的。我写这篇文章的时候,作者的引用的framelesshelper仍然处于NotFound状态, 可能需要直接去clone再放进此目录下。
删除framelesshelper与zxing-cpp文件夹,直接clone:
git clone --recursive https://github.com/zhuzichu520/framelesshelper.git
git clone https://github.com/zhuzichu520/zxing-cpp.git
完成安装后,Qt目录下会有QML模块生成的。路径类似F:\Qt\6.5.2\mingw_64\qml\FluentUI

路径中的版本和编译环境类型来源于图中
第一个程序
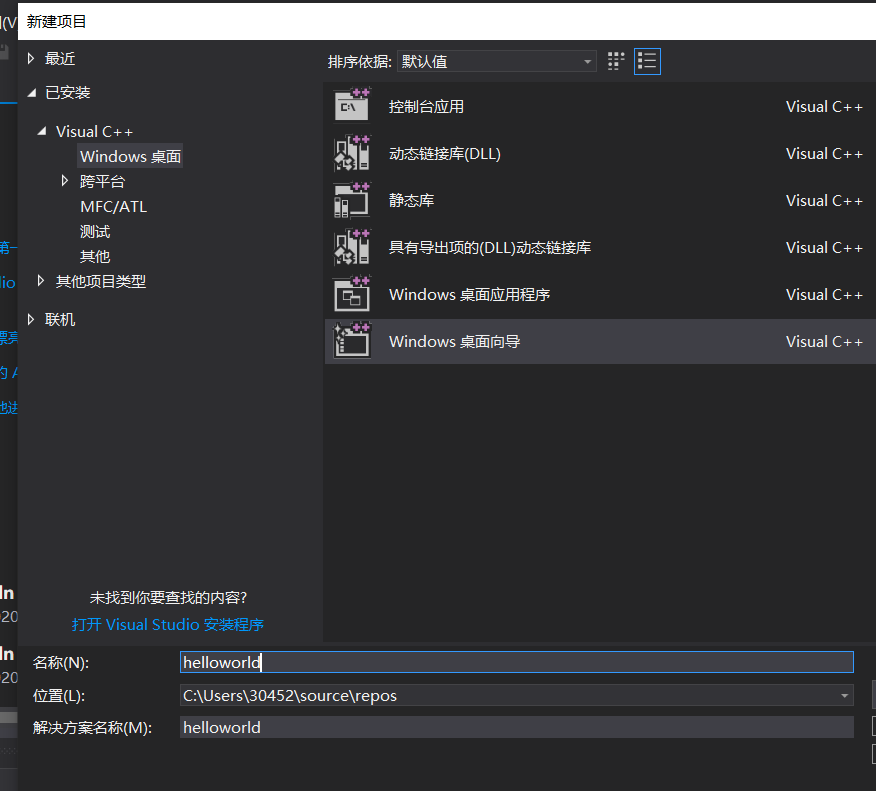
- 新建一个Qt Quick Application,为了方便可以命名为Tutorial1-FirstWindow

2. 选择前面用来编译FluentUI的Qt版本

3. 如果有选择项,构建方式选cmake而不是qmake或者qbs

新建项目完成后
4. 把之前的FluentUI文件夹丢到项目根目录下
5. 修改CMakeLists.txt, 改完之后类似上面的构建视频的cmakelist
cmake_minimum_required(VERSION 3.16)

# Tutorial1-FirstWindow是项目名, 修改为自己的项目名
project(Tutorial1-FirstWindow VERSION 0.1 LANGUAGES CXX)

set(CMAKE_AUTOMOC ON)
set(CMAKE_AUTORCC ON)
set(CMAKE_AUTOUIC ON)
set(CMAKE_CXX_STANDARD_REQUIRED ON)

set(FLUENTUI_BUILD_EXAMPLES OFF)
set(FLUENTUI_BUILD_FRAMELESSHEPLER OFF)
find_package(FluentUI)
find_package(Qt6 6.4 REQUIRED COMPONENTS Quick)

qt_standard_project_setup()

qt_add_executable(appTutorial1-FirstWindow
    main.cpp
)

qt_add_qml_module(appTutorial1-FirstWindow
    URI Tutorial1-FirstWindow
    VERSION 1.0
    QML_FILES Main.qml
)

# Qt for iOS sets MACOSX_BUNDLE_GUI_IDENTIFIER automatically since Qt 6.1.
# If you are developing for iOS or macOS you should consider setting an
# explicit, fixed bundle identifier manually though.
set_target_properties(appTutorial1-FirstWindow PROPERTIES
#    MACOSX_BUNDLE_GUI_IDENTIFIER com.example.appTutorial1-FirstWindow
    MACOSX_BUNDLE_BUNDLE_VERSION ${PROJECT_VERSION}
    MACOSX_BUNDLE_SHORT_VERSION_STRING ${PROJECT_VERSION_MAJOR}.${PROJECT_VERSION_MINOR}
    MACOSX_BUNDLE TRUE
    WIN32_EXECUTABLE TRUE
)

target_link_libraries(appTutorial1-FirstWindow
    PRIVATE Qt6::Quick
)

include(GNUInstallDirs)
install(TARGETS appTutorial1-FirstWindow
    BUNDLE DESTINATION .
    LIBRARY DESTINATION ${CMAKE_INSTALL_LIBDIR}
    RUNTIME DESTINATION ${CMAKE_INSTALL_BINDIR}
)
6. 修改Main.qml代码:
import QtQuick
import QtQuick.Window
// 注意这里,如果报错的话可能是前面构建FluentUI失败。检查这种路径F:\Qt\6.5.2\mingw_64\qml\FluentUI
import FluentUI

Window {
    width: 640
    height: 480
    visible: true
    title: qsTr("Hello World")

    FluFilledButton {
        width: 100
        height: 50
        anchors.centerIn: parent
        text: "HelloWorld"
    }

}
FluFilledButton
使用FluApp与FluWindow
- QtCreator右键项目选择添加新文件->Qt Resource File->命名resource
- 在项目根目录下新建文件夹qml
- qml文件夹内新建文件AppMainWindow.qml
- 修改AppMainWindow.qml
import QtQuick 2.15
import FluentUI

FluWindow {

    id: mainWindow

    // 避免双屏情景下的宽度溢出
    minimumWidth: Screen.width * 0.8
    minimumHeight: Screen.desktopAvailableHeight * 0.8
    visible: true
    title: "Helloworld"
    //appBar: undefined

}- 右键resource.qrc->添加现有文件->AppMainWindow.qml

创建完成后的项目
5. 右键resource.qrc下的AppMainWindow-> Copy URL "qrc:/qml/AppMainWindow.qml"
6. 修改Main.qml
import QtQuick
import QtQuick.Window
import FluentUI

Window {

    id: app
    flags: Qt.SplashScreen
    // 一定要是false
    visible: false

    Component.onCompleted: {
        // 初始化FluApp,实质是记录了app这个根组件实例用以获取QQmlEngine
        // 然后从engine中以initialRoute文本找到用户定义的组件.qml(在这里是AppMainWindow.qml)
        // 实例化AppMainWindow,在窗口实例表中对照是否已有相同窗口存在,若存在则会判断launchMode
        // 所以AppMainWindow要继承自FluWindow, 否则必须自行添加Property: _pageRegister 、 argument、 _route、 launchMode
        FluApp.init(app)
        // 相关枚举大部分都在Def.h里
        FluTheme.darkMode = FluThemeType.Light
        // 开启动画
        FluTheme.enableAnimation = true
        // 开启文本本地渲染
        FluTheme.nativeText = true
        // 切换主题色
        // FluTheme.primaryColor = FluColors.Orange
        // 路由表
        FluApp.routes = {
            "/": "qrc:/qml/AppMainWindow.qml"
        }
        // 初始化路径
        FluApp.initialRoute = "/"
        FluApp.run()
    }
}
Ctrl+R运行

FluWindow
图中的FluWindow拥有一个默认的FluAppBar,这个玩意儿是使用Loader动态载入的Component。我遇到过一个bug就是因为window的appbar还没有载入完成,我的canvas组件就依据appBar进行paint导致页面错误。所以可以自定义一个appBar。
这个appBar其实是有与FramelessHelper联动的,我的工作机上FramelessHelper时好时坏,就不无人子弟了。
刚刚AppMainWindow.qml里,取消这一行的注释:
appBar: undefined后面再加上新的AppBar,整个文件内容:
import QtQuick 2.15
import FluentUI

FluWindow {

    id: mainWindow

    // 避免双屏情景下的宽度溢出
    minimumWidth: Screen.width * 0.8
    minimumHeight: Screen.desktopAvailableHeight * 0.8
    visible: true
    title: "Tutorial1-FirstWindow"
    appBar: undefined

    // 窗口标题栏
    FluAppBar {
        id: title_bar
        title: mainWindow.title
        // 可以在resource.qrc中添加ico,把url复制过来,程序左上角就有图标了
        // icon:"qrc:/example/res/image/favicon.ico"
        anchors {
            top: parent.top
            left: parent.left
            right: parent.right
        }
        showDark: true
        darkText: "Dark Mode"
    }
}
这里点了右上角的dark mode会切换黑/白模式
关闭窗口提示
在AppMainWindow.qml中添加代码
    // 退出软件确认提示框
    FluContentDialog {
        id: dialog_close
        title: "退出"
        message: "确定要退出程序吗?"
        negativeText: "最小化"
        buttonFlags: FluContentDialogType.NegativeButton | FluContentDialogType.NeutralButton
                     | FluContentDialogType.PositiveButton
        onNegativeClicked: {
            mainWindow.hide()
        }
        positiveText: "退出"
        neutralText: "取消"
        onPositiveClicked: {
            FluApp.exit()
        }
    }
onPositiveClicked这里,如果是1.6.0版本之前的FluentUI,需要写成
            mainWindow.deleteWindow()
            FluApp.closeApp()
现在Ctrl+R运行程序,点击右上角关闭窗口,发现并没有什么不一样
我们查看FluWindow的代码里有:
    Connections{
        target: window
        function onClosing(event){closeListener(event)}
    }
    property var closeListener: function(event){
        if(closeDestory){
            destoryOnClose()
        }else{
            visible = false
            event.accepted = false
        }
    }
我们查看QML的Window 文档会发现
closing(CloseEvent close)
This signal is emitted when the user tries to close the window.
This signal includes a close parameter. The close.accepted property is true by default so that the window is allowed to close; but you can implement an onClosing handler and set close.accepted = false if you need to do something else before the window can be closed.
所以FluWindow的onClosing已经被监听了,会调用closeListener, 我们直接用closeListener就行。
    closeListener:function(event){
        // 打开关闭确认 弹窗
        dialog_close.open()
        // 取消关闭先
        event.accepted = false
    }
完整代码
import QtQuick 2.15
import FluentUI

FluWindow {

    id: mainWindow

    // 避免双屏情景下的宽度溢出
    minimumWidth: Screen.width * 0.8
    minimumHeight: Screen.desktopAvailableHeight * 0.8
    visible: true
    title: "Tutorial1-FirstWindow"
    appBar: undefined

    closeListener: function (event) {
        dialog_close.open()
        // 取消窗口关闭
        event.accepted = false
    }

    // 窗口标题栏
    FluAppBar {
        id: title_bar
        title: mainWindow.title
        // icon:"qrc:/example/res/image/favicon.ico"
        anchors {
            top: parent.top
            left: parent.left
            right: parent.right
        }
        showDark: true
        darkText: "Dark Mode"
    }

    // 退出软件确认提示框
    FluContentDialog {
        id: dialog_close
        title: "退出"
        message: "确定要退出程序吗?"
        negativeText: "最小化"
        buttonFlags: FluContentDialogType.NegativeButton | FluContentDialogType.NeutralButton
                     | FluContentDialogType.PositiveButton
        onNegativeClicked: {
            mainWindow.hide()
        }
        positiveText: "退出"
        neutralText: "取消"
        onPositiveClicked: {
            FluApp.exit()
        }
    }
}


![[lesson21]对象的构造顺序](https://img-blog.csdnimg.cn/direct/ddc668676e0f48a487b0422d60b0b124.png#pic_center)