一、屏幕分辨率
1.在creator中设置分辨率

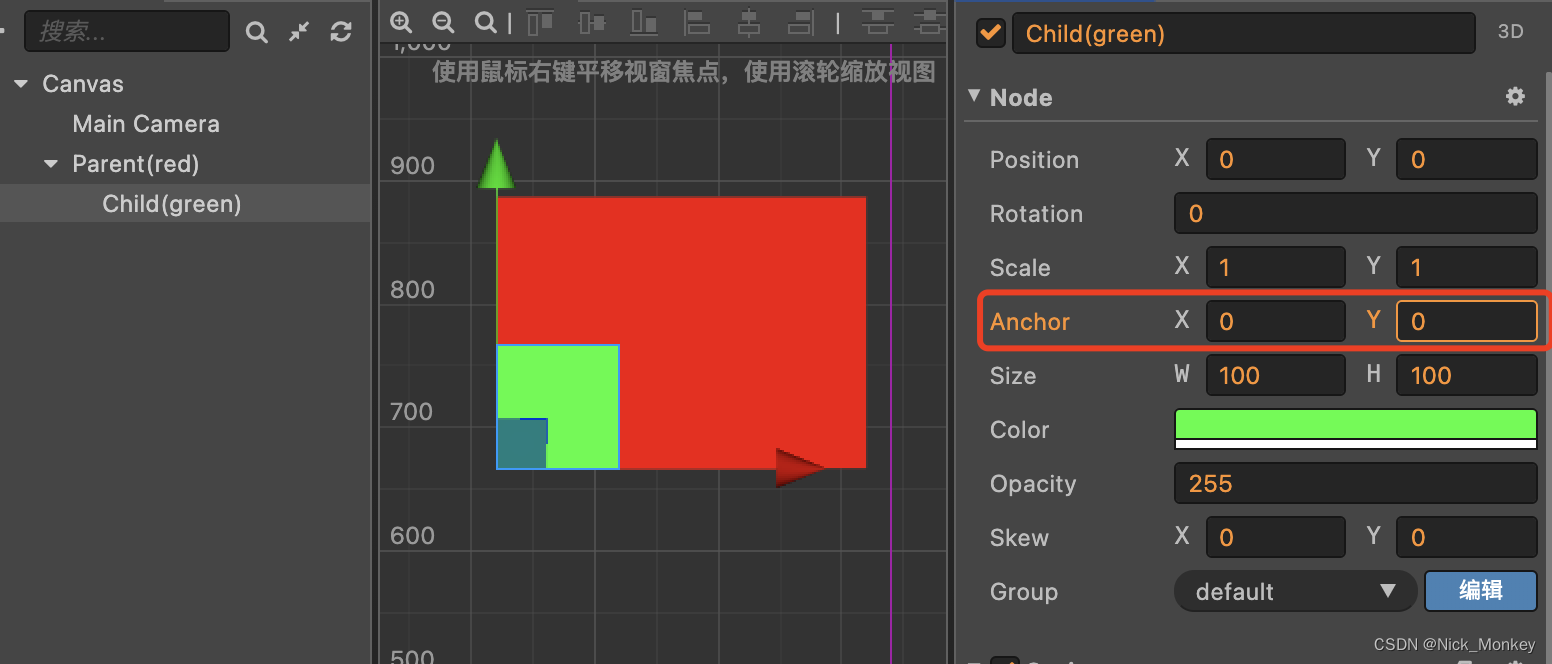
1)打开对应场景;
2)选中【层级管理器】中的Canvas节点;
3)修改【属性检察器】中Canvas组建的属性即可;
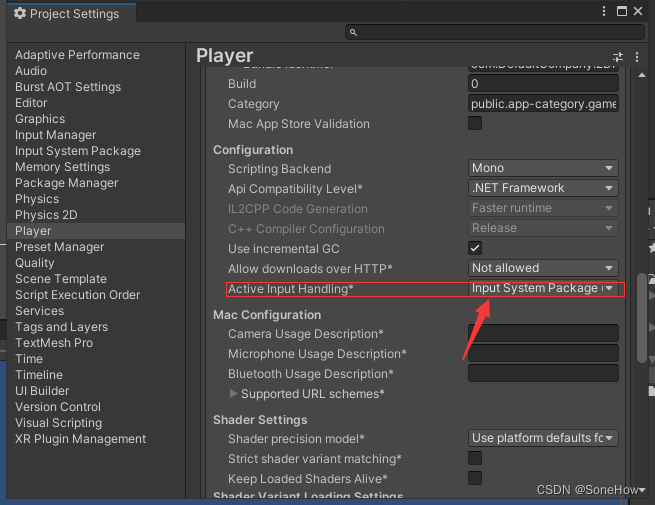
2.在Unity中设置屏幕分辨率
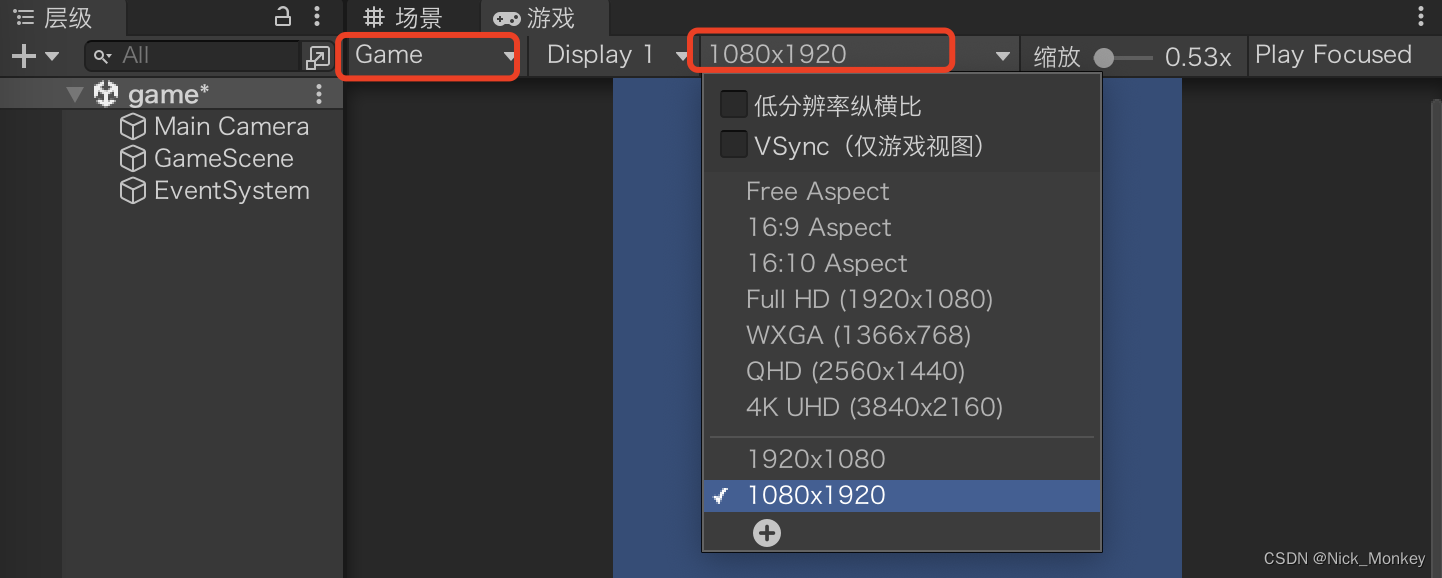
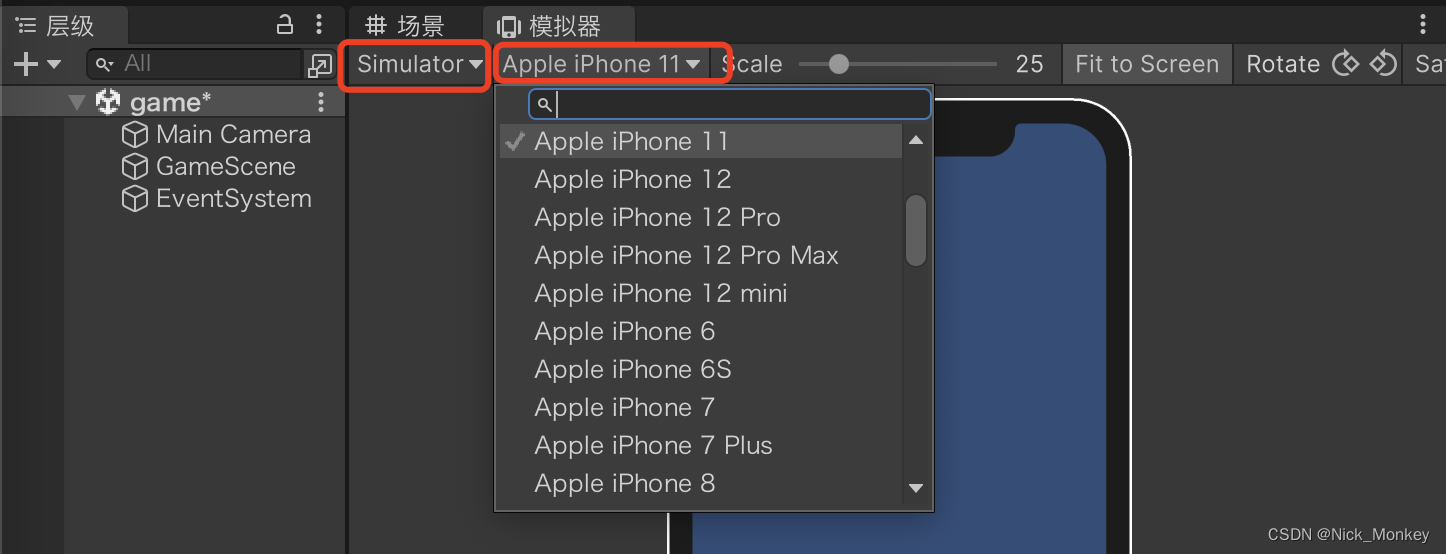
1)切换到【Game视图】或【Simulator视图】;
2)上图中点击【第一个红框】位置可以选择Game模式或者Simulator模式;
3)图1在Game模式可以在【第二个红框】位置可以添加选择各种分辨率;
4)图2在Simulator模式可以在【第二个红框】位置选择对应手机模拟器;
二、属性声明
1.在Creator中声明属性
- 下面的属性中使用装饰器@property()装饰的属性会出现在【属性检查器】页面
import GameView from "./GameView";

const {ccclass, property} = cc._decorator;

@ccclass
export default class GameBoxCell extends cc.Component {
    // 一些基础数据类型
    @property()
    eStr: string = "";
    @property()
    eNum: number = 0;
    @property()
    eBol: Boolean = false;
    @property([String])
    eArr: String[] = [];
    // 一些UI组件
    @property(cc.Sprite)
    eImg: cc.Sprite = null;
    @property(cc.Label)
    eLab: cc.Label = null;
    @property(cc.Button)
    eBtn: cc.Button = null;
    @property(cc.Toggle)
    eTogg:cc.Toggle = null;
    @property(cc.ScrollView)
    eScroll: cc.ScrollView = null;
    // 节点和预制
    @property(cc.Node)
    eNod: cc.Node = null;
    @property(cc.Prefab)
    ePre: cc.Prefab = null;
    // 一些资源
    @property([cc.SpriteFrame])
    eSfArr: cc.SpriteFrame[] = []; // 图片资源数组
    @property(cc.AudioClip)
    eAudio: cc.AudioClip = null; // 音频资源
    // 自定义脚本
    @property(GameView)
    eGameView: GameView = null;

    start () {

    }
}
2.在Unity中声明属性
- 下面的属性都只有用public声明的时候才会出现在【检查器】页面中;
using UnityEngine;
using UnityEngine.UI;

public class GameBoxCell : MonoBehaviour
{
    // 基础数据类型
    public string eTitle;
    public int eDay;
    public float eTime;
    public bool eIsWeekend;
    // 节点和预制
    public GameObject ePrefab;
    // 一些组件(这些UI组件来自UnityEngine.UI)
    public Image eImg;
    public Text eText;
    public Button eBtn;
    public InputField eEdit;
    public Dropdown eDown;
    // 精灵图片资源数组
    public Sprite[] eSprArr;
    // 自定义脚本组件
    public GameView gameView;

    void Start()
    {

    }
}
三、代码中修改UI
1.在Creator中
// 修改Lable文本
this.eLab.string = "新文本";
// 替换图片
this.eImg.spriteFrame = this.eSfArr[0];
// 节点隐藏
this.node.active = false;
2.在Unity中
// 修改Text文本
this.Score.text = "22";
// 替换图片
this.eImg.sprite = this.eSprArr[0];
四、预制件使用
- 预制件的创建和使用方式是一致的
1.在Cocos中
const {ccclass, property} = cc._decorator;

@ccclass
export default class GmaeView extends cc.Component {

    // 声明一个预制件属性
    @property(cc.Prefab)
    eGameView: cc.Prefab = null;


    onLoad () {
        // 销毁当前节点上的所有子节点
        this.node.destroyAllChildren();

        // 实例化预制件
        const view = cc.instantiate(this.eGameView);
        // 将其添加到当前脚步所在节点
        this.node.addChild(view);

        // 调用挂载的脚本GameView的init函数
        view.getComponent(GameView).init(this);
    }

}
2.在Unity中
using UnityEngine;

public class GameScene : MonoBehaviour
{
    // 声明预制件属性
    public GameObject eGameView;

    void Start()
    {
        // 销毁当前节点的所有子节点
        Transform transform;
        for (int i = 0; i < this.transform.childCount; i++)
        {
            transform = this.transform.GetChild(i);
            GameObject.Destroy(transform.gameObject);
        }

        // 实例化预制件,默认会添加到当前脚本所见节点
        GameObject obj = Instantiate(eGameView);

        // 将其添加到当前脚本所在节点
        obj.transform.SetParent(this.transform);

        // 调用挂载的脚本GameView的init函数
        obj.GetComponent<GameView>().init(this);
    }
}


![[C/C++] -- 二叉树](https://img-blog.csdnimg.cn/direct/ded55a5a05b74de39194d3842c6995e2.png)