说明
本文记录一下,使用Electron创建一个简单的客户端应用的全流程。
在官方文档的基础上,针对依赖安装过程中出现的异常,进行了补充,确保可以正常的创建应用。
创建步骤
0、校验node版本
官方文档建议使用 最新版本的 NodeJS 。
node -v
npm -v
1、创建目录
mkdir electron01
2、初始化目录
注意 :
1、 初始化过程中,author与description可为任意值,但对于应用打包是必填项。
2、entry point应为main.js。
cd electron01
npm init
初始化之后会生成
package.json文件,文件内容如下
{
  "name": "electron01",
  "version": "1.0.0",
  "description": "electron project 01",
  "main": "main.js",
  "author": "northcastle",
  "license": "ISC",
}
3、npm 配置electron的安装源(*)
当正常使用 npm 安装提示报错时,就需要进行这一步骤。
当正常使用 npm 安装提示报错时,就需要进行这一步骤。
当正常使用 npm 安装提示报错时,就需要进行这一步骤。
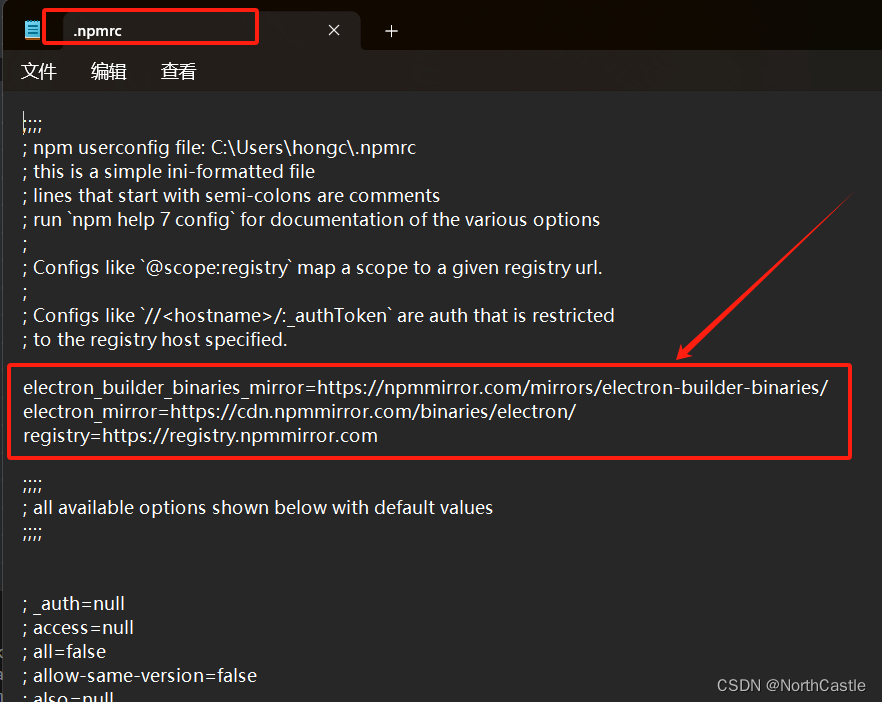
npm config edit
执行上述命令后,会打开记事本,在空白处添加如下内容:
registry=https://registry.npmmirror.com
electron_mirror=https://cdn.npmmirror.com/binaries/electron/
electron_builder_binaries_mirror=https://npmmirror.com/mirrors/electron-builder-binaries/
4、刷新npm的缓存
npm cache clean --force
5、安装electron依赖
npm install --save-dev electron
至此,依赖安装过程就结束了。
6、创建main.js
// 导入依赖
const { app, BrowserWindow } = require('electron')

// 在你文件顶部导入 Node.js 的 path 模块
const path = require('node:path')

// 创建窗口
const createWindow = () => {
    const win = new BrowserWindow({
      width: 800,
      height: 600,
      webPreferences: {
        preload: path.join(__dirname, 'preload.js')
      }
    })

    win.loadFile('index.html')
}

// 应用 ready 后执行窗口创建动作
app.whenReady().then(() => {
    createWindow()

    // 当没有窗口的时候,创建一个窗口
    app.on('activate', () => {
        if (BrowserWindow.getAllWindows().length === 0) createWindow()
    })
  })

// windows & linux 上关闭窗口
app.on('window-all-closed', () => {
    if (process.platform !== 'darwin') app.quit()
})
7、创建index.html
<!DOCTYPE html>
<html>
  <head>
    <meta charset="UTF-8">
    <!-- https://developer.mozilla.org/zh-CN/docs/Web/HTTP/CSP -->
    <meta http-equiv="Content-Security-Policy" content="default-src 'self'; script-src 'self'">
    <title>你好!</title>
  </head>
  <body>
    <h1>你好!</h1>
    我们正在使用 Node.js <span id="node-version"></span>,
    Chromium <span id="chrome-version"></span>,
    和 Electron <span id="electron-version"></span>.


    <!-- 可以加载其他的脚本文件 -->
    <!-- <script src="./renderer.js"></script> -->
  </body>
</html>
8、创建preload.js
window.addEventListener('DOMContentLoaded', () => {
    const replaceText = (selector, text) => {
      const element = document.getElementById(selector)
      if (element) element.innerText = text
    }

    for (const dependency of ['chrome', 'node', 'electron']) {
      replaceText(`${dependency}-version`, process.versions[dependency])
    }
  })
9、添加启动脚本
package.json 文件中添加如下内容 :
运行npm start时,执行electron .命令,启动项目。
  "scripts": {
    "start": "electron .",
  },
10、至此项目结构如下
electron01
	| -- node_modules
	| -- main.js
	| -- index.html
	| -- preload.js
	| -- package.json
11、运行
执行我们配置的脚本,运行项目
npm start
启动成功之后,界面如下:
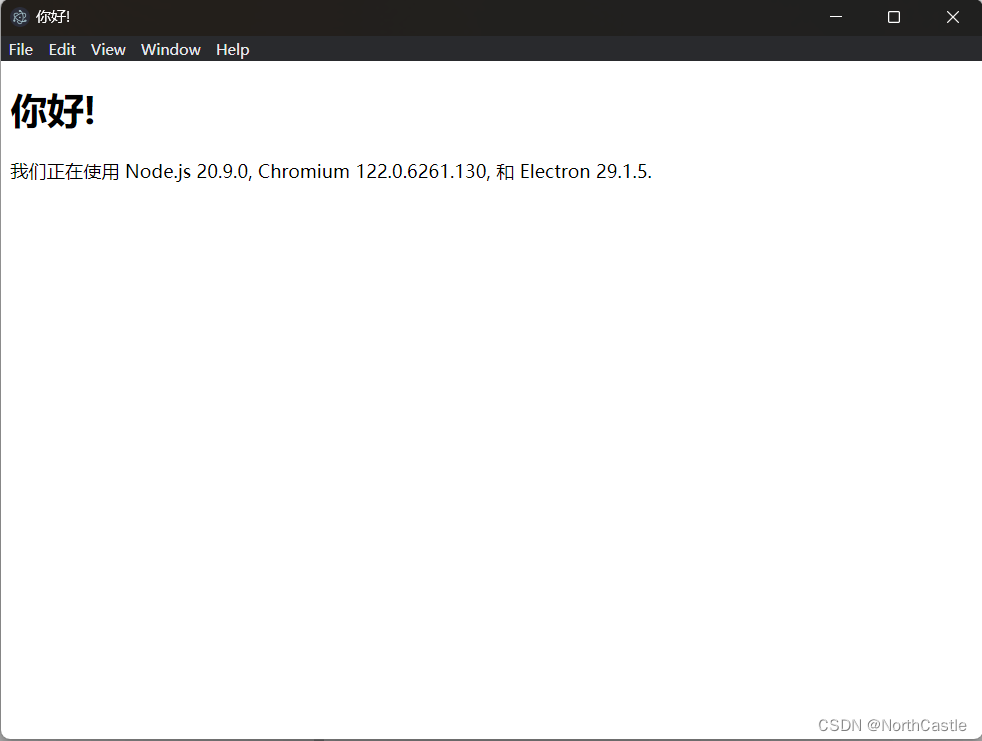
至此,使用 Electron创建项目的入门应用案例就完成了。