OceanBase
OceanBase就不必多加介绍了,本次主要是分享对于它的安装使用,先说说背景,首先接触是因为信创国产化的要求,为满足支持国产化,安装了Arm架构下版本4.0.0,满足支持通过。后来项目实际使用,重新进行搭建,采用了最新版4.2.2.1,本次是基于X86进行安装部署,经历过Arm和X86两种安装,他们的安装除了RPM包不同,安装过程一样,本次是基于X86安装最新版4.2.2.1,希望能帮到大家~
一:下载想要安装的版本rpm包
OceanBase相关组件很多,能力也很强,如果资源充足,可以安装所有相关东西,本次主要说明最小化使用组件安装,下面内容就可以完成一个数据库,当然OBP(obproxy)如不需要,也可以不安装,但本人还是推荐使用。
- observer:oceanbase数据库
- obproxy:oceanbase反向代理
- obclient:oceanbase客户端
- obd:oceanbase deploy

二:安装前的一些准备工作
注:部分内容,单机可跳过,会具体标注
2.1 创建用户
先创建adminy用户
adduser admin

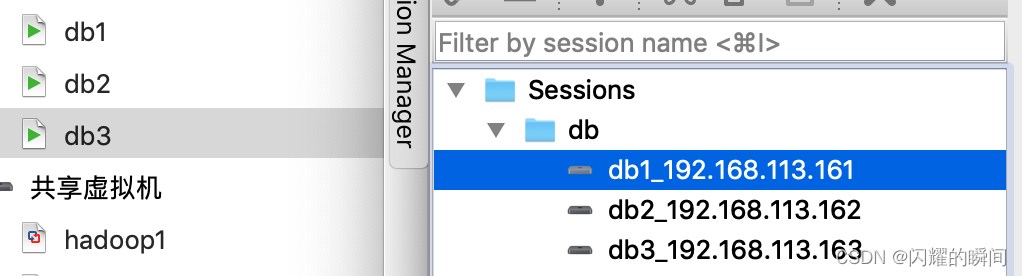
2.2 主机之间配置ssh互信
集群环境下需要,如果只是部署单机,这一步可以跳过。
因为机器有限,我这里采用双机部署
vi /etc/hosts

echo "admin ALL=(ALL)NOPASSWD:ALL" >>/etc/sudoers
ssh-keygen
ssh-copy-id host1
ssh-copy-id host2 对应几个host写几个
2.3 修改内核参数
也可以不进行修改,看个人
[root]# vim /etc/sysctl.conf
net.core.somaxconn = 2048

net.core.netdev_max_backlog = 10000

net.core.rmem_default = 16777216

net.core.wmem_default = 16777216

net.core.rmem_max = 16777216

net.core.wmem_max = 16777216


net.ipv4.ip_local_port_range = 3500 65535

net.ipv4.ip_forward = 0

net.ipv4.conf.default.rp_filter = 1

net.ipv4.conf.default.accept_source_route = 0

net.ipv4.tcp_syncookies = 0

net.ipv4.tcp_rmem = 4096 87380 16777216

net.ipv4.tcp_wmem = 4096 65536 16777216

net.ipv4.tcp_max_syn_backlog = 16384

net.ipv4.tcp_fin_timeout = 15

net.ipv4.tcp_max_syn_backlog = 16384

net.ipv4.tcp_tw_reuse = 1

net.ipv4.tcp_tw_recycle = 1

net.ipv4.tcp_slow_start_after_idle=0


vm.swappiness = 0

vm.min_free_kbytes = 2097152

vm.max_map_count=655360

fs.aio-max-nr=1048576
[root]# sysctl –p
2.4 修改全局会话变量
已经登录的会话需要重连,修改句柄数
- vi /etc/security/limits.conf
添加:
* soft nofile 655360
* hard nofile 655360
* soft nproc 655360
* hard nproc 655360
* soft core unlimited
* hard core unlimited
* soft stack unlimited
* hard stack unlimited
- vi /etc/sysctl.conf
添加:
fs.file-max = 6553560
- 刷新
sysctl -p
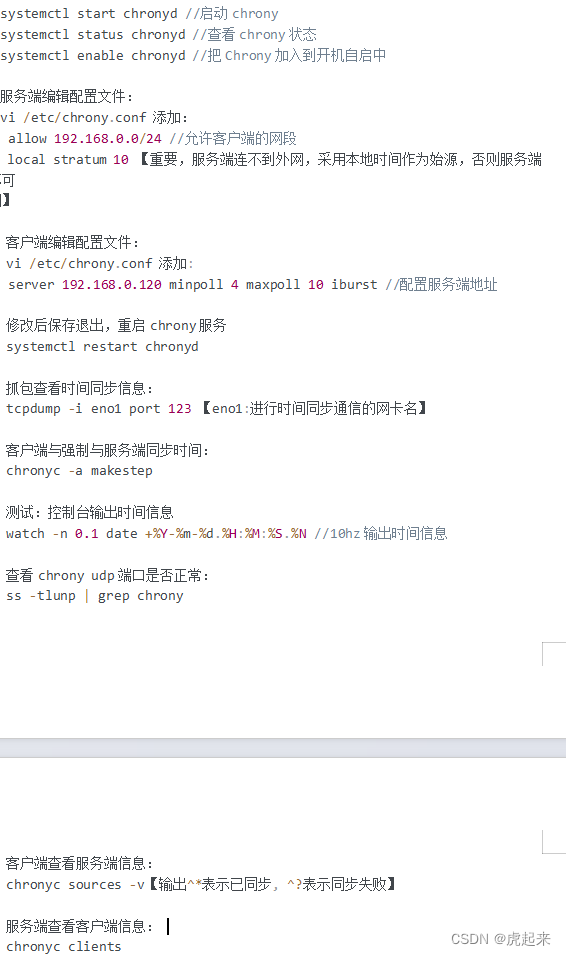
2.5 配置时钟同步
这一步,如果是单机可以跳过,如果是集群环境,就得验证,涉及到集群之间通信同步等问题,保证时间一致
![]()
![]()
需要同步时间,自行根据系统类型设置同步
- 安装chrony
[root]# yum install -y chrony
- 配置与阿里时钟同步
[root]# vi /etc/chrony.conf
server ntp.aliyun.com minpoll 4 maxpoll 10 iburst

allow xxx.xxx.xxx.xxx

allow xxx.xxx.xxx.xxx

local stratum 10
重启chronyd
[root]# systemctl restart chronyd
查看时间同步活动
[root]# chronyc activity
查看时间服务器
[root]# chronyc sources
查看同步状态
[root]# chronyc sources -v
校准时间服务器:
[root]# chronyc tracking
2.6 关闭防火墙
非集群,只部署单机的话,可以跳过
[root]# systemctl stop firewalld
[root]# systemctl disable firewalld
也可根据端口使用情况,开启对应的端口
2.7 关闭selinux
[root]# vi /etc/selinux/config
添加
SELINUX=disabled
[root]# setenforce 0
三:部署
3.1 单机部署
3.1.1安装obd
- 安装部署工具
rpm -ivh ob-deploy-2.6.2-2.el7.x86_64.rpm

- 设置环境变量
source /etc/profile.d/obd.sh
3.1.2构建本地源
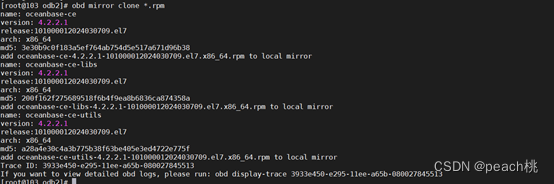
- 移动rpm包,构建本地源
obd mirror clone /home/rpm/*.rpm

- 删除远程源
rm -rf ~/.obd/mirror/remote/
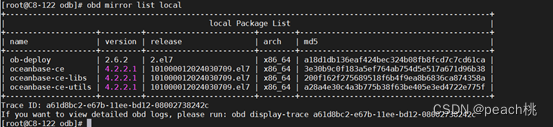
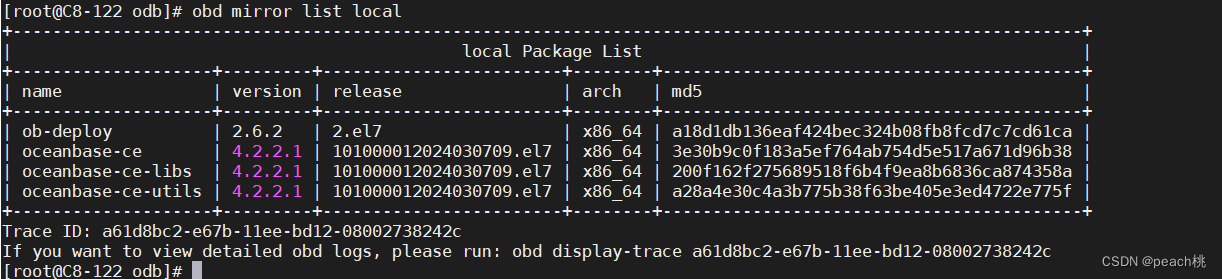
- 查看本地源
obd mirror list local

3.1.3编辑OBD配置文件
- 创建mini-local-example.yaml配置文件
获取方式
https://github.com/oceanbase/obdeploy/blob/master/example/mini-local-example.yaml
这里我提供一份
oceanbase-ce:
  servers:
    # Please don't use hostname, only IP can be supported
    - 127.0.0.1
  global:
    #  The working directory for OceanBase Database. OceanBase Database is started under this directory. This is a required field.
    home_path: /root/observer
    # The directory for data storage. The default value is $home_path/store.
    # data_dir: /data
    # The directory for clog, ilog, and slog. The default value is the same as the data_dir value.
    # redo_dir: /redo
    # Please set devname as the network adaptor's name whose ip is  in the setting of severs.
    # if set severs as "127.0.0.1", please set devname as "lo"
    # if current ip is 192.168.1.10, and the ip's network adaptor's name is "eth0", please use "eth0"
    devname: lo
    mysql_port: 2881 # External port for OceanBase Database. The default value is 2881. DO NOT change this value after the cluster is started.
    rpc_port: 2882 # Internal port for OceanBase Database. The default value is 2882. DO NOT change this value after the cluster is started.
    zone: zone1
    cluster_id: 1
    # please set memory limit to a suitable value which is matching resource.
    memory_limit: 6G # The maximum running memory for an observer
    system_memory: 1G # The reserved system memory. system_memory is reserved for general tenants. The default value is 30G.
    datafile_size: 20G # Size of the data file.
    log_disk_size: 24G # The size of disk space used by the clog files.
    cpu_count: 16
    production_mode: false
    syslog_level: INFO # System log level. The default value is INFO.
    enable_syslog_wf: false # Print system logs whose levels are higher than WARNING to a separate log file. The default value is true.
    enable_syslog_recycle: true # Enable auto system log recycling or not. The default value is false.
    max_syslog_file_count: 4 # The maximum number of reserved log files before enabling auto recycling. The default value is 0.
    # root_password: # root user password, can be empty
注意事项:
servers:只能使用ip,不能使用主机名(hostname)
cpu_count:CPU数量可以大于物理CPU的数量。
home_path 是 OceanBase 数据库的工作目录,OceanBase 数据库在此目录下启动,您需提前创建。
内存和CPU核数根据自己的机器进行调整,如果太大资源不够,后面启动时会进行报错,那会更改也可以,需要重新加载,后面问题解决里我会说明如何对于配置修改和加载
- 配置文件中的home权限
chown -R admin:admin /home/observer/(你的home_path路径)
3.1.4部署observer
- 进行单机部署observer
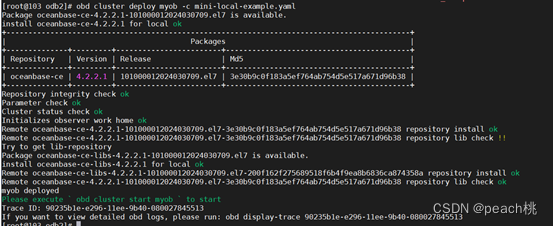
obd cluster deploy myob -c mini-local-example.yaml
如果遇到问题,可查看最后一章问题汇总;部署正常显示为:
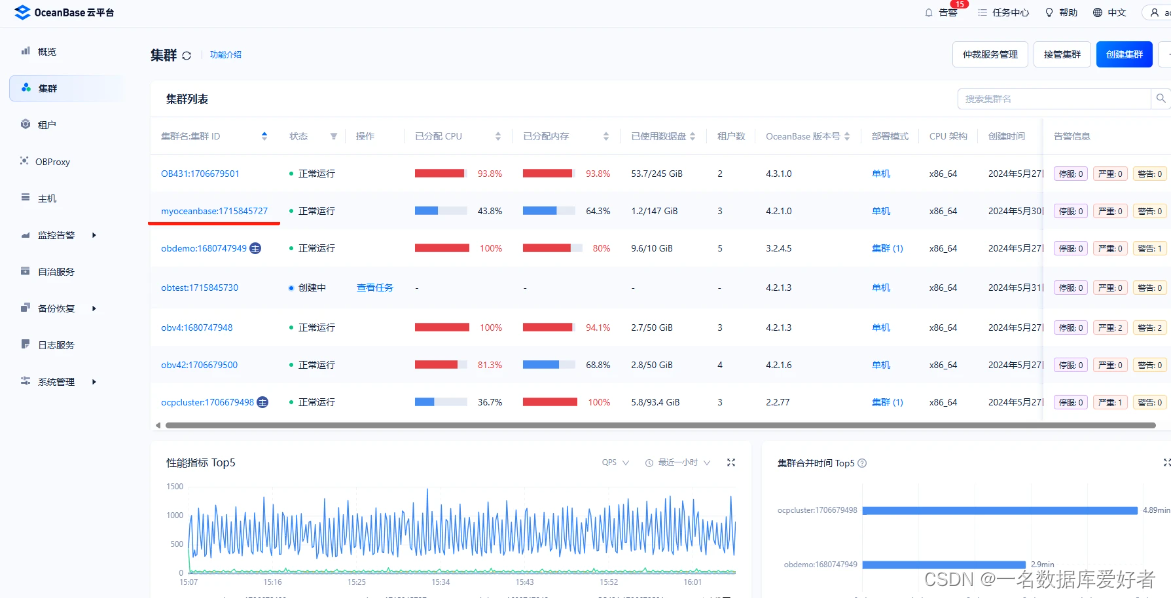
- 查看部署结果
obd cluster list

OBD 中注册的集群状态有如下几种。
- configured:已配置,表示 OBD 中已包含该集群的配置文件,但该集群还未部署,此时可执行 obd cluster deploy 命令部署该集群。
- deployed:已部署,表示该集群已部署,但是还未启动,此时可执行 obd cluster start 命令启动该集群。
- running:运行中,表示集群正在运行中。
- stopped:已停止,表示集群中有组件已被停止,此时可执行 obd cluster start 命令启动该集群。
- upgrading:升级中,表示集群中有组件处于升级中。
- destroyed:已销毁,表示该集群已被销毁。
- 启动集群
obd cluster start myob

默认的密码就在日志下方,具体可以进到数据库修改
然后再看状态,就是runing状态

3.2集群部署—双主
该部署方式,先不部署代理,只是部署两台服务器的数据库,数据库之间表数据实时同步,类似于双主数据库,当然,也可以部署多台,效果一致
3.2.1安装obd
- 安装部署工具
rpm -ivh ob-deploy-2.6.2-2.el7.x86_64.rpm

- 设置环境变量
source /etc/profile.d/obd.sh
3.2.2构建本地源
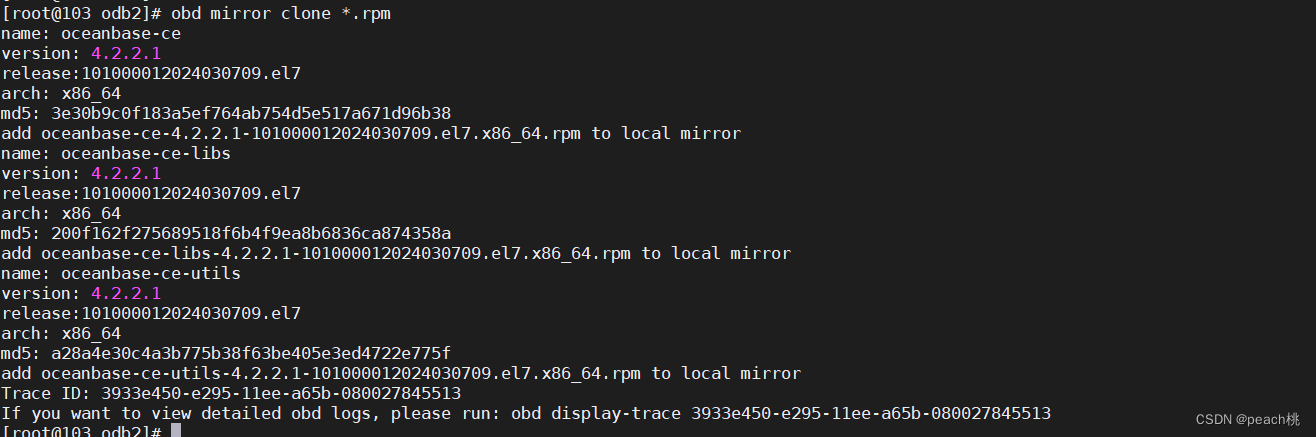
- 移动rpm包,构建本地源
obd mirror clone /home/rpm/*.rpm
- 删除远程源
rm -rf ~/.obd/mirror/remote/
- 查看本地源
obd mirror list local
3.2.3编辑OBD配置文件
- 创建mini-distributed-example.yaml配置文件
获取方式
https://github.com/oceanbase/obdeploy/blob/master/example/mini-distributed-example.yaml
这里我提供一份
## Only need to configure when remote login is required
# user:
#   username: your username
#   password: your password if need
#   key_file: your ssh-key file path if need
#   port: your ssh port, default 22
#   timeout: ssh connection timeout (second), default 30
oceanbase-ce:
  servers:
    - name: server1
      # Please don't use hostname, only IP can be supported
      ip: ip
    - name: server2
      ip: ip
    #- name: server3
    #  ip: 172.19.33.4
  global:
    # Starting from observer version 4.2, the network selection for the observer is based on the 'local_ip' parameter, and the 'devname' parameter is no longer mandatory.
    # If the 'local_ip' parameter is set, the observer will first use this parameter for the configuration, regardless of the 'devname' parameter.
    # If only the 'devname' parameter is set, the observer will use the 'devname' parameter for the configuration.
    # If neither the 'devname' nor the 'local_ip' parameters are set, the 'local_ip' parameter will be automatically assigned the IP address configured above.
    # devname: eth0
    cluster_id: 1
    # please set memory limit to a suitable value which is matching resource.
    memory_limit: 6G # The maximum running memory for an observer
    system_memory: 1G # The reserved system memory. system_memory is reserved for general tenants. The default value is 30G.
    datafile_size: 2G # Size of the data file.
    datafile_next: 2G # the auto extend step. Please enter an capacity, such as 2G
    datafile_maxsize: 20G # the auto extend max size. Please enter an capacity, such as 20G
    log_disk_size: 14G # The size of disk space used by the clog files.
    cpu_count: 8
    production_mode: false
    enable_syslog_wf: false # Print system logs whose levels are higher than WARNING to a separate log file. The default value is true.
    enable_syslog_recycle: true # Enable auto system log recycling or not. The default value is false.
    max_syslog_file_count: 4 # The maximum number of reserved log files before enabling auto recycling. The default value is 0.
    # root_password: # root user password, can be empty
  server1:
    mysql_port: 2881 # External port for OceanBase Database. The default value is 2881. DO NOT change this value after the cluster is started.
    rpc_port: 2882 # Internal port for OceanBase Database. The default value is 2882. DO NOT change this value after the cluster is started.
    #  The working directory for OceanBase Database. OceanBase Database is started under this directory. This is a required field.
    home_path: /home/admin/observer
    # The directory for data storage. The default value is $home_path/store.
    # data_dir: /data
    # The directory for clog, ilog, and slog. The default value is the same as the data_dir value.
    # redo_dir: /redo
    zone: zone1
  server2:
    mysql_port: 2881 # External port for OceanBase Database. The default value is 2881. DO NOT change this value after the cluster is started.
    rpc_port: 2882 # Internal port for OceanBase Database. The default value is 2882. DO NOT change this value after the cluster is started.
    #  The working directory for OceanBase Database. OceanBase Database is started under this directory. This is a required field.
    home_path: /home/admin/observer
    # The directory for data storage. The default value is $home_path/store.
    # data_dir: /data
    # The directory for clog, ilog, and slog. The default value is the same as the data_dir value.
    # redo_dir: /redo
    zone: zone2
  #server3:
  #  mysql_port: 2881 # External port for OceanBase Database. The default value is 2881. DO NOT change this value after the cluster is started.
  #  rpc_port: 2882 # Internal port for OceanBase Database. The default value is 2882. DO NOT change this value after the cluster is started.
    #  The working directory for OceanBase Database. OceanBase Database is started under this directory. This is a required field.
  #  home_path: /root/observer
    # The directory for data storage. The default value is $home_path/store.
    # data_dir: /data
    # The directory for clog, ilog, and slog. The default value is the same as the data_dir value.
    # redo_dir: /redo
  #  zone: zone3
注意事项:
cpu_count:CPU数量可以大于物理CPU的数量。
home_path 是 OceanBase 数据库的工作目录,OceanBase 数据库在此目录下启动,您需提前创建。
内存和CPU核数根据自己的机器进行调整,如果太大资源不够,后面启动时会进行报错,那会更改也可以,需要重新加载,后面问题解决里我会说明如何对于配置修改和加载
- 配置文件中的home权限
chown -R admin:admin /home/admin/observer(你的home_path路径)
3.2.4部署observer
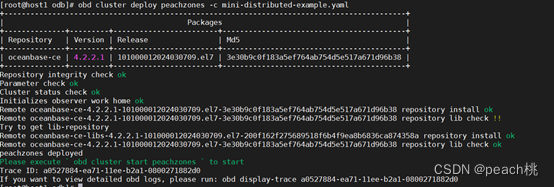
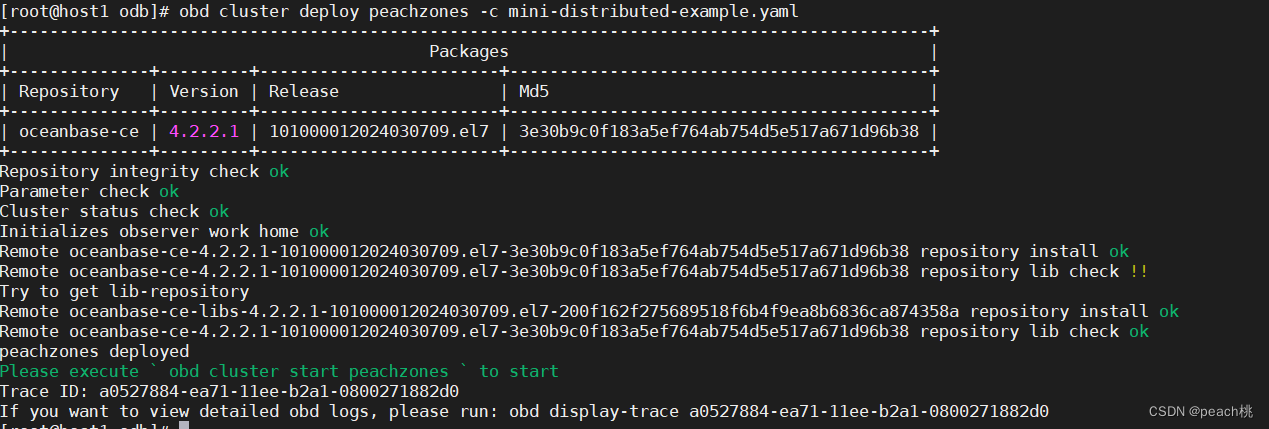
- 进行集群部署observer
部署命令:obd cluster deploy [集群名] -c [集群配置文件]
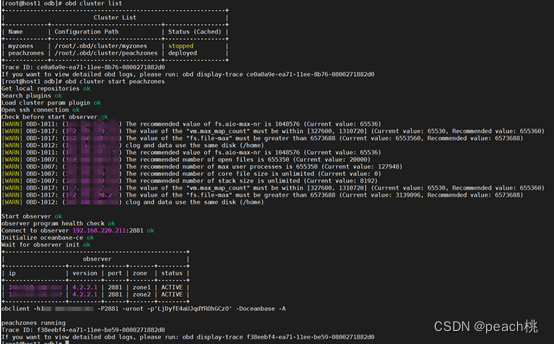
obd cluster deploy peachzones -c mini-distributed-example.yaml
如果遇到问题,可查看最后一章问题汇总;部署正常显示为:

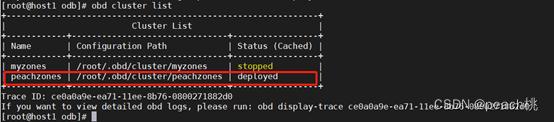
- 查看部署结果
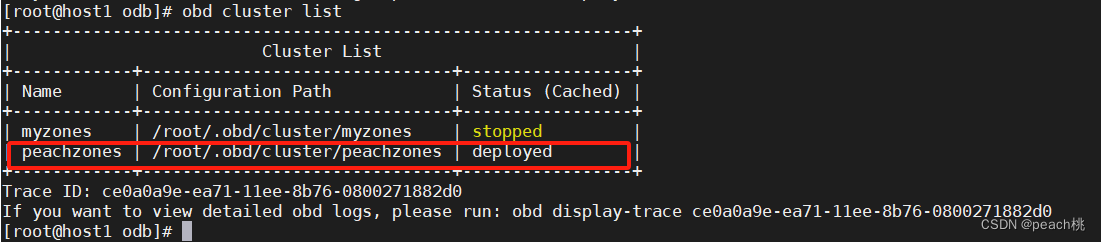
obd cluster list
myzone忽略,那是之前创建的集群

OBD 中注册的集群状态有如下几种。
- configured:已配置,表示 OBD 中已包含该集群的配置文件,但该集群还未部署,此时可执行 obd cluster deploy 命令部署该集群。
- deployed:已部署,表示该集群已部署,但是还未启动,此时可执行 obd cluster start 命令启动该集群。
- running:运行中,表示集群正在运行中。
- stopped:已停止,表示集群中有组件已被停止,此时可执行 obd cluster start 命令启动该集群。
- upgrading:升级中,表示集群中有组件处于升级中。
- destroyed:已销毁,表示该集群已被销毁。
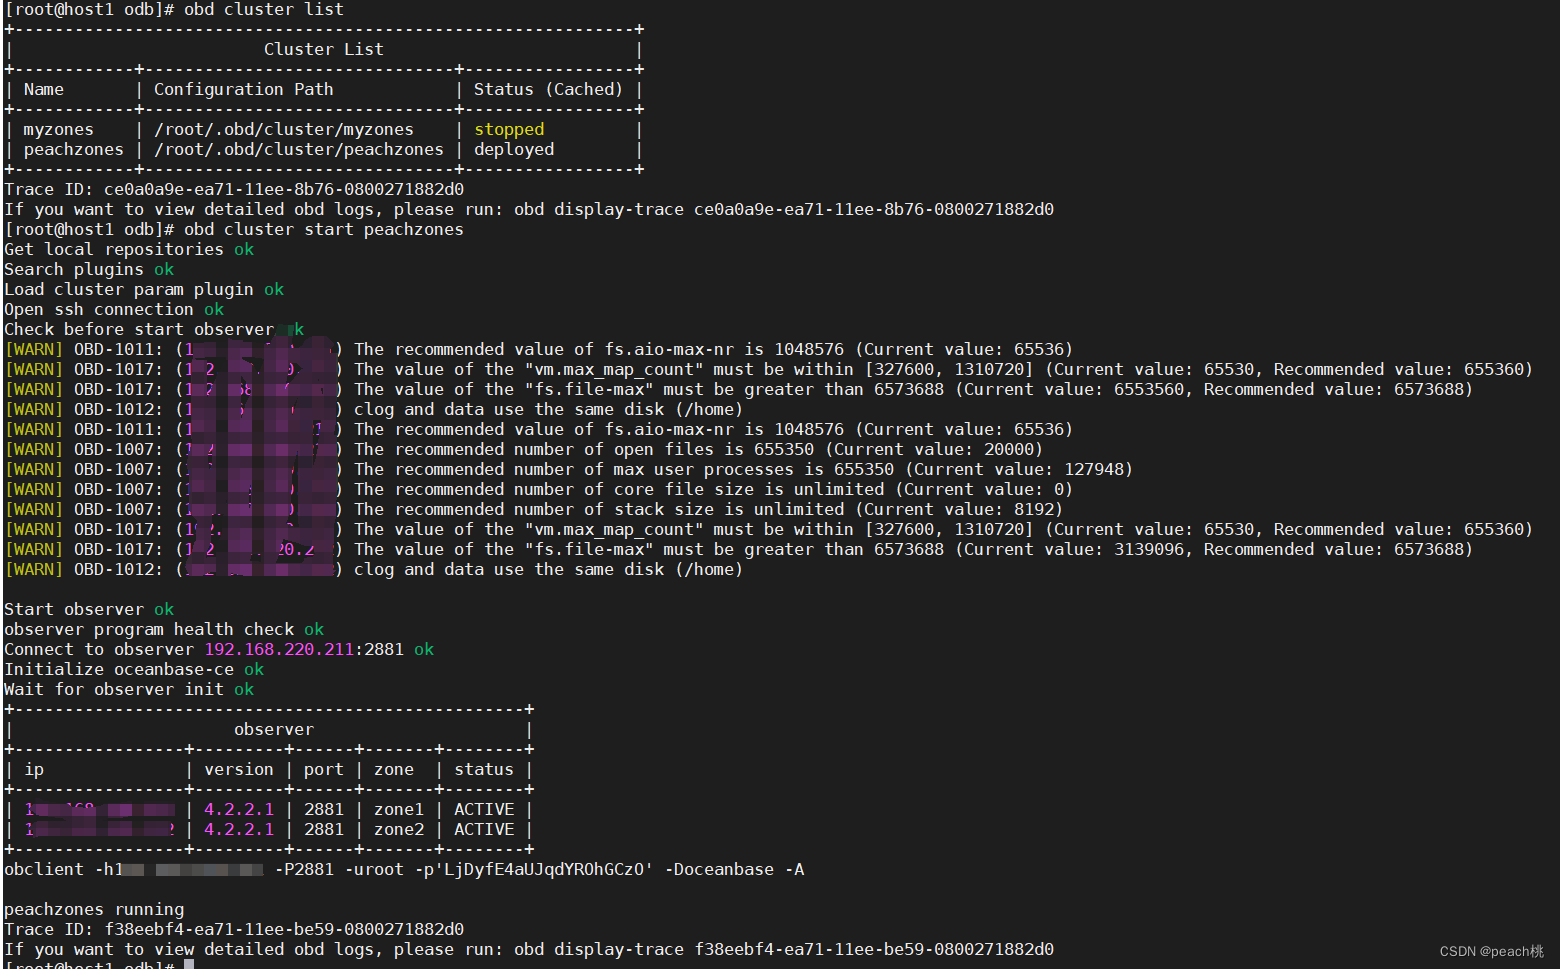
- 启动集群
obd cluster start peachzones

默认的密码就在日志下方,具体可以进到数据库修改
然后再看状态,就是runing状态


3.3集群部署—分开部署proxy
该部署方式,将proxy进行单独部署,不会通过cluster进行绑定,都需要单独的部署服务,proxy的配置信息和OBD的配置信息分开,如果看过集群部署—不带proxy,那么前面的步骤都是一样的,直接到部署observer以后的步骤看就可以了
3.3.1安装obd
- 安装部署工具
rpm -ivh ob-deploy-2.6.2-2.el7.x86_64.rpm

- 设置环境变量
source /etc/profile.d/obd.sh
3.3.2构建本地源
- 移动rpm包,构建本地源
obd mirror clone /home/rpm/*.rpm

- 删除远程源
rm -rf ~/.obd/mirror/remote/
- 查看本地源
obd mirror list local

3.3.3编辑OBD配置文件
- 创建mini-distributed-example.yaml配置文件
获取方式
https://github.com/oceanbase/obdeploy/blob/master/example/mini-distributed-example.yaml
这里我提供一份
## Only need to configure when remote login is required
# user:
#   username: your username
#   password: your password if need
#   key_file: your ssh-key file path if need
#   port: your ssh port, default 22
#   timeout: ssh connection timeout (second), default 30
oceanbase-ce:
  servers:
    - name: server1
      # Please don't use hostname, only IP can be supported
      ip: ip
    - name: server2
      ip: ip
    #- name: server3
    #  ip: 172.19.33.4
  global:
    # Starting from observer version 4.2, the network selection for the observer is based on the 'local_ip' parameter, and the 'devname' parameter is no longer mandatory.
    # If the 'local_ip' parameter is set, the observer will first use this parameter for the configuration, regardless of the 'devname' parameter.
    # If only the 'devname' parameter is set, the observer will use the 'devname' parameter for the configuration.
    # If neither the 'devname' nor the 'local_ip' parameters are set, the 'local_ip' parameter will be automatically assigned the IP address configured above.
    # devname: eth0
    cluster_id: 1
    # please set memory limit to a suitable value which is matching resource.
    memory_limit: 6G # The maximum running memory for an observer
    system_memory: 1G # The reserved system memory. system_memory is reserved for general tenants. The default value is 30G.
    datafile_size: 2G # Size of the data file.
    datafile_next: 2G # the auto extend step. Please enter an capacity, such as 2G
    datafile_maxsize: 20G # the auto extend max size. Please enter an capacity, such as 20G
    log_disk_size: 14G # The size of disk space used by the clog files.
    cpu_count: 8
    production_mode: false
    enable_syslog_wf: false # Print system logs whose levels are higher than WARNING to a separate log file. The default value is true.
    enable_syslog_recycle: true # Enable auto system log recycling or not. The default value is false.
    max_syslog_file_count: 4 # The maximum number of reserved log files before enabling auto recycling. The default value is 0.
    # root_password: # root user password, can be empty
  server1:
    mysql_port: 2881 # External port for OceanBase Database. The default value is 2881. DO NOT change this value after the cluster is started.
    rpc_port: 2882 # Internal port for OceanBase Database. The default value is 2882. DO NOT change this value after the cluster is started.
    #  The working directory for OceanBase Database. OceanBase Database is started under this directory. This is a required field.
    home_path: /home/admin/observer
    # The directory for data storage. The default value is $home_path/store.
    # data_dir: /data
    # The directory for clog, ilog, and slog. The default value is the same as the data_dir value.
    # redo_dir: /redo
    zone: zone1
  server2:
    mysql_port: 2881 # External port for OceanBase Database. The default value is 2881. DO NOT change this value after the cluster is started.
    rpc_port: 2882 # Internal port for OceanBase Database. The default value is 2882. DO NOT change this value after the cluster is started.
    #  The working directory for OceanBase Database. OceanBase Database is started under this directory. This is a required field.
    home_path: /home/admin/observer
    # The directory for data storage. The default value is $home_path/store.
    # data_dir: /data
    # The directory for clog, ilog, and slog. The default value is the same as the data_dir value.
    # redo_dir: /redo
    zone: zone2
  #server3:
  #  mysql_port: 2881 # External port for OceanBase Database. The default value is 2881. DO NOT change this value after the cluster is started.
  #  rpc_port: 2882 # Internal port for OceanBase Database. The default value is 2882. DO NOT change this value after the cluster is started.
    #  The working directory for OceanBase Database. OceanBase Database is started under this directory. This is a required field.
  #  home_path: /root/observer
    # The directory for data storage. The default value is $home_path/store.
    # data_dir: /data
    # The directory for clog, ilog, and slog. The default value is the same as the data_dir value.
    # redo_dir: /redo
  #  zone: zone3
注意事项:
cpu_count:CPU数量可以大于物理CPU的数量。
home_path 是 OceanBase 数据库的工作目录,OceanBase 数据库在此目录下启动,您需提前创建。
内存和CPU核数根据自己的机器进行调整,如果太大资源不够,后面启动时会进行报错,那会更改也可以,需要重新加载,后面问题解决里我会说明如何对于配置修改和加载
- 配置文件中的home权限
chown -R admin:admin /home/admin/observer(你的home_path路径)
3.3.4部署observer
- 进行集群部署observer
部署命令:obd cluster deploy [集群名] -c [集群配置文件]
obd cluster deploy peachzones -c mini-distributed-example.yaml
如果遇到问题,可查看最后一章问题汇总;部署正常显示为:
- 查看部署结果
obd cluster list
myzone忽略,那是之前创建的集群
OBD 中注册的集群状态有如下几种。
- configured:已配置,表示 OBD 中已包含该集群的配置文件,但该集群还未部署,此时可执行 obd cluster deploy 命令部署该集群。
- deployed:已部署,表示该集群已部署,但是还未启动,此时可执行 obd cluster start 命令启动该集群。
- running:运行中,表示集群正在运行中。
- stopped:已停止,表示集群中有组件已被停止,此时可执行 obd cluster start 命令启动该集群。
- upgrading:升级中,表示集群中有组件处于升级中。
- destroyed:已销毁,表示该集群已被销毁。
- 启动集群
obd cluster start peachzones
默认的密码就在日志下方,具体可以进到数据库修改
然后再看状态,就是runing状态


3.3.5安装obproxy
3.3.5.1上传obproxy

- 移动rpm包,构建本地源
//可操作可不操作
obd mirror clone /home/rpm/ obproxy-ce-4.2.3.0-3.el7.x86_64.rpm
- 删除远程源
rm -rf ~/.obd/mirror/remote/
- 查看本地源
obd mirror list local
3.3.5.2安装obproxy
- 安装
rpm -ivh obproxy-ce-4.2.3.0-3.el7.x86_64.rpm

- 执行
[root]# cd /home/admin/obproxy-4.2.3.0
[root]# bin/obproxy -r "ip:2881;ip:2881" -p 2885 -o "enable_strict_kernel_release=false,enable_cluster_checkout=false,enable_metadb_used=false,skip_proxy_sys_private_check=true,observer_sys_password=pass " -c msp_cluster

3.3.5.3安装obclient
rpm -ivh obclient-2.2.3-1.el7.x86_64.rpm

3.3.5.4配置操作proxy
使用root@sys用户连接
[admin]# obclient –hxxx.xxx.xxx.xxx -P2881 -D oceanbase -uroot@sys -p –A
1、修改root用户密码
obclient [oceanbase]> alter user root identified by 'peachpass';
2、创建proxyro用户,obproxy连接oceanbase时使用
obclient [oceanbase]> grant select on oceanbase.* to proxyro identified by 'peachproxy';
3、修改proxy密码
用户名:root@proxysys,端口:2883,初始密码:空
[admin]# obclient -h ip -P2883 -u root@proxysys –p
obclient [oceanbase]> show proxyconfig like '%sys_password%';

修改proxy密码为数据设置的proxyro用户密码
alter proxyconfig set observer_sys_password='peachproxy';
可选择修改proxysys密码
alter proxyconfig set obproxy_sys_password='OceanBase010';
3.3.5.5obproxy连接集群
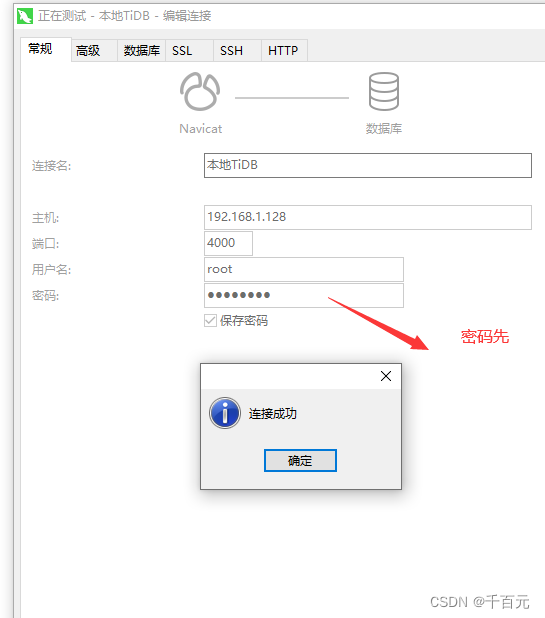
通过obproxy连接oceanbase集群
obclient –hxxx.xxx.xxx.xxx -P2883 -uroot -p –A
最终访问成功
3.4集群部署—组件部署proxy
该部署方式,将proxy和db绑定在一起,进行同时部署, proxy的配置信息和OBD的配置信息分开
3.4.1安装obd
- 安装部署工具
rpm -ivh ob-deploy-2.6.2-2.el7.x86_64.rpm

- 设置环境变量
source /etc/profile.d/obd.sh
3.4.2构建本地源
- 移动rpm包,构建本地源
注意:这里截图我没有加proxy,正常应该在开始就将proxy一起放进去构建
obd mirror clone /home/rpm/*.rpm
- 删除远程源
rm -rf ~/.obd/mirror/remote/
- 查看本地源
obd mirror list local
注意:这里截图我没有加proxy,正常应该在里面有proxy
3.3.3编辑OBD配置文件
- 创建mini-distributed-with-obproxy-example.yaml配置文件
获取方式
https://github.com/oceanbase/obdeploy/blob/master/example/ mini-distributed-with-obproxy-example.yaml这里我提供一份
## Only need to configure when remote login is required
# user:
#   username: your username
#   password: your password if need
#   key_file: your ssh-key file path if need
#   port: your ssh port, default 22
#   timeout: ssh connection timeout (second), default 30
oceanbase-ce:
  servers:
    - name: server1
      # Please don't use hostname, only IP can be supported
      ip: ip
    - name: server2
      ip: ip
    #- name: server3
    #  ip: 192.168.1.4
  global:
    # Starting from observer version 4.2, the network selection for the observer is based on the 'local_ip' parameter, and the 'devname' parameter is no longer mandatory.
    # If the 'local_ip' parameter is set, the observer will first use this parameter for the configuration, regardless of the 'devname' parameter.
    # If only the 'devname' parameter is set, the observer will use the 'devname' parameter for the configuration.
    # If neither the 'devname' nor the 'local_ip' parameters are set, the 'local_ip' parameter will be automatically assigned the IP address configured above.
    # devname: eth0
    cluster_id: 1
    # please set memory limit to a suitable value which is matching resource.
    memory_limit: 6G # The maximum running memory for an observer
    system_memory: 1G # The reserved system memory. system_memory is reserved for general tenants. The default value is 30G.
    datafile_size: 2G # Size of the data file.
    datafile_next: 2G # the auto extend step. Please enter an capacity, such as 2G
    datafile_maxsize: 20G # the auto extend max size. Please enter an capacity, such as 20G
    log_disk_size: 14G # The size of disk space used by the clog files.
    cpu_count: 16
    production_mode: false
    enable_syslog_wf: false # Print system logs whose levels are higher than WARNING to a separate log file. The default value is true.
    enable_syslog_recycle: true # Enable auto system log recycling or not. The default value is false.
    max_syslog_file_count: 4 # The maximum number of reserved log files before enabling auto recycling. The default value is 0.
    # observer cluster name, consistent with obproxy's cluster_name
    appname: obcluster
    # root_password: # root user password, can be empty
    # proxyro_password: # proxyro user pasword, consistent with obproxy's observer_sys_password, can be empty
  server1:
    mysql_port: 2881 # External port for OceanBase Database. The default value is 2881. DO NOT change this value after the cluster is started.
    rpc_port: 2882 # Internal port for OceanBase Database. The default value is 2882. DO NOT change this value after the cluster is started.
    #  The working directory for OceanBase Database. OceanBase Database is started under this directory. This is a required field.
    home_path: /home/admin/observer
    # The directory for data storage. The default value is $home_path/store.
    # data_dir: /data
    # The directory for clog, ilog, and slog. The default value is the same as the data_dir value.
    # redo_dir: /redo
    zone: zone1
  server2:
    mysql_port: 2881 # External port for OceanBase Database. The default value is 2881. DO NOT change this value after the cluster is started.
    rpc_port: 2882 # Internal port for OceanBase Database. The default value is 2882. DO NOT change this value after the cluster is started.
    #  The working directory for OceanBase Database. OceanBase Database is started under this directory. This is a required field.
    home_path: /home/admin/observer
    # The directory for data storage. The default value is $home_path/store.
    # data_dir: /data
    # The directory for clog, ilog, and slog. The default value is the same as the data_dir value.
    # redo_dir: /redo
    zone: zone2
#  server3:
#    mysql_port: 2881 # External port for OceanBase Database. The default value is 2881. DO NOT change this value after the cluster is started.
#    rpc_port: 2882 # Internal port for OceanBase Database. The default value is 2882. DO NOT change this value after the cluster is started.
    #  The working directory for OceanBase Database. OceanBase Database is started under this directory. This is a required field.
#    home_path: /root/observer
    # The directory for data storage. The default value is $home_path/store.
    # data_dir: /data
    # The directory for clog, ilog, and slog. The default value is the same as the data_dir value.
    # redo_dir: /redo
#    zone: zone3
obproxy-ce:
  # Set dependent components for the component.
  # When the associated configurations are not done, OBD will automatically get the these configurations from the dependent components.
  depends:
    - oceanbase-ce
  servers:
    - ip
  global:
    listen_port: 2883 # External port. The default value is 2883.
    prometheus_listen_port: 2884 # The Prometheus port. The default value is 2884.
    home_path: /home/admin/obproxy
    # oceanbase root server list
    # format: ip:mysql_port;ip:mysql_port. When a depends exists, OBD gets this value from the oceanbase-ce of the depends.
    # rs_list: 192.168.1.2:2881;192.168.1.3:2881;192.168.1.4:2881
    enable_cluster_checkout: false
    # observer cluster name, consistent with oceanbase-ce's appname. When a depends exists, OBD gets this value from the oceanbase-ce of the depends.
    # cluster_name: obcluster
    skip_proxy_sys_private_check: true
    enable_strict_kernel_release: false
    # obproxy_sys_password: # obproxy sys user password, can be empty. When a depends exists, OBD gets this value from the oceanbase-ce of the depends.
    # proxyro user pasword, consistent with oceanbase-ce's proxyro_password, can be empty. When a depends exists, OBD gets this value from the oceanbase-ce of the depends.
    observer_sys_password: peachpass
注意事项:
cpu_count:CPU数量可以大于物理CPU的数量。
home_path 是 OceanBase 数据库的工作目录,OceanBase 数据库在此目录下启动,您需提前创建。
内存和CPU核数根据自己的机器进行调整,如果太大资源不够,后面启动时会进行报错,那会更改也可以,需要重新加载,后面问题解决里我会说明如何对于配置修改和加载
- 配置文件中的home权限
chown -R admin:admin /home/admin/observer(你的home_path路径)
3.3.4部署observer
下面的部署内容和单独上节分开部署内容差不了太多,就是直接将proxy进行提前配置和一起安装了,安装过程种截图大差不差,主要看结果,流程是一样的
- 进行集群部署observer
部署命令:obd cluster deploy [集群名] -c [集群配置文件]
obd cluster deploy peachzones -c mini-distributed-with-obproxy-example.yaml
如果遇到问题,可查看最后一章问题汇总;部署正常显示为:
- 查看部署结果
obd cluster list
myzone忽略,那是之前创建的集群
OBD 中注册的集群状态有如下几种。
- configured:已配置,表示 OBD 中已包含该集群的配置文件,但该集群还未部署,此时可执行 obd cluster deploy 命令部署该集群。
- deployed:已部署,表示该集群已部署,但是还未启动,此时可执行 obd cluster start 命令启动该集群。
- running:运行中,表示集群正在运行中。
- stopped:已停止,表示集群中有组件已被停止,此时可执行 obd cluster start 命令启动该集群。
- upgrading:升级中,表示集群中有组件处于升级中。
- destroyed:已销毁,表示该集群已被销毁。
- 启动集群
obd cluster start peachzones
默认的密码就在日志下方,具体可以进到数据库修改
然后再看状态,就是runing状态


3.3.5配置操作proxy
使用root@sys用户连接
[admin]# obclient –hxxx.xxx.xxx.xxx -P2881 -D oceanbase -uroot@sys -p –A
1、修改root用户密码
obclient [oceanbase]> alter user root identified by 'peachpass';
2、创建proxyro用户,obproxy连接oceanbase时使用
obclient [oceanbase]> grant select on oceanbase.* to proxyro identified by 'peachproxy';
3、修改proxy密码
用户名:root@proxysys,端口:2883,初始密码:空
[admin]# obclient -h ip -P2883 -u root@proxysys –p
obclient [oceanbase]> show proxyconfig like '%sys_password%';

修改proxy密码为数据设置的proxyro用户密码
alter proxyconfig set observer_sys_password='peachproxy';
可选择修改proxysys密码
alter proxyconfig set obproxy_sys_password='OceanBase010';
3.3.6obproxy连接集群
通过obproxy连接oceanbase集群
obclient –hxxx.xxx.xxx.xxx -P2883 -uroot -p –A
最终访问成功
三:问题汇总
3.1 重复部署
再次执行 obd cluster display myob

可忽略,说明已部署,至于至于部署状态是什么,单独看了
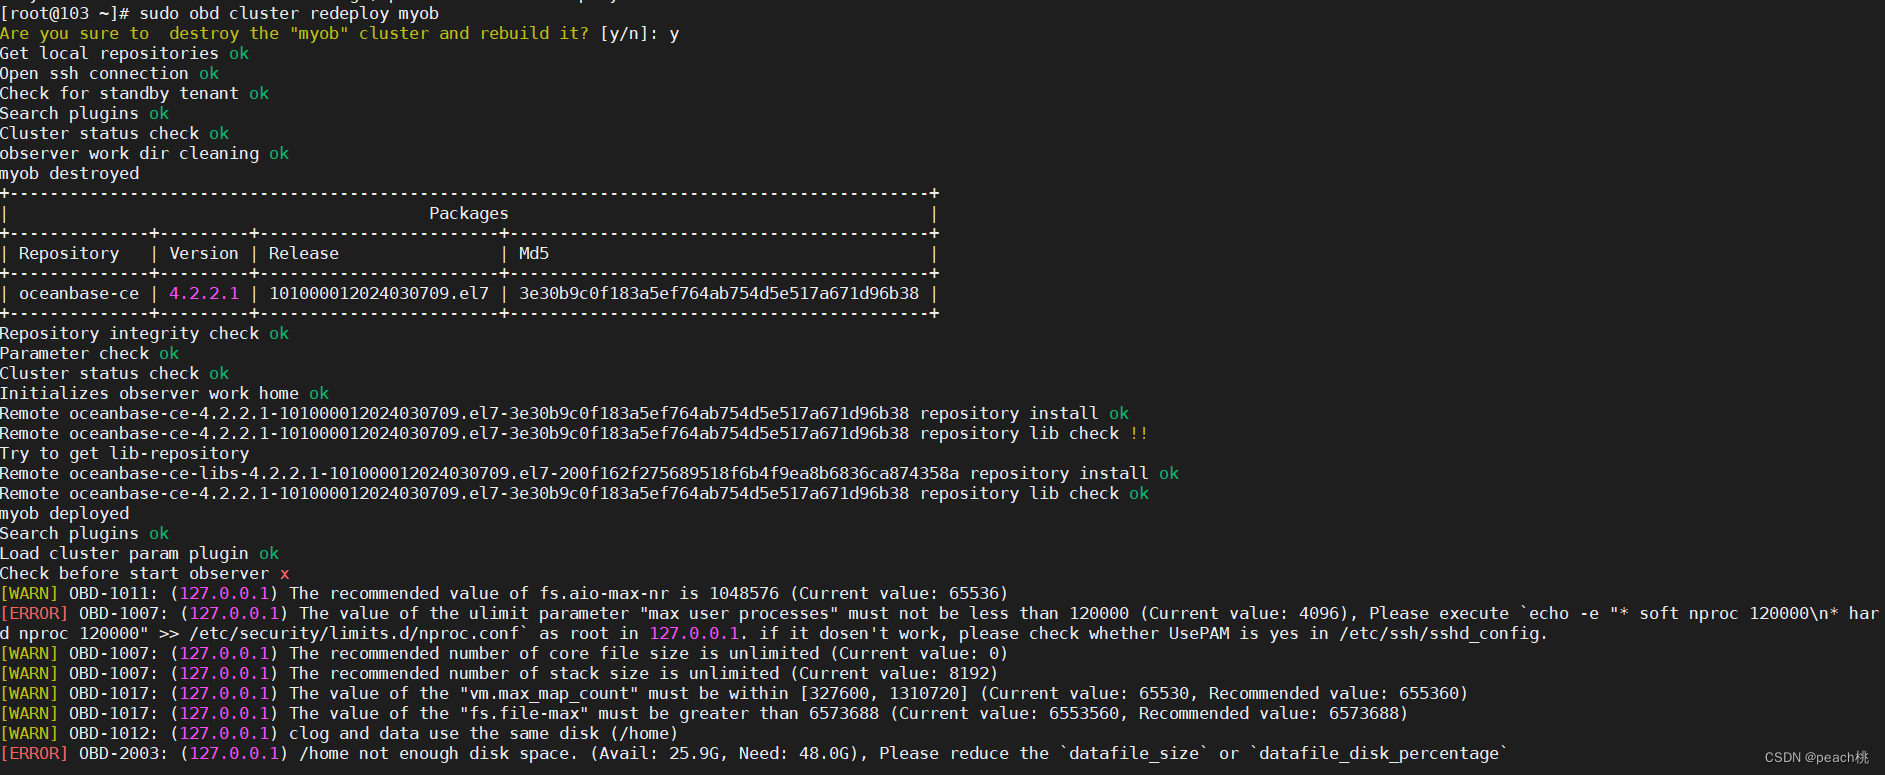
3.2 重新部署
obd cluster destroy
销毁已部署的集群。如果集群处于运行中的状态,该命令会先尝试执行 stop,成功
再执行 destroy。
3.3 enp0s3 fail to ping ……
enp0s3 fail to ping 127.0.0.1,please check ‘devname’

此问题单机部署出现,配置IP地址为网卡地址,非loopback地址。
解决方案:编辑配置文件,重新部署集群myob 。
3.4 修改配置文件yaml,但是没生效
Deplay以后,配置文件就被加载进去了,原始的文件修改不生效,需要命令修改
[wuhs@s153 ~]$ sudo obd cluster edit-config myob
#如将devname参数改为:devname: eth0
[wuhs@s153 ~]$ sudo obd cluster redeploy myob
3.5 fail to init xxx.xxx.xxx.xxx home path : /home/admin/observer is not empty
fail to init xxx.xxx.xxx.xxx home path : /home/admin/observer is not empty
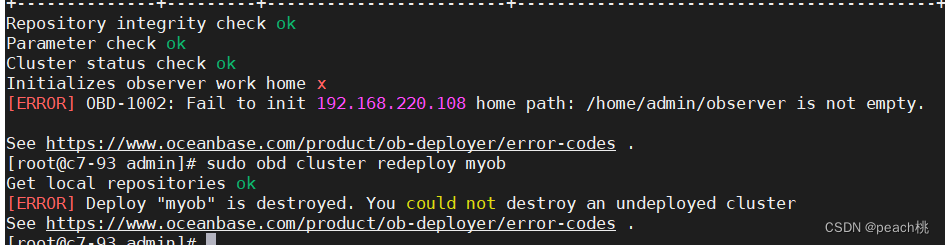
之前已经部署过集群,目录里面存在文件
解决:1、删除里面内容,
2、修改原配置文件home_path,加载创建新的集群
3.6 The value of the ulimit parameter "max user processes"……
The value of the ulimit parameter "max user processes" must not be less than 120000 (Current value: 4096), Please execute `echo -e "* soft nproc 120000\n* hard nproc 120000" >> /etc/security/limits.d/nproc.conf` as root in 127.0.0.1. if it dosen't work, please check whether UsePAM is yes in /etc/ssh/sshd_config.
按提示操作
echo -e "* soft nproc 120000\n* hard nproc 120000" >> /etc/security/limits.d/nproc.conf
3.7 no authentication methods available
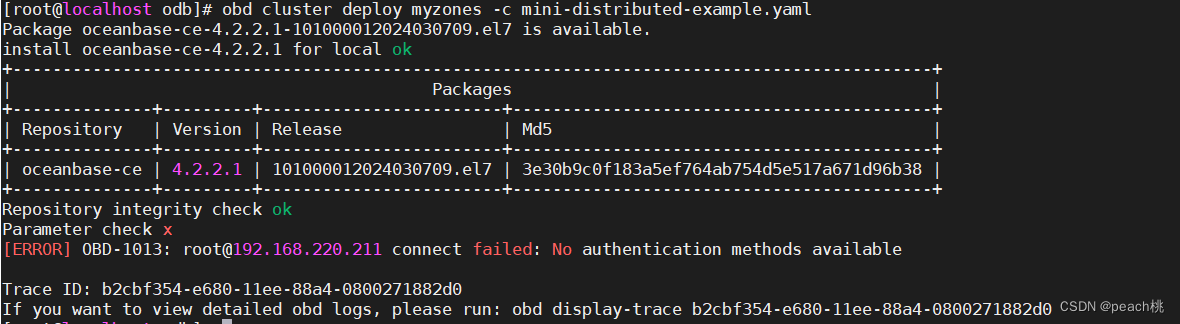
解决:主机之间配置ssh互信,具体看准备工作2.2
3.8长时间停留在Initialize oceanbase-ce \

长时间停留在这,集群环境中防火墙端口没放开,关闭防火墙
[root]# systemctl stop firewalld
[root]# systemctl disable firewalld
3.9 defaultuser@ip connect failed:timeout
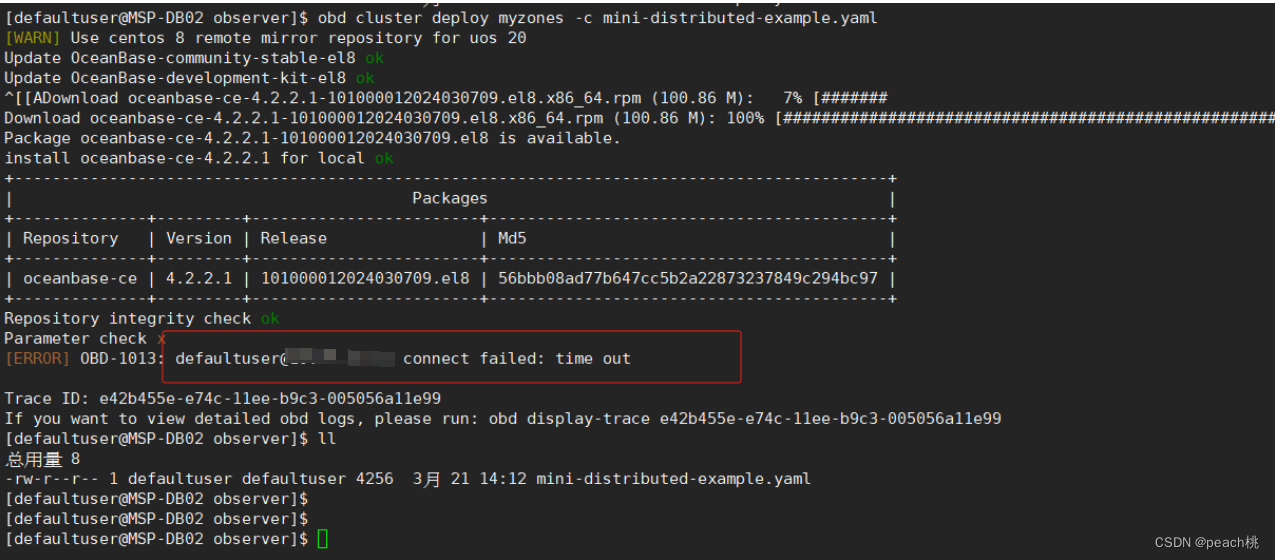
Ssh端口不是默认的,需要在配置文件手动配置
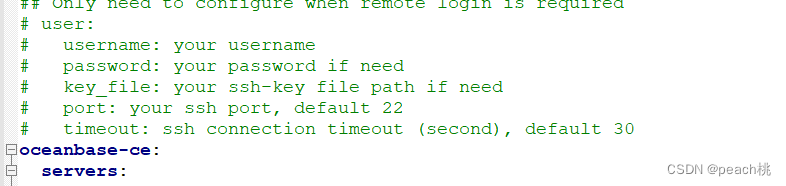
打开yaml配置文件种user属性,配置用户名,密码,Port,如果配置证书,可不配置密码
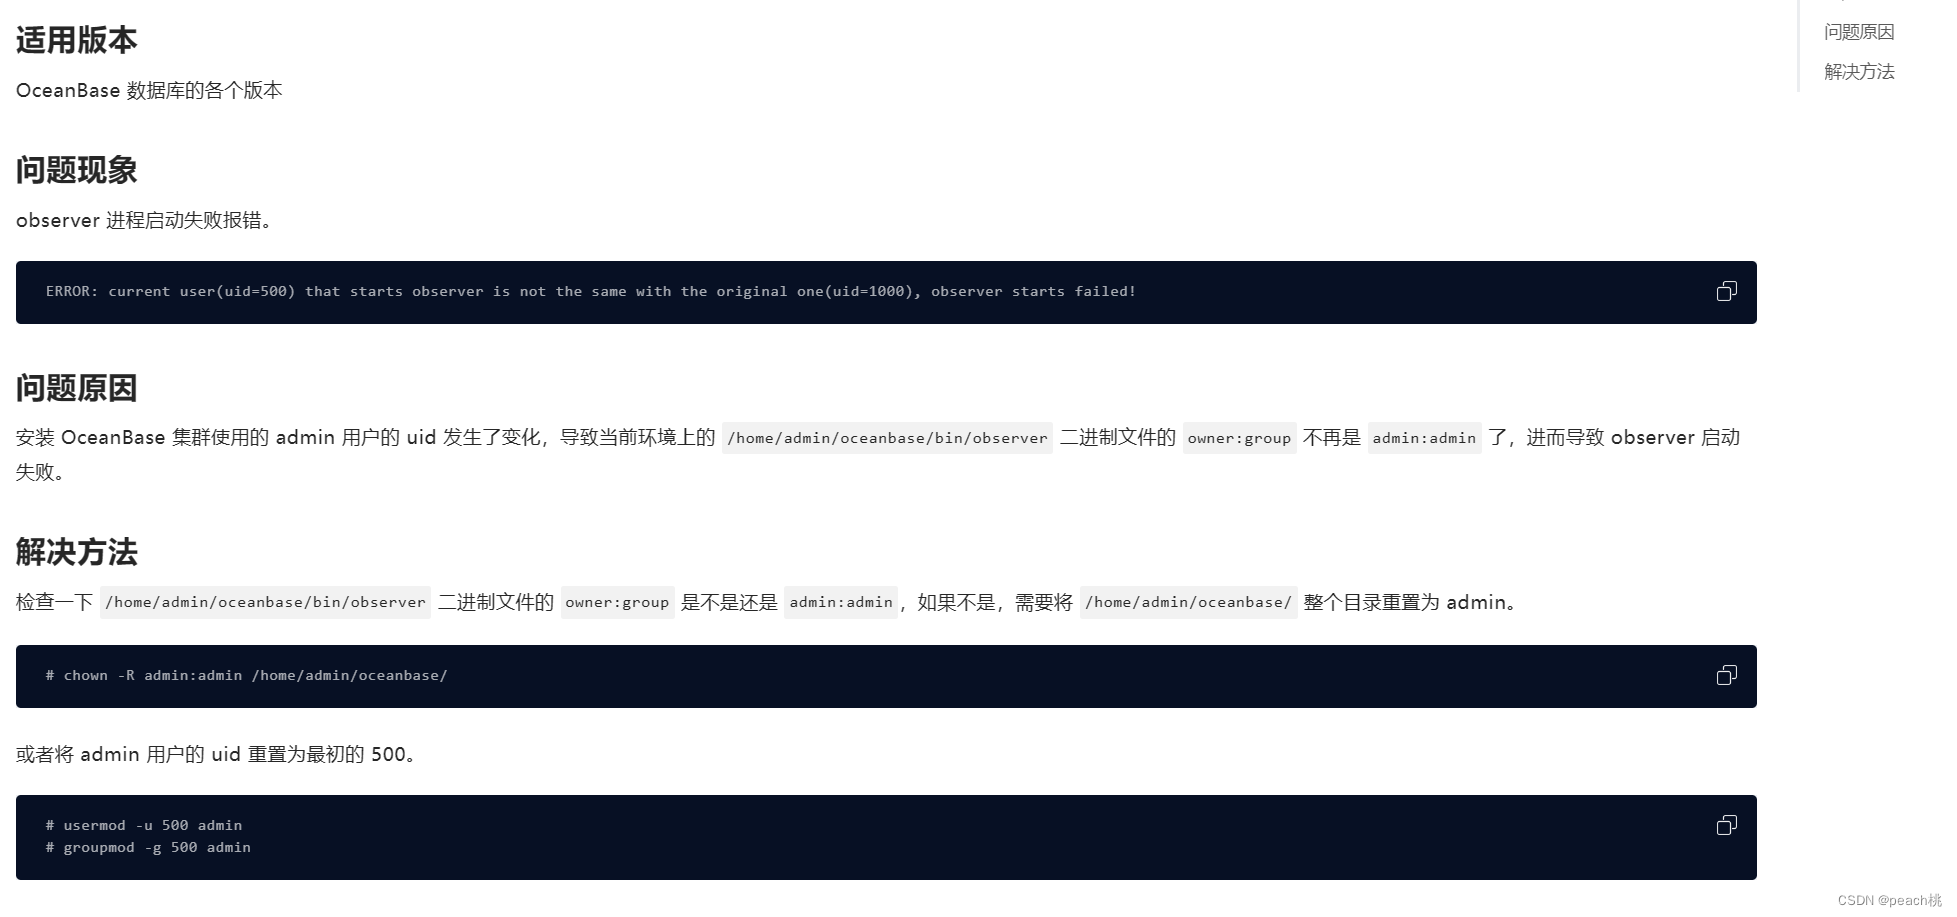
3.10 Fail check_uid_before_start, please use the initial user to start observer!
出现这个报错,可以查看启动日志,里面是否有
current user(uid=0) that starts observer is not the same with the original one(uid=1000), observer starts failed!
说明部署用户uid和启动用户uid存在差异,不让启动,