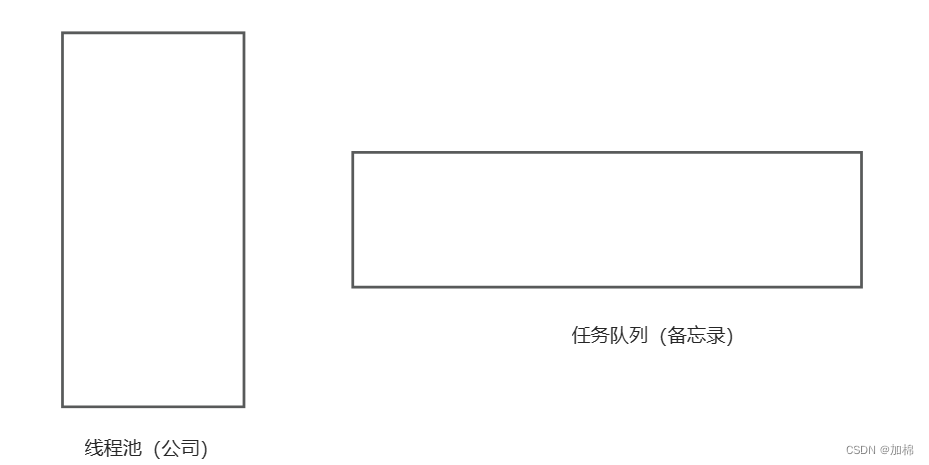
本篇主要用以实现一个线程池,用来方便后续代码编写等,核心工作是体会线程池的工作原理
预备资源
首先增加一个任务函数,这里直接使用一份写好的任务头文件,该头文件中包含的内容是计算各种数据运算:
// task.hpp
#pragma once
#include <iostream>
#include <string>

std::string opers = "+-*/%";

enum
{
    DivZero = 1,
    ModZero,
    Unknown
};

class Task
{
public:
    Task()
    {
    }
    Task(int x, int y, char op) : data1_(x), data2_(y), oper_(op), result_(0), exitcode_(0)
    {
    }
    void run()
    {
        switch (oper_)
        {
        case '+':
            result_ = data1_ + data2_;
            break;
        case '-':
            result_ = data1_ - data2_;
            break;
        case '*':
            result_ = data1_ * data2_;
            break;
        case '/':
        {
            if (data2_ == 0)
                exitcode_ = DivZero;
            else
                result_ = data1_ / data2_;
        }
        break;
        case '%':
        {
            if (data2_ == 0)
                exitcode_ = ModZero;
            else
                result_ = data1_ % data2_;
        }
        break;
        default:
            exitcode_ = Unknown;
            break;
        }
    }
    void operator()()
    {
        run();
        std::cout << GetResult() << std::endl;
    }
    std::string GetResult()
    {
        std::string r = std::to_string(data1_);
        r += oper_;
        r += std::to_string(data2_);
        r += "=";
        r += std::to_string(result_);
        r += "[code: ";
        r += std::to_string(exitcode_);
        r += "]";
        return r;
    }
    std::string GetTask()
    {
        std::string r = std::to_string(data1_);
        r += oper_;
        r += std::to_string(data2_);
        r += "=?";
        return r;
    }
    ~Task()
    {
    }

private:
    int data1_;
    int data2_;
    char oper_;

    int result_;
    int exitcode_;
};
线程池
基本框架
对于线程池来说,基本框架是要有线程池的任务,运行队列,还有必要的锁和环境变量,所以创建一个线程池,其中包含对应的成员变量
template <class T>
class ThreadPool
{
private:
    // 线程池中所有任务,用顺序表管理起来
    std::vector<ThreadInfo> threads_;
    // 当前运行队列中运行的任务,用队列管理起来
    std::queue<T> tasks_;

    // 线程所必要的锁和条件变量
    pthread_mutex_t mutex_;
    pthread_cond_t cond_;

    // 全局的线程池索引和锁
    static ThreadPool<T> *tp_;
    static pthread_mutex_t lock_;
};
单例模式
一种基本的认识是,线程池不应该有多份资源,正常来说在一份进程中只应该出现一份进程池资源即可,所以这里采用了一个单例模式的方法来实现线程池
// 单例模式,创建或者获取一个线程池,在一份代码中只有一份线程池的实例
static ThreadPool<T> *GetInstance()
{
    if (nullptr == tp_)
    {
        pthread_mutex_lock(&lock_);
        if (nullptr == tp_)
        {
            std::cout << "log: singleton create done first!" << std::endl;
            tp_ = new ThreadPool<T>();
        }
        pthread_mutex_unlock(&lock_);
    }

    return tp_;
}
线程池的运行
针对于线程池的运行,由于有线程的顺序表的存在,所以只需要依次启动线程即可,对于线程执行的函数,只需要在handle处理方法中进行执行即可
    // 对应任务的处理方法
    static void *HandlerTask(void *args)
    {
        ThreadPool<T> *tp = static_cast<ThreadPool<T> *>(args);
        std::string name = tp->GetThreadName(pthread_self());
        while (true)
        {
            tp->Lock();

            while (tp->IsQueueEmpty())
            {
                tp->ThreadSleep();
            }
            T t = tp->Pop();
            tp->Unlock();

            t();
        }
    }

    // 开始运行线程池的内容,初始化线程的名字,并创建线程执行对应的处理函数方法
    void Start()
    {
        int num = threads_.size();
        for (int i = 0; i < num; i++)
        {
            threads_[i].name = "thread-" + std::to_string(i + 1);
            pthread_create(&(threads_[i].tid), nullptr, HandlerTask, this);
        }
    }
而核心代码实质上已经结束了,剩下就是对于线程池进行一定程度的封装即可,最终要实现的效果起码是可以对于任务进行推送,并且可以对于任务进行计算和输出
样例
#pragma once
#include <iostream>
#include <vector>
#include <string>
#include <queue>
#include <pthread.h>
#include <unistd.h>

// 对线程的信息进行封装,线程的信息包括线程的id和线程的名字
struct ThreadInfo
{
    pthread_t tid;
    std::string name;
};

// 设定线程池的最大容量是10个线程
static const int defalutnum = 10;

template <class T>
class ThreadPool
{
public:
    // 对线程的基本操作,加锁解锁唤醒休眠等等
    void Lock()
    {
        pthread_mutex_lock(&mutex_);
    }
    void Unlock()
    {
        pthread_mutex_unlock(&mutex_);
    }
    void Wakeup()
    {
        pthread_cond_signal(&cond_);
    }
    void ThreadSleep()
    {
        pthread_cond_wait(&cond_, &mutex_);
    }
    bool IsQueueEmpty()
    {
        return tasks_.empty();
    }
    // 获取特定线程id对应的线程名
    std::string GetThreadName(pthread_t tid)
    {
        for (const auto &ti : threads_)
        {
            if (ti.tid == tid)
                return ti.name;
        }
        return "None";
    }

public:
    // 对应任务的处理方法
    static void *HandlerTask(void *args)
    {
        ThreadPool<T> *tp = static_cast<ThreadPool<T> *>(args);
        std::string name = tp->GetThreadName(pthread_self());
        while (true)
        {
            tp->Lock();

            while (tp->IsQueueEmpty())
            {
                tp->ThreadSleep();
            }
            T t = tp->Pop();
            tp->Unlock();

            t();
        }
    }
    // 开始运行线程池的内容,初始化线程的名字,并创建线程执行对应的处理函数方法
    void Start()
    {
        int num = threads_.size();
        for (int i = 0; i < num; i++)
        {
            threads_[i].name = "thread-" + std::to_string(i + 1);
            pthread_create(&(threads_[i].tid), nullptr, HandlerTask, this);
        }
    }
    // 获取当前任务队列中将要处理的任务
    T Pop()
    {
        T t = tasks_.front();
        tasks_.pop();
        return t;
    }
    // STL并不线程安全,先加锁,放到运行队列中,唤醒线程执行,再释放锁
    void Push(const T &t)
    {
        Lock();
        tasks_.push(t);
        Wakeup();
        Unlock();
    }
    // 单例模式,创建或者获取一个线程池,在一份代码中只有一份线程池的实例
    static ThreadPool<T> *GetInstance()
    {
        if (nullptr == tp_)
        {
            pthread_mutex_lock(&lock_);
            if (nullptr == tp_)
            {
                std::cout << "log: singleton create done first!" << std::endl;
                tp_ = new ThreadPool<T>();
            }
            pthread_mutex_unlock(&lock_);
        }

        return tp_;
    }

private:
    // 对线程池构造等函数的封装,能够实现单例模式的效果
    ThreadPool(int num = defalutnum) : threads_(num)
    {
        pthread_mutex_init(&mutex_, nullptr);
        pthread_cond_init(&cond_, nullptr);
    }
    ~ThreadPool()
    {
        pthread_mutex_destroy(&mutex_);
        pthread_cond_destroy(&cond_);
    }
    ThreadPool(const ThreadPool<T> &) = delete;
    const ThreadPool<T> &operator=(const ThreadPool<T> &) = delete; // a=b=c
private:
    // 线程池中所有任务,用顺序表管理起来
    std::vector<ThreadInfo> threads_;
    // 当前运行队列中运行的任务,用队列管理起来
    std::queue<T> tasks_;

    // 线程所必要的锁和条件变量
    pthread_mutex_t mutex_;
    pthread_cond_t cond_;

    // 全局的线程池索引和锁
    static ThreadPool<T> *tp_;
    static pthread_mutex_t lock_;
};

template <class T>
ThreadPool<T> *ThreadPool<T>::tp_ = nullptr;

template <class T>
pthread_mutex_t ThreadPool<T>::lock_ = PTHREAD_MUTEX_INITIALIZER;
那在实际的使用中,可以和生产消费者模型进行搭配进行使用