一、安装Redis服务
1、下载Redis压缩包
以下这个是我网盘里面的(这个是v8.0版本的,支持导入.rdb数据文件)
链接:百度网盘 请输入提取码
提取码:x0f1
--来自百度网盘超级会员V5的分享
2、解压到文件夹
将下载的压缩包解压到指定的文件夹中,如:D:\redis,内容如下:

3、修改redis.conf
把以下内容直接全部替换掉redis.conf里面的内容,注意是全部覆盖掉,如自己知道怎么修改配置文件的请自便,嘻嘻嘻~~~
# Save the DB to disk.
# save <seconds> <changes> [<seconds> <changes> ...]
#
# Redis will save the DB if the given number of seconds elapsed and it
# surpassed the given number of write operations against the DB.
#
# Snapshotting can be completely disabled with a single empty string argument
# as in following example:
#
# save ""
#
# Unless specified otherwise, by default Redis will save the DB:
#   * After 3600 seconds (an hour) if at least 1 change was performed
#   * After 300 seconds (5 minutes) if at least 100 changes were performed
#   * After 60 seconds if at least 10000 changes were performed
#
# You can set these explicitly by uncommenting the following line.
#
# save 3600 1 300 100 60 10000

save ""
port 6379
requirepass '123456'
maxmemory 256mb
appendonly no
maxmemory-policy allkeys-lru

# Examples:
#
# bind 192.168.1.100 10.0.0.1     # listens on two specific IPv4 addresses
# bind 127.0.0.1 ::1              # listens on loopback IPv4 and IPv6
# bind * -::*                     # like the default, all available interfaces
#
# ~~~ WARNING ~~~ If the computer running Redis is directly exposed to the
# internet, binding to all the interfaces is dangerous and will expose the
# instance to everybody on the internet. So by default we uncomment the
# following bind directive, that will force Redis to listen only on the
# IPv4 and IPv6 (if available) loopback interface addresses (this means Redis
# will only be able to accept client connections from the same host that it is
# running on).
#
# IF YOU ARE SURE YOU WANT YOUR INSTANCE TO LISTEN TO ALL THE INTERFACES
# COMMENT OUT THE FOLLOWING LINE.
#
# You will also need to set a password unless you explicitly disable protected
# mode.
# ~~~~~~~~~~~~~~~~~~~~~~~~~~~~~~~~~~~~~~~~~~~~~~~~~~~~~~~~~~~~~~~~~~~~~~~~

bind 127.0.0.1

# Redis supports recording timestamp annotations in the AOF to support restoring
# the data from a specific point-in-time. However, using this capability changes
# the AOF format in a way that may not be compatible with existing AOF parsers.
#aof-timestamp-enabled no

# Since version 5 of RDB a CRC64 checksum is placed at the end of the file.
# This makes the format more resistant to corruption but there is a performance
# hit to pay (around 10%) when saving and loading RDB files, so you can disable it
# for maximum performances.
#
# RDB files created with checksum disabled have a checksum of zero that will
# tell the loading code to skip the check.

rdbchecksum no

# By default protected mode is enabled. You should disable it only if
# you are sure you want clients from other hosts to connect to Redis
# even if no authentication is configured.

protected-mode yes
4、启动Redis服务
在Redis的安装目录下打开cmd窗口,然后执行命令来启动服务:
redis-server --service-start
出现以上提示则表示启动成功~嘻嘻嘻~
为了方便,建议把Redis路径配置到系统变量Path值中,这样就省得再输路径了。

Redis常用的服务指令
# 卸载服务
redis-server --service-uninstall

# 开启服务
redis-server --service-start

# 停止服务
redis-server --service-stop
二、使用可视化工具
Redis Desktop Manager
需要安装使用,0.9.4以上是要收费的
链接:百度网盘 请输入提取码
提取码:qwqp
--来自百度网盘超级会员V5的分享
把安装包下载下来,改一下安装路径,然后不断下一步即可
无需任何配置直接连接-》

界面如下:
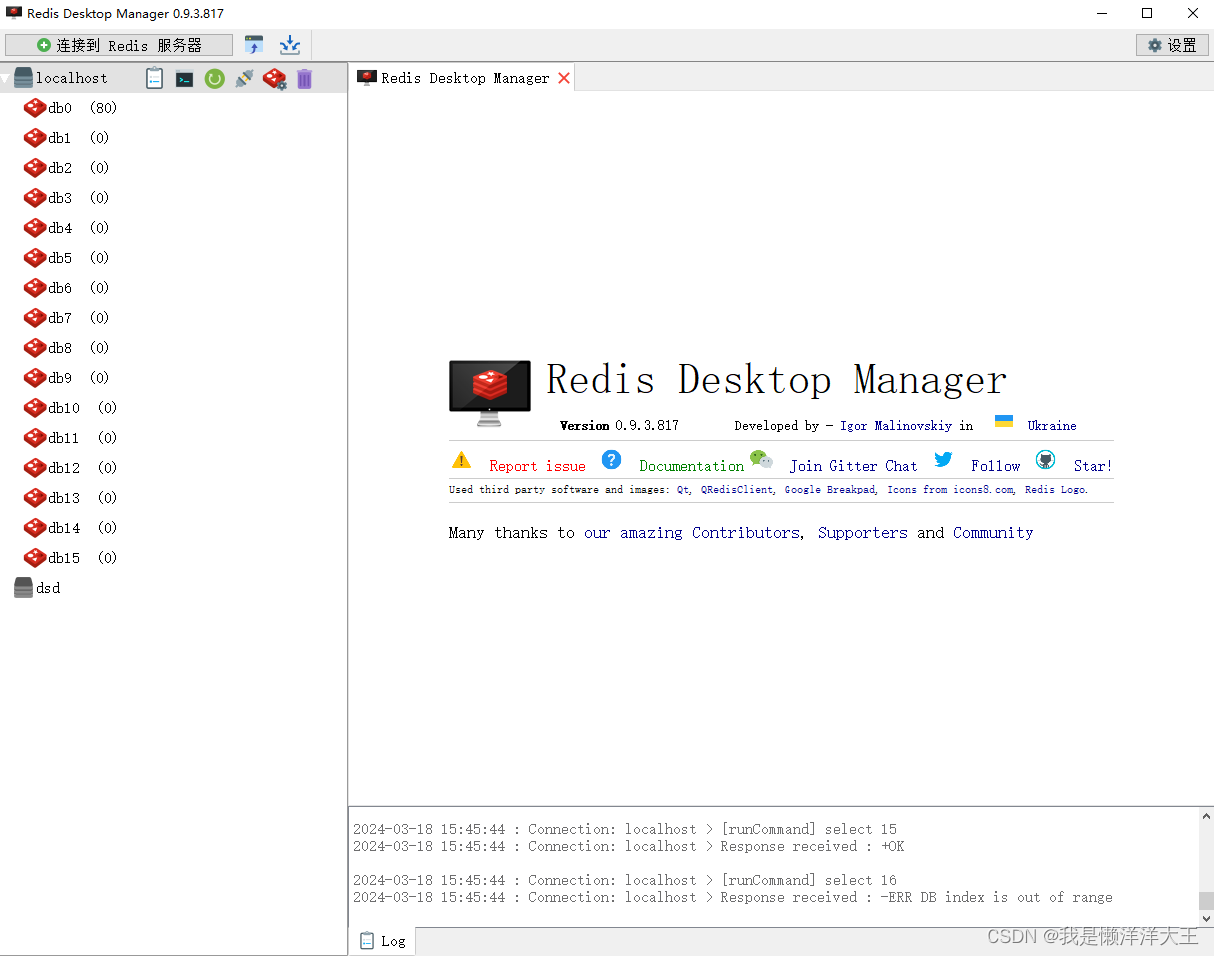
这样就可以可视化操作Redis数据库了~~