一、安装cuda
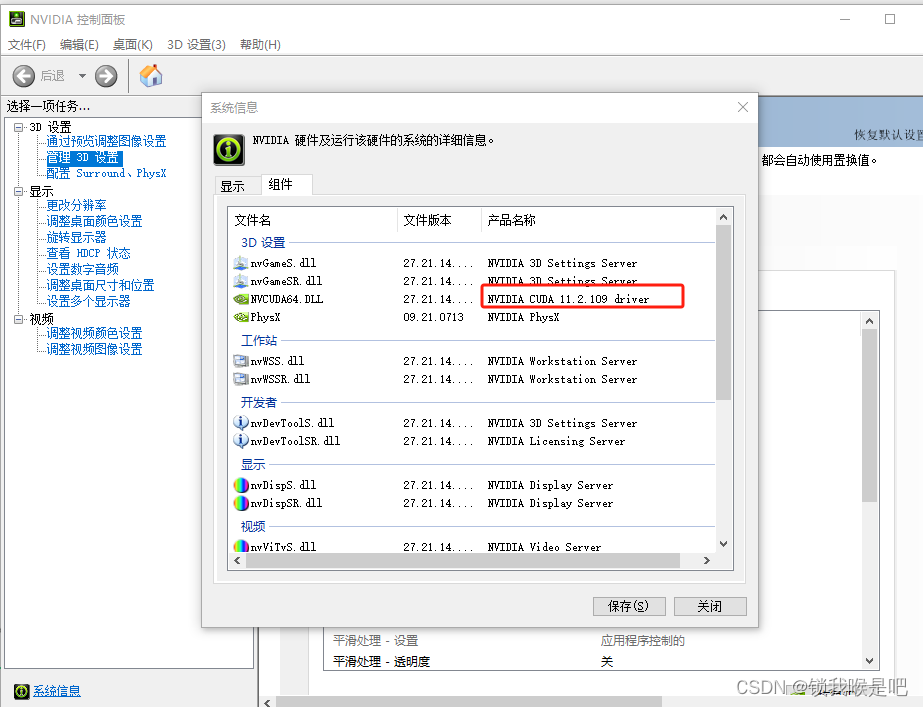
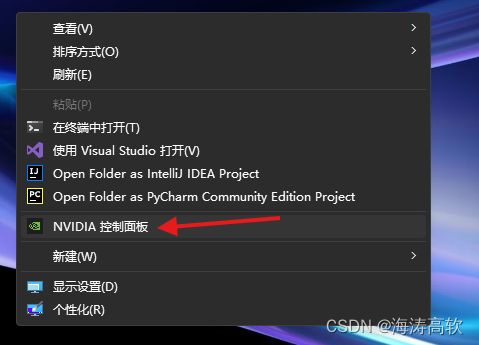
打开NVIDIA控制面板 —>帮助—>系统信息—>组件,找到驱动版本新,我这边是11.2,
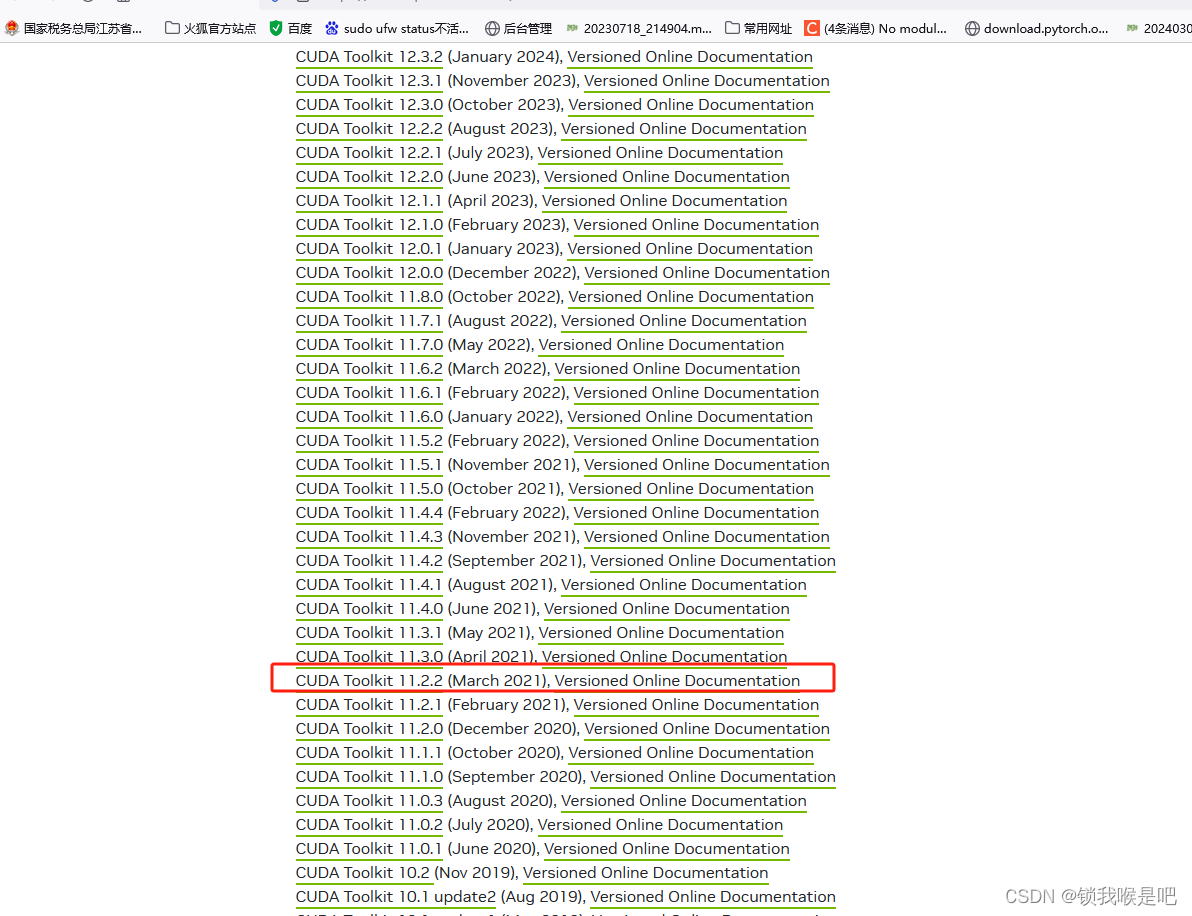
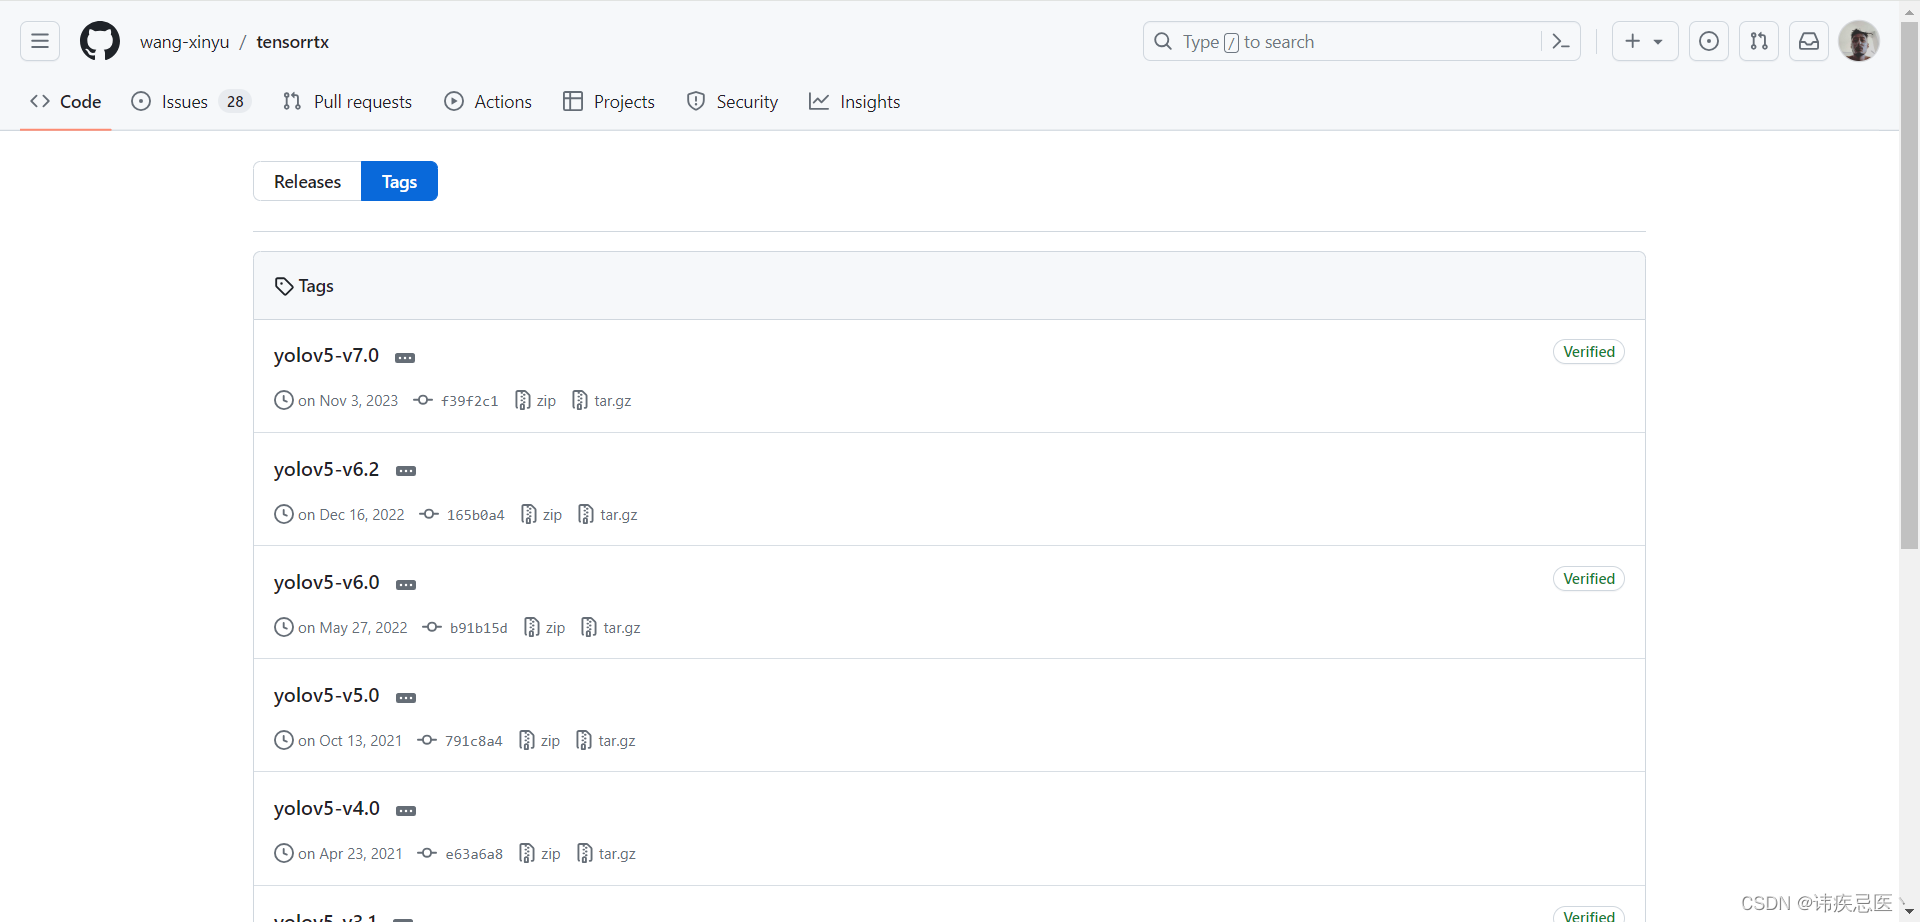
然后去CUDA Toolkit Archive | NVIDIA Developer下载对应版本的CUDA,根据查看的CUDA型号确定对应的cuda Toolhit版本,我这边下载的是11.2.2
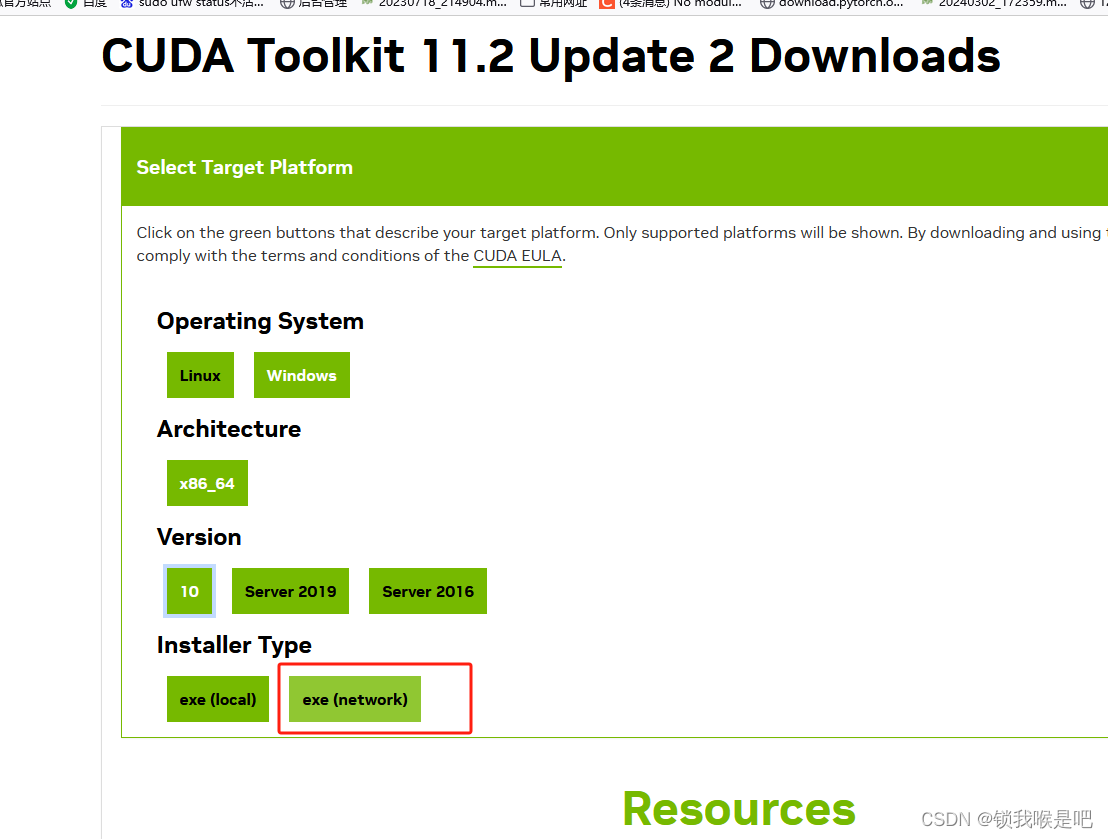
 建议下载network版本,
 在后续安装步骤建议选择自定义安装。
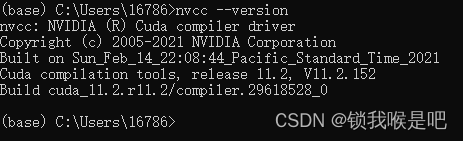
验证是否安装成功,打开cmd输入nvcc --version,显示如下信息,即成功安装。
二、安装cudnn
CUDNN下载并配置 https://developer.nvidia.cn/rdp/cudnn-archive
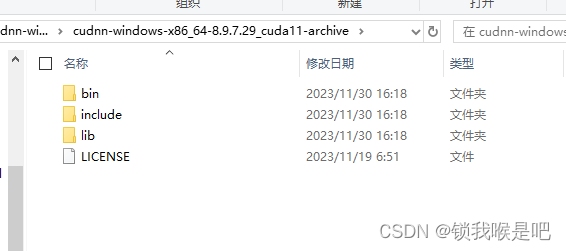
下载压缩包,然后解压。 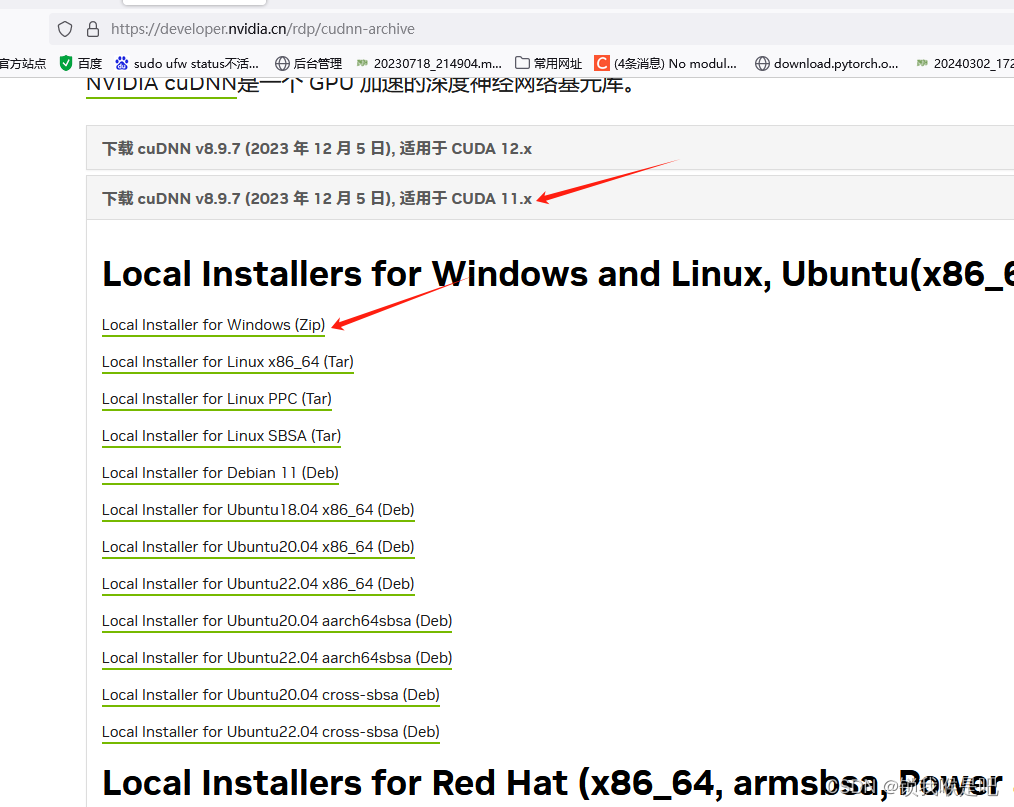 将解压后的三个文件夹复制到cuda的安装目录下。默认安装路径如下,可以去系统变量path中找
C:\Program Files\NVIDIA GPU Computing Toolkit\CUDA\v11.2
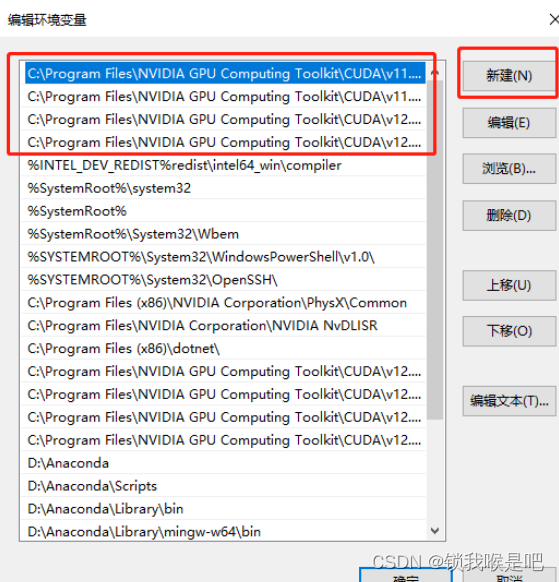
往系统环境变量中的 path 添加如下路径(根据自己的路径进行修改)
C:\Program Files\NVIDIA GPU Computing Toolkit\CUDA\v11.2\bin
C:\Program Files\NVIDIA GPU Computing Toolkit\CUDA\v11.2\include
C:\Program Files\NVIDIA GPU Computing Toolkit\CUDA\v11.2\lib
C:\Program Files\NVIDIA GPU Computing Toolkit\CUDA\v11.2\libnvvp
三、安装pytorch
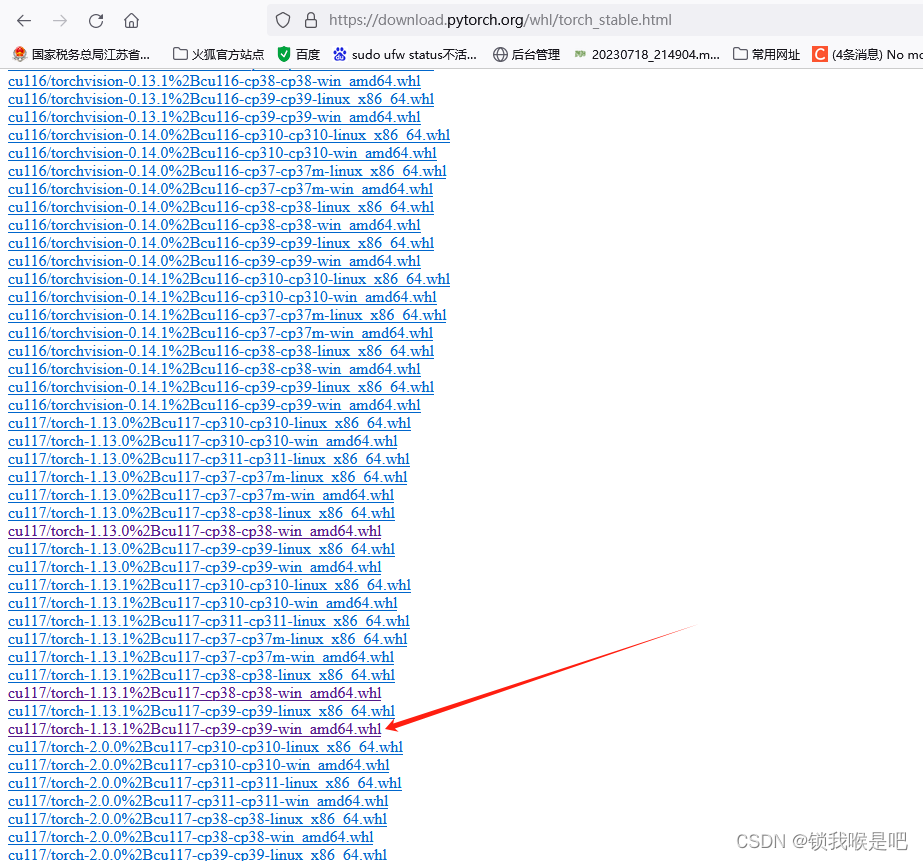
建议直接到到pytorch官网下载对应的cuda版本的GPU的torch。直接离线安装更稳妥。torchvision也是。
四、安装tensorrt
下载网址https://developer.nvidia.com/nvidia-tensorrt-8x-download,Windows只能下载zip。下载之后解压到自己想放的目录。按照官方文档一步步走就行
 其实8.6版本的不复制文件也可以,我就是没复制文件,直接在系统环境变量中加入路径
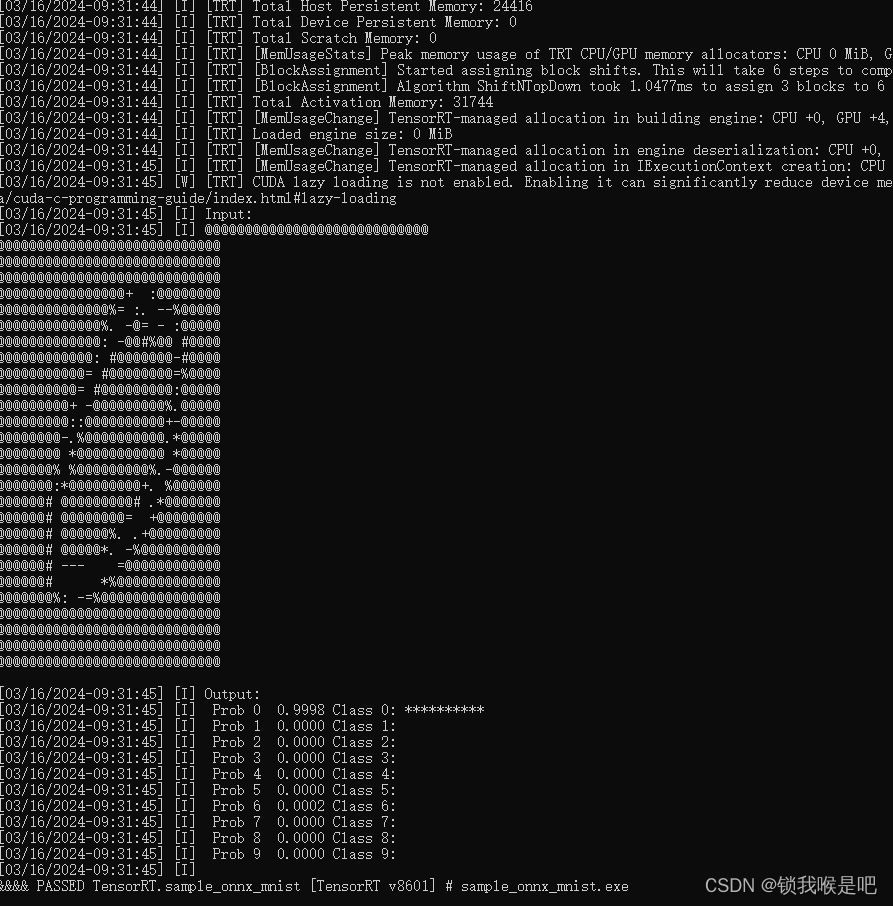
验证是否安装成功
利用vscode打开C:\Program Files\TensorRT-8.6.1.6\samples\sampleOnnxMNIST下的sample_onnx_mnist.sln,然后重新生成。
接下来在C:\Program Files\TensorRT-8.6.1.6\bin中可以看见sample_onnx_mnist.exe,我们打开cmd进入到该目录下,运行sample_onnx_mnist.exe,

出现下面结果,即成功安装。
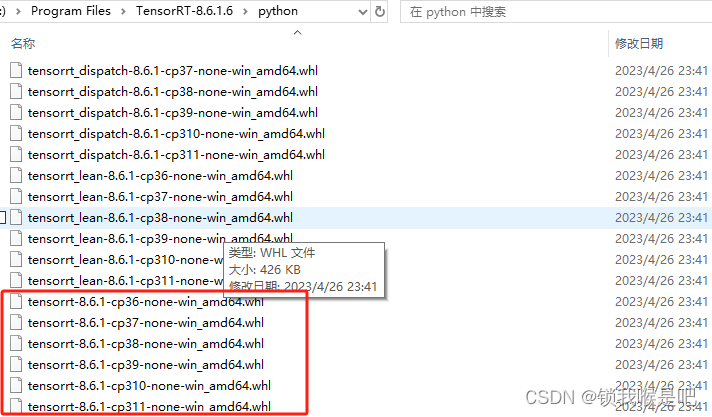
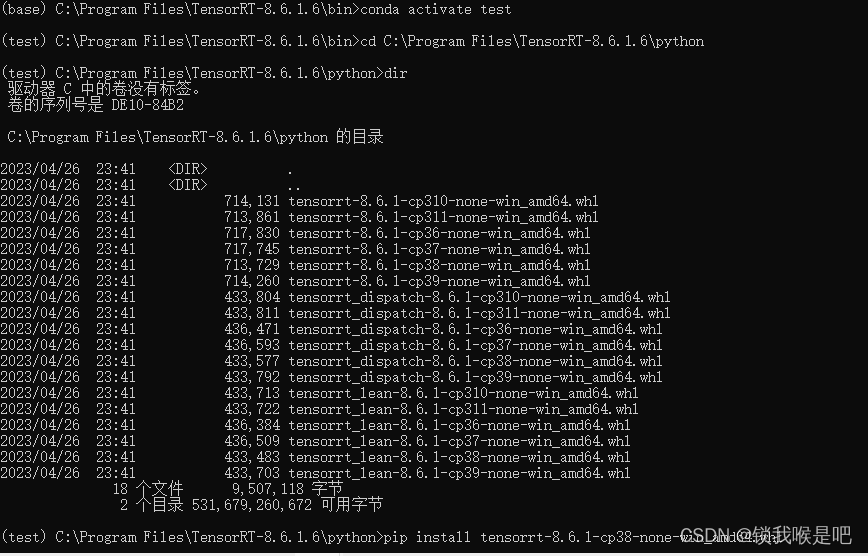
五、在python环境中安装tensorrt
激活虚拟环境,进入tensorrt安装目录下的python,根据自己的python版本安装对应的tensort。
验证tensorrt是否安装成功

六、部署yolov5
1. yolov5s.pt转onnx在转engine
.pt文件转onnx直接利用yolov5自带的export.py输出即可,onnx转engine利用C:\Program Files\TensorRT-8.6.1.6\bin下的trtexec.exe文件
trtexec.exe --onnx=C:\PycharmProject\yolov5-7.0(myself)\yolov5s.onnx --saveEngine=C:\PycharmProject\yolov5-7.0(myself)\yolov5s.engine
接下来就可以用python+tensorrt对yolov5进行部署。
import os
os.environ['KMP_DUPLICATE_LIB_OK']='True'
import cv2
import time
import ctypes
from dector_trt import Detector
import pycuda.autoinit

import numpy as np

import pycuda.driver as cuda
def detect(engine_file_path):
    detector = Detector(engine_file_path)
    capture = cv2.VideoCapture(0)
    # capture = cv2.VideoCapture(0)
    fps = 0.0
    while True:
        ret, img = capture.read()
        if img is None:
            print('No image input!')
            break

        t1 = time.time()
        img = img.astype(np.float32)
        result_img = detector.detect(img)


        fps = (fps + (1. / (time.time() - t1))) / 2
        cv2.putText(result_img, 'FPS: {:.2f}'.format(fps), (50, 30), 0, 1, (0, 255, 0), 2)
        cv2.putText(result_img, 'Time: {:.3f}'.format(time.time() - t1), (50, 60), 0, 1, (0, 255, 0), 2)
        if ret == True:
            cv2.imshow('frame', result_img)
            if cv2.waitKey(5) & 0xFF == ord('q'):
                break
        else:
            break

    capture.release()
    cv2.destroyAllWindows()
    detector.destroy()


if __name__ == '__main__':
    # 在程序的退出点添加这行代码,手动清理 CUDA 上下文
    cctx  = cuda.Device(0).make_context()
    # PLUGIN_LIBRARY = "weights/libmyplugins.so"
    # ctypes.CDLL(PLUGIN_LIBRARY)
    engine_file_path = 'C:\PycharmProject\yolov5-7.0(myself)\weight\yolov5s.engine'
    detect(engine_file_path)

    # 在程序的退出点添加这行代码,手动清理 CUDA 上下文
    ctx.pop()
但我部署的时候出现点问题,写该篇博客的时候还未解决。
ValueError: could not broadcast input array from shape (371712,) into shape (1228800,)
-------------------------------------------------------------------
PyCUDA ERROR: The context stack was not empty upon module cleanup.
-------------------------------------------------------------------
A context was still active when the context stack was being
cleaned up. At this point in our execution, CUDA may already
have been deinitialized, so there is no way we can finish
cleanly. The program will be aborted now.
Use Context.pop() to avoid this problem.
有遇到该问题并解决的还请留个言,告诉我解决办法,谢谢。


![[C++]使用C++<span style='color:red;'>部署</span><span style='color:red;'>yolov</span><span style='color:red;'>10</span>目标检测的tensorrt模型支持图片视频推理<span style='color:red;'>windows</span>测试通过](https://img-blog.csdnimg.cn/direct/f4f5a49606cb4ce884accfeda78ac2d3.png)