🌟 前言
欢迎来到我的技术小宇宙!🌌 这里不仅是我记录技术点滴的后花园,也是我分享学习心得和项目经验的乐园。📚 无论你是技术小白还是资深大牛,这里总有一些内容能触动你的好奇心。🔍
🤖 洛可可白:个人主页
🏠 个人博客:洛可可白博客
🐱 代码获取:bestwishes0203
📷 封面壁纸:洛可可白wallpaper

文章目录
快速上手:使用Hexo搭建并自定义个人博客
摘要
Hexo 是一个轻量级、简洁的静态博客框架,它允许你使用 Markdown 语法编写文章,并通过简单的命令生成静态网页。本文将指导你如何从零开始搭建一个基于 Hexo 的个人博客,选择并安装一个新主题,以及如何部署到 Gitee 上。
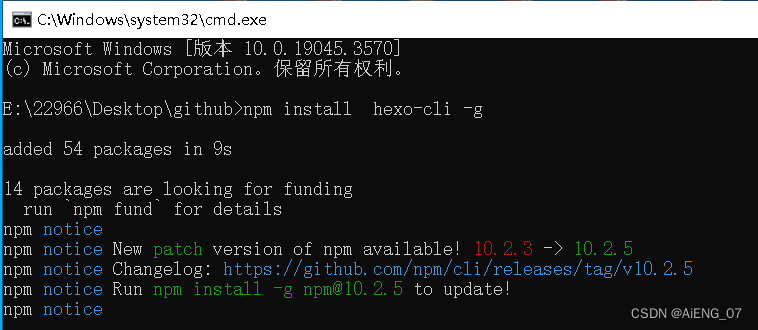
1. 安装 Hexo
首先,确保你的计算机上安装了 Node.js 和 npm。然后,通过 npm 安装 Hexo 命令行工具。
# 安装 Hexo CLI
npm install hexo-cli -g

# 初始化一个新的 Hexo 博客项目
hexo init blog

# 进入博客项目目录
cd blog

# 安装依赖
npm install
2. 启动本地服务器
在 Hexo 项目目录中,启动本地服务器以实时预览你的博客。
# 启动本地服务器
hexo server

# 或者使用简写
hexo s
3. 创建你的文章
使用 Hexo 创建新文章。
# 创建一篇新文章
hexo new "第一篇文章"
4. 安装并应用新主题
选择一个 Hexo 主题,例如 Ayer。安装并应用到你的 Hexo 博客。
# 安装 Ayer 主题
npm install hexo-theme-ayer --save

# 或者对于 Hexo 版本低于 5.0
git clone https://gitee.com/mirrors/ayer.git themes/ayer
5. 配置主题
在 Hexo 的配置文件 _config.yml 中设置主题。
# 在 _config.yml 中设置主题
theme: ayer
6. 自定义主题
根据你选择的主题,编辑主题的配置文件来自定义你的博客。例如,Ayer 主题的配置文件通常位于 themes/ayer/_config.yml。
# 打开主题配置文件进行自定义
# themes/ayer/_config.yml
具体配置可以参考我的。
# 侧边栏菜单
menu:
  主页: /
  归档: /archives
  分类: /categories
  标签: /tags
  旅行: /tags/旅行/
  壁纸: https://wallpaper.seenav.cn/
  友链: /friends
  关于我: /2022/01/01/关于我/

# 站点次标题和打字动效
# https://github.com/mattboldt/typed.js
subtitle:
  enable: true # 是否开启动效
  text: 面朝大海,春暖花开 # 显示的文字
  text2: 一生努力,一生被爱 # 滚动播放,如果不需要可以留空
  text3: 想要的都拥有,得不到的都释怀 # 最多支持三段文字
  startDelay: 0 # 延迟时间
  typeSpeed: 200 # 打字速度
  loop: true # 是否循环
  backSpeed: 100 # 回退速度
  showCursor: true # 是否显示光标

# 网站图标和侧边栏logo
favicon: /blog/favicon.ico
logo: /blog/images/ayer.png

# 封面配置
# enable-是否启用封面;path-封面背景图;logo-封面logo
cover:
  enable: true
  path: /blog/images/cover1.jpg # /source/images目录下附送多张美图,可更换
  logo: false #/images/ayer.svg,如果不要直接设置成false

# 页面顶部进度条
progressBar: false

# 告示板模块
broadcast:
  enable: true # true开启,false关闭
  type: 2 # 1:自定义输入,2:一言api(https://hitokoto.cn/)
  text: 一个安静优雅的hexo主题,快速且响应式。 # type为1时有效

# 文章配置
# 文章太长,截断按钮文字(在需要截断的行增加此标记:<!--more-->)
excerpt_link: 阅读更多...
# 如果你嫌每篇文章手动加more标记比较麻烦,又不想在首页全文显示,可以把excerpt_all设置成true,这样首页只会显示文章归档
excerpt_all: false

# 是否开启代码复制按钮
copy_btn: true
# 是否开启文章分享按钮
share_enable: true
# 国内的社交平台(If you are not in China, maybe you prefer to set:false)
share_china: true
# 文章分享文字
share_text: 分享

# 分页文字
nav_text:
  page_prev: 上一页
  page_next: 下一页
  post_prev: 上一篇
  post_next: 下一篇

# 文章页是否显示目录
toc: true

# 文章中的图片是否支持点击放大
image_viewer: true

# https://github.com/willin/hexo-wordcount
# 是否开启字数统计(关闭请设置enable为false)
# 也可以单独在md文件里Front-matter设置`no_word_count: true`属性,来自定义关闭字数统计
word_count:
  enable: true
  # 只在文章详情显示(不在首页显示)
  only_article_visit: true

# 打赏
# 打赏type设定:0-关闭打赏; 1-文章对应的md文件里有reward:true属性,才有打赏; 2-所有文章均有打赏
reward_type: 2
# 打赏wording
reward_wording: "请我喝杯奶茶吧~"
# 支付宝二维码图片地址,跟你设置logo的方式一样。比如:/images/alipay.jpg
alipay: /images/alipay.jpg
# 微信二维码图片地址
weixin: /images/wechat.jpg

# 版权声明
# 版权声明type设定:0-关闭版权声明; 1-文章对应的md文件里有copyright: true属性,才有版权声明; 2-所有文章均有版权声明
copyright_type: 2

# 是否启用搜索
# 需要安装hexo-generator-searchdb(https://github.com/theme-next/hexo-generator-searchdb)
search: true

# RSS订阅(先安装hexo-generator-feed插件,再去博客根目录config进行配置)
# 不想显示可以直接留空
rss: /atom.xml

# 是否启用黑夜模式开关
darkmode: true

# 动态背景效果: 0-关闭,1-动态线条(跟随鼠标)
canvas_bg: 1

# 自定义鼠标样式,直接替换/images/mouse.cur文件
mouse:
  enable: false
  path: /blog/images/mouse.cur

# 鼠标点击效果:0-关闭,1-爱心,2-爆炸烟花,3-粒子烟花
click_effect: 3

# 页面宽度自定义(不建议修改,可能造成布局混乱),article_width文章宽度,sidebar_width侧边栏宽度
layout:
  article_width: 80rem
  sidebar_width: 8rem

# GitHub Ribbons-封面右上角的forkme,换样式直接在source/images目录下替换forkme图片
github:
  # (关闭请设置为false)
  enable: true
  url: https://gitee.com/bestwishes0203

# 网易云音乐插件
music:
  enable: true
  # 播放器尺寸类型(1:小尺寸、2:大尺寸)
  type: 1
  id: 1497588709 # 网易云分享的音乐ID(更换音乐请更改此配置项)
  autoPlay: false # 是否开启自动播放

# 访问量统计(不蒜子)
busuanzi:
  enable: true

# 友盟cnzz统计(url填js代码src链接)
cnzz:
  enable: true
  url: https://s9.cnzz.com/z_stat.php?id=1278069914&web_id=1278069914

# Google Analytics
google_analytics: ""
# 百度统计
baidu_analytics: ""

# Mathjax数学公式
mathjax: false

# Katex数学公式(allpost设置为false时只有头部设置math:true的文章才开启)
# 需要更换hexo渲染器,npm un hexo-renderer-marked -S && npm i hexo-renderer-markdown-it-katex -S
katex:
  enable: false # true
  allpost: true
  copy_tex: false

# mermaid流程图 三个选项缺一不可(https://mermaid-js.github.io/mermaid/)
mermaid:
  enable: false
  cdn: https://cdn.staticfile.org/mermaid/8.14.0/mermaid.min.js
  theme: forest

# 网站成立年份(默认为 2019,若填入年份小于当前年份,则显示为 2018-2019 类似的格式)
since: 2022

# ICP备案信息尾部显示
icp:
  enable: false
  url: "https://beian.miit.gov.cn/" # 备案链接
  text: "浙ICP备88888888" # 备案信息
# 公安备案信息尾部显示
gongan:
  enable: false
  img: /images/beian.png #公安备案图片
  url: "http://www.beian.gov.cn/portal/registerSystemInfo?recordcode=01234567890123" #公安备案链接
  text: "浙公网安备01234567890123号" #公安备案信息

# 友情链接
friends_link:
  # Ayer主题: #网站名称
  #   #网站地址
  #   url: https://github.com/Shen-Yu/hexo-theme-ayer
  #   #网站图片(可忽略不写)
  #   img: /images/ayer.png
  Hexo官网:
    url: https://hexo.io
    img: /images/hexo.png
  Hexo图表插件:
    url: https://github.com/Shen-Yu/hexo-tag-chart
    img: /images/hexo-tag-chart.png

# 评论:1、Valine(推荐);2、Gitalk;3、Twikoo;

# 1、Valine[一款快速、简洁且高效的无后端评论系统](https://github.com/xCss/Valine)
# 启用Valine必须先创建leancloud应用, 获取 id|key 填入即可
leancloud:
  enable: false
  app_id: #
  app_key: #
# Valine配置
valine:
  enable: false # 是否启用
  avatar: monsterid # 头像样式(https://valine.js.org/avatar.html)
  placeholder: 给我的文章加点评论吧~ # placeholder

# 2、Gitalk(https://github.com/gitalk/gitalk)
gitalk:
  enable: false # true
  clientID: # GitHub Application Client ID
  clientSecret: # Client Secret
  repo: # Repository name
  owner: # GitHub ID
  admin: # GitHub ID

# 3、Twikoo(https://github.com/imaegoo/twikoo)
twikoo:
  enable: true
  envId: #

# 首页广告配置
# 可以根据需要自行增加ad_3,ad_4...,留空则不显示,建议图片和url不要带ad等关键词,否则可能会被adblock等插件屏蔽
# ads:
#   ad_1:
#     title: 云服务器限时秒杀
#     img: https://pic.imgdb.cn/item/62174b452ab3f51d912a5ccc.jpg
#     url: https://curl.qcloud.com/kvO7hb43
#     width: 300
#   ad_2:
#     title: vultr优惠vps
#     img: https://pic.imgdb.cn/item/62174b452ab3f51d912a5cd7.png
#     url: https://www.vultr.com/?ref=8630075
#     width: 300

# 网站开启加密访问,密码可设置任何字符
lock:
  enable: false
  password: 123456
这里还可以替换博客themes文件夹下的静态文件来美化自己的博客。
7. 关联博客到 Gitee
在 _config.yml 文件中配置 Gitee 仓库信息,并部署博客。
# 配置 Git 用户名和邮箱
git config --global user.name "your-gitee-username"
git config --global user.email "your-email@example.com"

# 生成 SSH 密钥
ssh-keygen -t ed25519 -C "Gitee SSH Key"

# 添加 SSH 公钥到 Gitee 账户
cat ~/.ssh/id_ed25519.pub

# 测试 SSH 连接
ssh -T git@gitee.com
如何生成 SSH 密钥: 生成 SSH 密钥
确保将 your-gitee-username 和 your-repo 替换为你在 Gitee 上的用户名和仓库名。
8. 预览和部署
确保一切设置正确,进入本地博客文件夹>右键>在终端打开。
# 启动本地服务器预览博客
hexo server

# 简写
hexo s
如果满意,部署博客到 Gitee。
# 清理缓存
hexo clean

# 生成博客内容
hexo g

# 启动本地服务器预览博客(可选)
hexo server
# 简写
hexo s

# 安装 Hexo 部署插件(安装一次即可)
npm install hexo-deployer-git --save

# 部署博客
hexo deploy

# 简写
hexo d
如果部署不上去可能是博客跟目录下的 _congif.yml 中deploy>repo没有修改为自己的地址。
# Hexo Configuration
## Docs: https://hexo.io/docs/configuration.html
## Source: https://github.com/hexojs/hexo/

# Site
title: 洛可可白的个人博客
subtitle: '执着于理想,纯粹于当下'
description: '有事者,事竟成;破釜沉舟,百二秦关终归楚;苦心人,天不负;卧薪尝胆,三千越甲可吞吴。'
keywords: "生活,旅行,思考,代码"
author: 洛可可白
language: zh-CN
timezone: ''

# URL
## Set your site url here. For example, if you use GitHub Page, set url as 'https://username.github.io/project'
url: https://bestwishes0203.gitee.io/blog
# root: /
# permalink_style: pretty
permalink: :year/:month/:day/:title/
permalink_defaults:
pretty_urls:
  trailing_index: true # Set to false to remove trailing 'index.html' from permalinks
  trailing_html: true # Set to false to remove trailing '.html' from permalinks

# Directory
source_dir: source
public_dir: public
tag_dir: tags
archive_dir: archives
category_dir: categories
code_dir: downloads/code
i18n_dir: :lang
skip_render:

# Writing
new_post_name: :title.md # File name of new posts
default_layout: post
titlecase: false # Transform title into titlecase
external_link:
  enable: true # Open external links in new tab
  field: site # Apply to the whole site
  exclude: ''
filename_case: 0
render_drafts: false
post_asset_folder: false
relative_link: false
future: true
highlight:
  enable: true
  line_number: true
  auto_detect: false
  tab_replace: ''
  wrap: true
  hljs: false
prismjs:
  enable: false
  preprocess: true
  line_number: true
  tab_replace: ''

# Home page setting
# path: Root path for your blogs index page. (default = '')
# per_page: Posts displayed per page. (0 = disable pagination)
# order_by: Posts order. (Order by date descending by default)
index_generator:
  path: ''
  per_page: 10
  order_by: -date

# Category & Tag
default_category: uncategorized
category_map:
tag_map:

# Metadata elements
## https://developer.mozilla.org/en-US/docs/Web/HTML/Element/meta
meta_generator: true

# Date / Time format
## Hexo uses Moment.js to parse and display date
## You can customize the date format as defined in
## http://momentjs.com/docs/#/displaying/format/
date_format: YYYY-MM-DD
time_format: HH:mm:ss
## updated_option supports 'mtime', 'date', 'empty'
updated_option: 'mtime'

# Pagination
## Set per_page to 0 to disable pagination
per_page: 10
pagination_dir: page

# Include / Exclude file(s)
## include:/exclude: options only apply to the 'source/' folder
include:
exclude:
ignore:

# Extensions
## Plugins: https://hexo.io/plugins/
## Themes: https://hexo.io/themes/
# theme: landscape
theme: ayer

# hexo-generator-searchdb
search:
  path: search.xml
  field: post
  format: html

# Deployment
## Docs: https://hexo.io/docs/one-command-deployment
deploy:
  type: 'git'
  repo: git@gitee.com:bestwishes0203/blog.git
最后,在Gitee仓库中开启 Gitee Pages 服务并且更新内容。


添加或修改博客内容之后,重复 步骤8 即可更新到线上。
结论
通过以上步骤,你已经成功地搭建了一个基于 Hexo 的个人博客,选择了一个新主题,并将其部署到了 Gitee。现在,你可以开始编写文章,分享你的知识和见解了。
感谢你的访问,期待与你在技术的道路上相遇!👋🌟🚀


![[VulnHub靶机渗透] Nullbyte](https://img-blog.csdnimg.cn/direct/a5be5dc926284e3c99fecad3bb11b237.png)