1 roles角色
1.1 roles角色的作用?
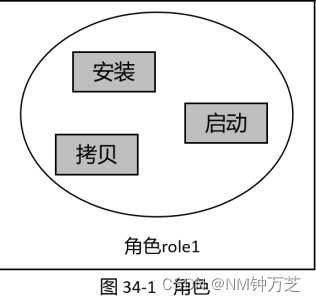
可以把playbook剧本里的各个play看作为一个角色,将各个角色打的tasks任务、vars变量、template模版和copy、script模块使用的相关文件等内容放置在指定角色的目录里统一管理,在需要的时候可在playbook中使用roles角色直接调用即可。
1.2 roles的目录格式
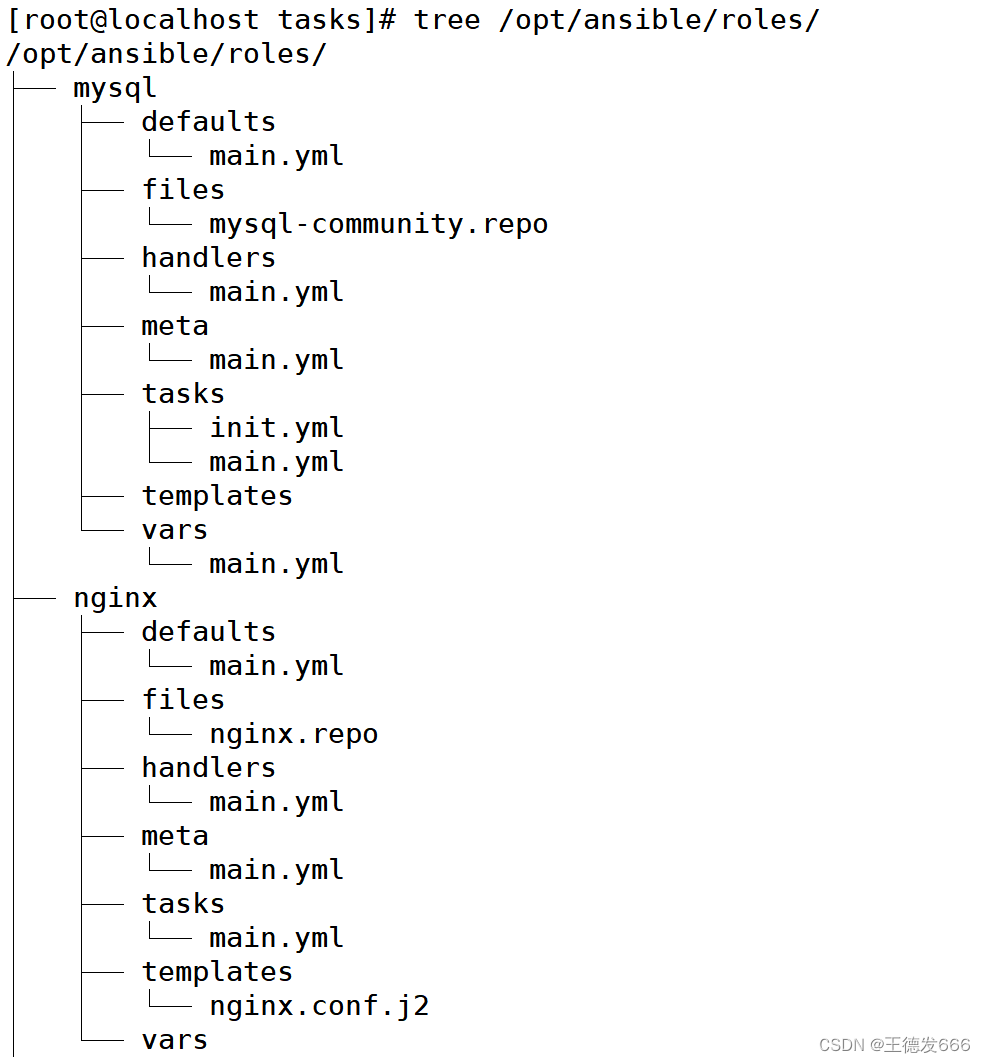
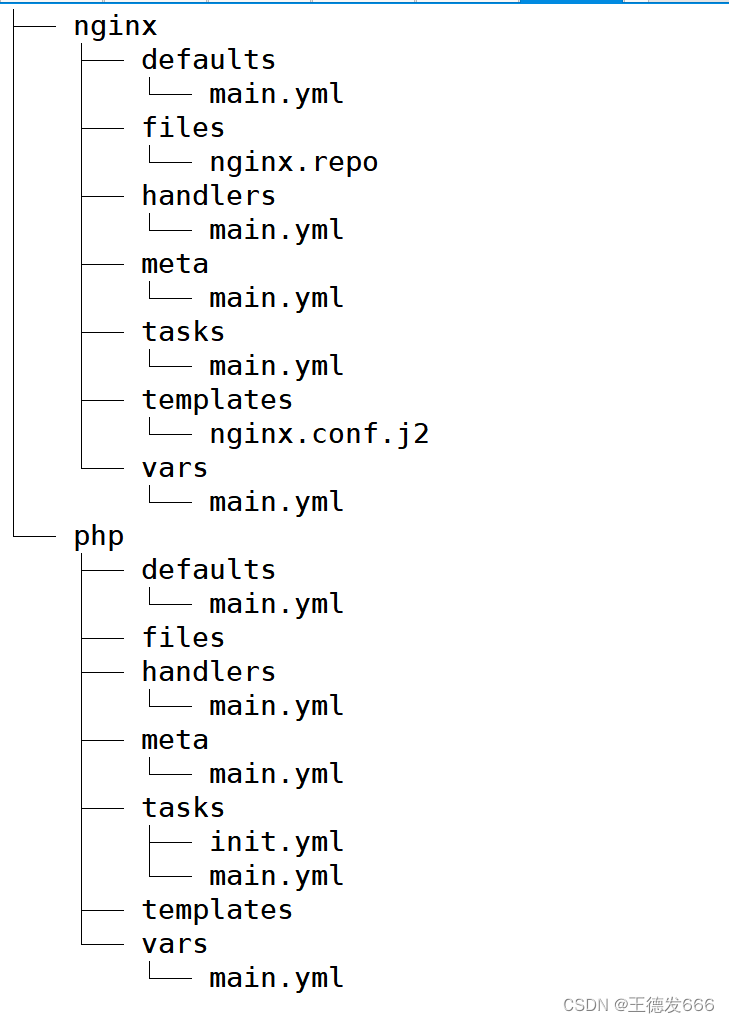
roles/                         #角色总目录,其每个子目录就是一个角色目录
   nginx/                         #相当于playbook中的每一个play主题,目录名就是角色名
      files/                         #存放copy、script模块调用的文件
      templates/                     #存放template模块调用的 XXX.j2 模板文件
      tasks/main.yml                 #定义此角色的tasks普通任务列表
      handlers/main.yml              #定义此角色通过notify触发时执行的handlers处理器任务列表
      vars/main.yml                  #定义此角色用的自定义变量
      defaults/main.yml              #定义此角色用的默认变量(一般不用)
      meta/main.yml                  #定义此角色的元数据信息和依赖关系
   mysql/
     ....
   php/
     ....
1.3 调用roles
vim XXX.yaml
- name:
hosts:
remote_user:
roles:
- nginx
- mysql
- php
ansible-playbook XXX.yaml

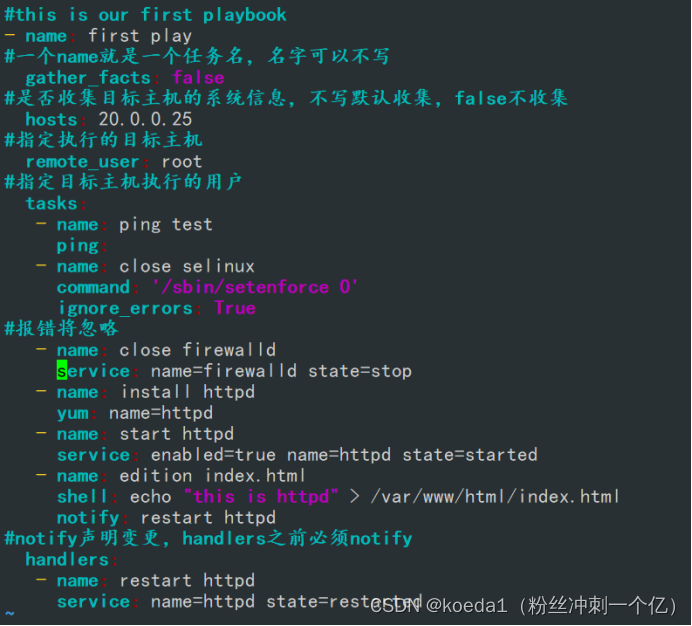
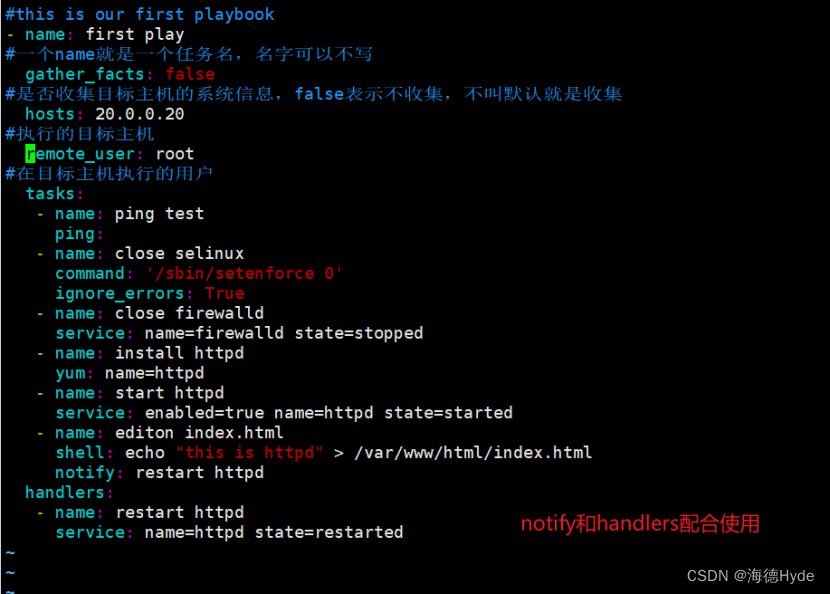
2 playbook调用roles分布式安装LNMP
2.1 管理端安装ansible并配置主机清单,与远程主机建立免交互
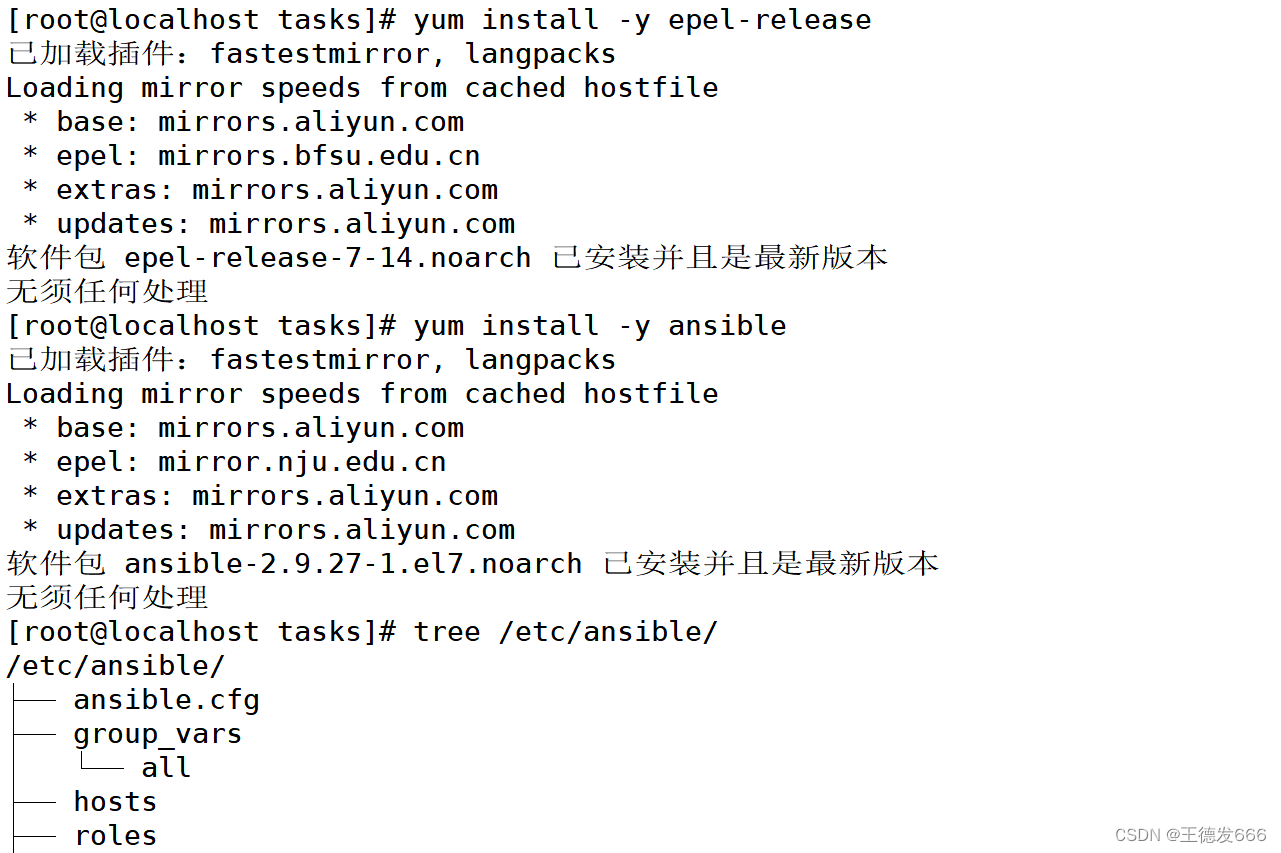
管理端安装 ansible
yum install -y epel-release         //先安装 epel 源
yum install -y ansible
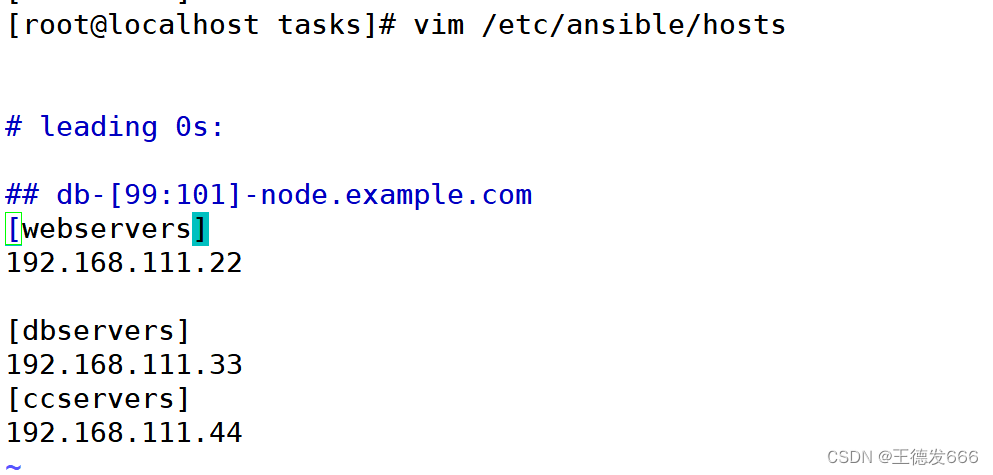
配置主机清单
cd /etc/ansible
vim hosts
[webservers]            #配置组名
192.168.111.22          #组里包含的被管理的主机IP地址或主机名(主机名需要先修改/etc/hosts文件)
[dbservers]
192.168.111.33
[ccservers]
192.168.111.44
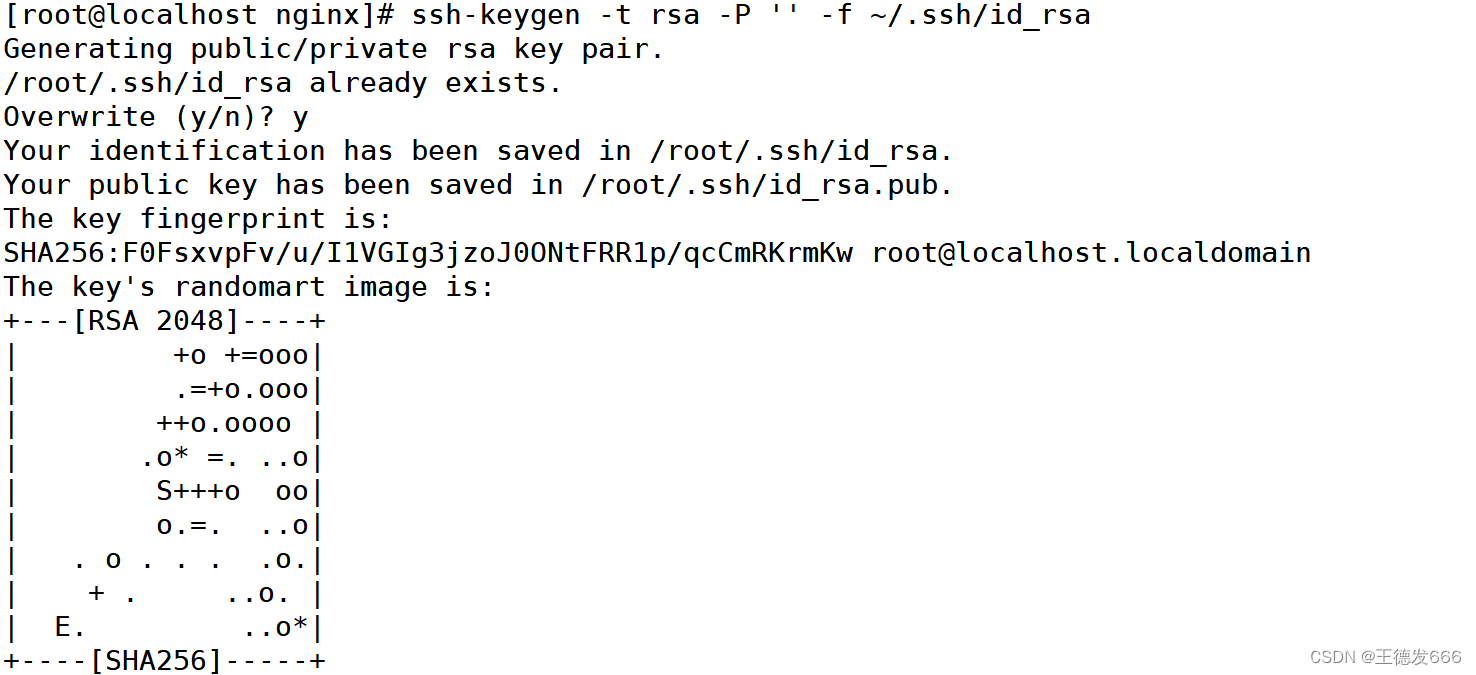
配置密钥对验证
ssh-keygen -t rsa -P '' -f ~/.ssh/id_rsa
yum install -y sshpass
sshpass -p '123' ssh-copy-id -o StrictHostKeyChecking=no root@192.168.111.22
sshpass -p '123' ssh-copy-id -o StrictHostKeyChecking=no root@192.168.111.33
sshpass -p '123' ssh-copy-id -o StrictHostKeyChecking=no root@192.168.111.44
2.2 部署nginx主机配置
创建nginx主机目录和yml文件
在命名的目录中分别创建files、handlers、tasks、templates、meta、defaults和vars目录,用不到的目录可以创建为空目录,也可以不创建
mkdir /opt/ansible/roles/nginx/{files,templates,tasks,handlers,vars,defaults,meta}
在角色的 handlers、tasks、meta、defaults、vars 目录下创建 main.yml 文件,千万不能自定义文件名
touch /opt/ansible/roles/nginx/{defaults,vars,tasks,meta,handlers}/main.yml

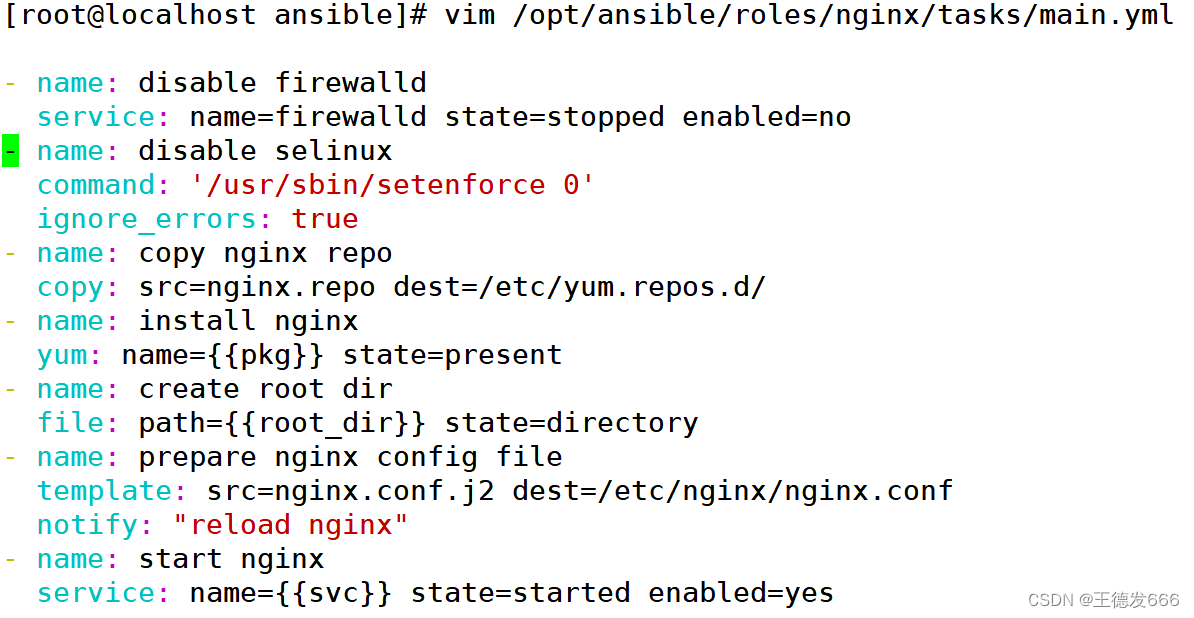
配置tasks文件
vim /opt/ansible/roles/nginx/tasks/main.yml
- name: disable firewalld
service: name=firewalld state=stopped enabled=no
- name: disable selinux
command: '/usr/sbin/setenforce 0'
ignore_errors: true
- name: copy nginx repo
copy: src=nginx.repo dest=/etc/yum.repos.d/
- name: install nginx
yum: name={
{pkg}} state=present
- name: create root dir
file: path={
{root_dir}} state=directory
- name: prepare nginx config file
template: src=nginx.conf.j2 dest=/etc/nginx/nginx.conf
notify: "reload nginx"
- name: start nginx
service: name={
{svc}} state=started enabled=yes
~
配置vars文件
vim /opt/ansible/roles/nginx/vars/main.yml
nginx_addr: 192.168.111.22
nginx_port: 80
server_name: www.ky33.com
root_dir: /var/www/html
php_addr: 192.168.111.22
php_port: 9000
pkg: nginx
svc: nginx

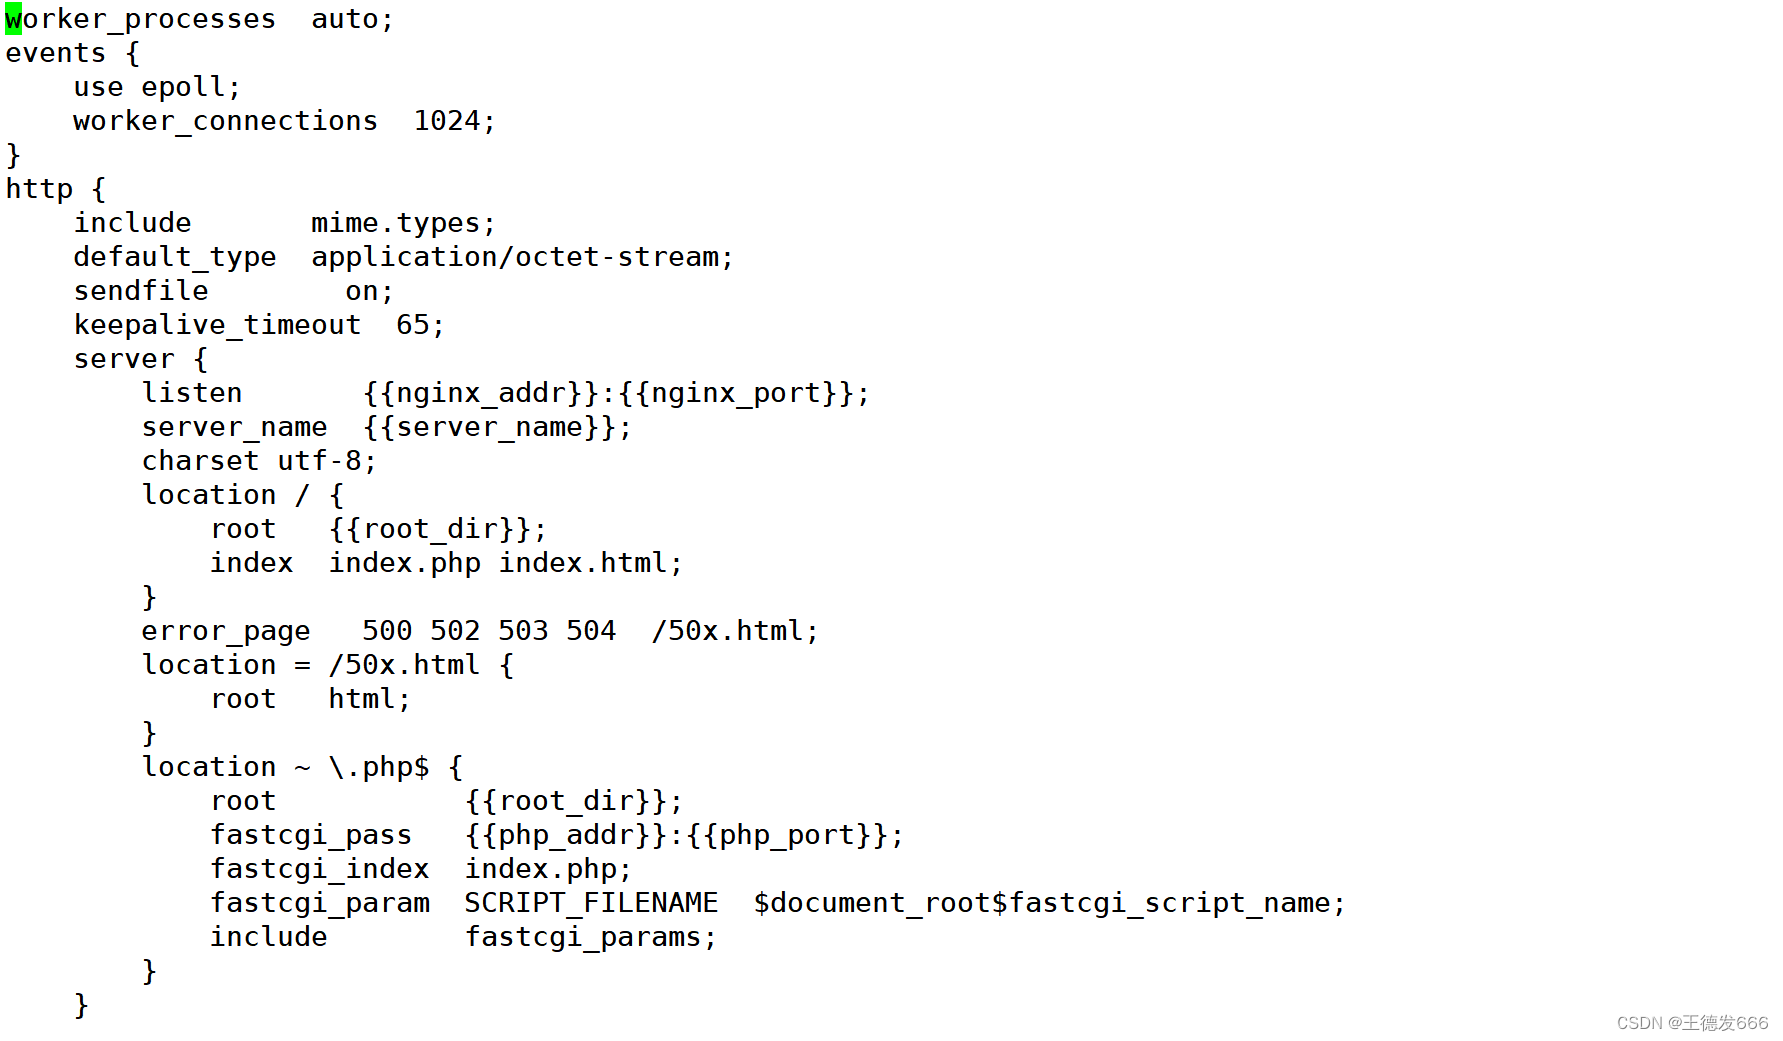
配置templates模版中nginx用于支持php服务的配置文件
vim /opt/ansible/roles/nginx/templates/nginx.conf.j2
worker_processes auto;
events {
use epoll;
worker_connections 1024;
}
http {
include mime.types;
default_type application/octet-stream;
sendfile on;
keepalive_timeout 65;
server {
listen {
{nginx_addr}}:{
{nginx_port}};
server_name {
{server_name}};
charset utf-8;
location / {
root {
{root_dir}};
index index.php index.html;
}
error_page 500 502 503 504 /50x.html;
location = /50x.html {
root html;
}
location ~ \.php$ {
root {
{root_dir}};
fastcgi_pass {
{php_addr}}:{
{php_port}};
fastcgi_index index.php;
fastcgi_param SCRIPT_FILENAME $document_root$fastcgi_script_name;
include fastcgi_params;
}
}
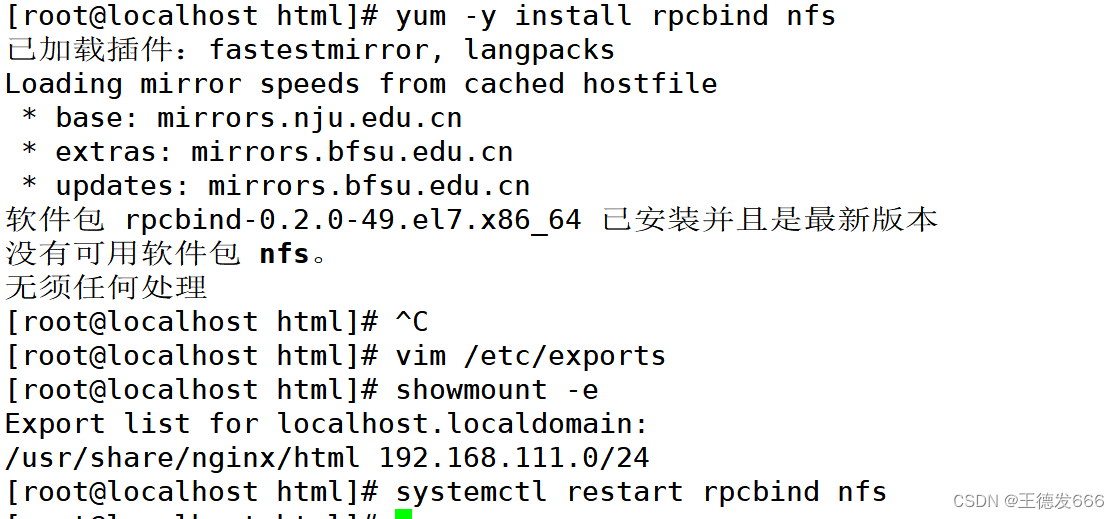
安装rpcbind和nfs并配置用于php挂载
yum -y install rpcbind nfs
vim /etc/exports
/usr/share/nginx/html 192.168.111.0/24(rw)
showmount -e
Export list for localhost.localdomain:
/usr/share/nginx/html 192.168.111.0/24
systemctl restart rpcbind nfs
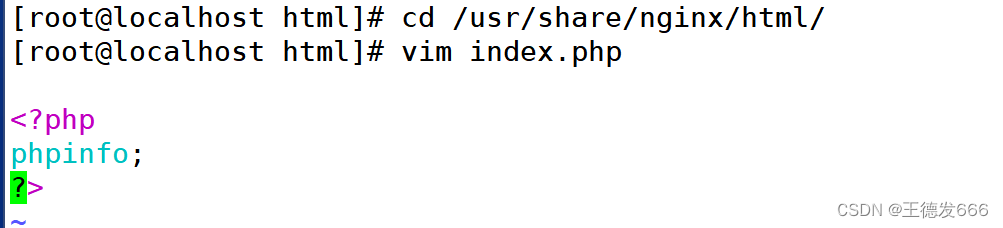
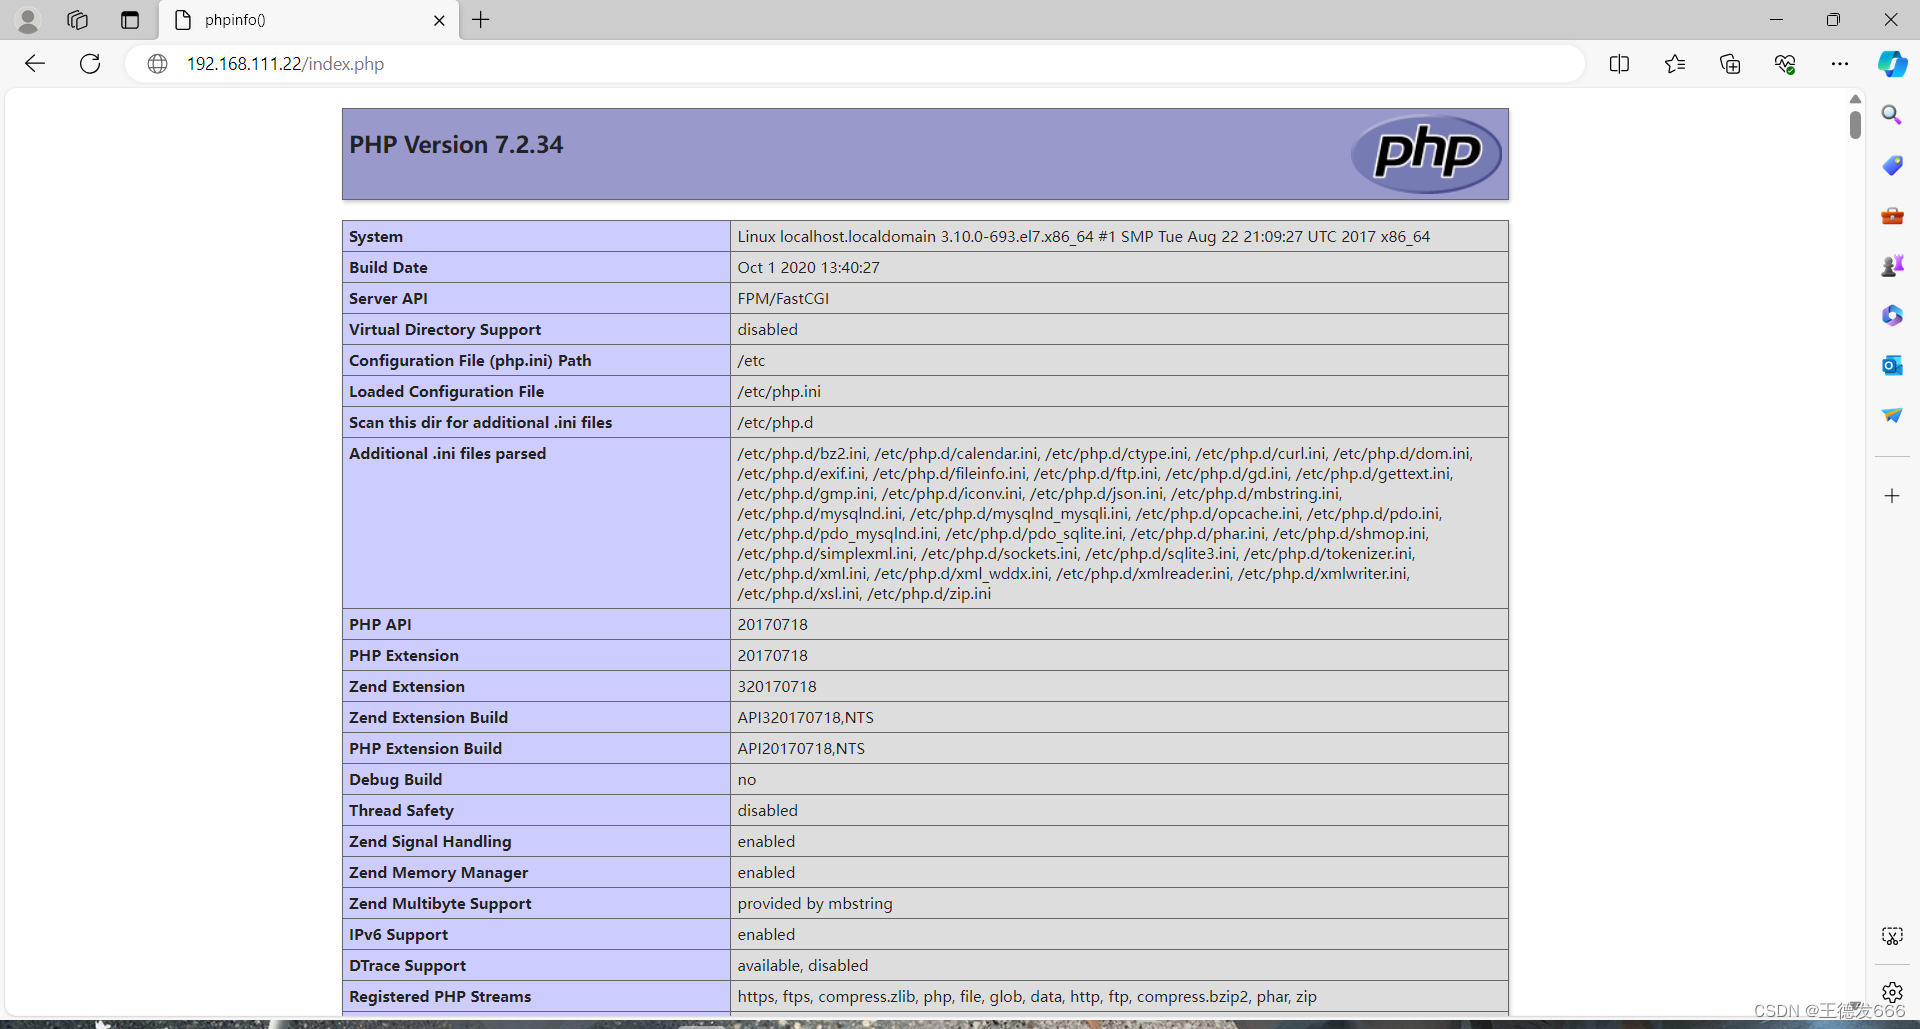
配置php服务文件用于测试
cd /usr/share/nginx/html/
vim index.php
<?php
phpinfo;
?>
2.3 部署mysql主机配置
创建mysql主机目录和yml文件
在命名的目录中分别创建files、handlers、tasks、templates、meta、defaults和vars目录,用不到的目录可以创建为空目录,也可以不创建
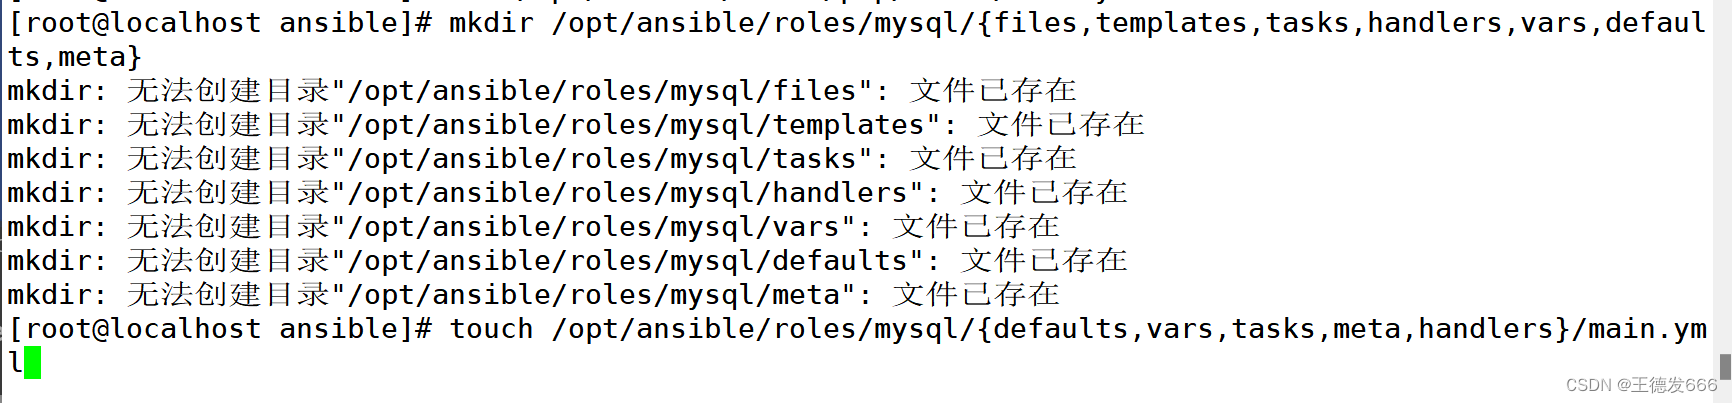
mkdir /opt/ansible/roles/mysql/{files,templates,tasks,handlers,vars,defaults,meta}
在角色的 handlers、tasks、meta、defaults、vars 目录下创建 main.yml 文件,千万不能自定义文件名
touch /opt/ansible/roles/mysql/{defaults,vars,tasks,meta,handlers}/main.yml
配置tasks文件
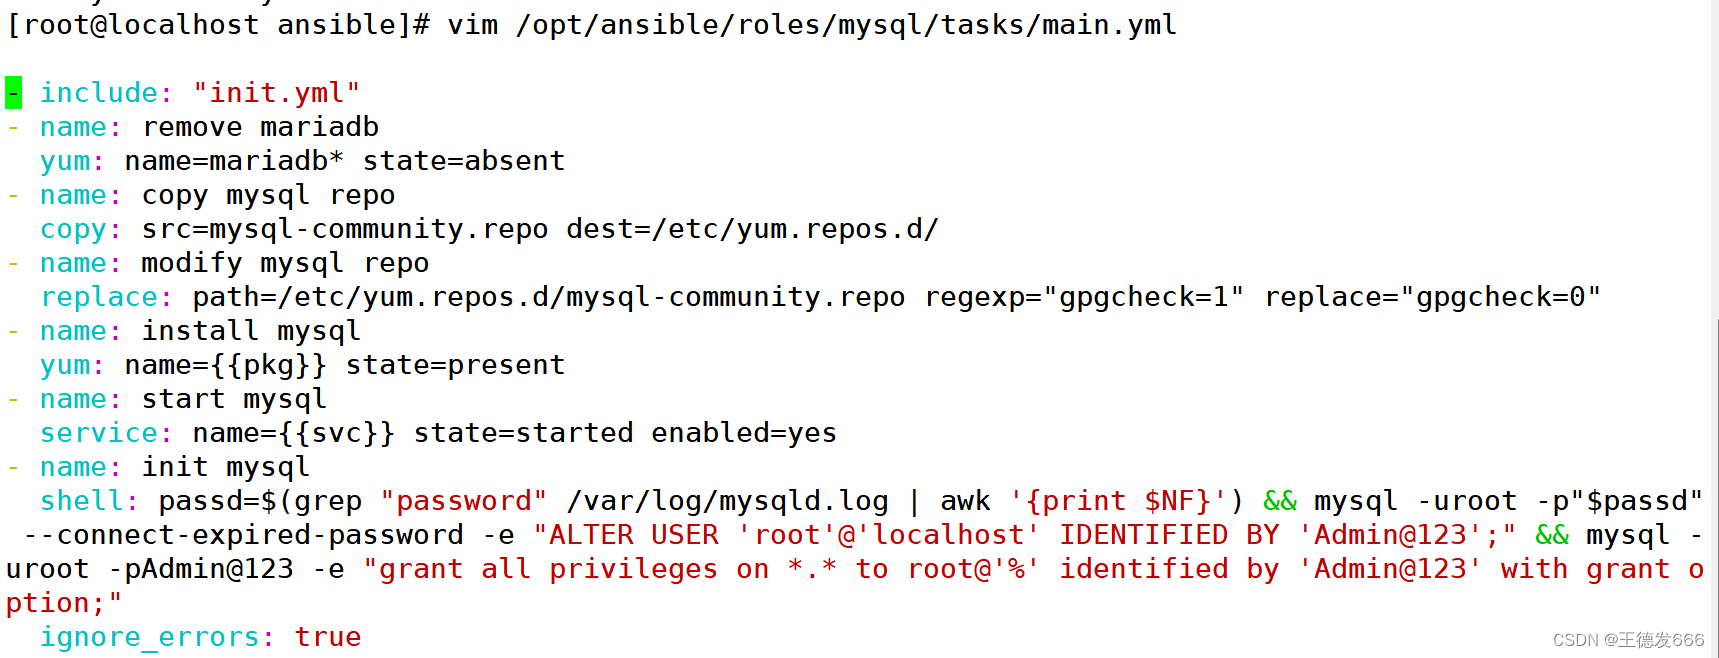
vim /opt/ansible/roles/mysql/tasks/main.yml
- include: "init.yml"
- name: remove mariadb
yum: name=mariadb* state=absent
- name: copy mysql repo
copy: src=mysql-community.repo dest=/etc/yum.repos.d/
- name: modify mysql repo
replace: path=/etc/yum.repos.d/mysql-community.repo regexp="gpgcheck=1" replace="gpgcheck=0"
- name: install mysql
yum: name={
{pkg}} state=present
- name: start mysql
service: name={
{svc}} state=started enabled=yes
- name: init mysql
shell: passd=$(grep "password" /var/log/mysqld.log | awk '{print $NF}') && mysql -uroot -p"$passd" --connect-expired-password -e "ALTER USER 'root'@'localhost' IDENTIFIED BY 'Admin@123';" && mysql -uroot -pAdmin@123 -e "grant all privileges on *.* to root@'%' identified by 'Admin@123' with grant option;"
ignore_errors: true
配置防火墙文件
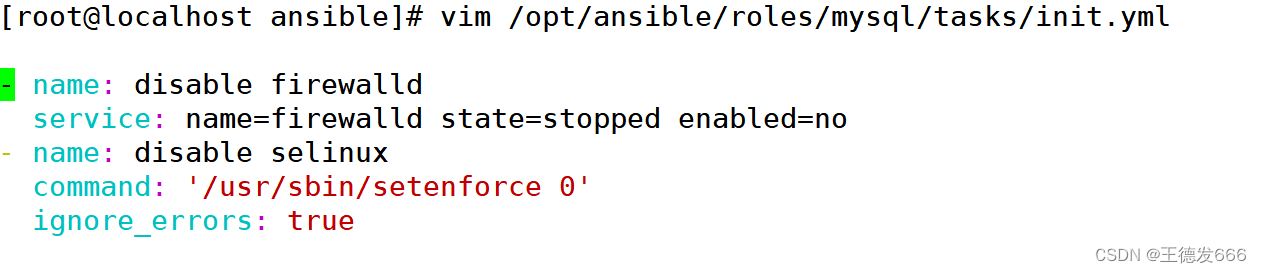
vim /opt/ansible/roles/mysql/tasks/init.yml
- name: disable firewalld
service: name=firewalld state=stopped enabled=no
- name: disable selinux
command: '/usr/sbin/setenforce 0'
ignore_errors: true
配置vars文件
vim /opt/ansible/roles/mysql/vars/main.yml
pkg: mysql-server
svc: mysqld

2.4 部署php主机配置
创建php主机目录和yml文件
在命名的目录中分别创建files、handlers、tasks、templates、meta、defaults和vars目录,用不到的目录可以创建为空目录,也可以不创建
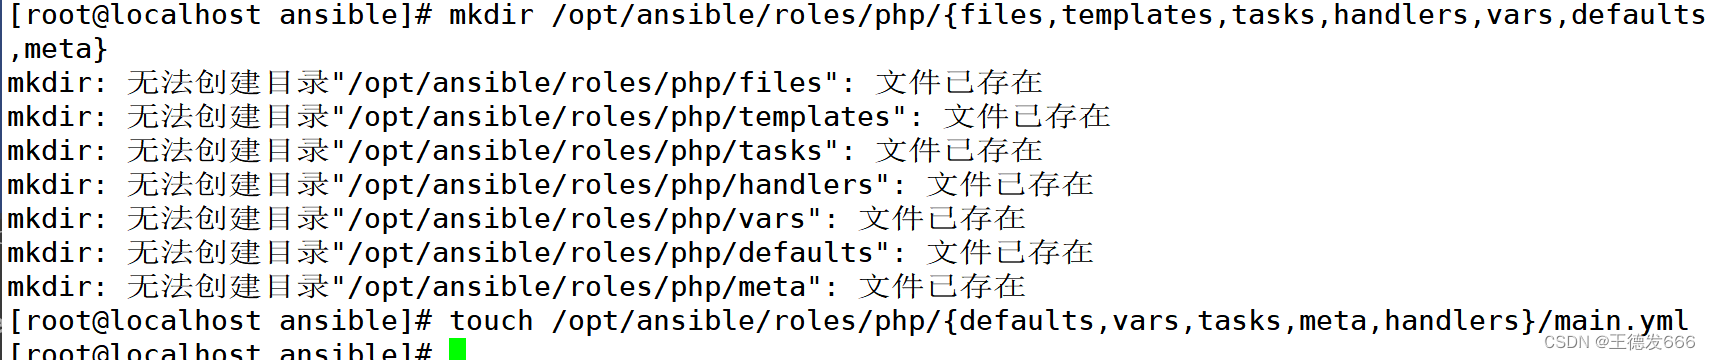
mkdir /opt/ansible/roles/php/{files,templates,tasks,handlers,vars,defaults,meta}
在角色的 handlers、tasks、meta、defaults、vars 目录下创建 main.yml 文件,千万不能自定义文件名
touch /opt/ansible/roles/php/{defaults,vars,tasks,meta,handlers}/main.yml
配置tasks文件
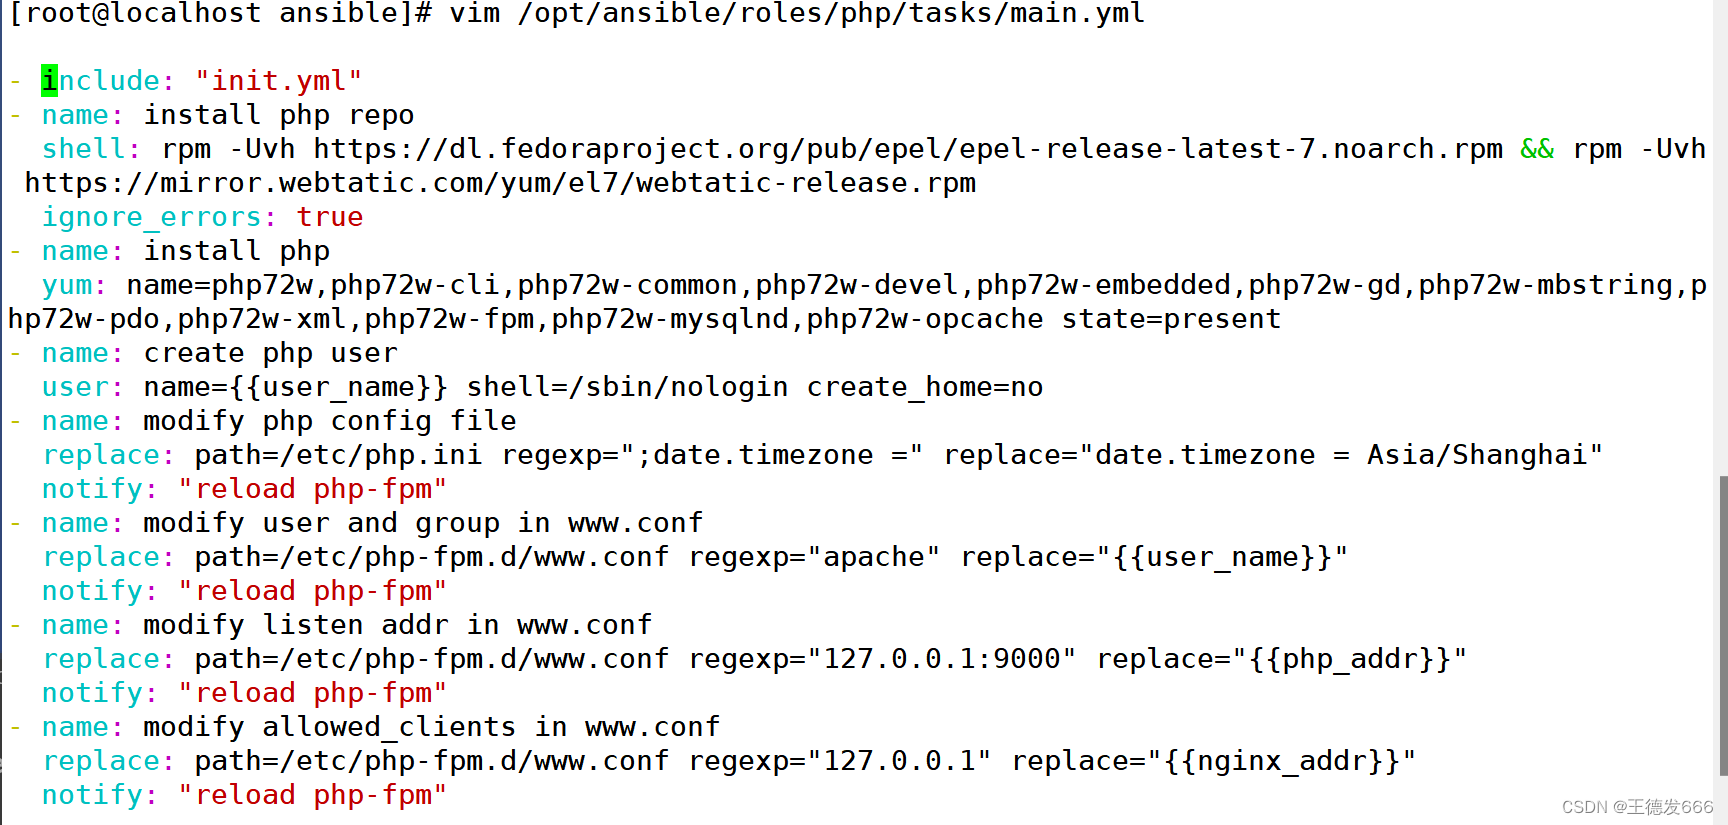
vim /opt/ansible/roles/php/tasks/main.yml
- name: install php
yum: name=php72w,php72w-cli,php72w-common,php72w-devel,php72w-embedded,php72w-gd,php72w-mbstring,php72w-pdo,php72w-xml,php72w-fpm,php72w-mysqlnd,php72w-opcache state=present
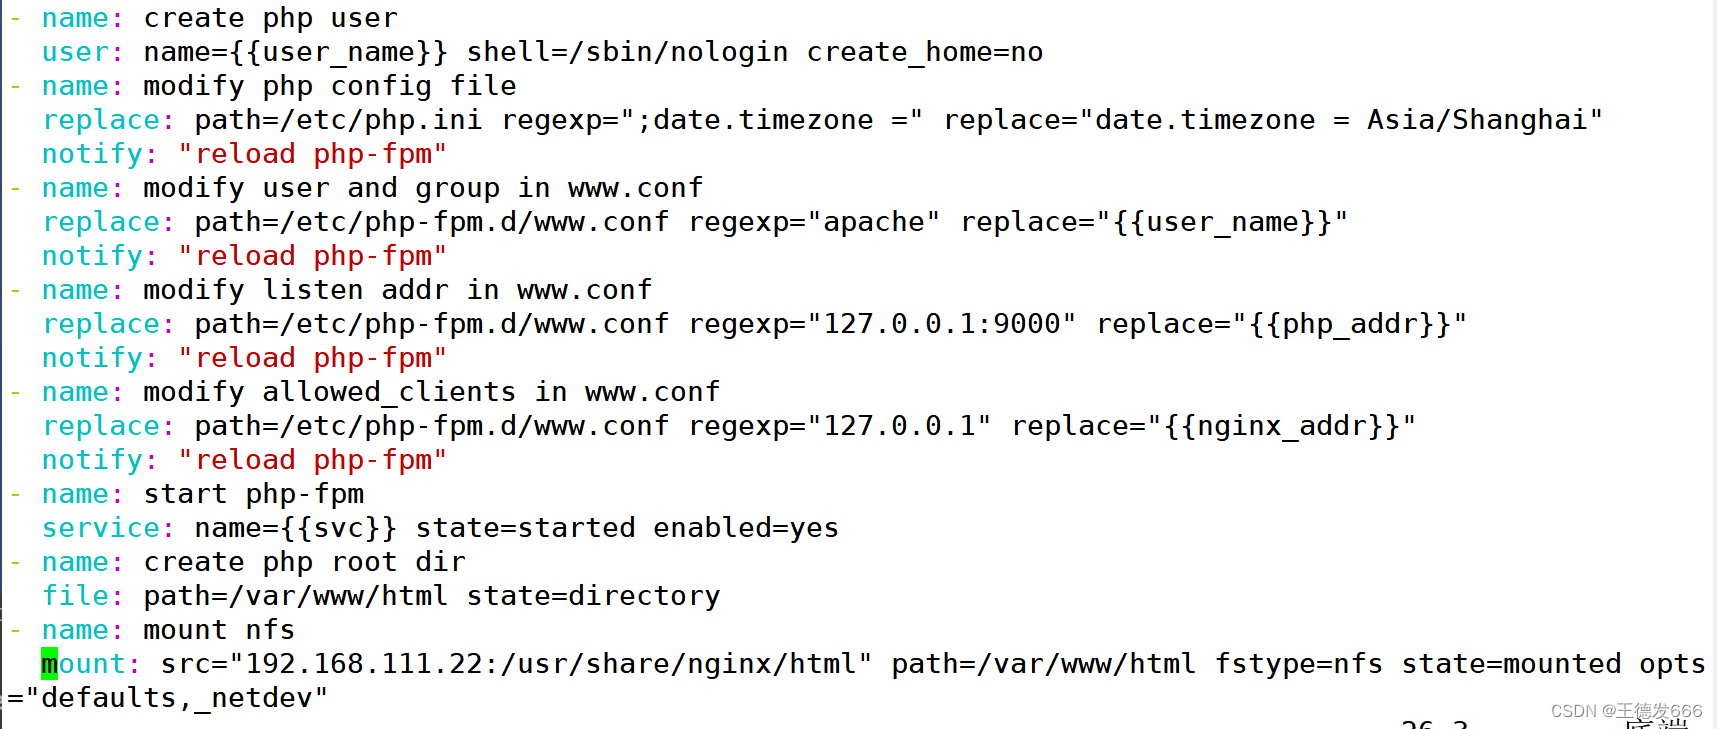
- name: create php user
user: name={
{user_name}} shell=/sbin/nologin create_home=no
- name: modify php config file
replace: path=/etc/php.ini regexp=";date.timezone =" replace="date.timezone = Asia/Shanghai"
notify: "reload php-fpm"
- name: modify user and group in www.conf
replace: path=/etc/php-fpm.d/www.conf regexp="apache" replace="{
{user_name}}"
notify: "reload php-fpm"
- name: modify listen addr in www.conf
replace: path=/etc/php-fpm.d/www.conf regexp="127.0.0.1:9000" replace="{
{php_addr}}"
notify: "reload php-fpm"
- name: modify allowed_clients in www.conf
replace: path=/etc/php-fpm.d/www.conf regexp="127.0.0.1" replace="{
{nginx_addr}}"
notify: "reload php-fpm"
- name: start php-fpm
service: name={
{svc}} state=started enabled=yes
- name: create php root dir
file: path=/var/www/html state=directory
- name: mount nfs
mount: src="192.168.111.22:/usr/share/nginx/html" path=/var/www/html fstype=nfs state=mounted opts="defaults,_netdev"
配置vars文件
vim /opt/ansible/roles/php/vars/main.yml
user_name: php
php_addr: 192.168.111.44:9000
nginx_addr: 192.168.111.22
svc: php-fpm

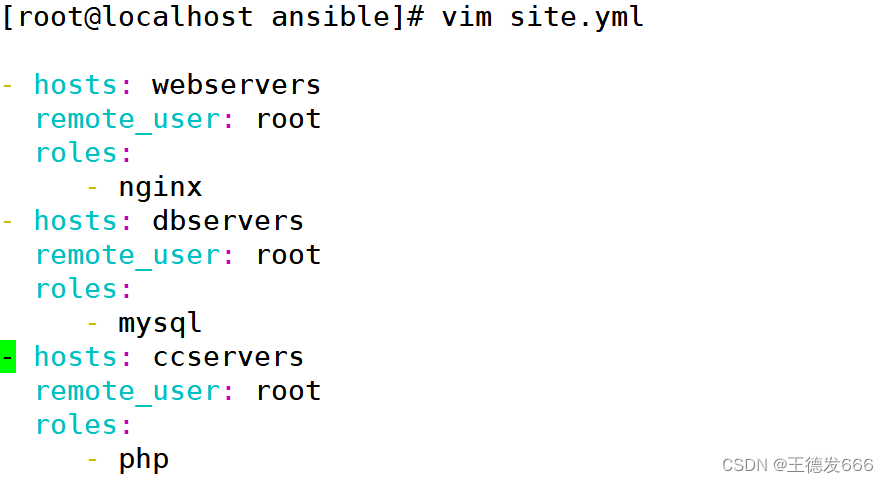
2.5 配置lnmp启动剧本
vim site.yml
- hosts: webservers
remote_user: root
roles:
- nginx
- hosts: dbservers
remote_user: root
roles:
- mysql
- hosts: ccservers
remote_user: root
roles:
- php
执行脚本
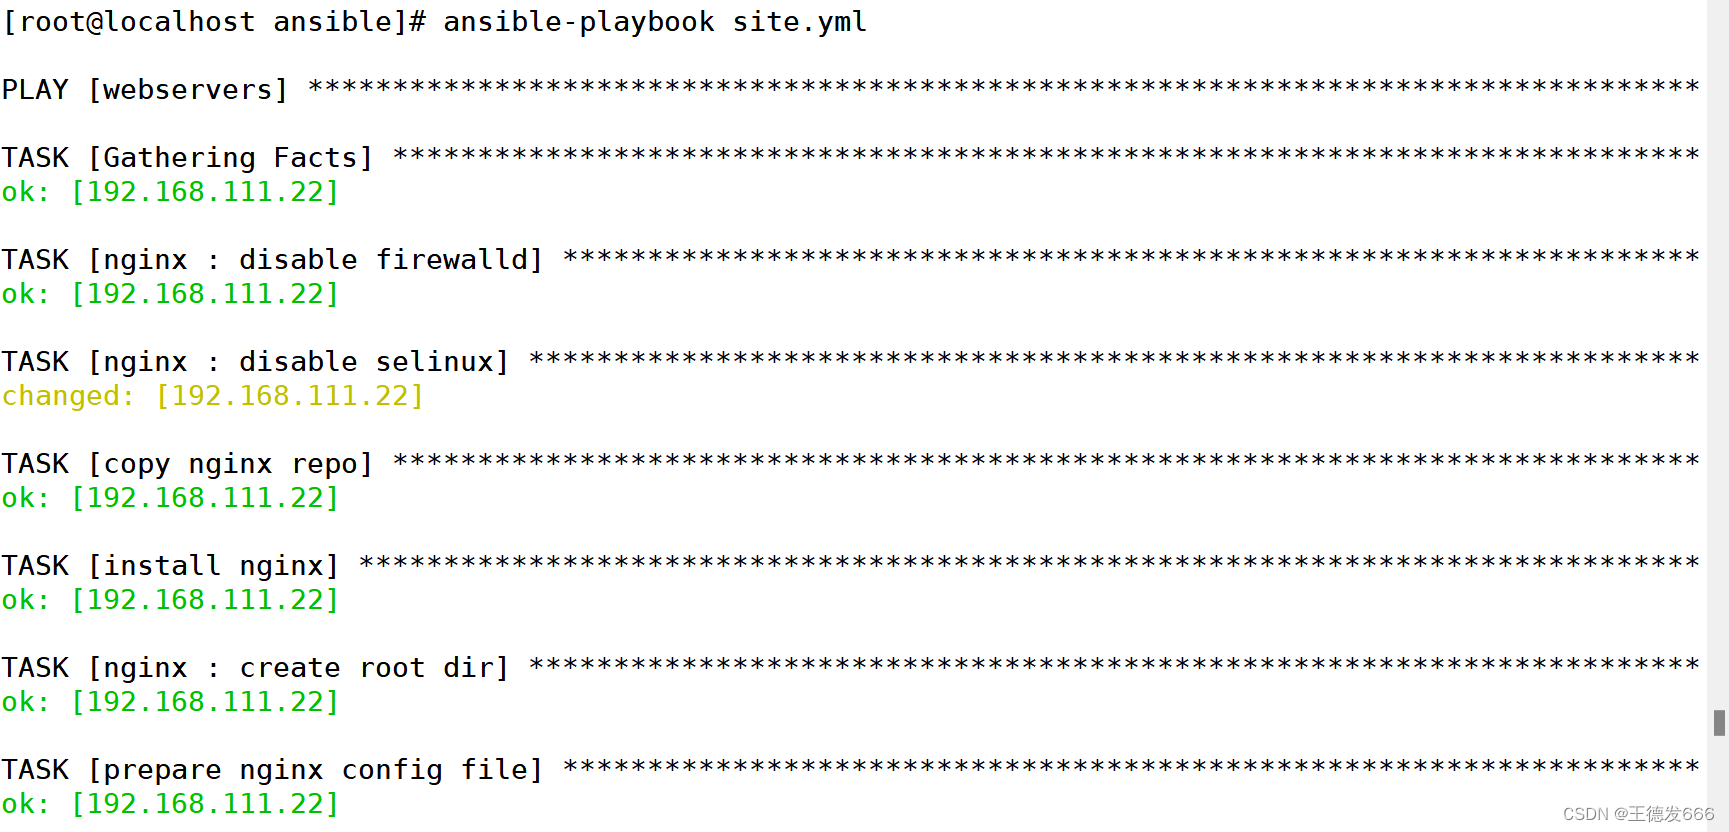
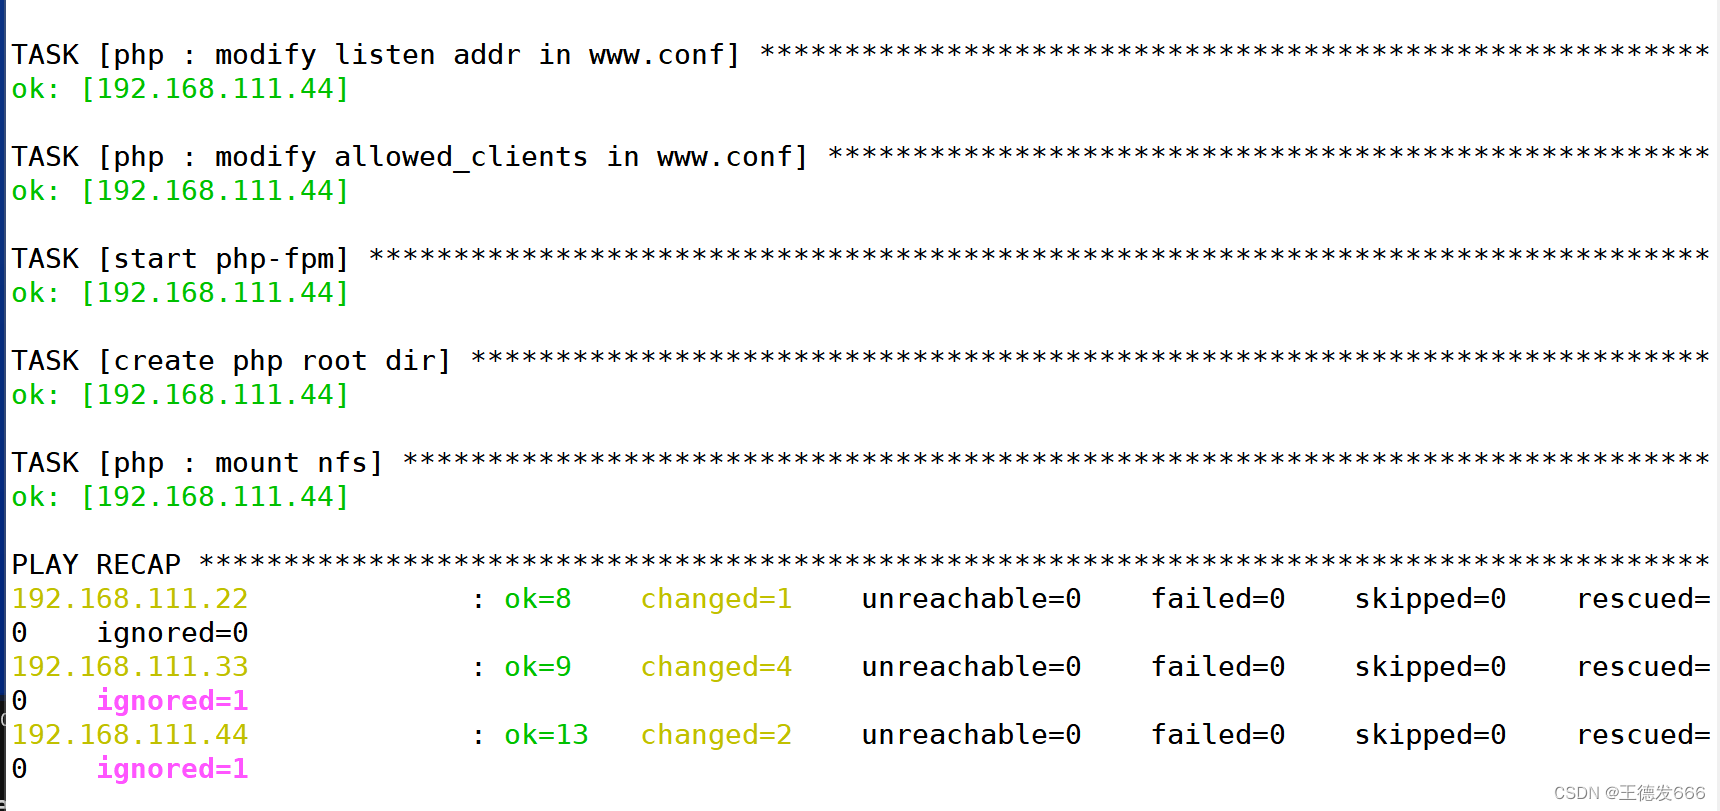


![[工具探索]VSCode介绍和进阶使用](https://img-blog.csdnimg.cn/direct/9296daa2883b4152850b8caa7e289ced.jpeg#pic_center)


![[ansible] playbook角色](https://img-blog.csdnimg.cn/direct/e6eb3e571abb40ed9af3feb94c2b1c5a.png)