部署lomp环境,安装typecho、WordPress博客
- 一、环境要求
- 二、Linux下安装openresty
- 三、Linux下安装Mysql
- 四、安装Apache【此步骤可省略】
- 五、remi扩展源安装PHP
- 六、搭建博客【WordPress】
-
- 6.1.创建文件夹管理
- 6.2.下载Wordpress安装包并解压
- 6.3.修改WordPress配置文件wp-config.php
- 6.4.创建存储博客网站内容的数据库
- 6.5.配置MySQL的安全性
- 6.6.输入exit退出数据库
- 6.7.修改openresty配置文件并重启
- 6.8.防火墙放行8080端口
- 6.9.确保服务启动
- 6.10.FastCGI sent in stderr: "Primary script unknown" while reading response header from upstream
- 6.11.打开浏览器,访问http://<ECS公网IP>:8080
- 6.12.博客页面进行相关设置
- 七、安装typecho博客
- endl 本文章下载链接
一、环境要求
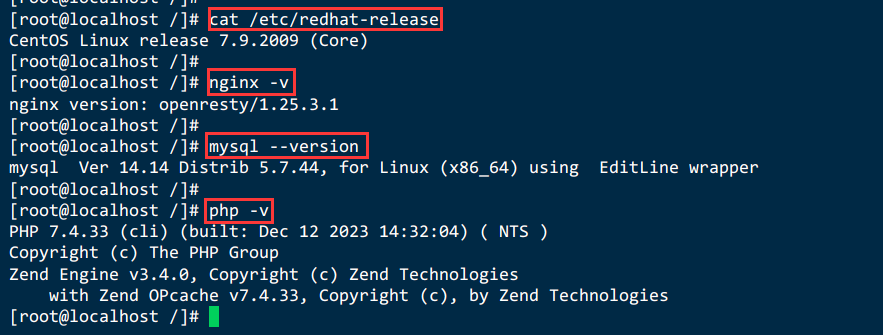
1.1.版本信息
CentOS 7.9
openresty 1.25.3.1
Mysql 5.7
PHP 7.4.33
1.2.准备阿里云服务器【新用户免费使用三个月】
阿里云服务器链接专享:https://www.aliyun.com/daily-act/ecs/activity_selection?userCode=yu4fhct7

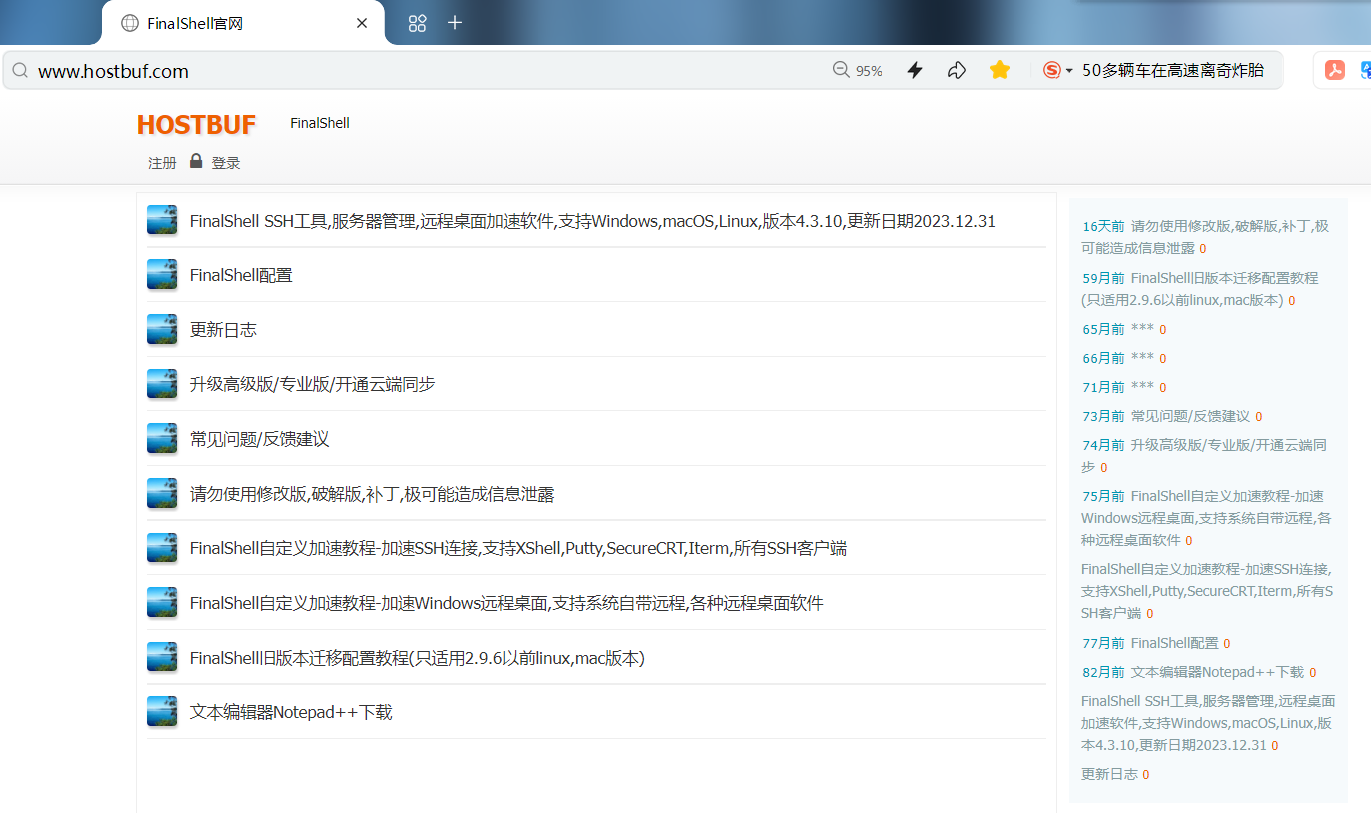
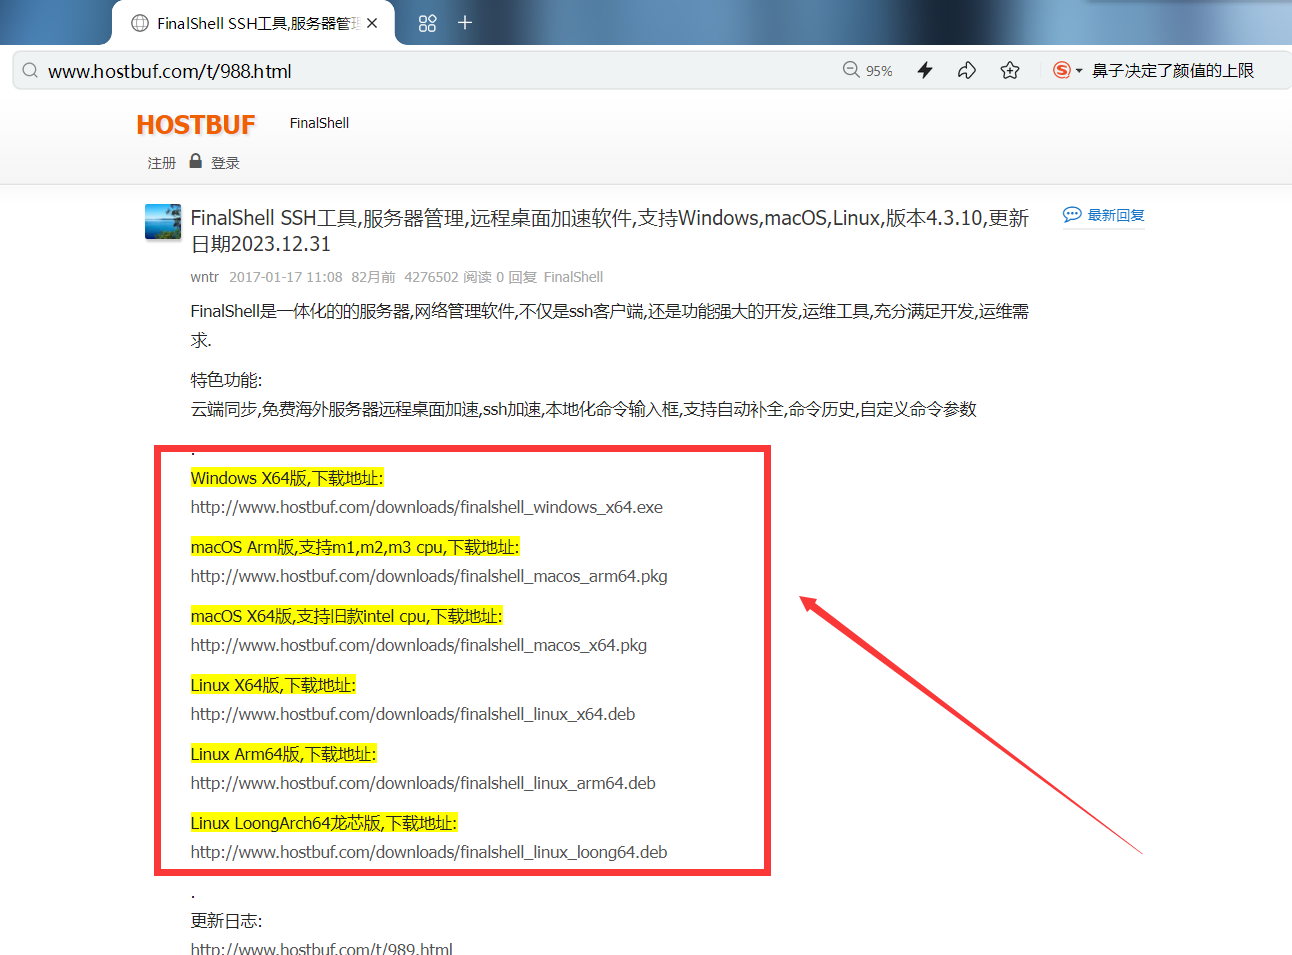
1.3.准备远程工具【FinalShell】
官网:http://www.hostbuf.com/
下载链接:http://www.hostbuf.com/t/988.html
二、Linux下安装openresty
参考链接:https://blog.csdn.net/qq_45740503/article/details/135887895
三、Linux下安装Mysql
参考链接:https://blog.csdn.net/qq_45740503/article/details/135617610
四、安装Apache【此步骤可省略】
4.1.安装Apache服务及其扩展包
yum -y install httpd httpd-manual httpd-devel mod_ssl mod_perl
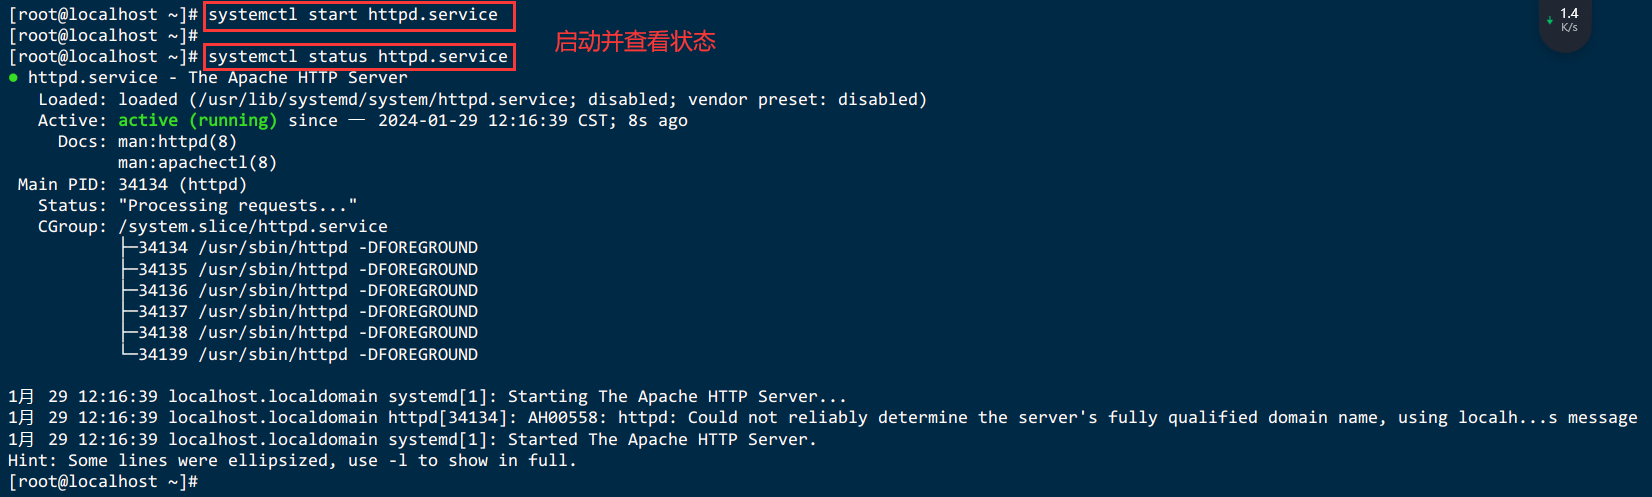
4.2.Apache服务相关命令
#启动Apache服务
systemctl start httpd

#重启Apache服务
systemctl restart httpd

# 查看Apache状态
systemctl status httpd

#停止Apache服务
systemctl stop httpd

# 设置Apache服务开机自启动
systemctl enable httpd
4.3.检查Apache状态
# 查看Apache状态
systemctl status httpd
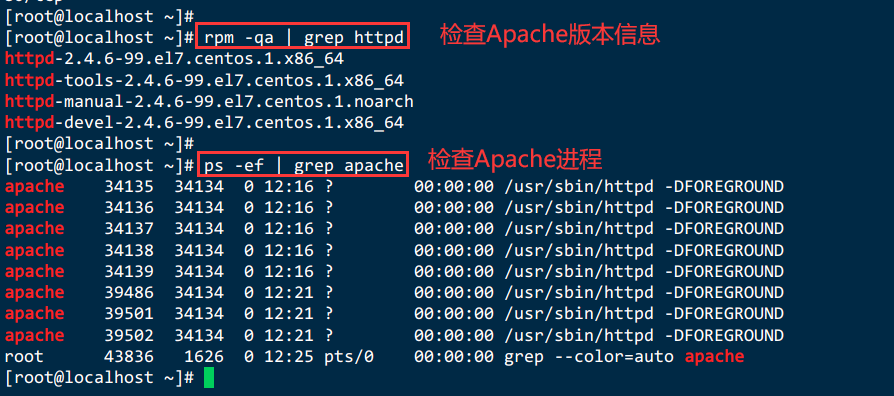
# 检查apache软件版本
rpm -qa | grep httpd
# 检查apache的进程
ps -ef | grep apache
4.4.查看其配置文件位置
rpm -qc httpd
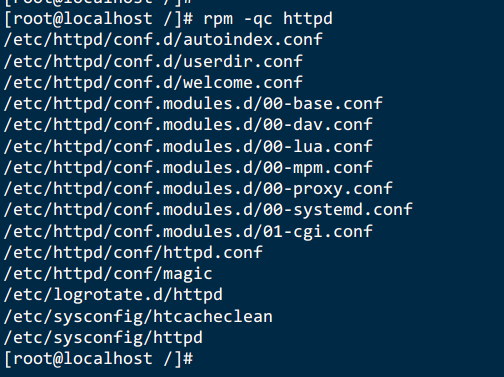
配置文件主目录: /etc/httpd/conf/http.conf

默认发布目录是:/var/www/html

子配置文件目录 /etc/httpd/conf.d/*

默认关联上下文的情况是 httpd_sys_content_t

通找到index 进行添加默认访问目录,其访问顺序分先后次序

apache 日志文件位置 :/etc/httpd/logs/*

apache 的默认用户为apache

apache 有同步阻塞功能,使用的意义是在有多个文件时是顺序访问的
4.5.如果想修改默认页面,可以修改指定目录中 index.html 内容
# 目录地址
cd /usr/share/httpd/noindex
4.6.开放centos7的80和3306端口,配置防火墙相关命令
方法1 直接关闭防火墙,开启系统所有端口
systemctl stop firewalld

方法2 防火墙放行80端口【推荐】
//放行80端口
firewall-cmd --zone=public --add-port=80/tcp --permanent
//让防火墙通过mysql的3306端口
firewall-cmd --zone=public --add-port=3306/tcp --permanent
//使能防火墙生效
firewall-cmd --reload
//查看是否生效
firewall-cmd --list-ports


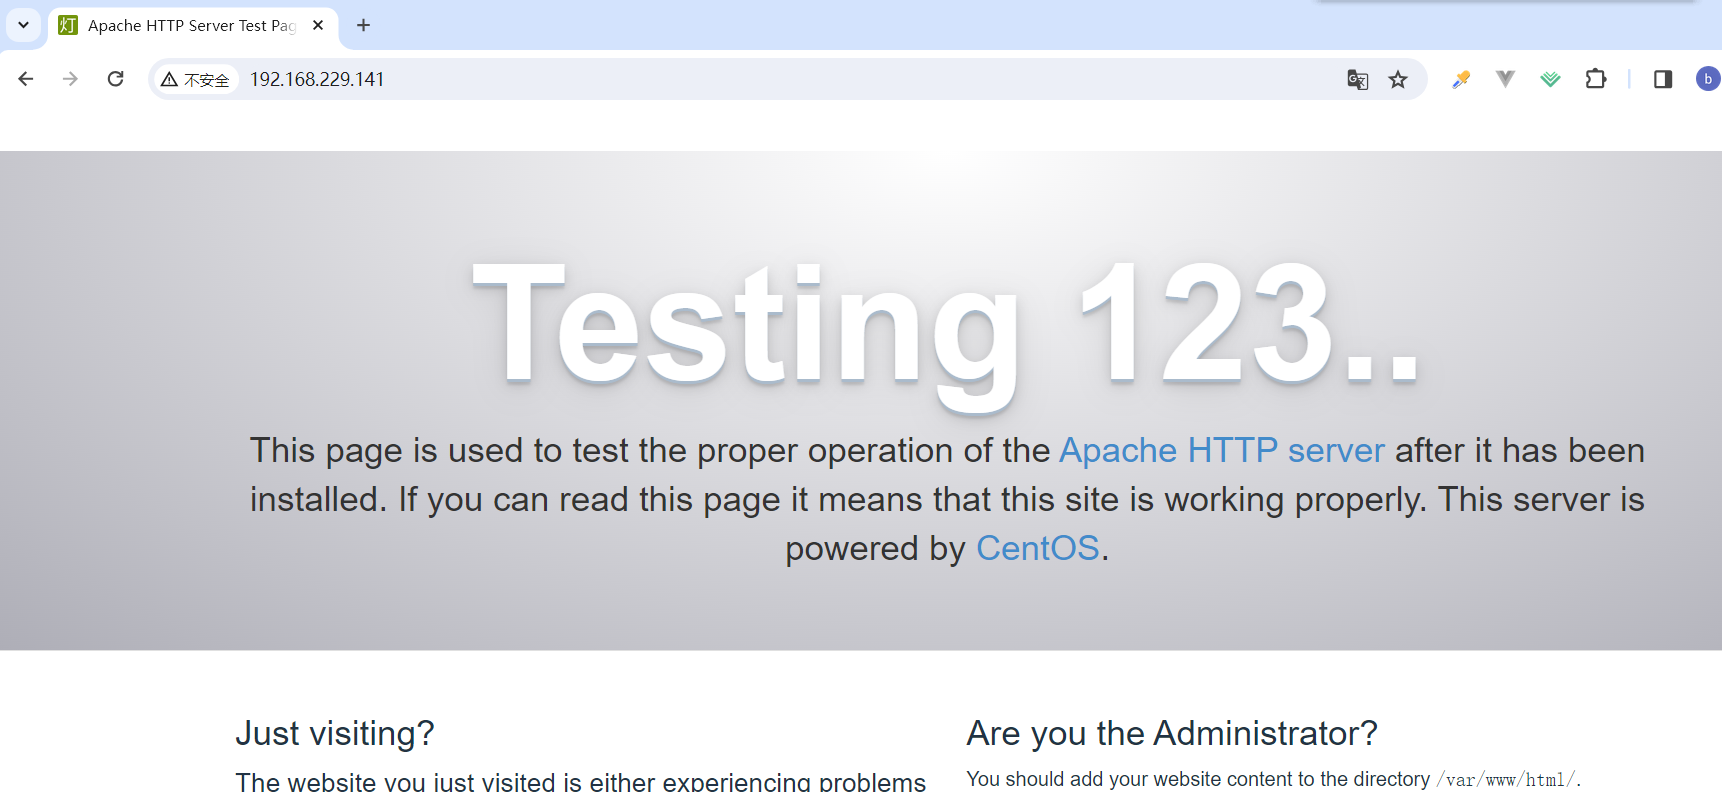
4.7.打开浏览器输入ECS服务器的公网IP,如果显示如下图的测试页面表示Apache服务安装成功。
说明:在实例页面可查看到ECS服务器的公网IP。
五、remi扩展源安装PHP
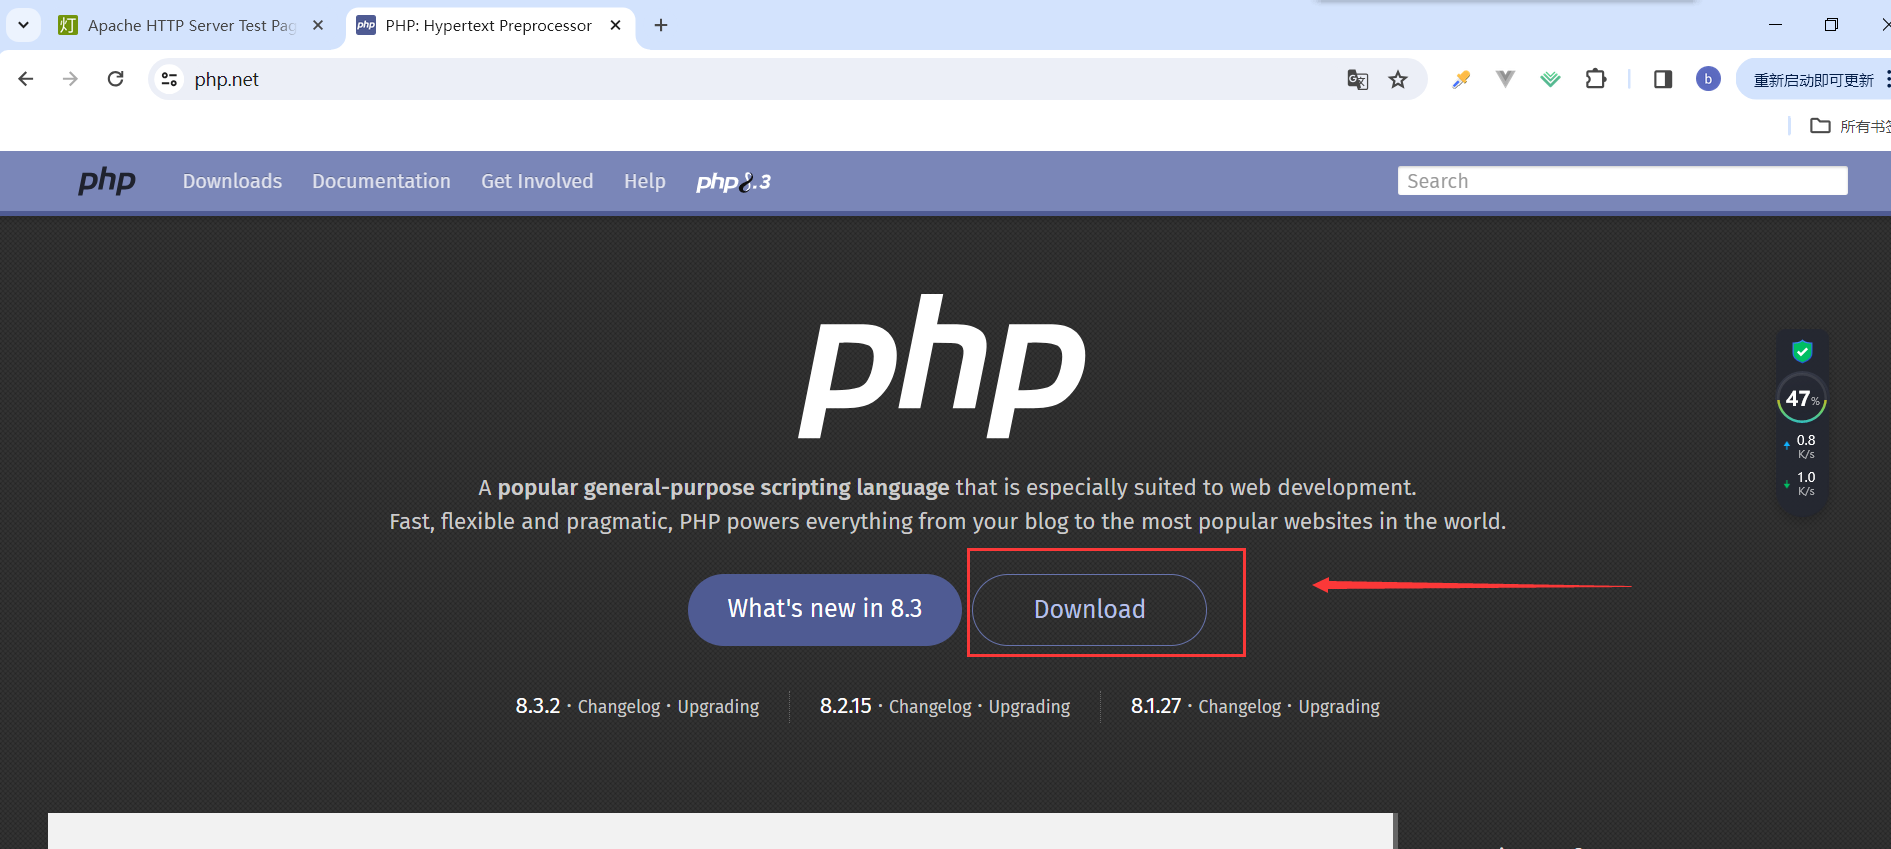
5.1.PHP官网
5.2.安装remi扩展源
yum install -y epel-release

yum install -y http://rpms.remirepo.net/enterprise/remi-release-7.rpm
5.3.安装yum管理工具
yum install -y yum-utils
5.4.安装php7.4
yum search php74

yum install -y php74-php-cli php74-php-common php74-php-devel \
php74-php-embedded php74-php-fpm php74-php-gd php74-php-mbstring \
php74-php-mysqlnd php74-php-pdo php74-php-opcache php74-php-xml php74-php-soap php74-php-zip
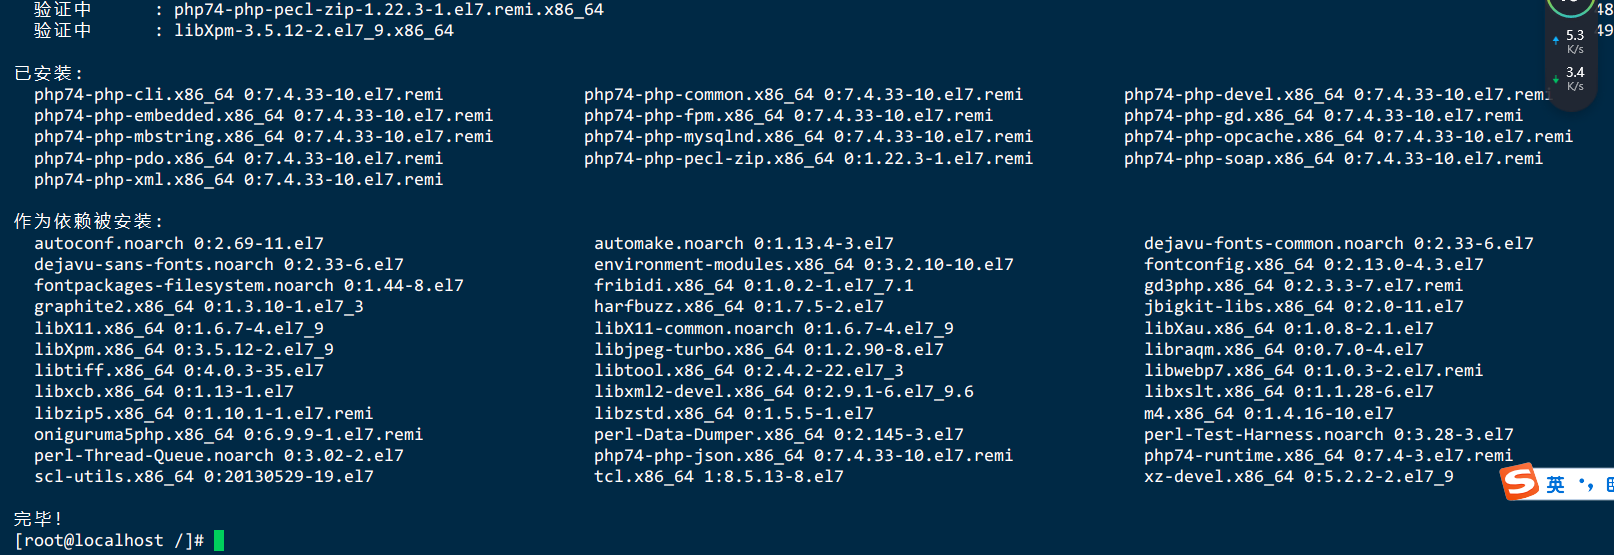
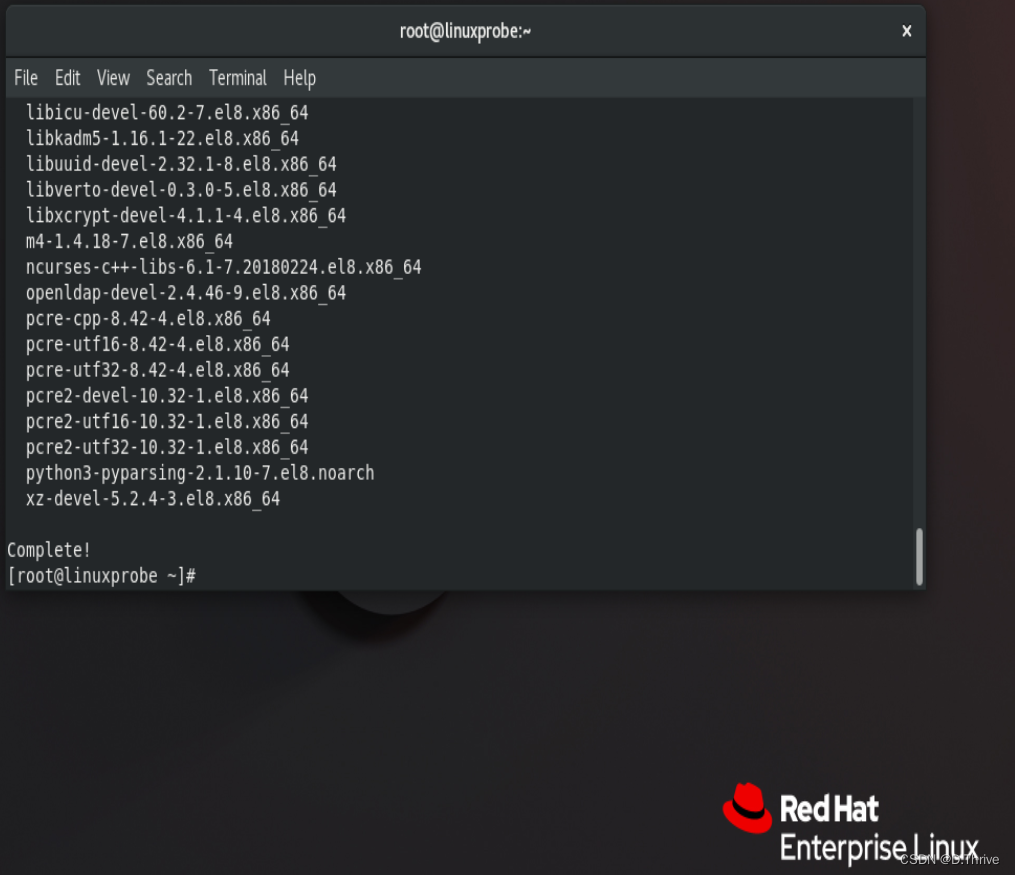
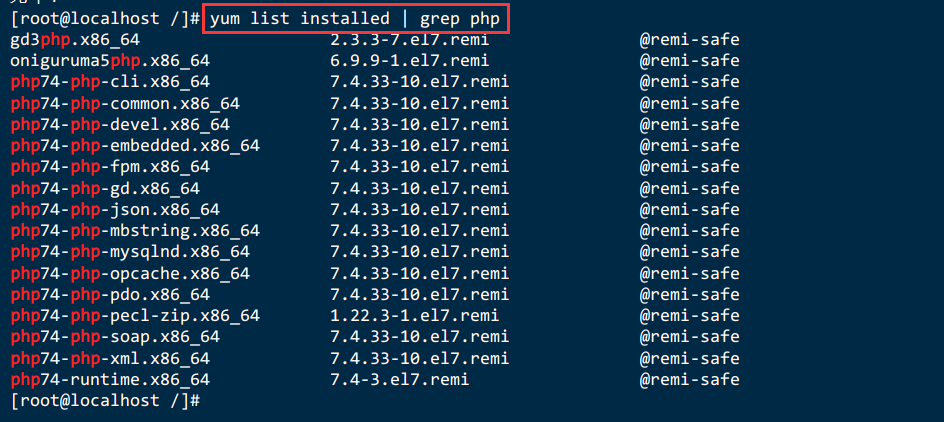
5.5.查看安装结果
yum list installed | grep php
5.6.建立软连接
通过remi安装的php的指令是php74,建立一下软链接
find / -name php74

ln -s /opt/remi/php74/root/usr/bin/php /usr/local/bin/php
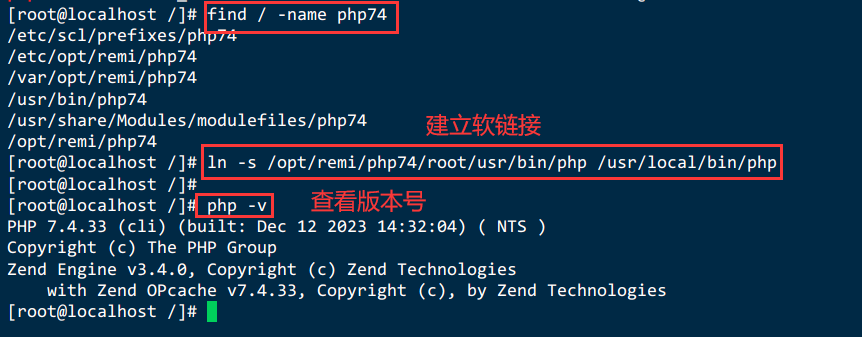
5.7.启动PHP
start、stop、restart、enable、status、restart
php -v

# 启动fpm
systemctl start php74-php-fpm

# 开机自启
systemctl enable php74-php-fpm

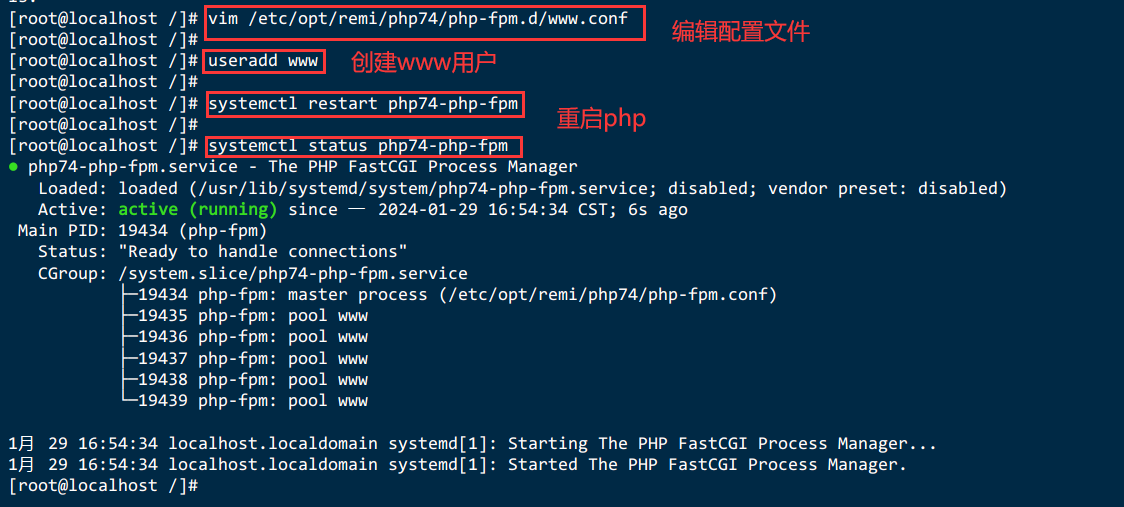
5.8.修改php-fpm的配置
vim /etc/opt/remi/php74/php-fpm.d/www.conf
#创建 www的用户
useradd www
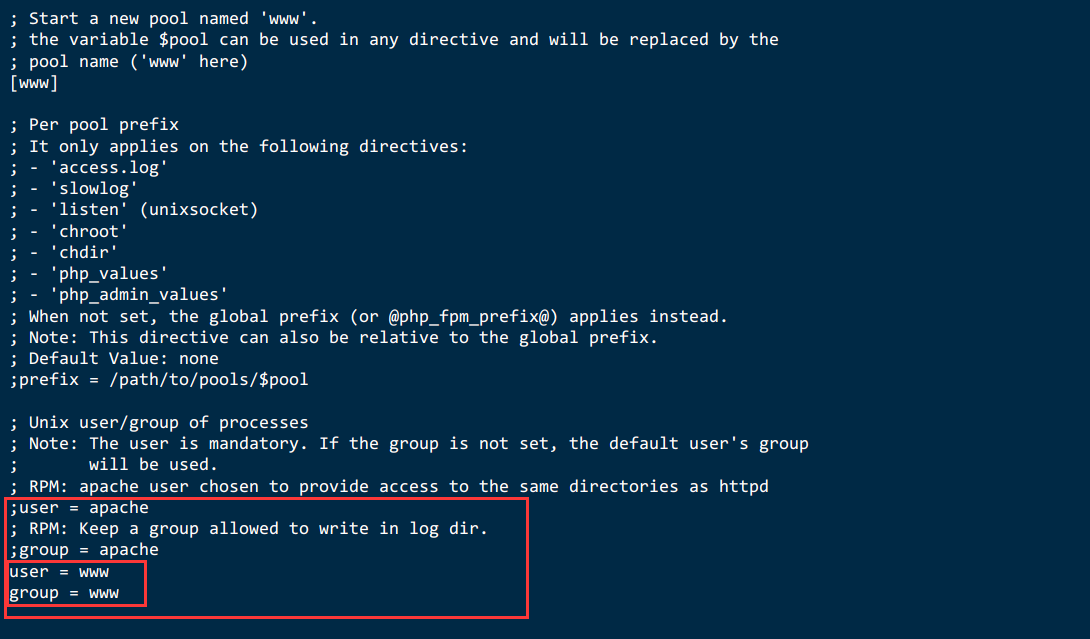
;把user = apache和group = apache 改成

user = www
group = www

;在这个配置文件中前面加上;就是注释
;user = apache
;group = apache
systemctl restart php74-php-fpm
5.9.创建PHP测试页面
mkdir -p /opt/www
echo "<?php phpinfo(); ?>" > /opt/www/info.php

5.10.修改nginx配置文件,使nginx支持php
# 备份文件
mv /usr/local/openresty/nginx/conf/nginx.conf /usr/local/openresty/nginx/conf/nginx.conf.bak

vi /usr/local/openresty/nginx/conf/nginx.conf
主要添加内容:
user www;

server {

        listen 8080;
        server_name localhost;

        location / {

        		#修改html路径
                root /opt/www;
                # 添加index.php
                index index.php index.html;
        }
        # pass the PHP scripts to FastCGI server listening on 127.0.0.1:9000
        location ~ \.php$ {

                root /opt/www;
                fastcgi_index index.php;
                fastcgi_param SCRIPT_FILENAME $document_root$fastcgi_script_name;
                fastcgi_pass  127.0.0.1:9000;
                include fastcgi_params;
        }
    }
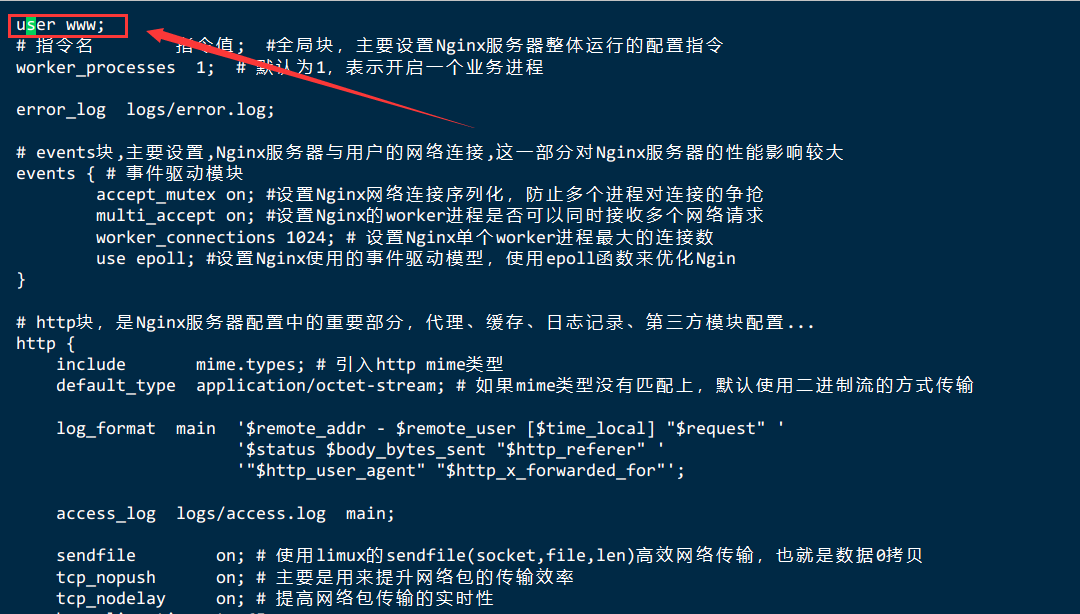
完整内容:
user www;
# 指令名	指令值;  #全局块,主要设置Nginx服务器整体运行的配置指令
worker_processes  1;  # 默认为1,表示开启一个业务进程

error_log  logs/error.log;

# events块,主要设置,Nginx服务器与用户的网络连接,这一部分对Nginx服务器的性能影响较大
events {
    # 事件驱动模块
	accept_mutex on; #设置Nginx网络连接序列化,防止多个进程对连接的争抢
	multi_accept on; #设置Nginx的worker进程是否可以同时接收多个网络请求
	worker_connections 1024; # 设置Nginx单个worker进程最大的连接数
	use epoll; #设置Nginx使用的事件驱动模型,使用epoll函数来优化Ngin
}

# http块,是Nginx服务器配置中的重要部分,代理、缓存、日志记录、第三方模块配置...
http {

    include       mime.types; # 引入http mime类型
    default_type  application/octet-stream; # 如果mime类型没有匹配上,默认使用二进制流的方式传输

    log_format  main  '$remote_addr - $remote_user [$time_local] "$request" '
                      '$status $body_bytes_sent "$http_referer" '
                      '"$http_user_agent" "$http_x_forwarded_for"';

    access_log  logs/access.log  main;

    sendfile        on; # 使用limux的sendfile(socket,file,len)高效网络传输,也就是数据0拷贝
    tcp_nopush      on; # 主要是用来提升网络包的传输效率
    tcp_nodelay     on; # 提高网络包传输的实时性
    keepalive_timeout  65;

	# server块,是Nginx配置和虚拟主机vhost相关的内容
    server {
    # 虚拟主机配置
        listen       80; # 监听端口号80
        server_name  localhost; # 域名、主机名
        #  location块,基于Nginx服务器接收请求字符串与location后面的值进行匹配,对特定请求进行处理
        location / {
    # 匹配路径
            root   html; # 文件根目录
            index  index.html index.htm; # 默认页名称
        }
        error_page   500 502 503 504  /50x.html; # 报编码错误对应页面
        location = /50x.html {

            root   html;
        }
    }
    server {

        listen 8080;
        server_name localhost;

        location / {

        		#修改html路径
                root /opt/www;
                # 添加index.php
                index index.php index.html;
        }
        # pass the PHP scripts to FastCGI server listening on 127.0.0.1:9000
        location ~ \.php$ {

                root /opt/www;
                fastcgi_index index.php;
                fastcgi_param SCRIPT_FILENAME $document_root$fastcgi_script_name;
                fastcgi_pass  127.0.0.1:9000;
                include fastcgi_params;
        }
    }

}

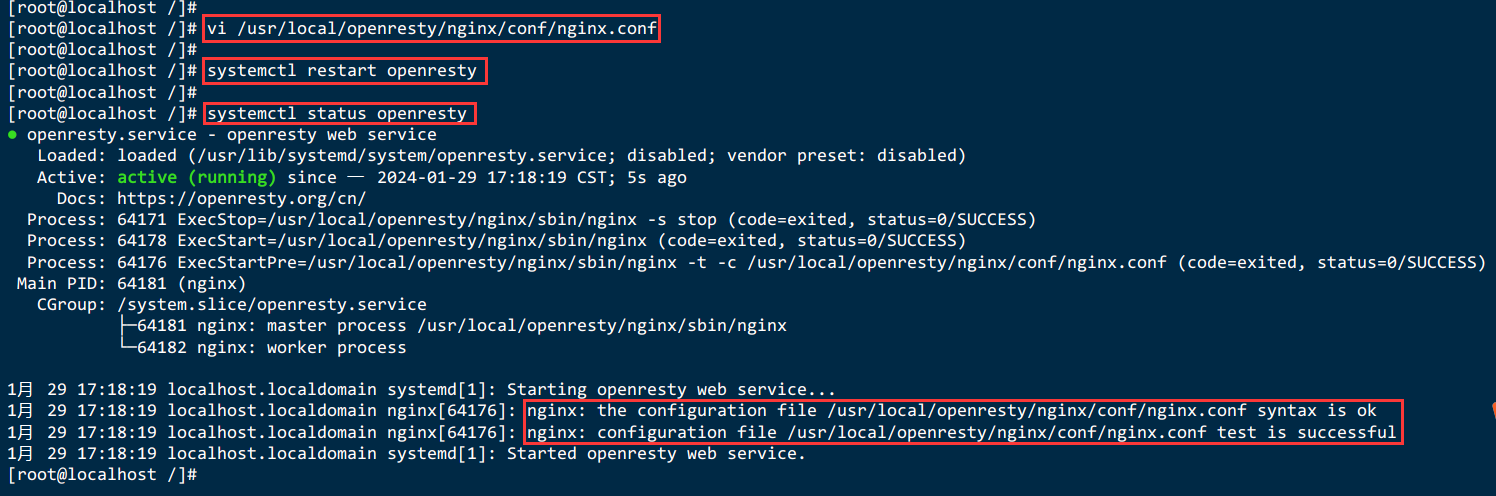
5.11.重启openresty服务
systemctl restart openresty
5.12.查看openresty运行状态来判断是否成功
systemctl status openresty
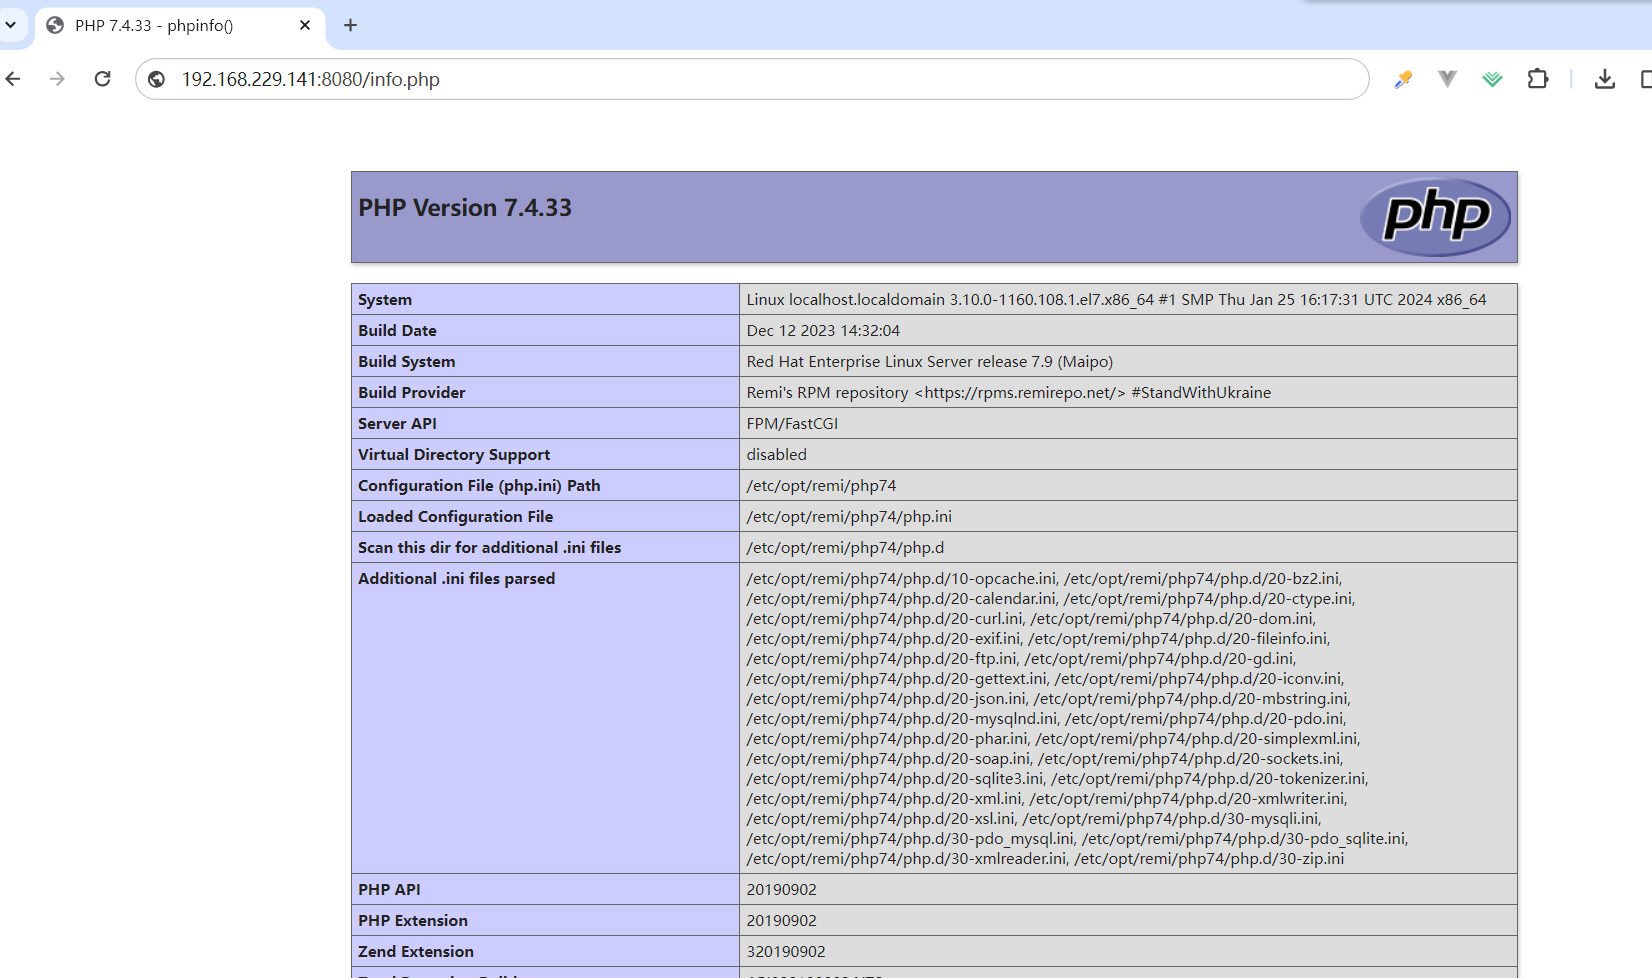
5.13.打开浏览器,访问http://<ECS公网IP>:8080/info.php,显示如下页面表示PHP安装成功
http://192.168.229.141:8080/info.php
5.14.出现问题解决
5.14.1.CentOS 64 编译PHP出现 error: Cannot find ldap libraries in /usr/lib
cp -frp /usr/lib64/libldap* /usr/lib/
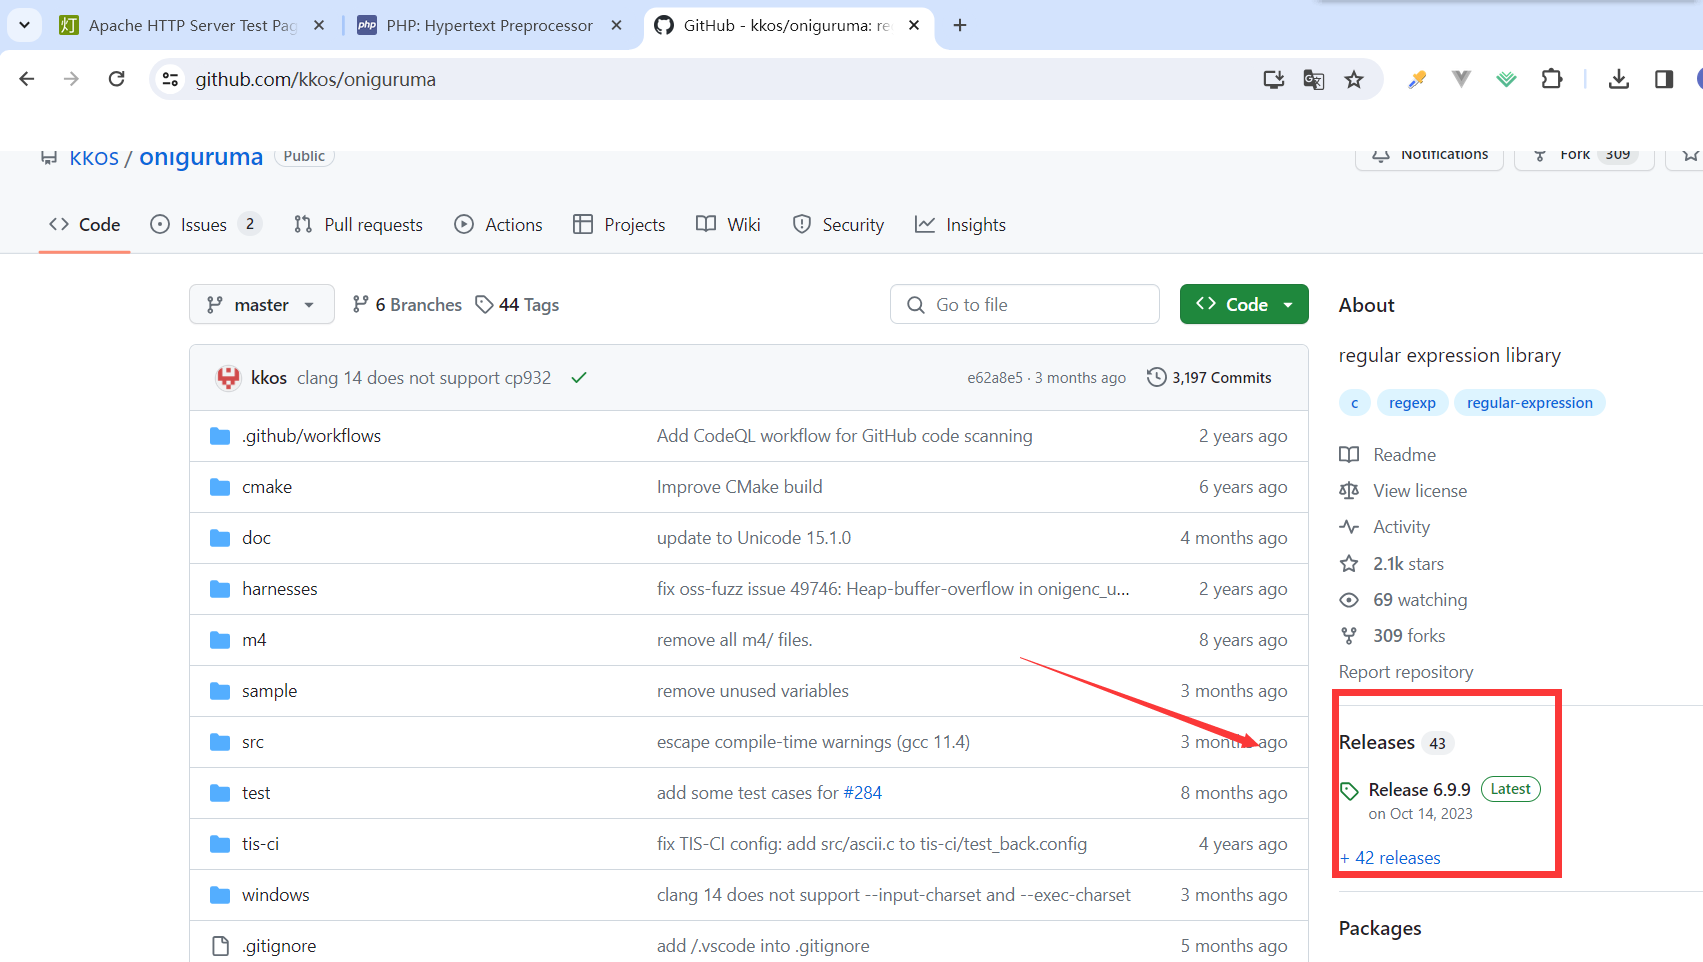
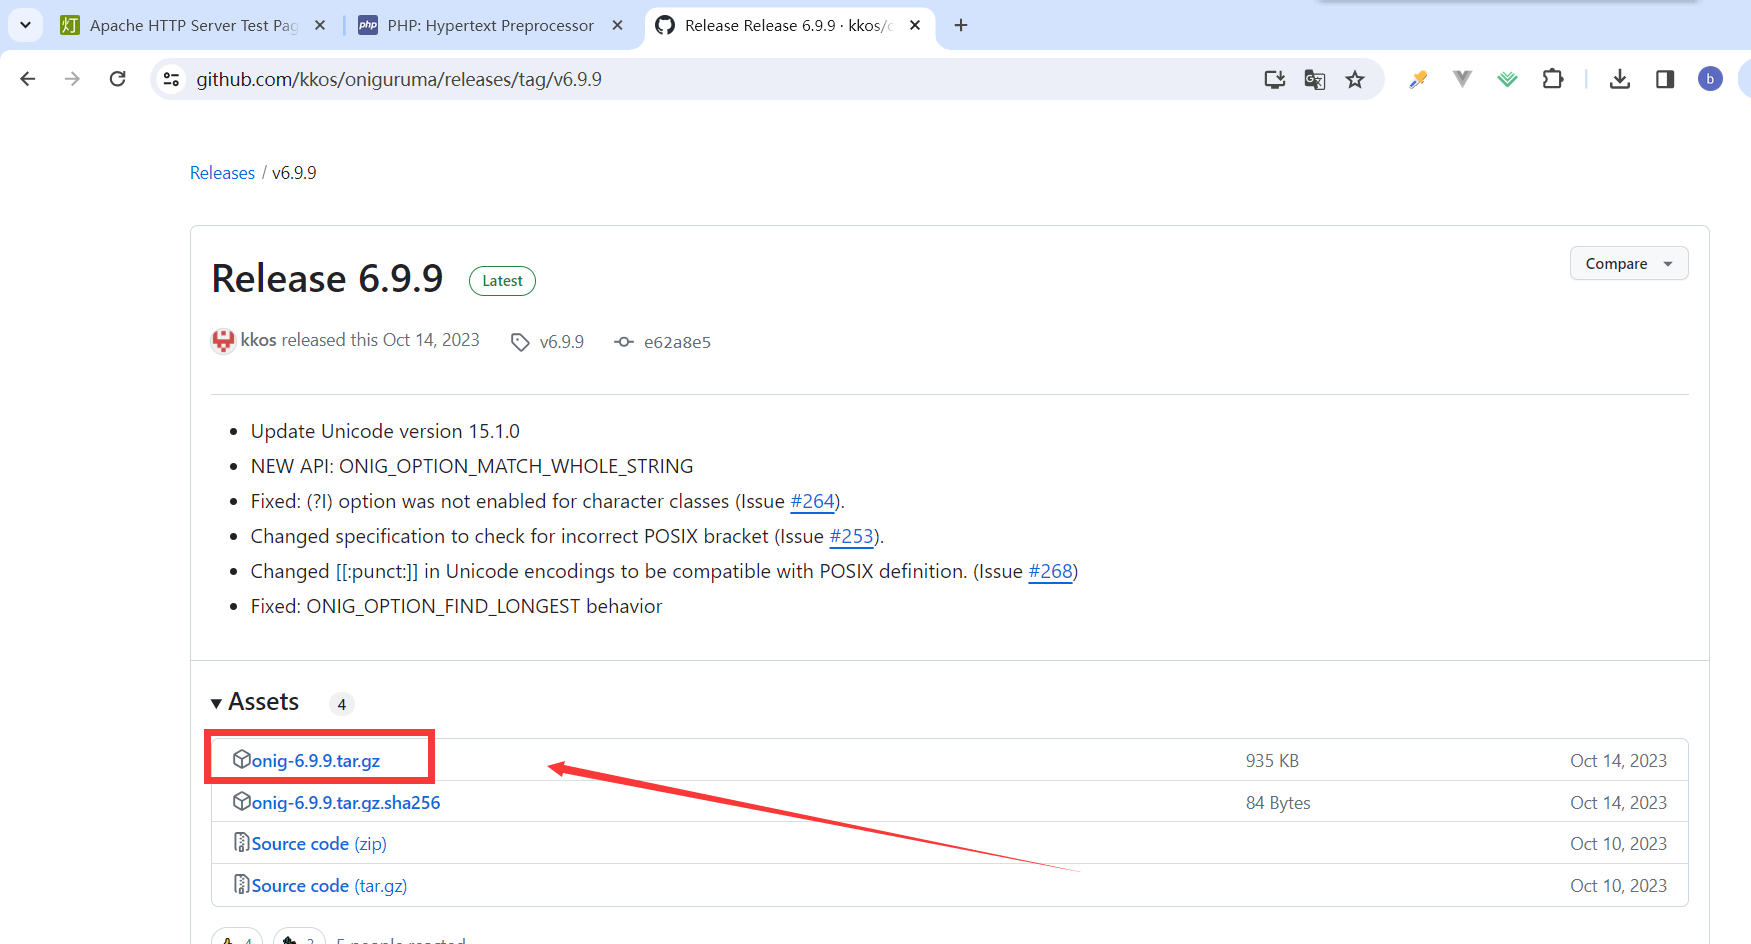
5.14.2.编译安装PHP7.4时出现configure: error: Package requirements (oniguruma) were not met
网址: https://github.com/kkos/oniguruma
mkdir -p /php/modules
cd /php/modules
wget https://github.com/kkos/oniguruma/releases/download/v6.9.9/onig-6.9.9.tar.gz
tar -zxf onig-6.9.9.tar.gz
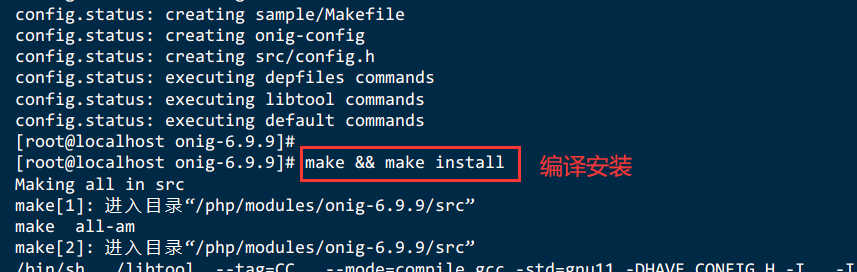
./configure --prefix=/usr --libdir=/lib64
#64位的系统一定要标识 --libdir=/lib64 否则还是不行
make && make install


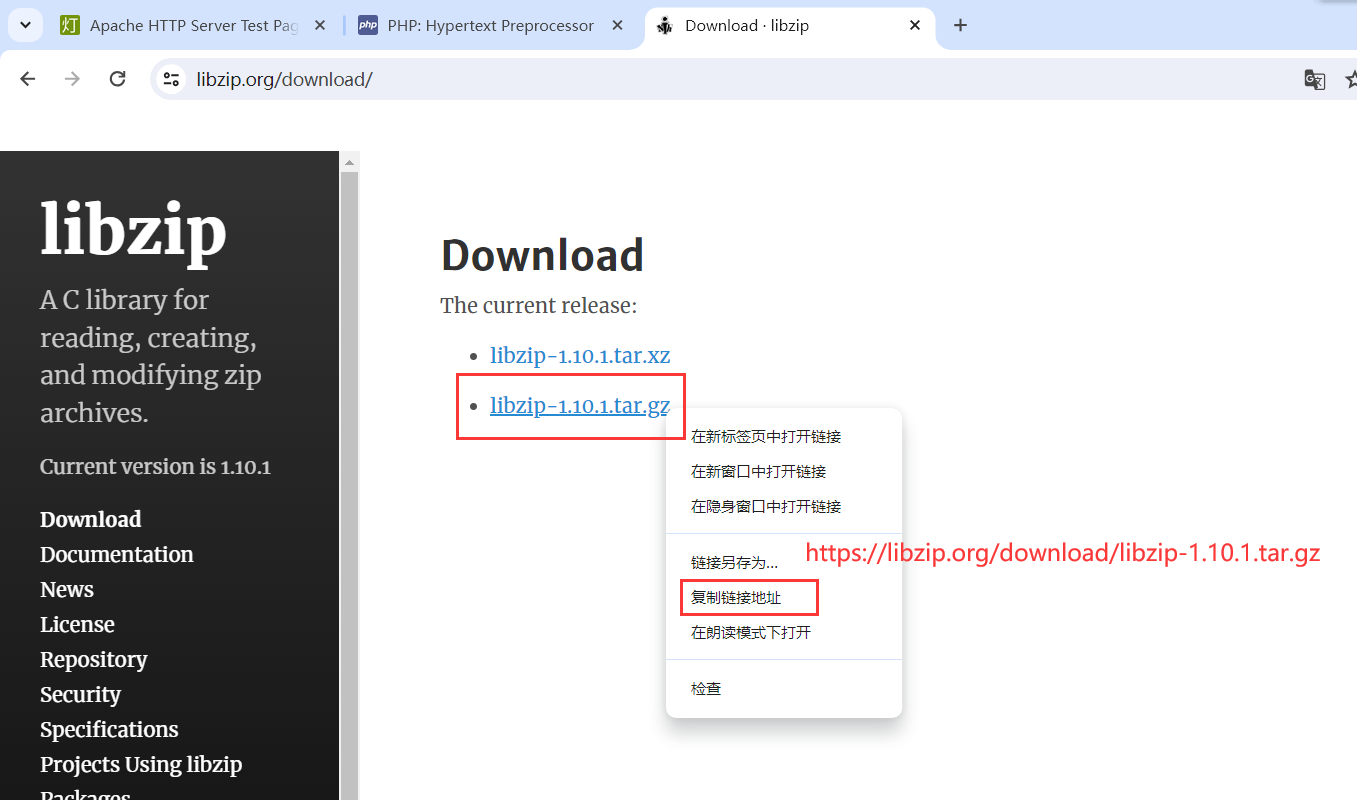
5.14.3.Package requirements (libzip >= 0.11 libzip != 1.3.1 libzip != 1.7.0) were not met
CMake Error at CMakeLists.txt:1 (cmake_minimum_required):
  CMake 3.5.0 or higher is required.  You are running version 2.8.12.2


-- Configuring incomplete, errors occurred!
configure: error: Package requirements (libzip >= 0.11 libzip != 1.3.1 libzip != 1.7.0) were not met:

No package 'libzip' found
No package 'libzip' found
No package 'libzip' found
解决:
提示cmake版本过低,需新版本,则需要重新安装cmake
# 移除旧的cmake
yum remove cmake
# 安装cmake
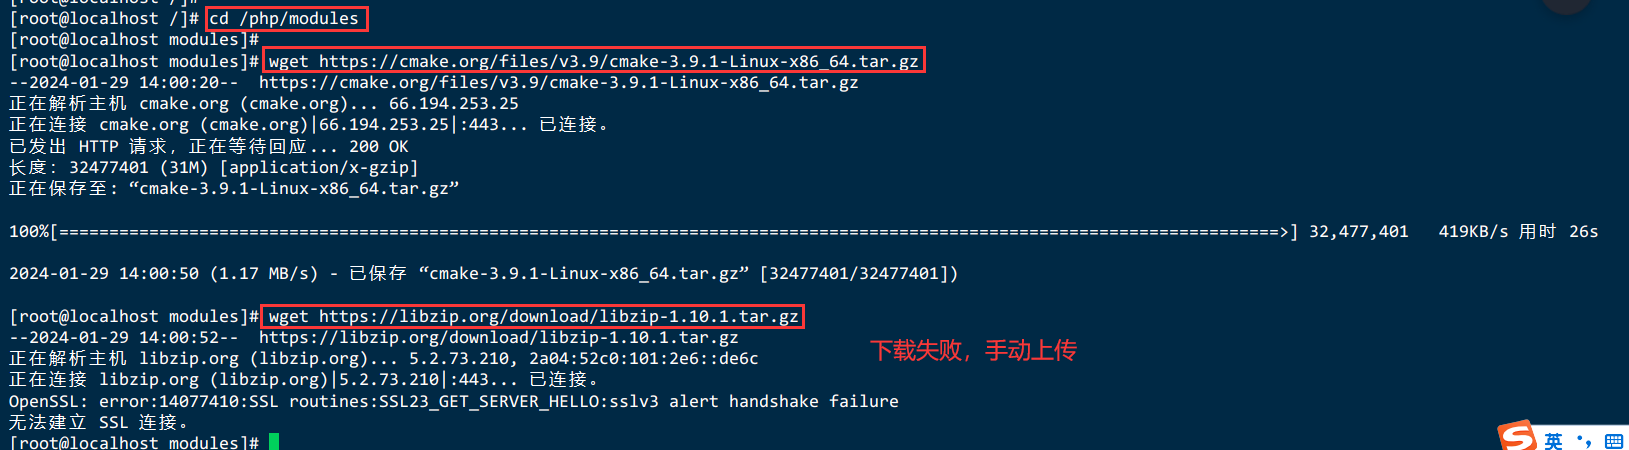
cd /php/modules
wget https://cmake.org/files/v3.9/cmake-3.9.1-Linux-x86_64.tar.gz
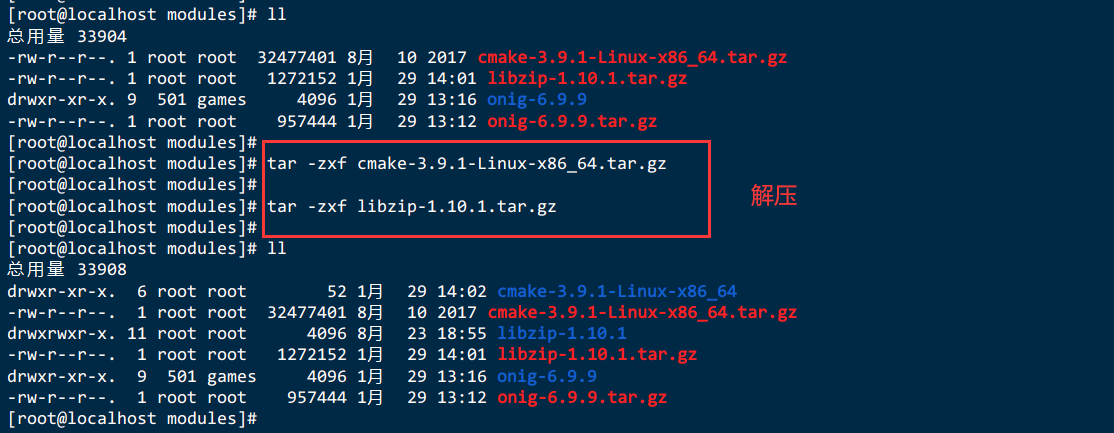
# 这个cmake压缩包不是源码包,解压后直接用
tar -zxf cmake-3.9.1-Linux-x86_64.tar.gz
mv cmake-3.9.1-Linux-x86_64 /opt/cmake-3.9.1
# 创建软链接
ln -sf /opt/cmake-3.9.1/bin/* /usr/bin/
# 查看版本
cmake --version
# libzip 编译生成静态库
# 移除旧的libzip
yum remove libzip
cd /php/modules
wget https://libzip.org/download/libzip-1.3.2.tar.gz
tar -zxf libzip-1.3.2.tar.gz
cd libzip-1.3.2
./configure --prefix=/usr/local/libzip-1.3.2
make && make install
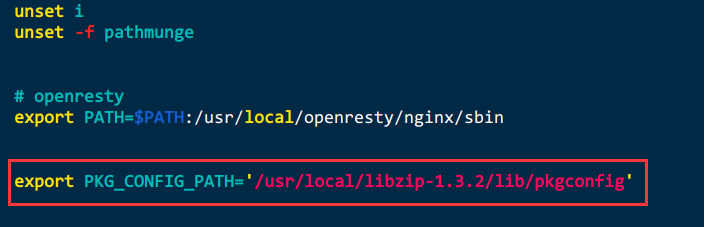
vim /etc/profile
export PKG_CONFIG_PATH='/usr/local/libzip-1.3.2/lib/pkgconfig'
source /etc/profile
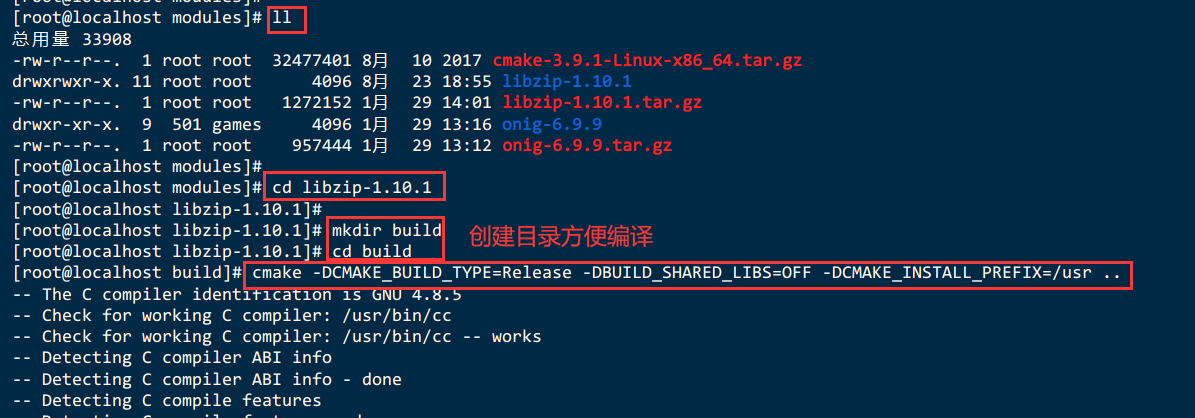
mkdir build
cd build
cmake -DCMAKE_BUILD_TYPE=Release -DBUILD_SHARED_LIBS=OFF -DCMAKE_INSTALL_PREFIX=/usr/local/libzip-1.10.1 ..
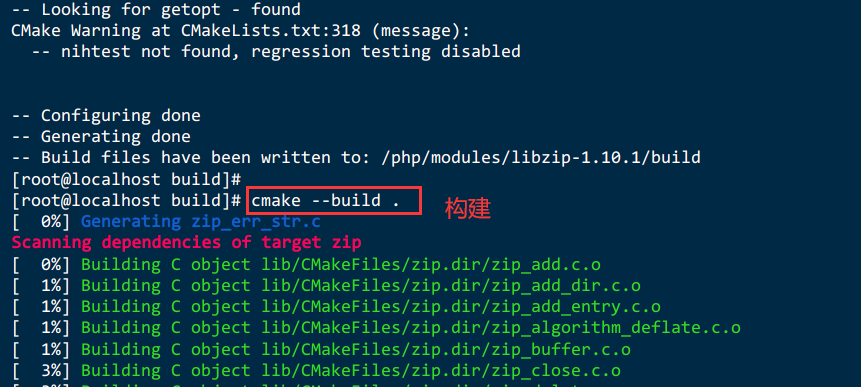
cmake --build .
cmake --install .

六、搭建博客【WordPress】
WordPress官网:https://cn.wordpress.org/
6.1.创建文件夹管理
mkdir -p /wordpress/core
cd /wordpress/core
6.2.下载Wordpress安装包并解压
wget https://cn.wordpress.org/wordpress-6.4.2-zh_CN.tar.gz

tar -zxf wordpress-6.4.2-zh_CN.tar.gz

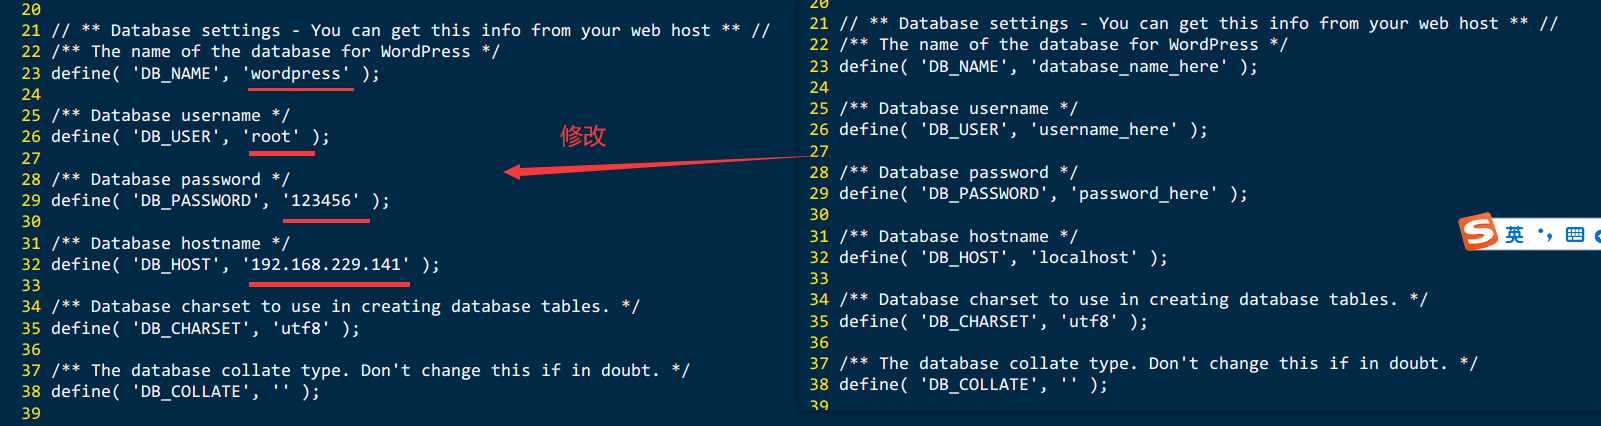
6.3.修改WordPress配置文件wp-config.php
- database_name_here为之前步骤中创建的数据库名称,本示例为wordpress。
- username_here为MySQL数据库的用户名,本示例为root。
- password_here为MySQL数据库的登录密码,本示例为Mysql.123456。
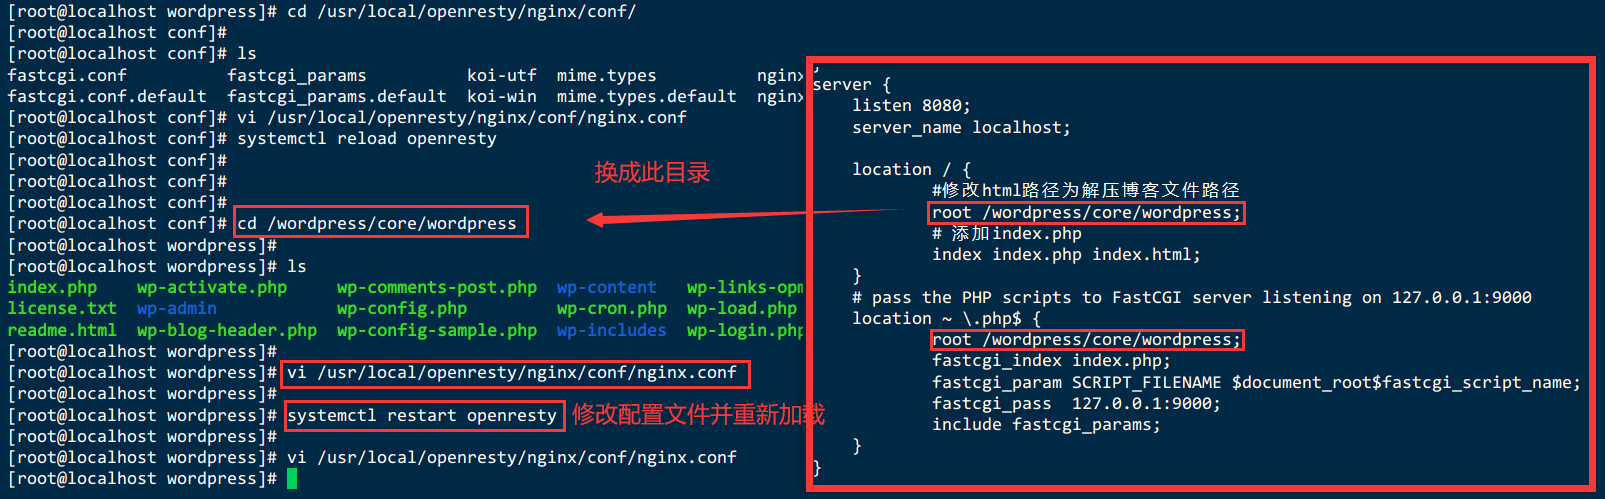
cd /wordpress/core/wordpress

cp wp-config-sample.php wp-config.php

vi wp-config.php

# 设置wordpress的权限
chown -R www.www /wordpress/core/wordpress

systemctl restart php74-php-fpm
// ** MySQL 设置 - 具体信息来自您正在使用的主机 ** //
/** WordPress数据库的名称 */
define( 'DB_NAME', 'wordpress' );

/** MySQL数据库用户名 */
define( 'DB_USER', 'root' );

/** MySQL数据库密码 */
define( 'DB_PASSWORD', '123456' );

/** MySQL主机 */
define( 'DB_HOST', '192.168.229.141:3306' );

/** 创建数据表时默认的文字编码 */
define( 'DB_CHARSET', 'utf8' );

/** 数据库整理类型。如不确定请勿更改 */
define( 'DB_COLLATE', '' );

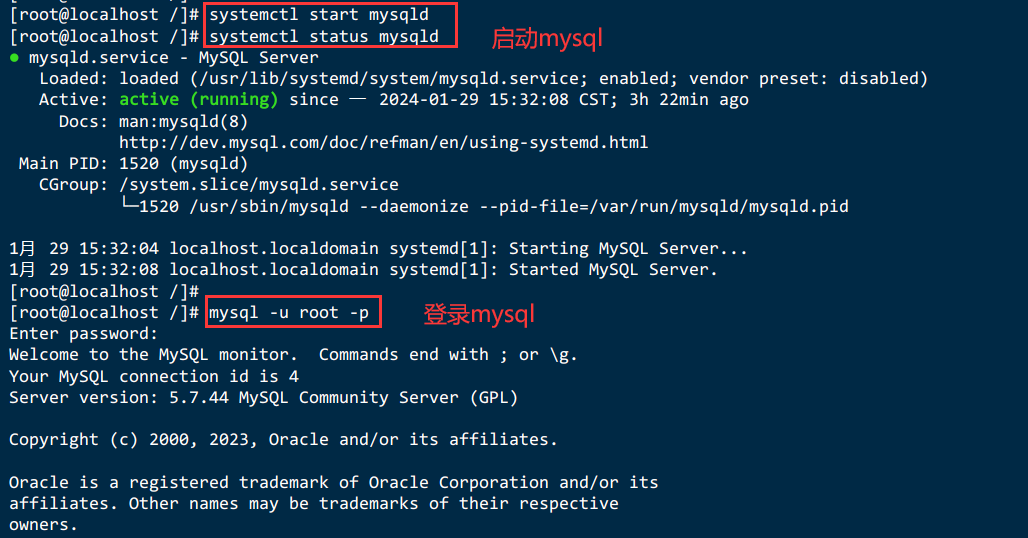
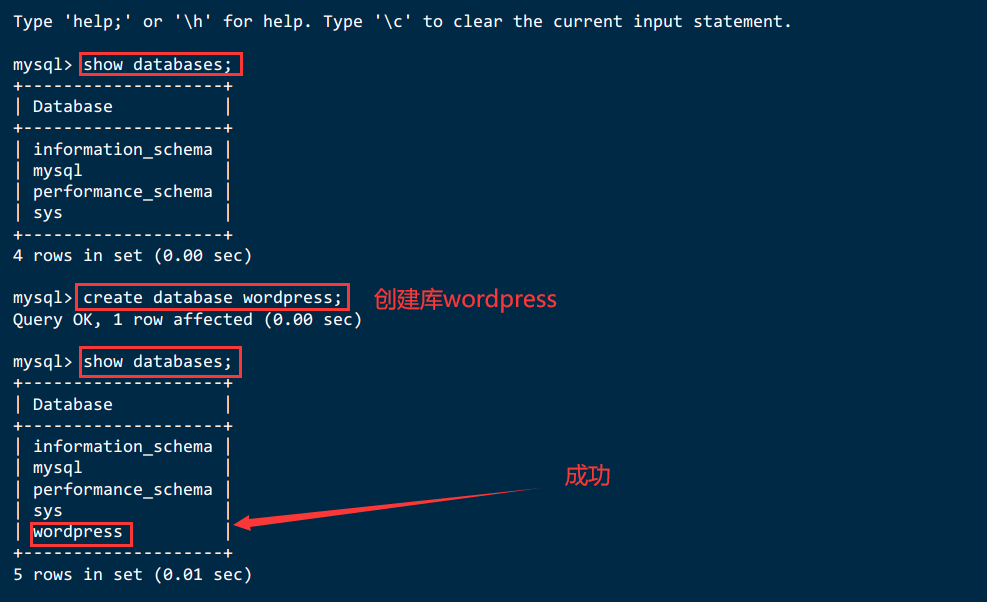
6.4.创建存储博客网站内容的数据库
systemctl start mysqld

mysql -u root -p

create database wordpress;

show databases;
6.5.配置MySQL的安全性
mysql_secure_installation
[root@localhost mysql]# mysql_secure_installation
## 默认已用空密码登录
Securing the MySQL server deployment.
Connecting to MySQL using a blank password.

##是否安装密码强度验证模块,看自己需求
VALIDATE PASSWORD COMPONENT can be used to test passwords
and improve security. It checks the strength of password
and allows the users to set only those passwords which are
secure enough. Would you like to setup VALIDATE PASSWORD component?
Press y|Y for Yes, any other key for No: no

## 设置root的密码
Please set the password for root here.
New password:
Re-enter new password:

## 是否删除匿名用户,可删
By default, a MySQL installation has an anonymous user,
allowing anyone to log into MySQL without having to have
a user account created for them. This is intended only for
testing, and to make the installation go a bit smoother.
You should remove them before moving into a production
environment.

Remove anonymous users? (Press y|Y for Yes, any other key for No) : y
Success.

## 默认情况下只允许本机访问,是否开启远程访问,按自己需求
Normally, root should only be allowed to connect from
'localhost'. This ensures that someone cannot guess at
the root password from the network.

Disallow root login remotely? (Press y|Y for Yes, any other key for No) : y
Success.

## 是否删除测试数据库,可删
By default, MySQL comes with a database named 'test' that
anyone can access. This is also intended only for testing,
and should be removed before moving into a production
environment.

Remove test database and access to it? (Press y|Y for Yes, any other key for No) : y
 - Dropping test database...
Success.

 - Removing privileges on test database...
Success.

## 是否立即重新加载刚才的配置,选择是
Reloading the privilege tables will ensure that all changes
made so far will take effect immediately.

Reload privilege tables now? (Press y|Y for Yes, any other key for No) : y
Success.
## 配置完毕
All done!
6.6.输入exit退出数据库
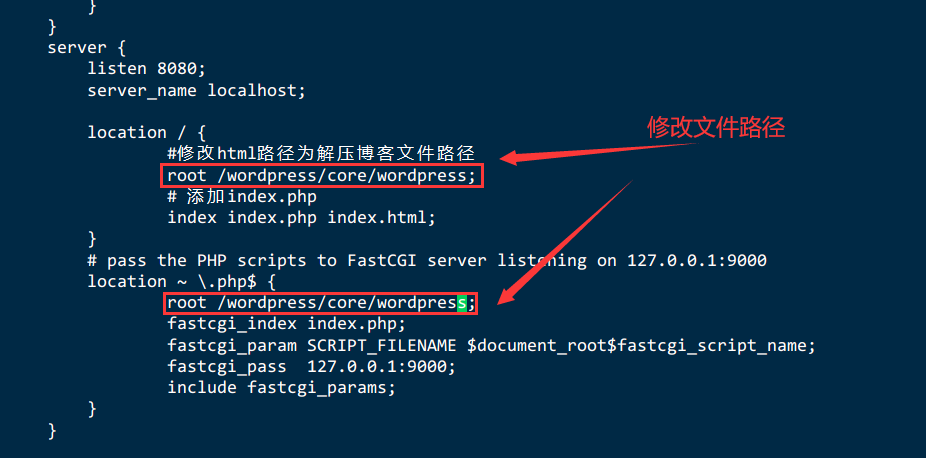
6.7.修改openresty配置文件并重启
vi /usr/local/openresty/nginx/conf/nginx.conf

systemctl restart openresty
6.8.防火墙放行8080端口
//放行8080端口
firewall-cmd --zone=public --add-port=8080/tcp --permanent
//使能防火墙生效
firewall-cmd --reload
//查看是否生效
firewall-cmd --list-ports
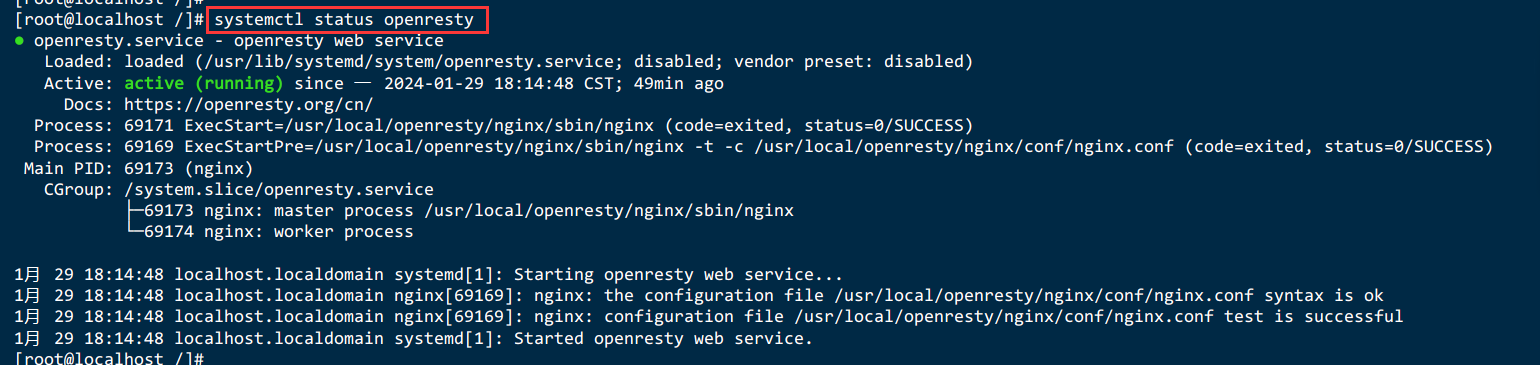
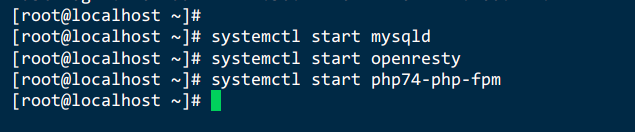
6.9.确保服务启动
systemctl status php74-php-fpm

systemctl status openresty

systemctl status mysqld


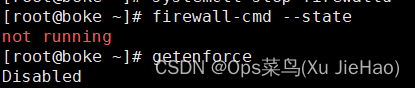
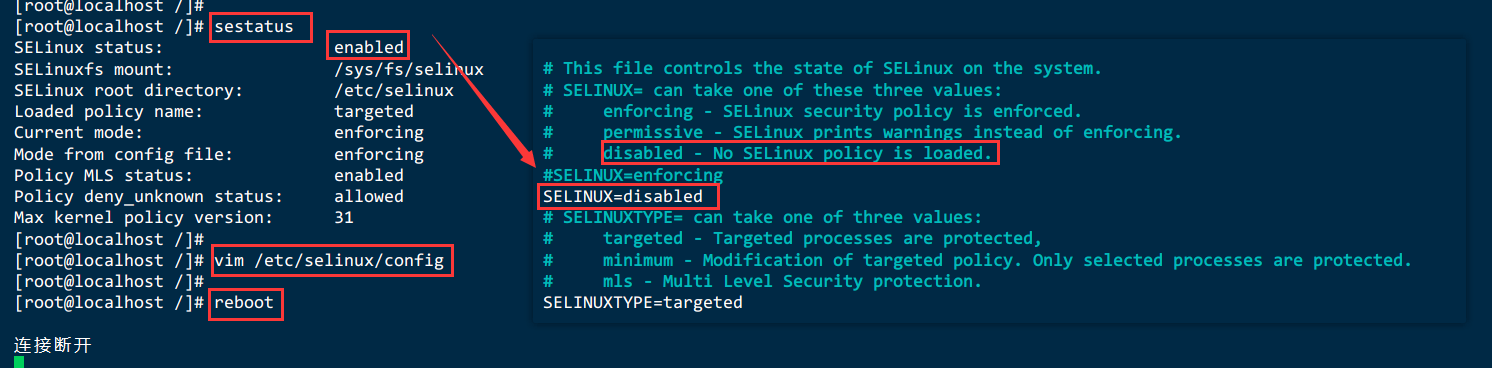
6.10.FastCGI sent in stderr: “Primary script unknown” while reading response header from upstream
权限不足停用selinux
# 查看状态
sestatus

# 如果查看不是disabled状态,我们可以通过修改配置文件来进行设置,修改SELINUX=disabled,然后重启下系统即可生效。
vim /etc/selinux/config

# 重启系统
reboot
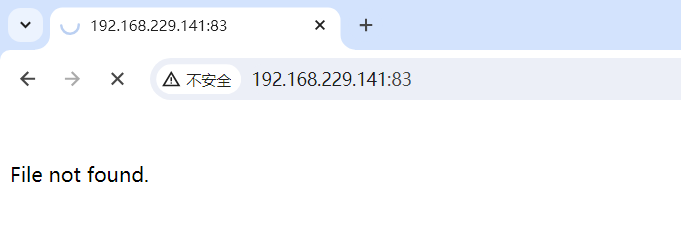
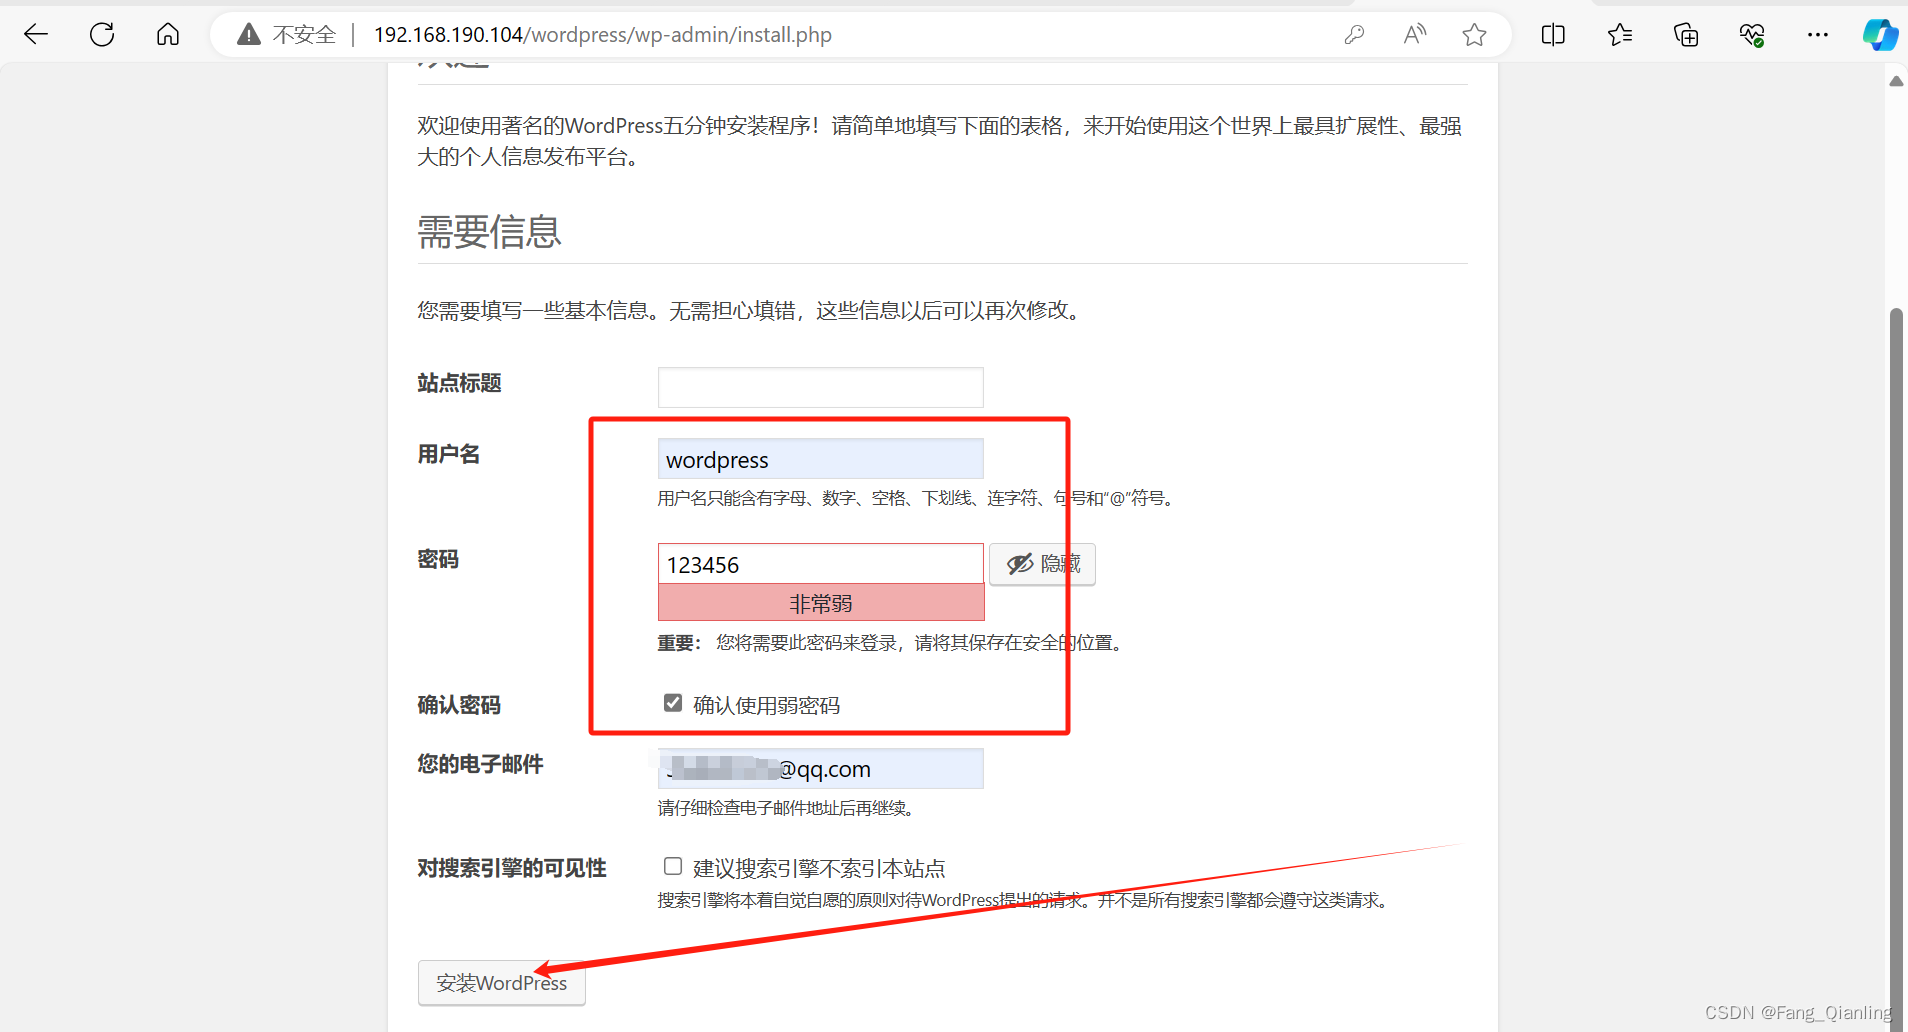
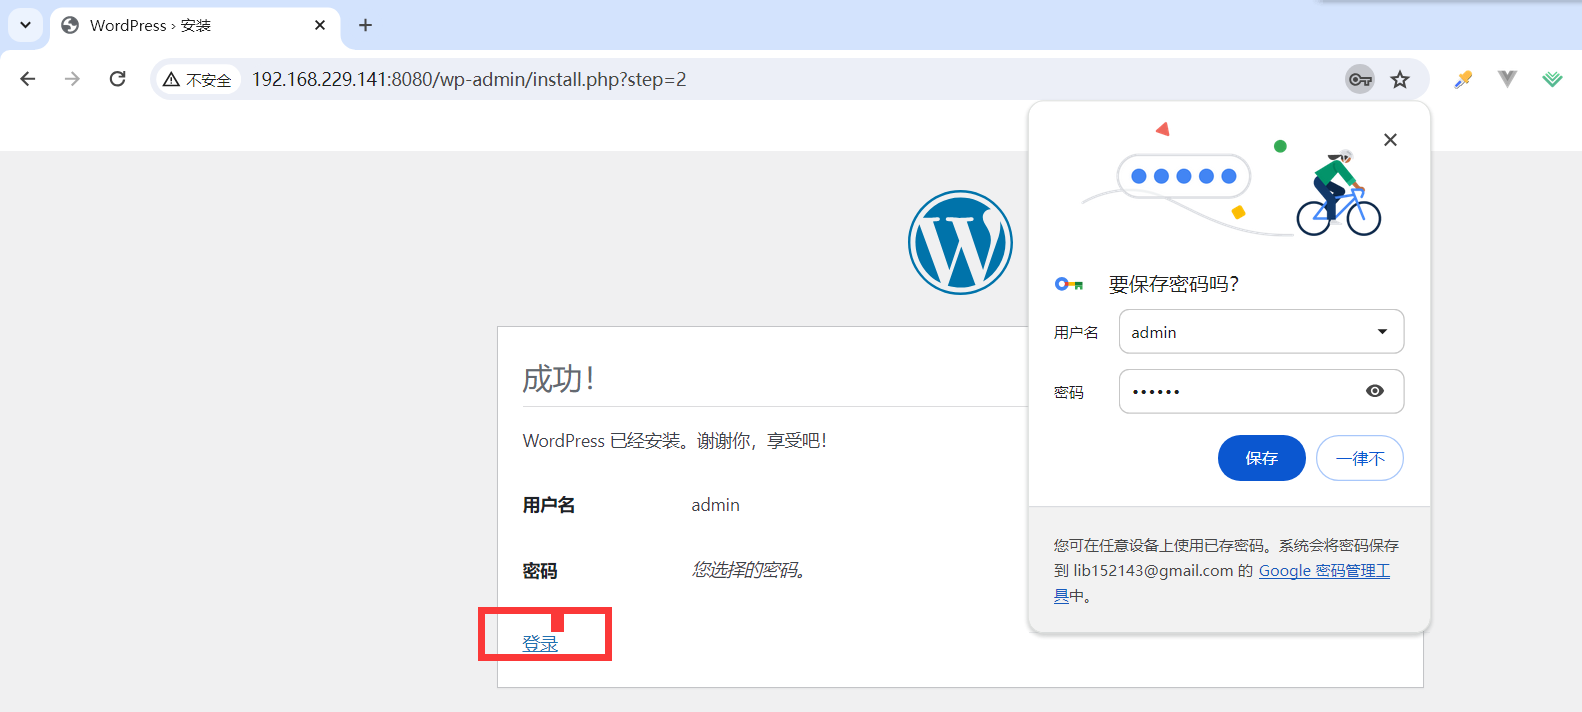
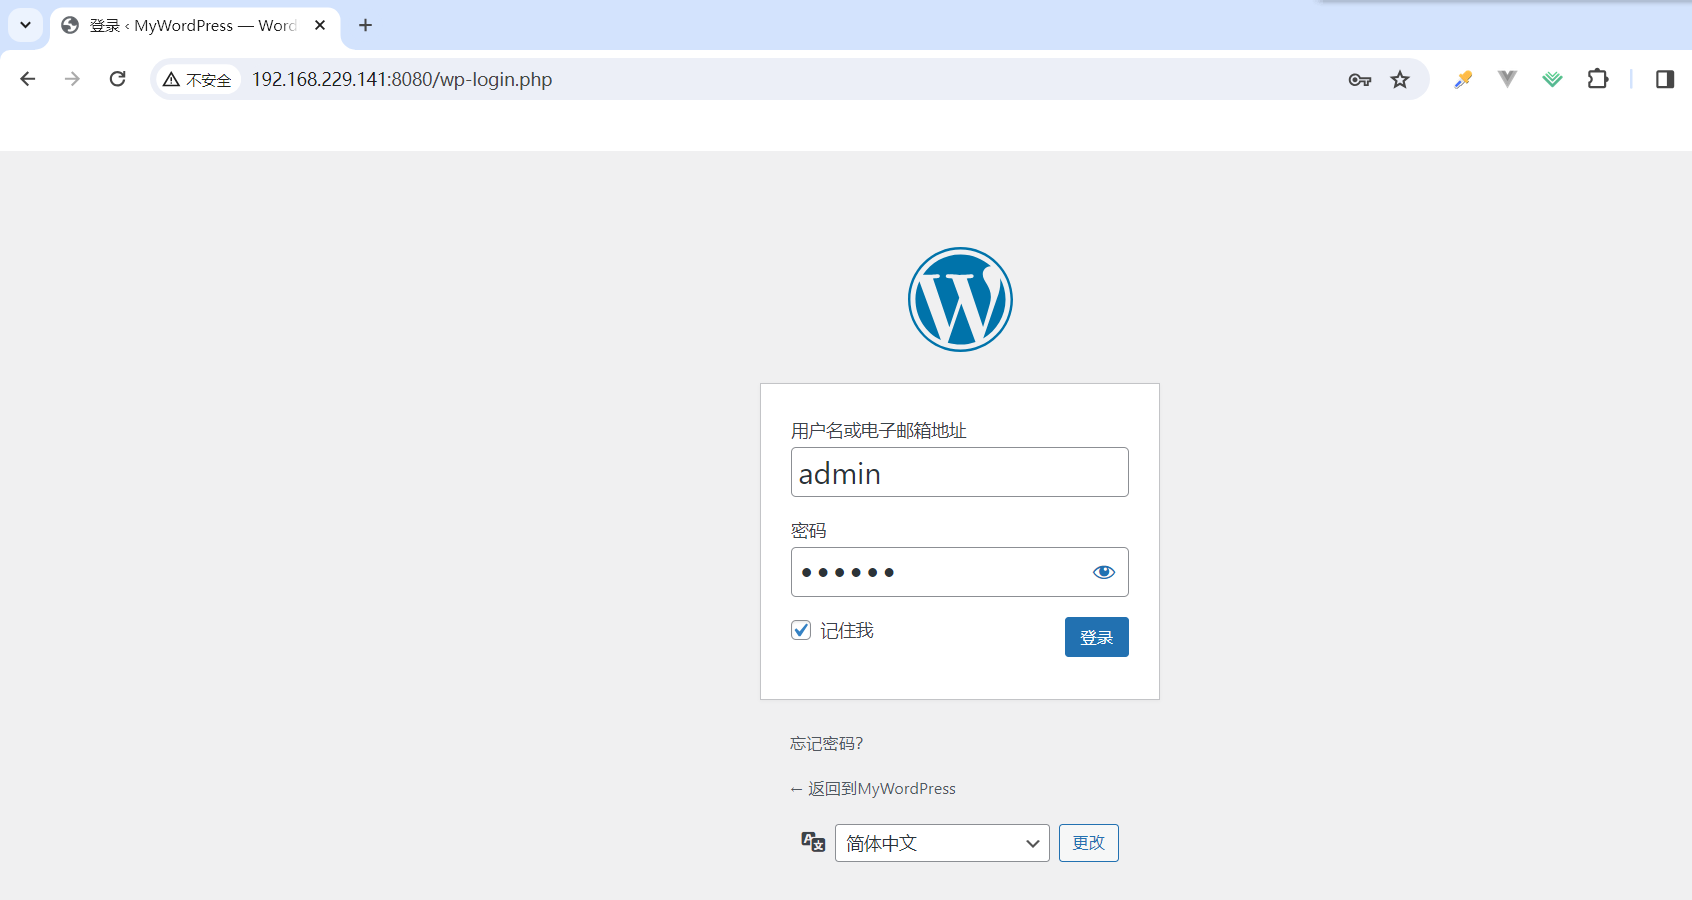
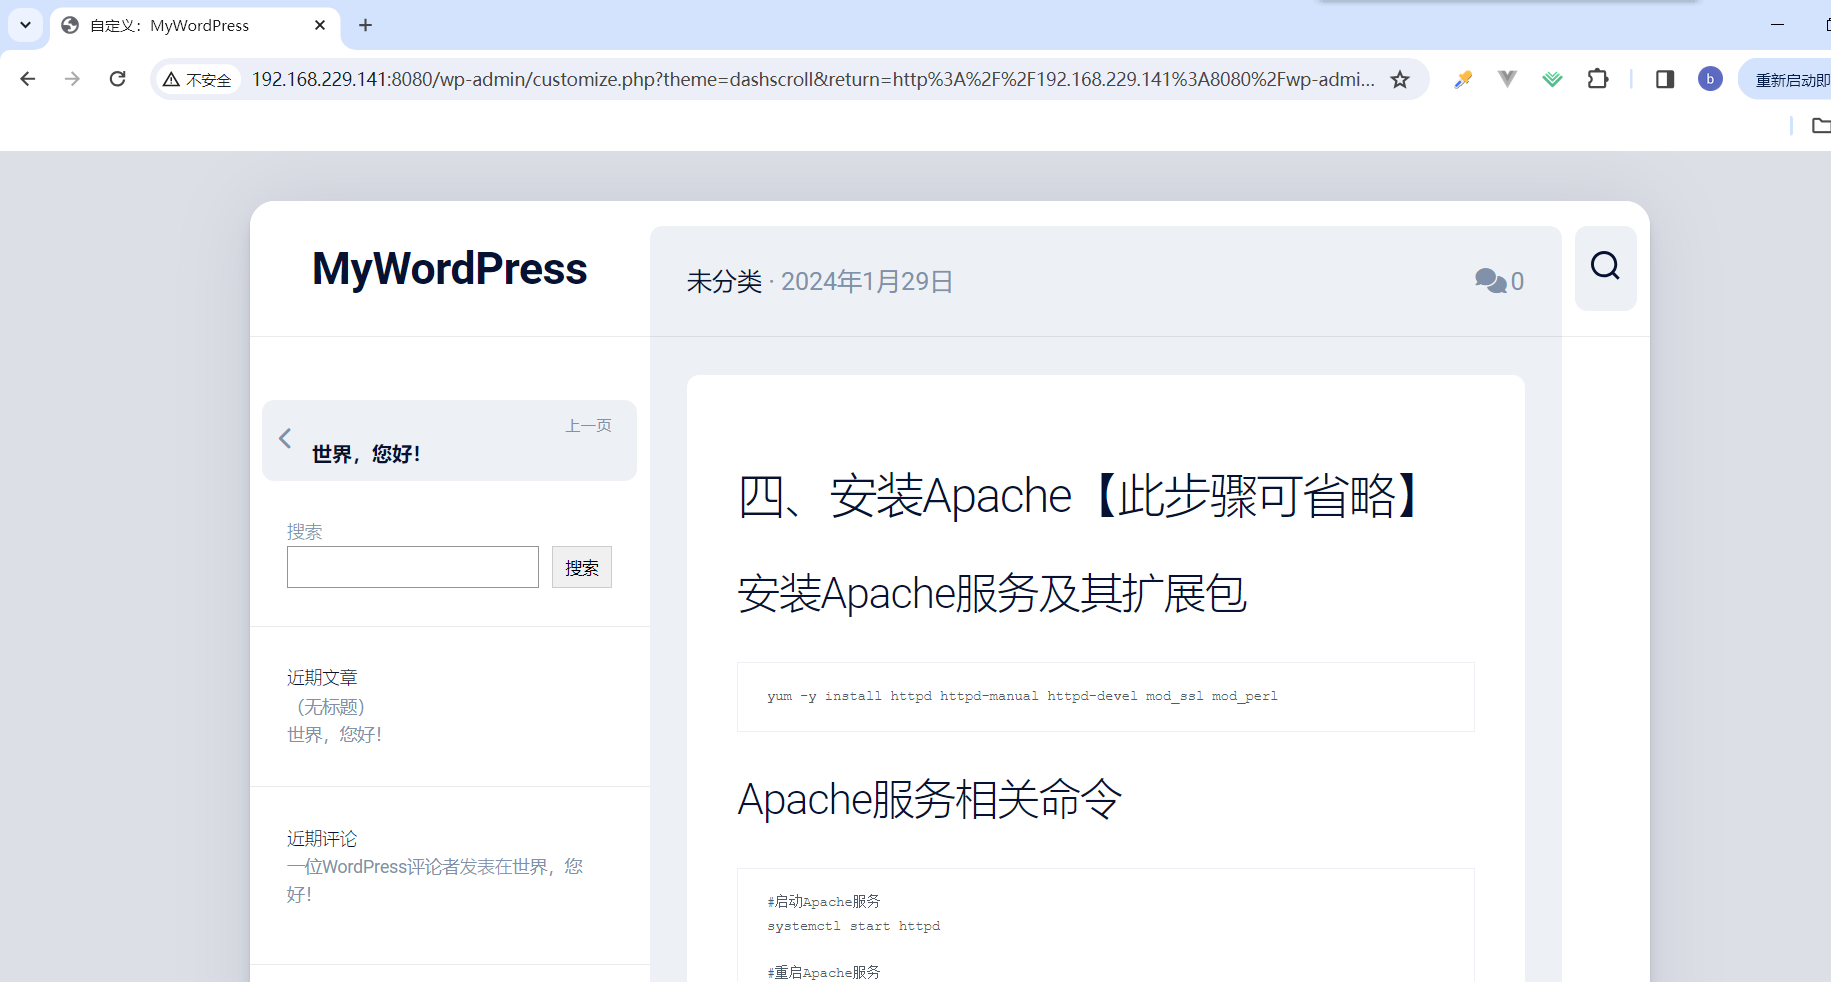
6.11.打开浏览器,访问http://<ECS公网IP>:8080
http://192.168.229.141:8080/
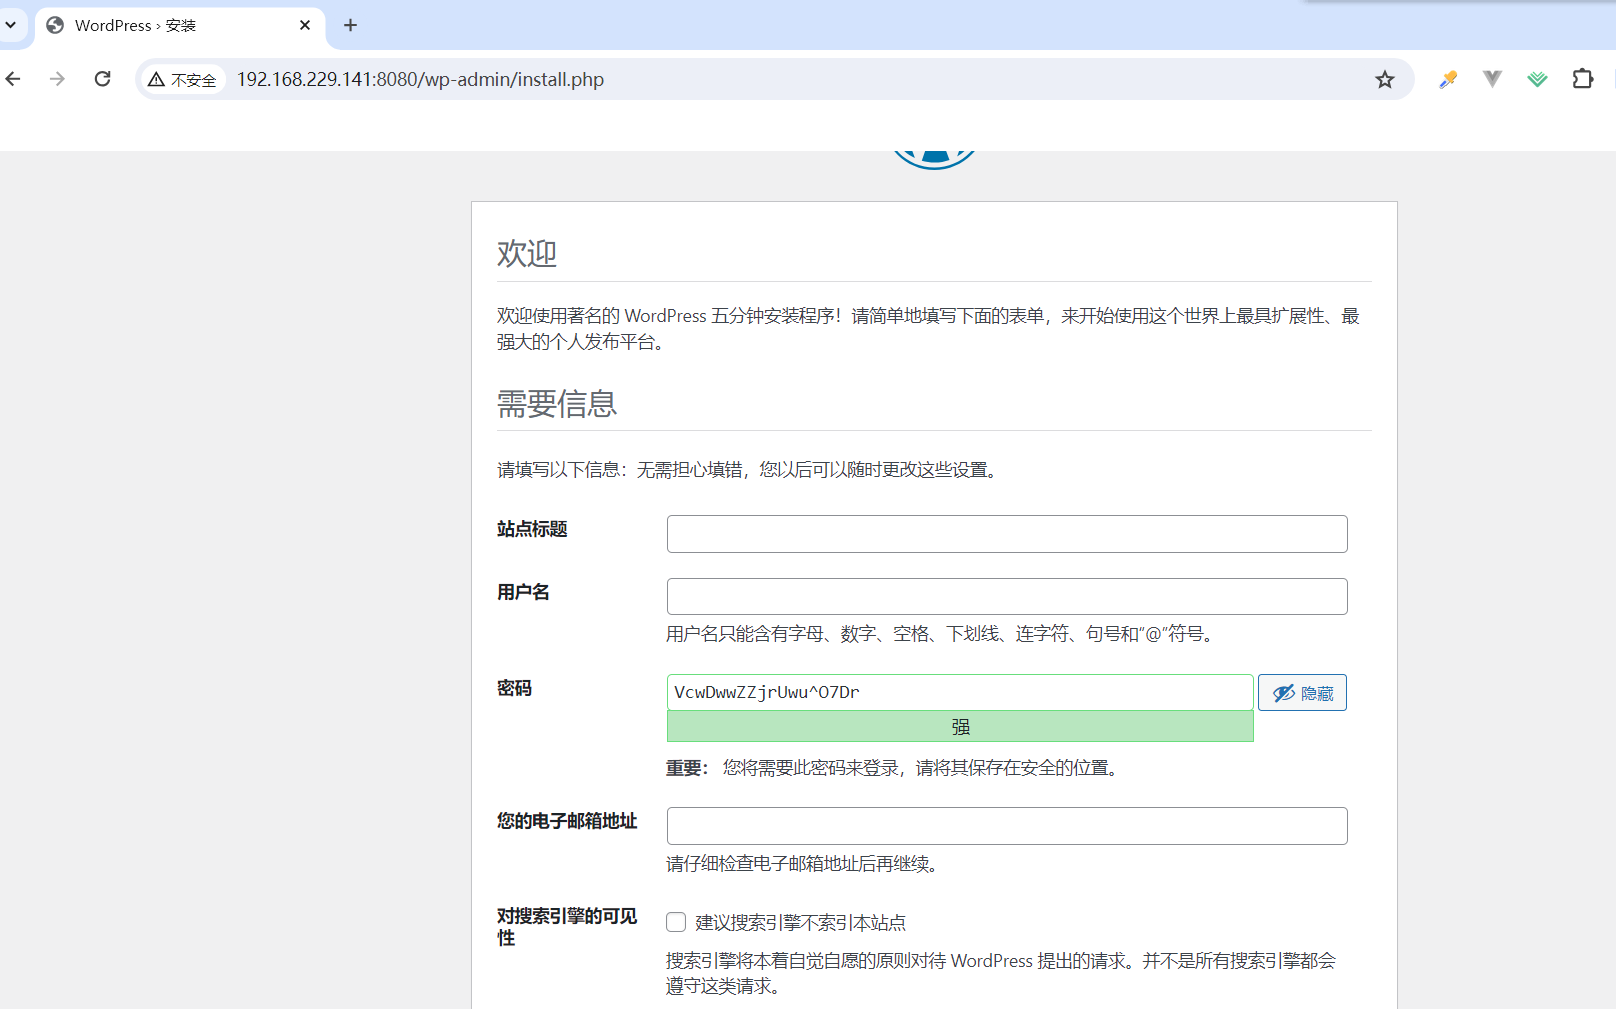
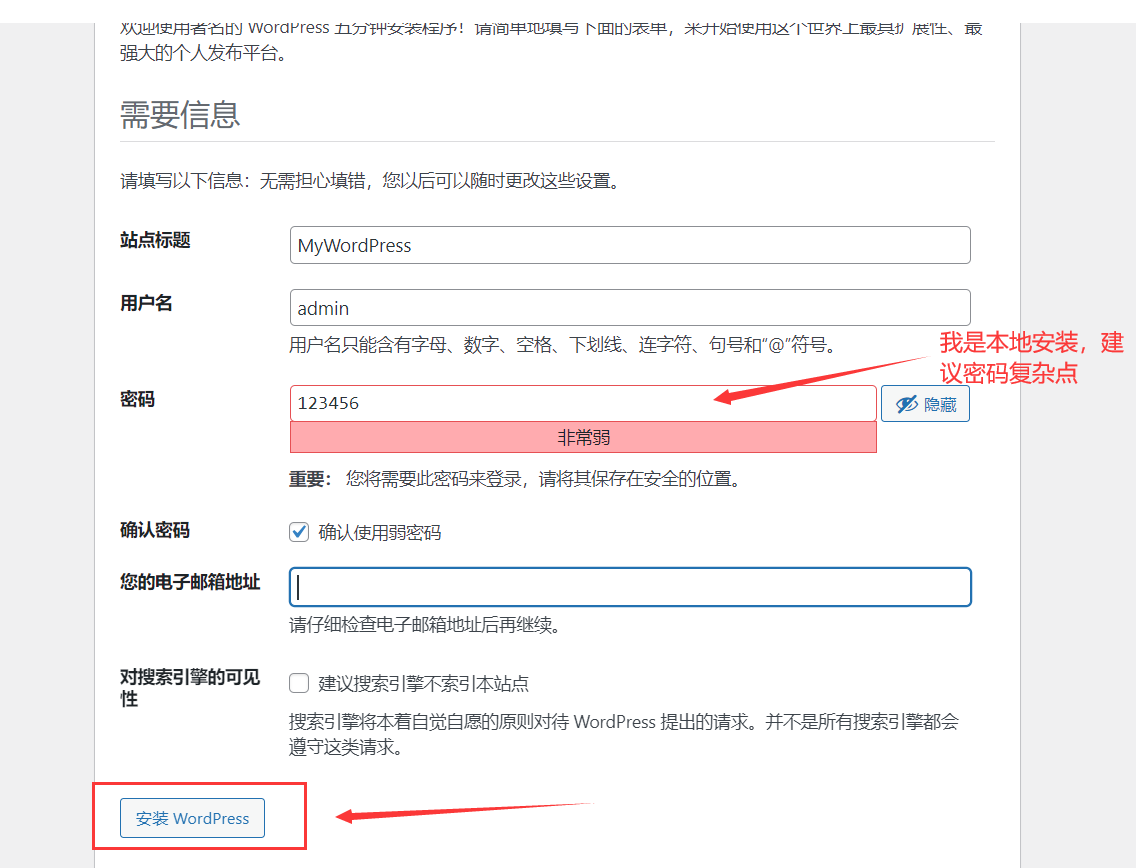
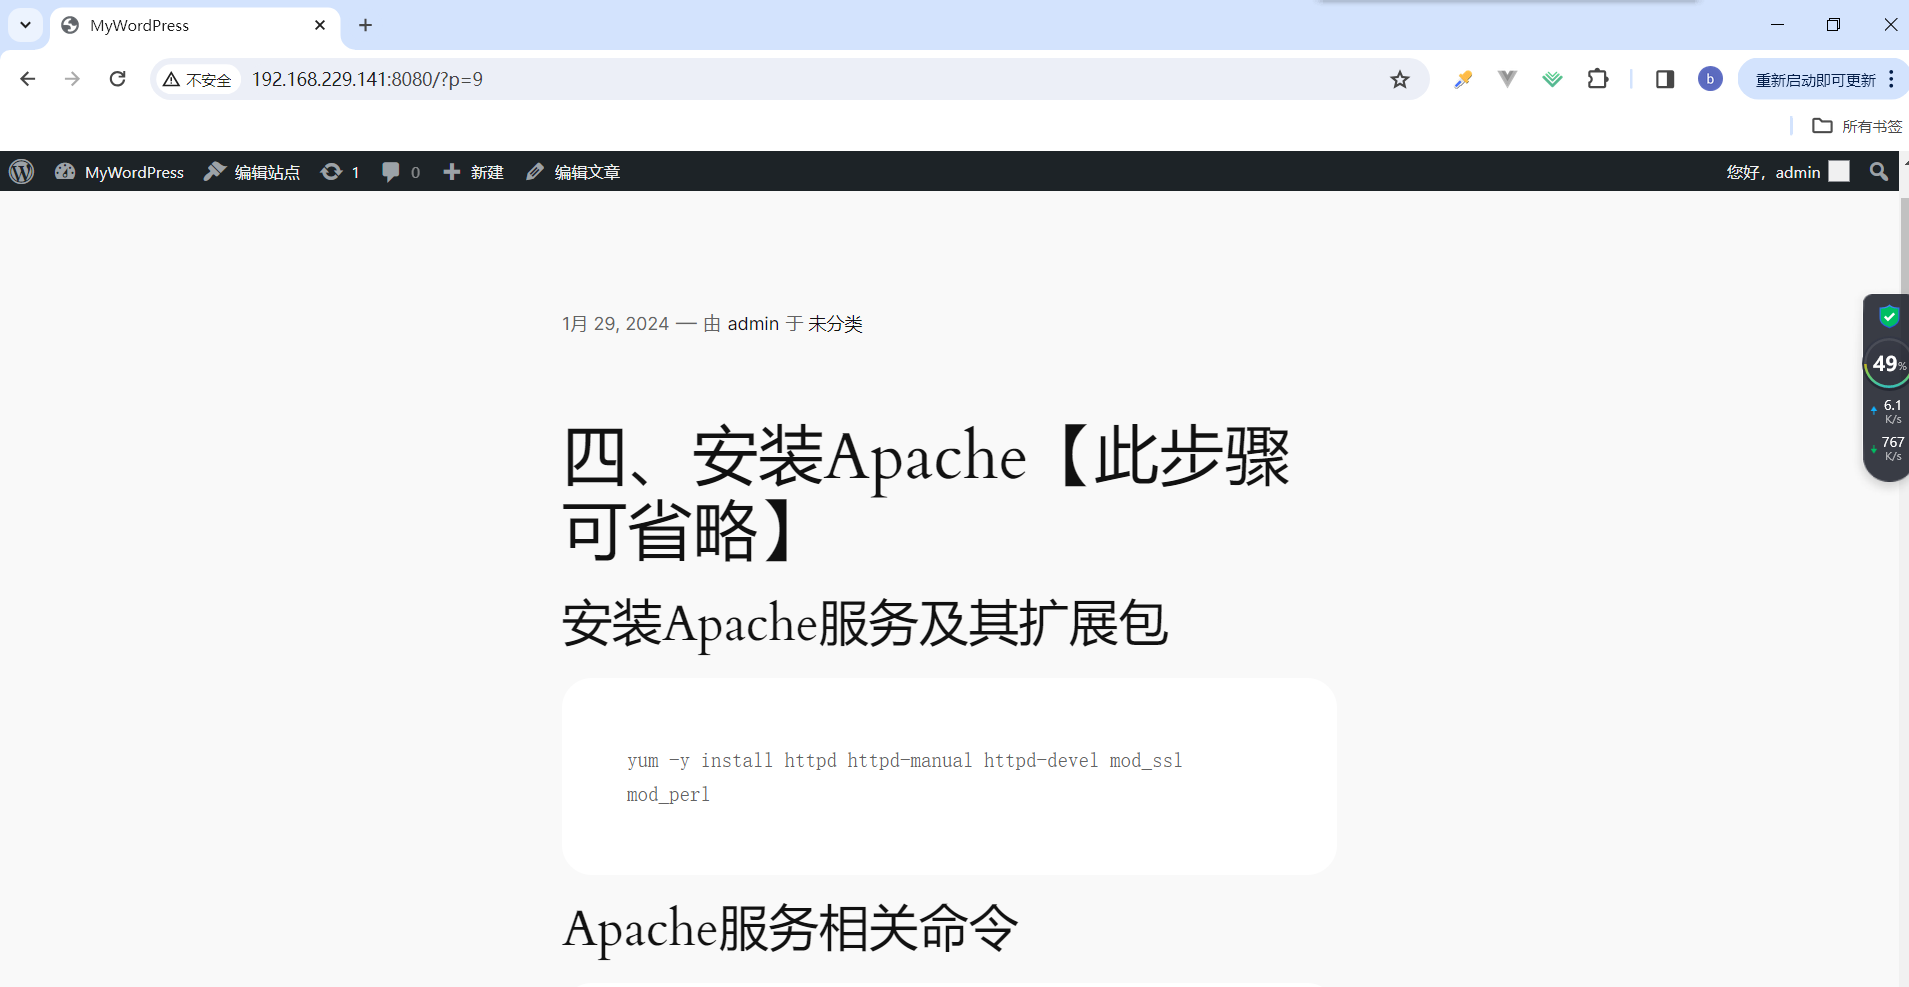
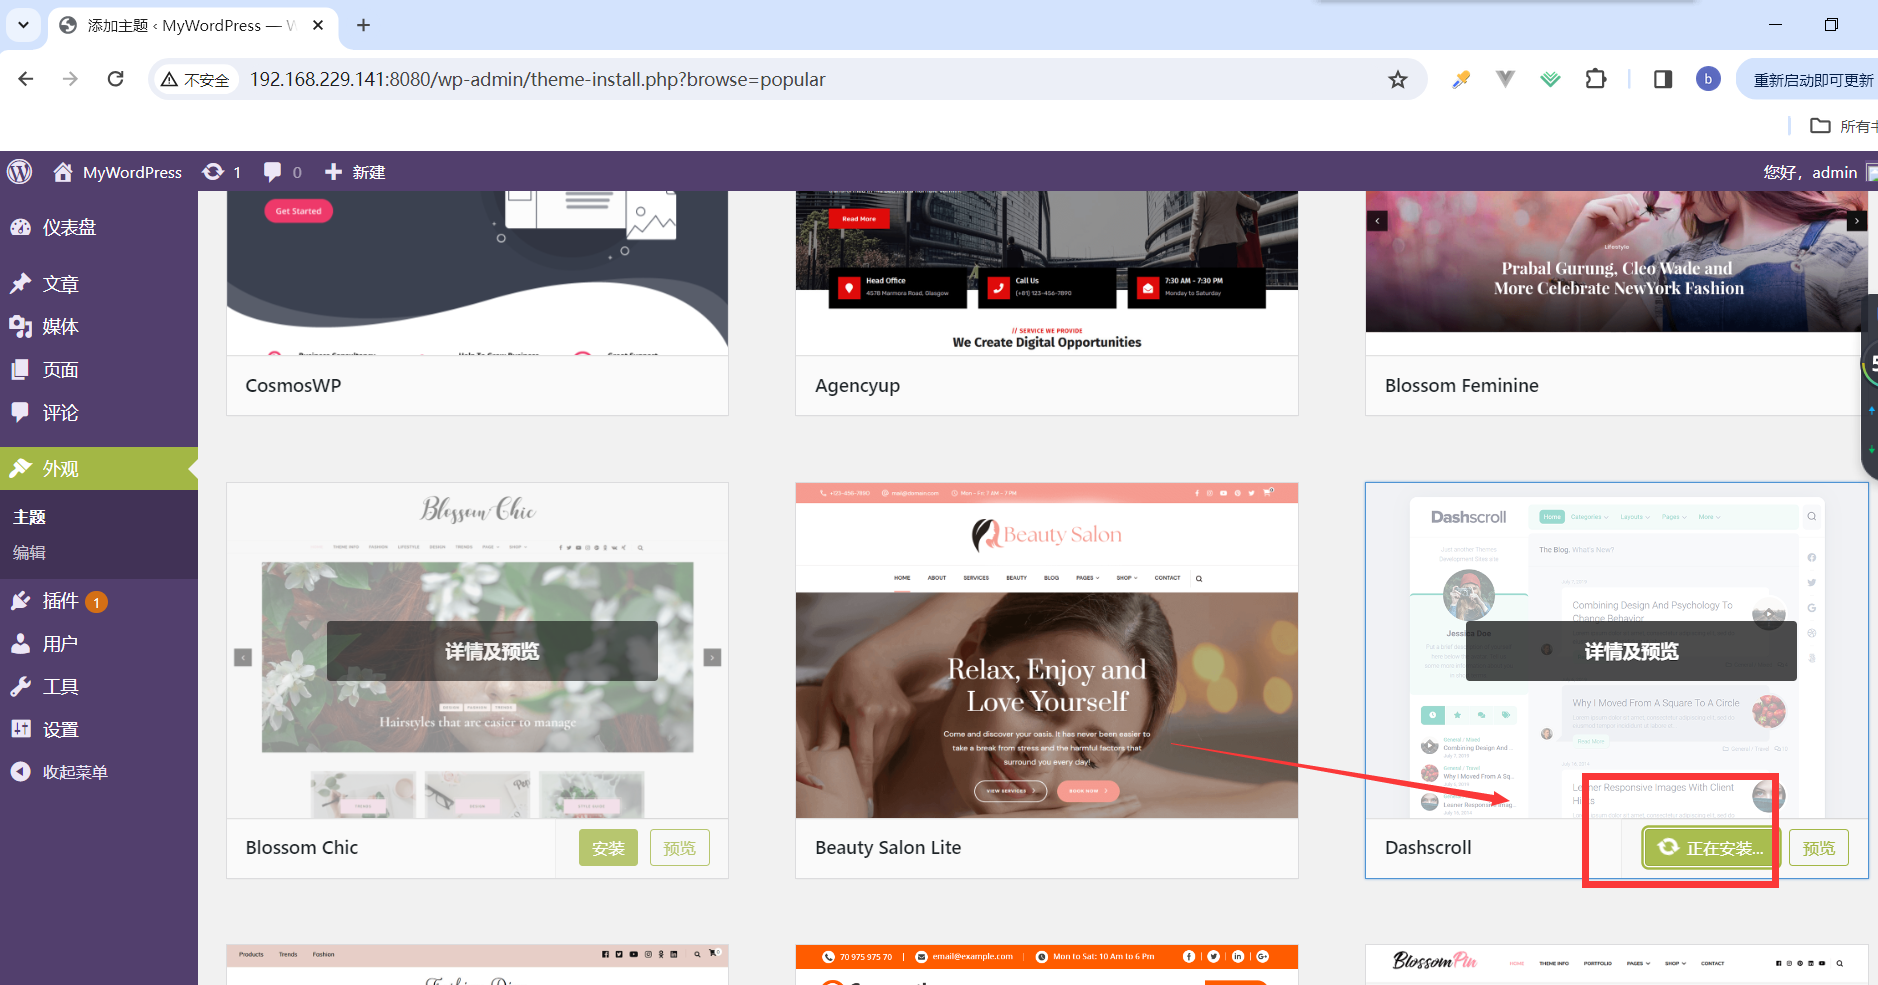
6.12.博客页面进行相关设置

七、安装typecho博客
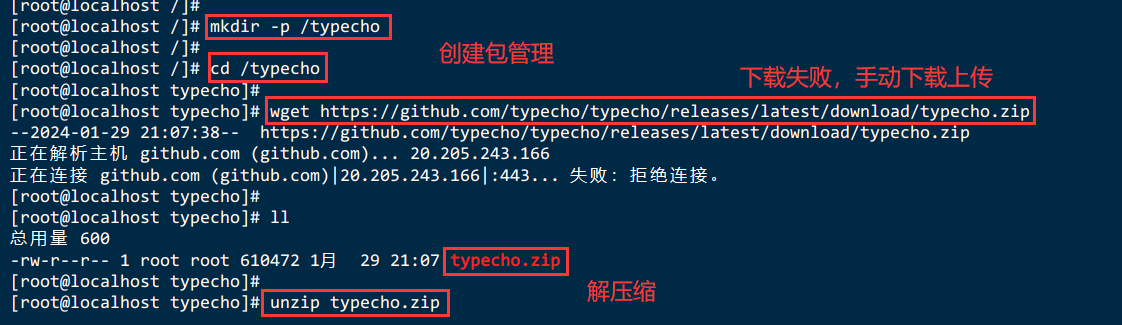
7.1.创建文件夹管理并下载
typecho博客官网下载:https://typecho.org/download
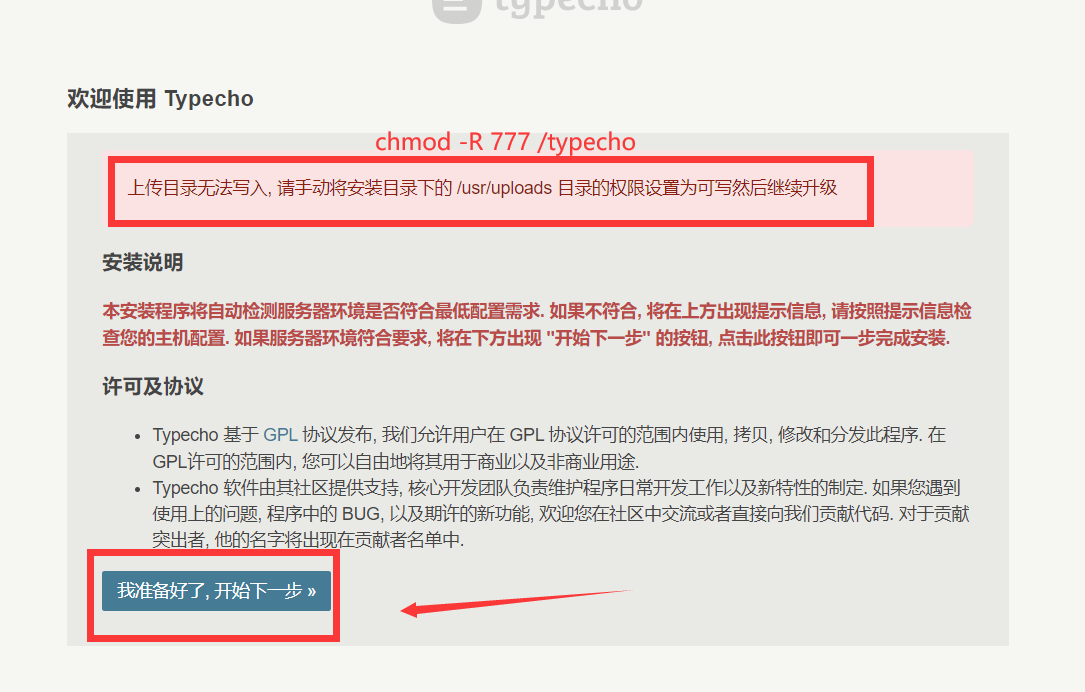
mkdir -p /typecho
cd typecho
wget https://github.com/typecho/typecho/releases/latest/download/typecho.zip
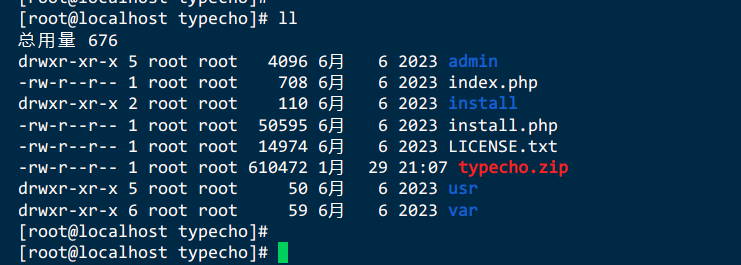
unzip typecho.zip
chmod -R 777 /typecho # 直接给 typecho 目录及子文件赋予所有权限,防止安装时出现其他问题
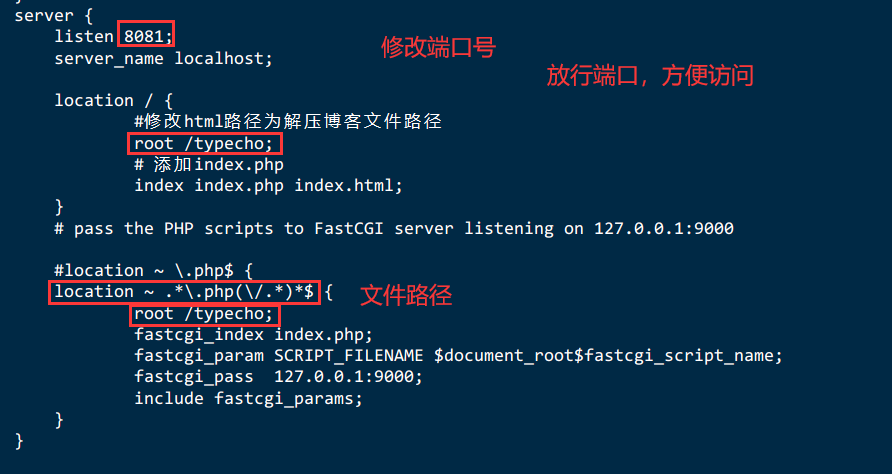
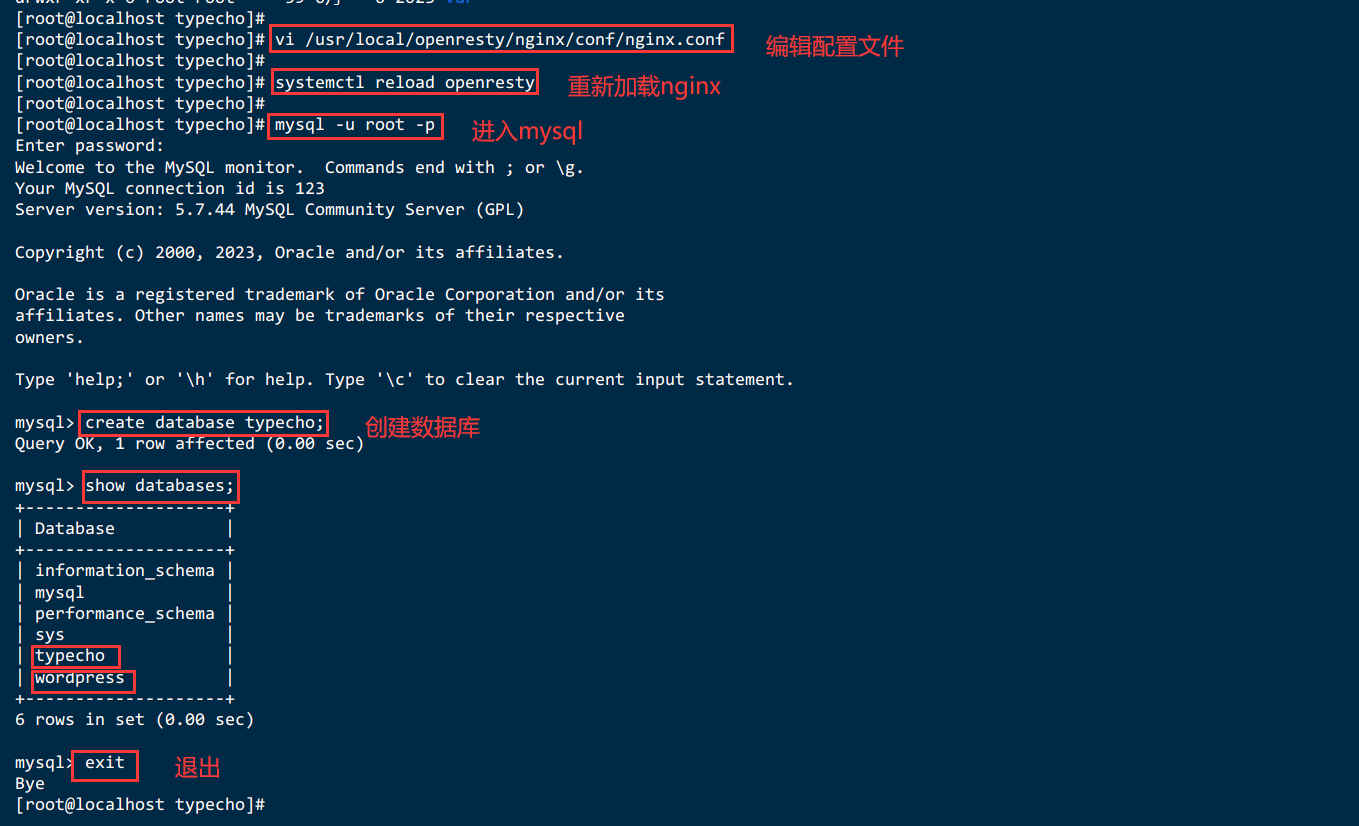
7.2.修改openresty配置文件
vi /usr/local/openresty/nginx/conf/nginx.conf

systemctl reload openresty
server {

        listen 8081;
        server_name localhost;

        location / {

                #修改html路径为解压博客文件路径
                root /typecho;
                # 添加index.php
                index index.php index.html;
        }
        # pass the PHP scripts to FastCGI server listening on 127.0.0.1:9000
        location ~ .*\.php(\/.*)*$  {

                root /typecho;
                fastcgi_index index.php;
                fastcgi_param SCRIPT_FILENAME $document_root$fastcgi_script_name;
                fastcgi_pass  127.0.0.1:9000;
                include fastcgi_params;
        }
    }
7.3.创建数据库typecho
# 进入数据库
mysql -u root -p
自己的密码

# 创建数据库
create database typecho;
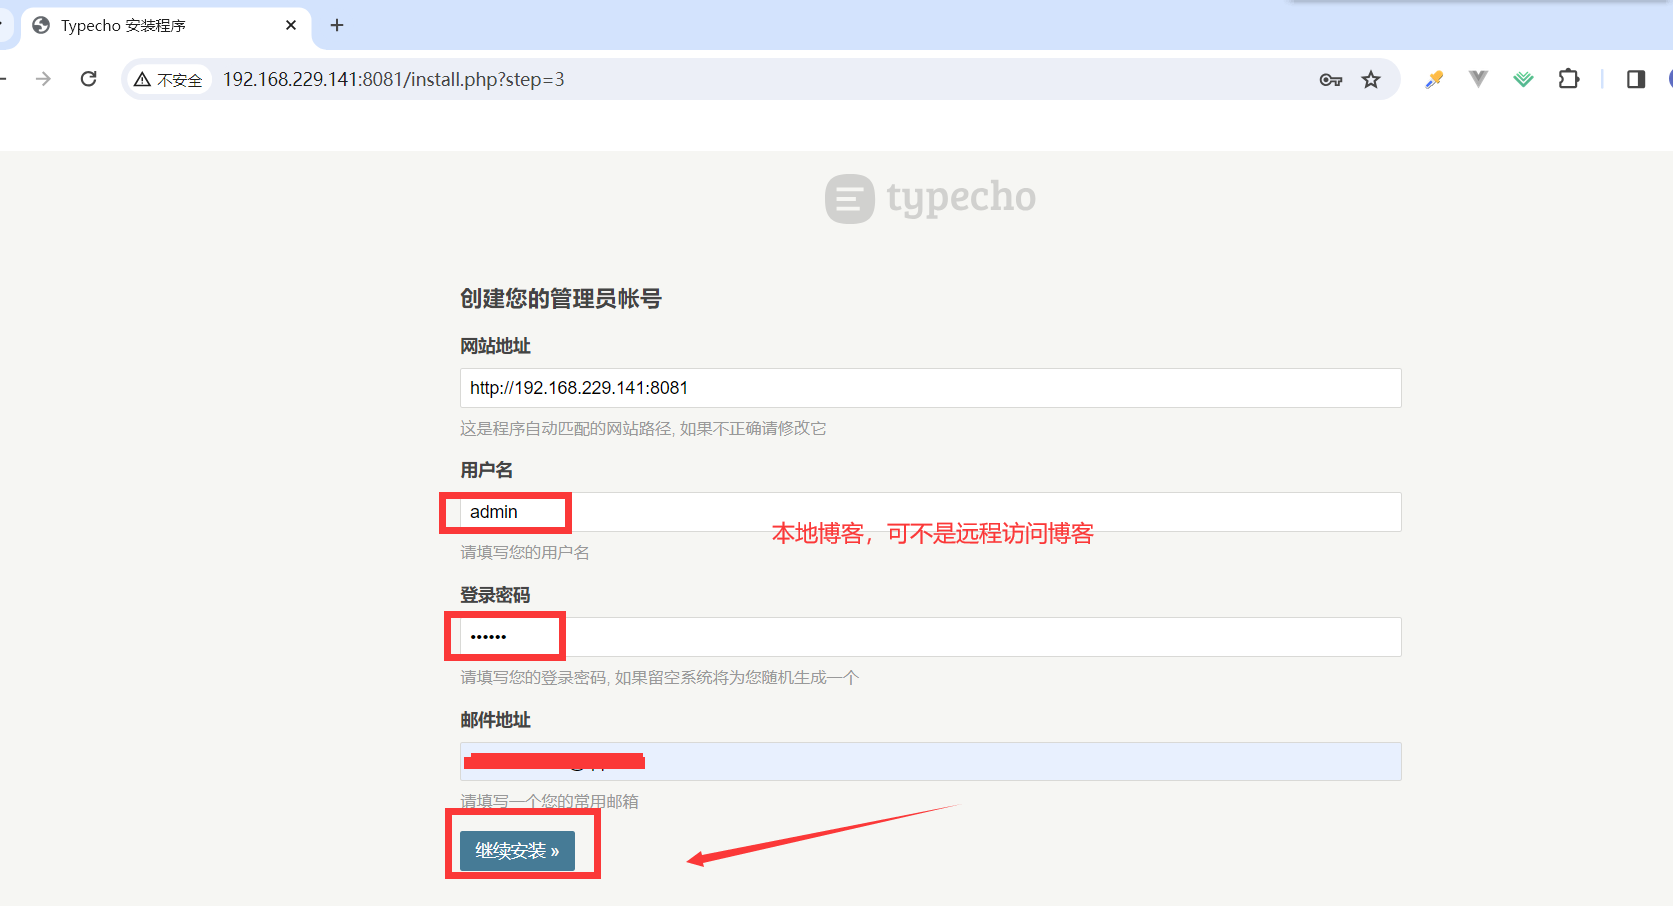
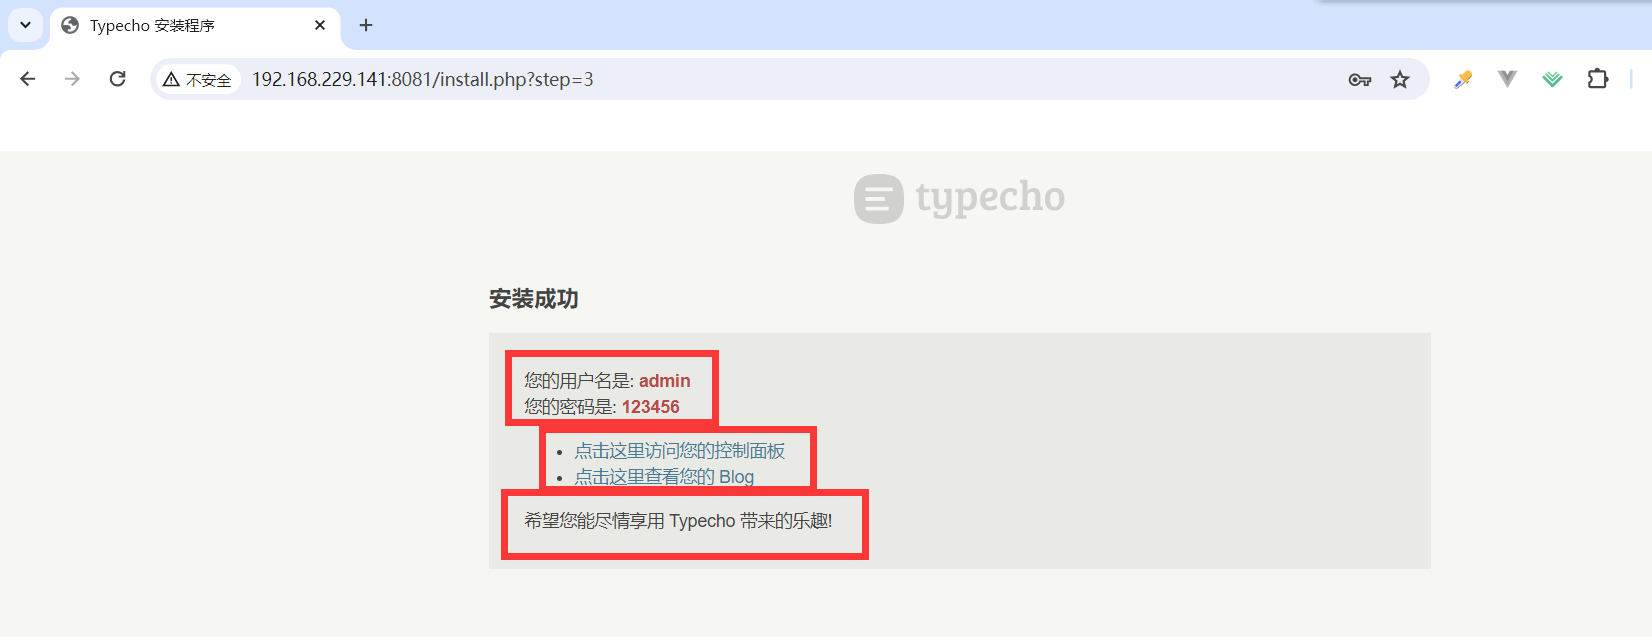
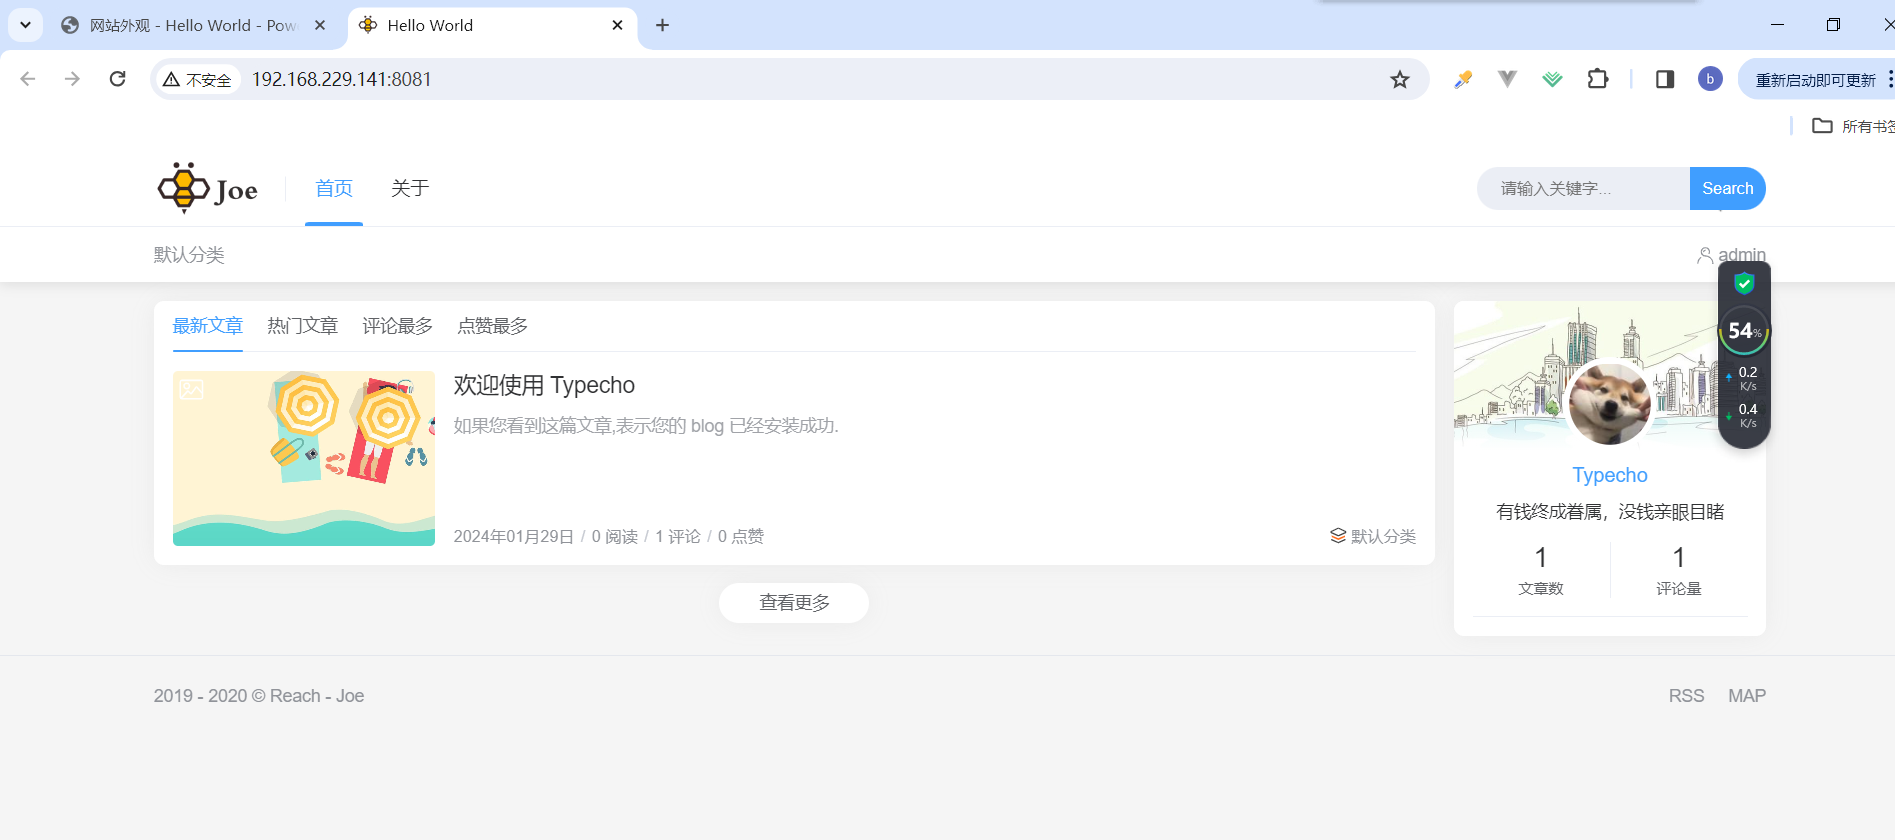
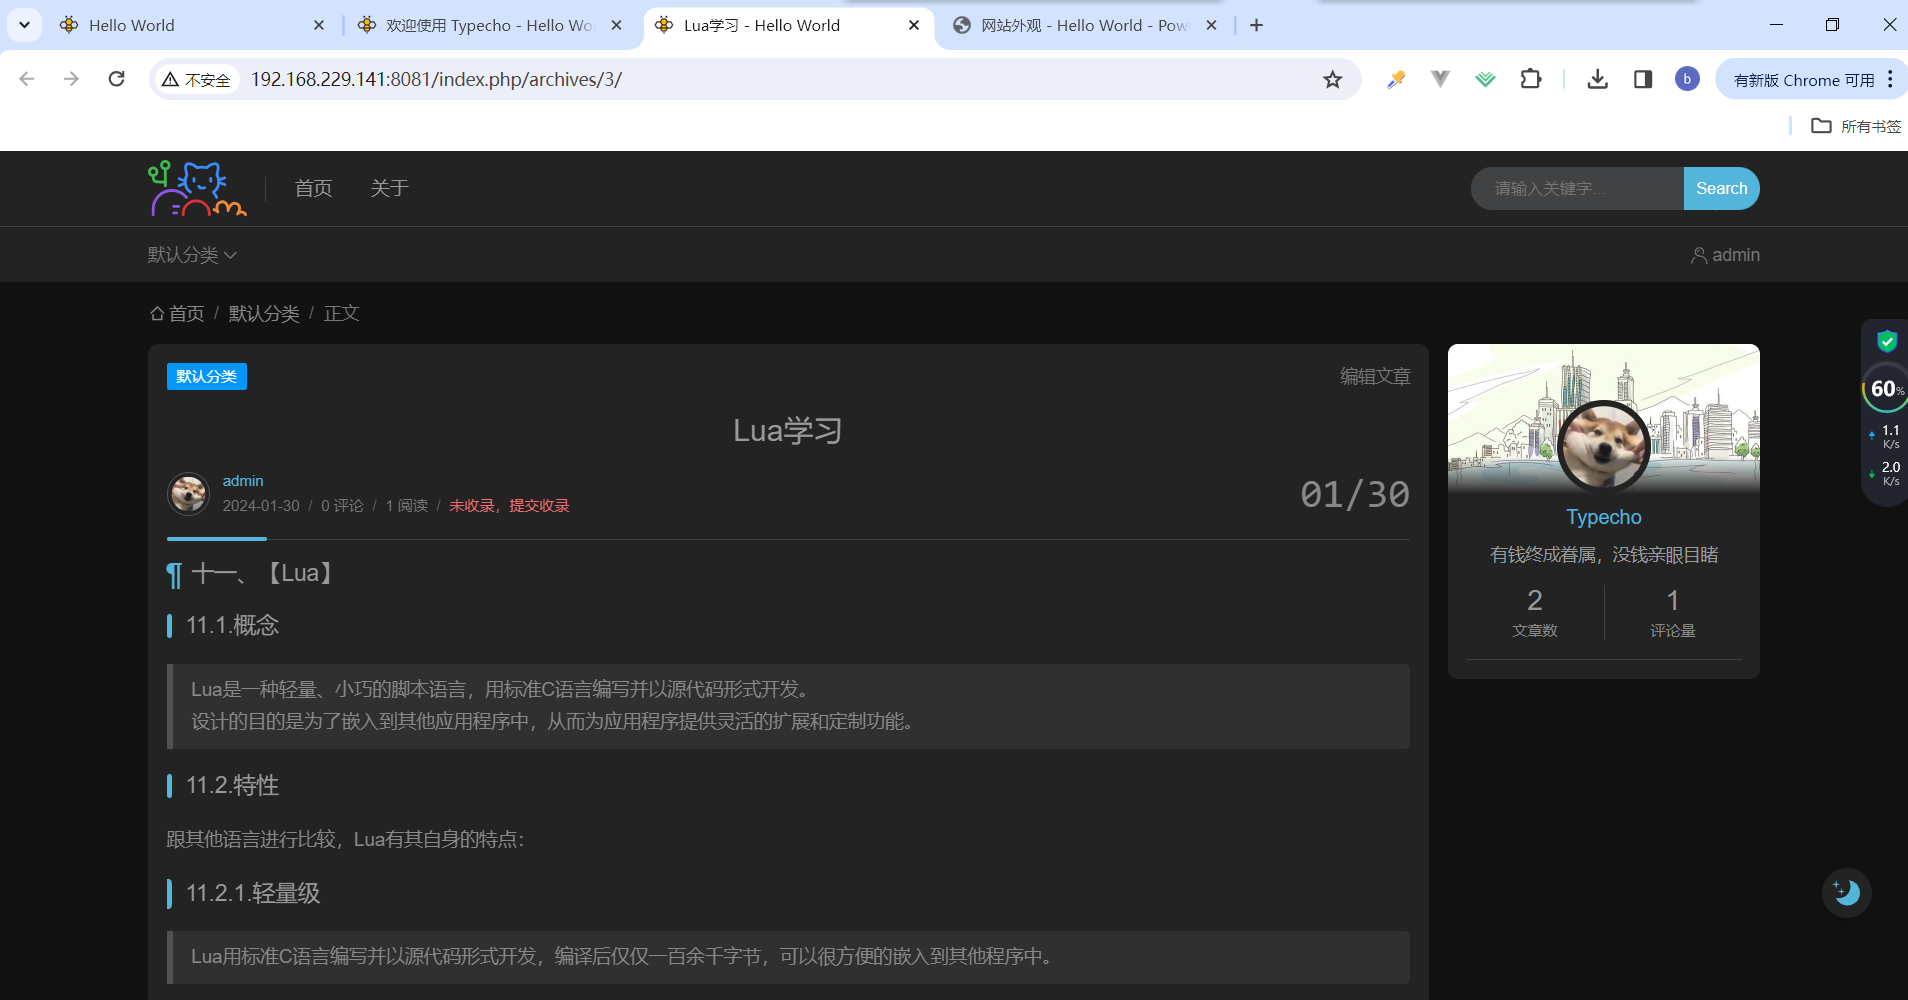
7.4.打开浏览器,访问http://<ECS公网IP>:8081
http://192.168.229.141:8081/
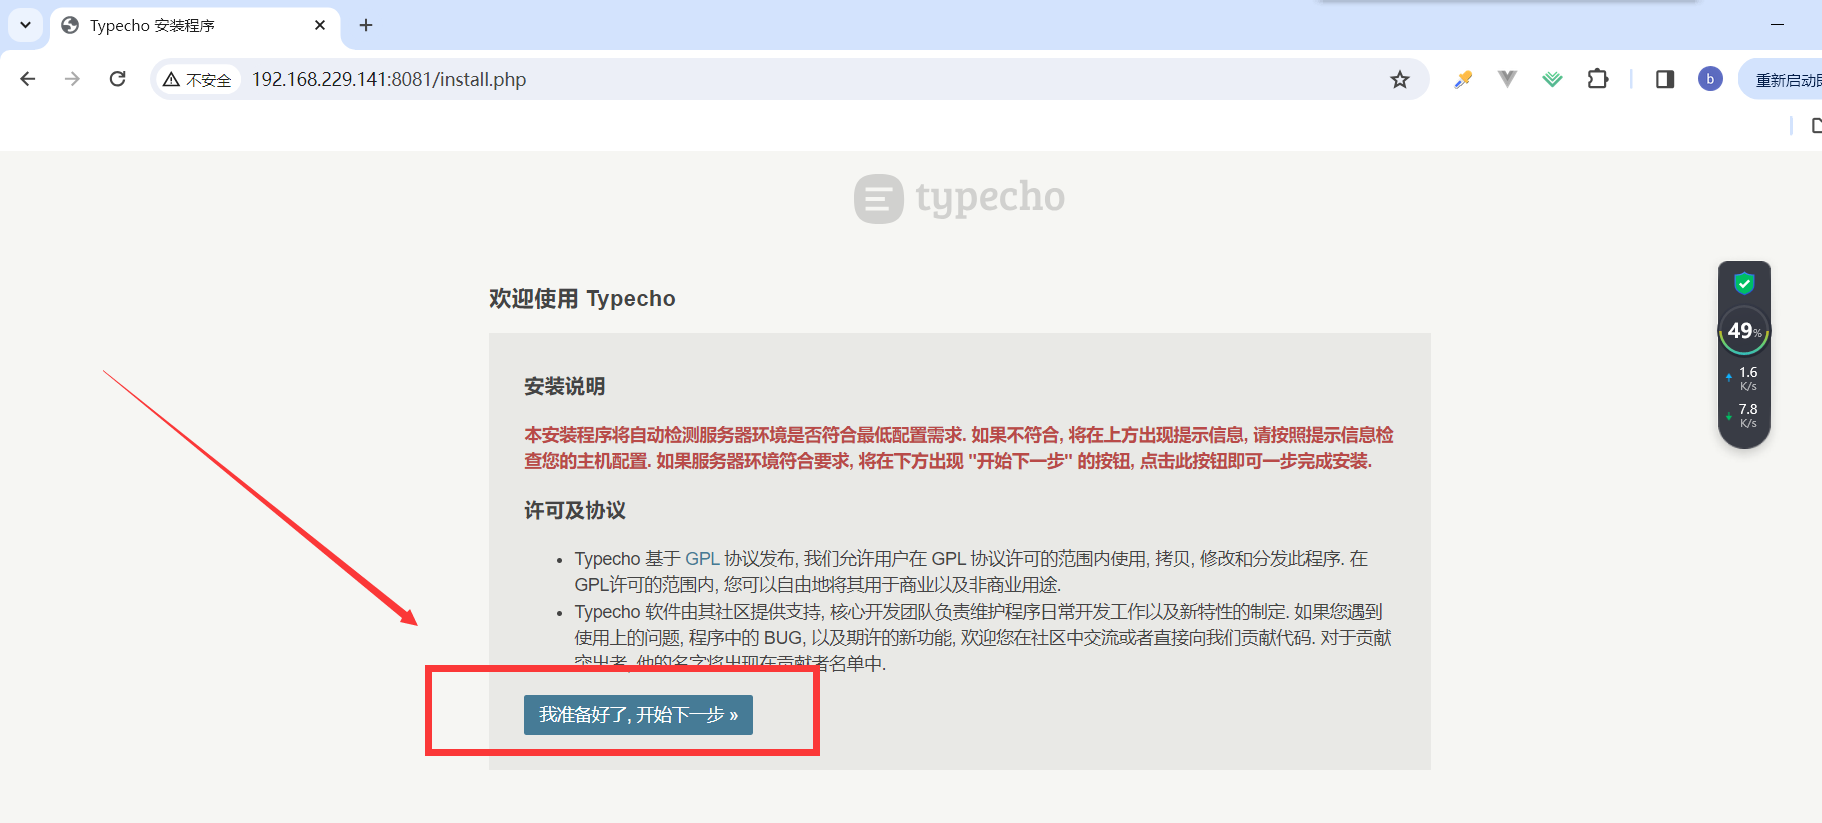
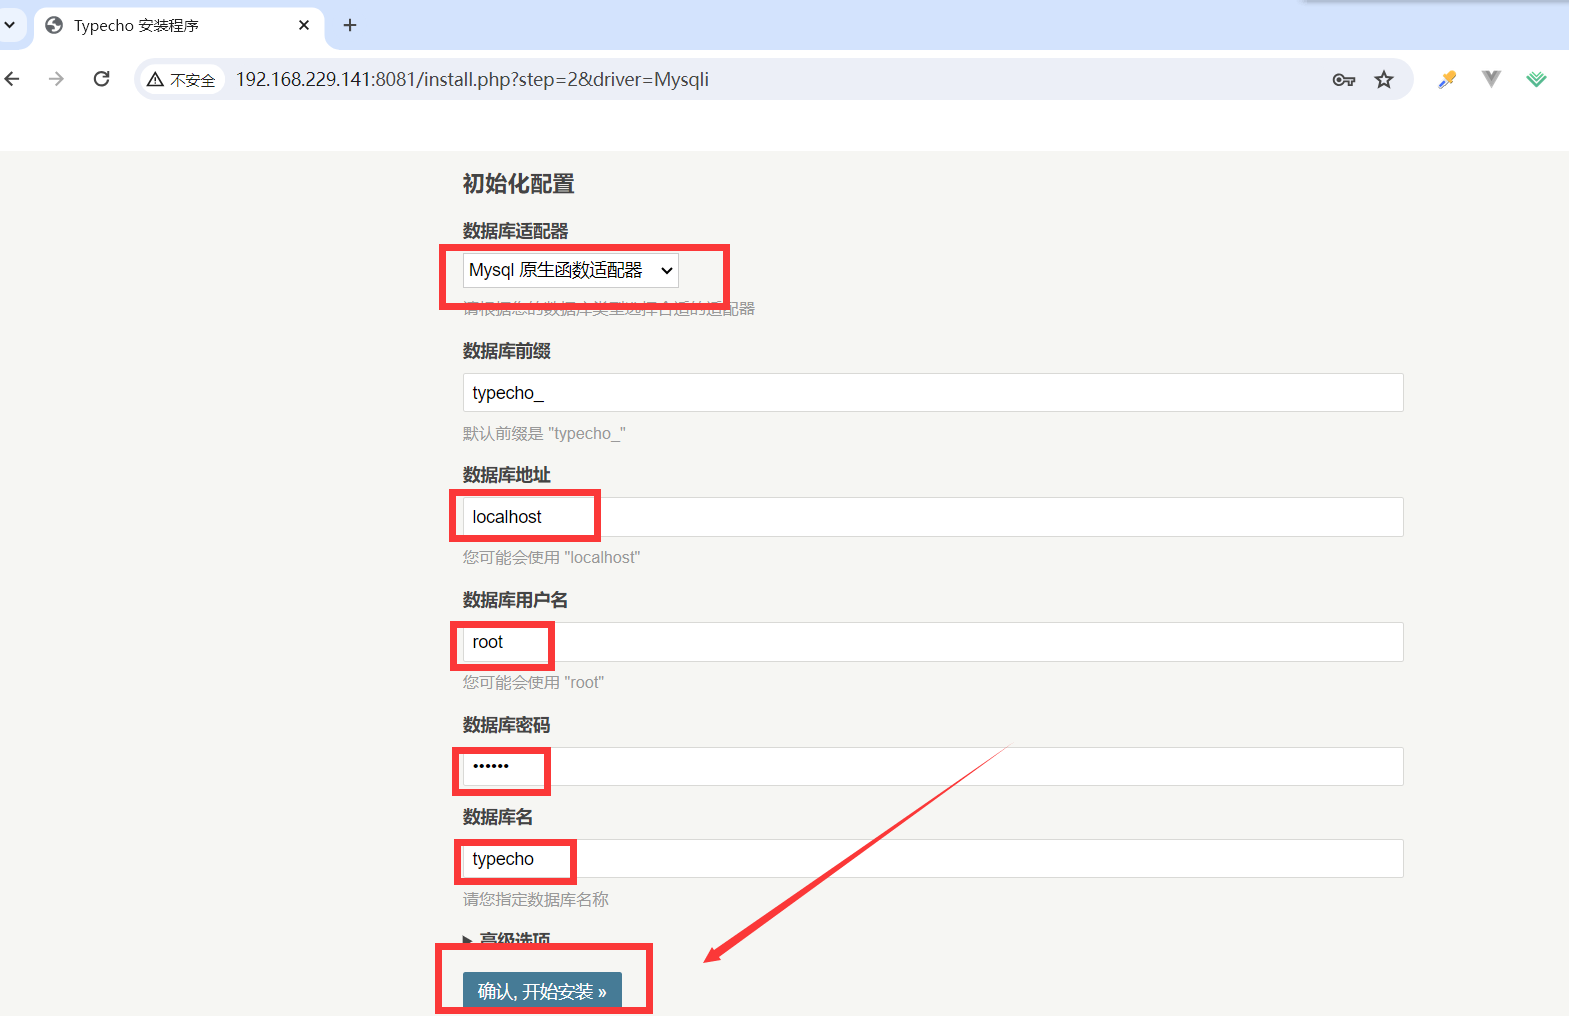
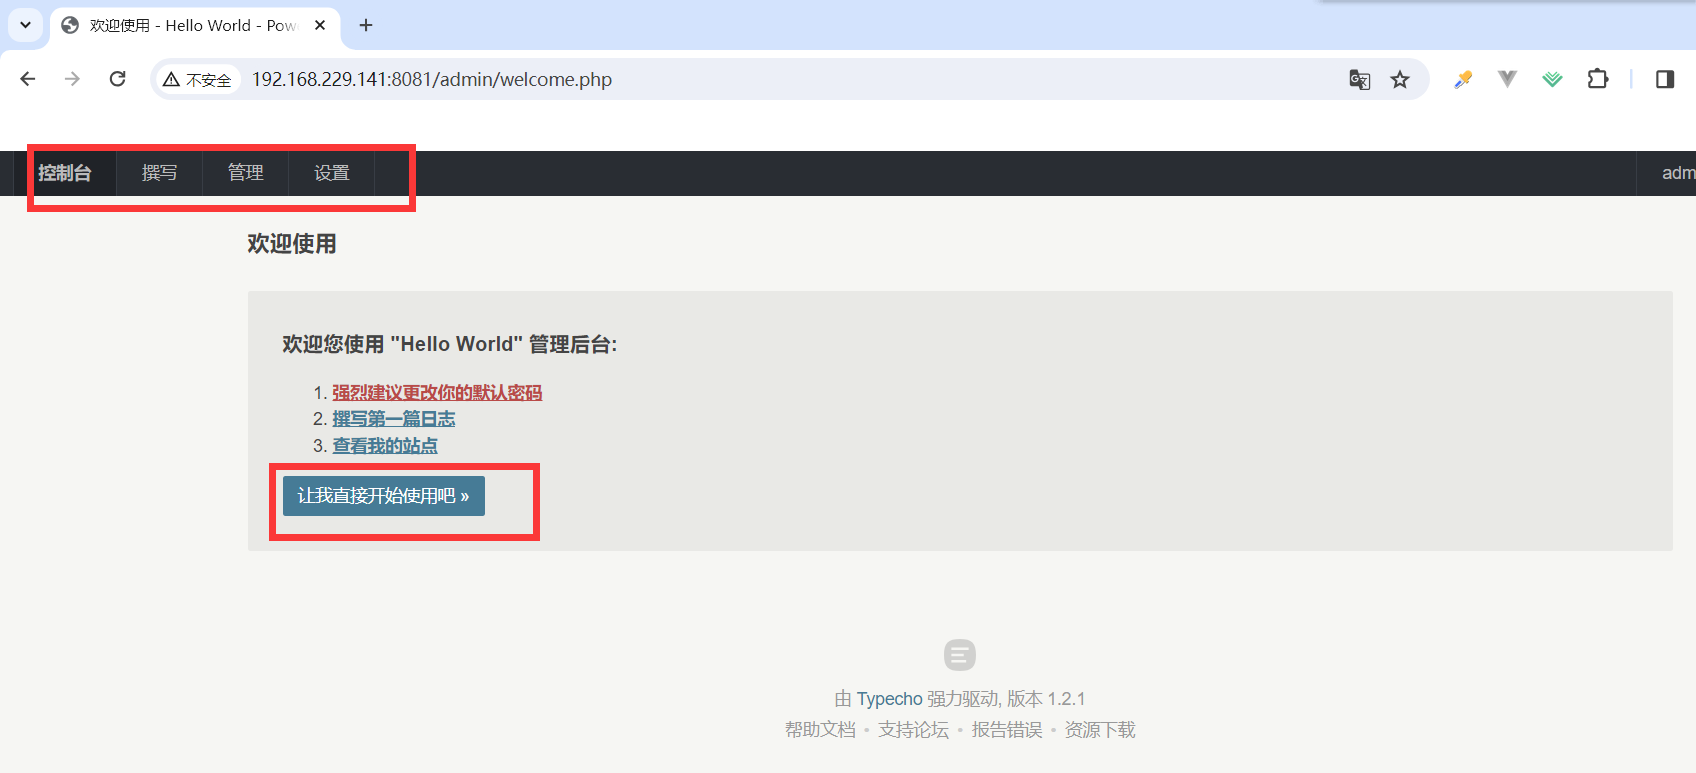
7.5.博客页面进行相关设置
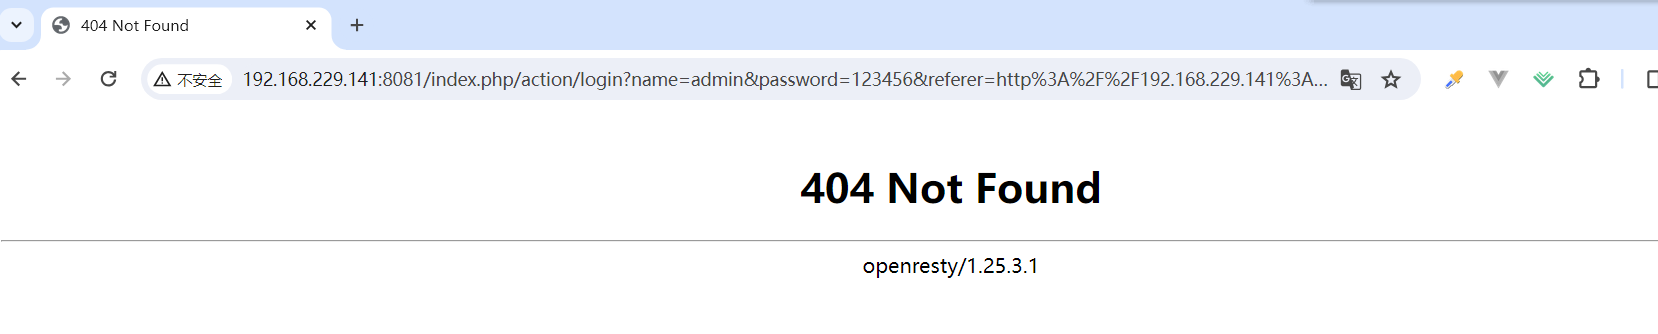
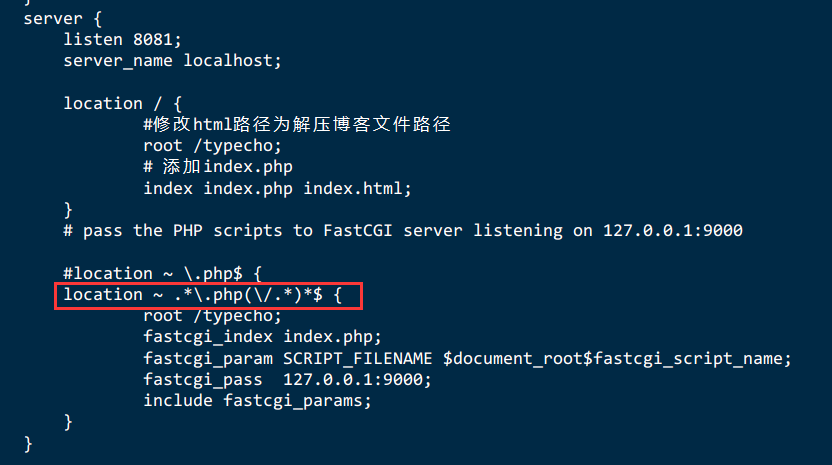
7.6.Typecho点击前台链接或者后台登录时出现404的解决方法
官方给的解决方式是nginx.conf 里的 location 设置成这样
location ~ .*\.php$
要支持 pathinfo,需要改成
location ~ .*\.php(\/.*)*$
#location ~ [^/]\.php(/|$)
在某些老版本的php里面,可能还要打开php.ini里的cgi.fix_pathinfo
find / -name php.ini

vi /etc/opt/remi/php74/php.ini

cgi.fix_pathinfo = 1
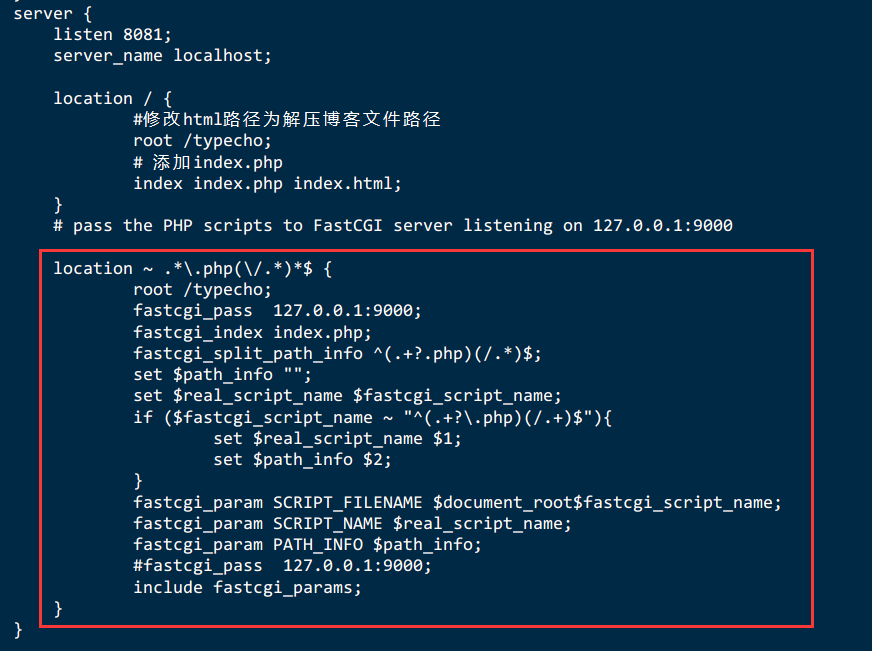
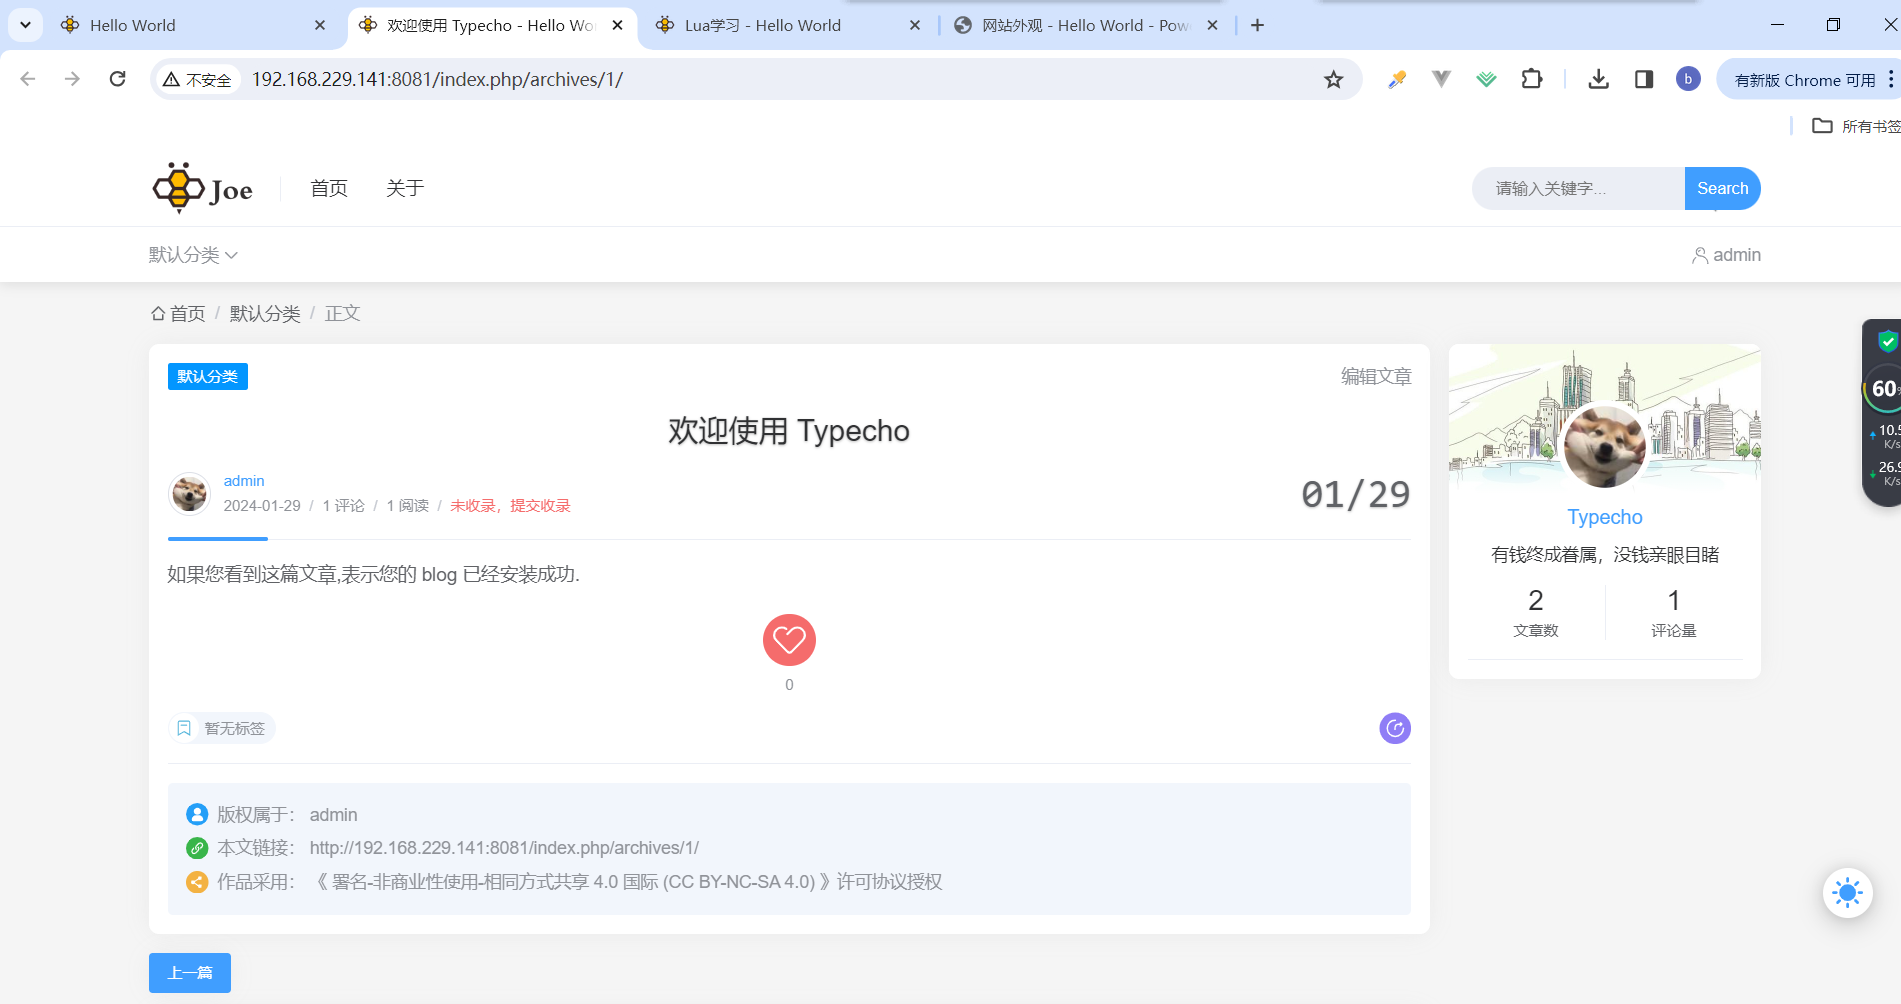
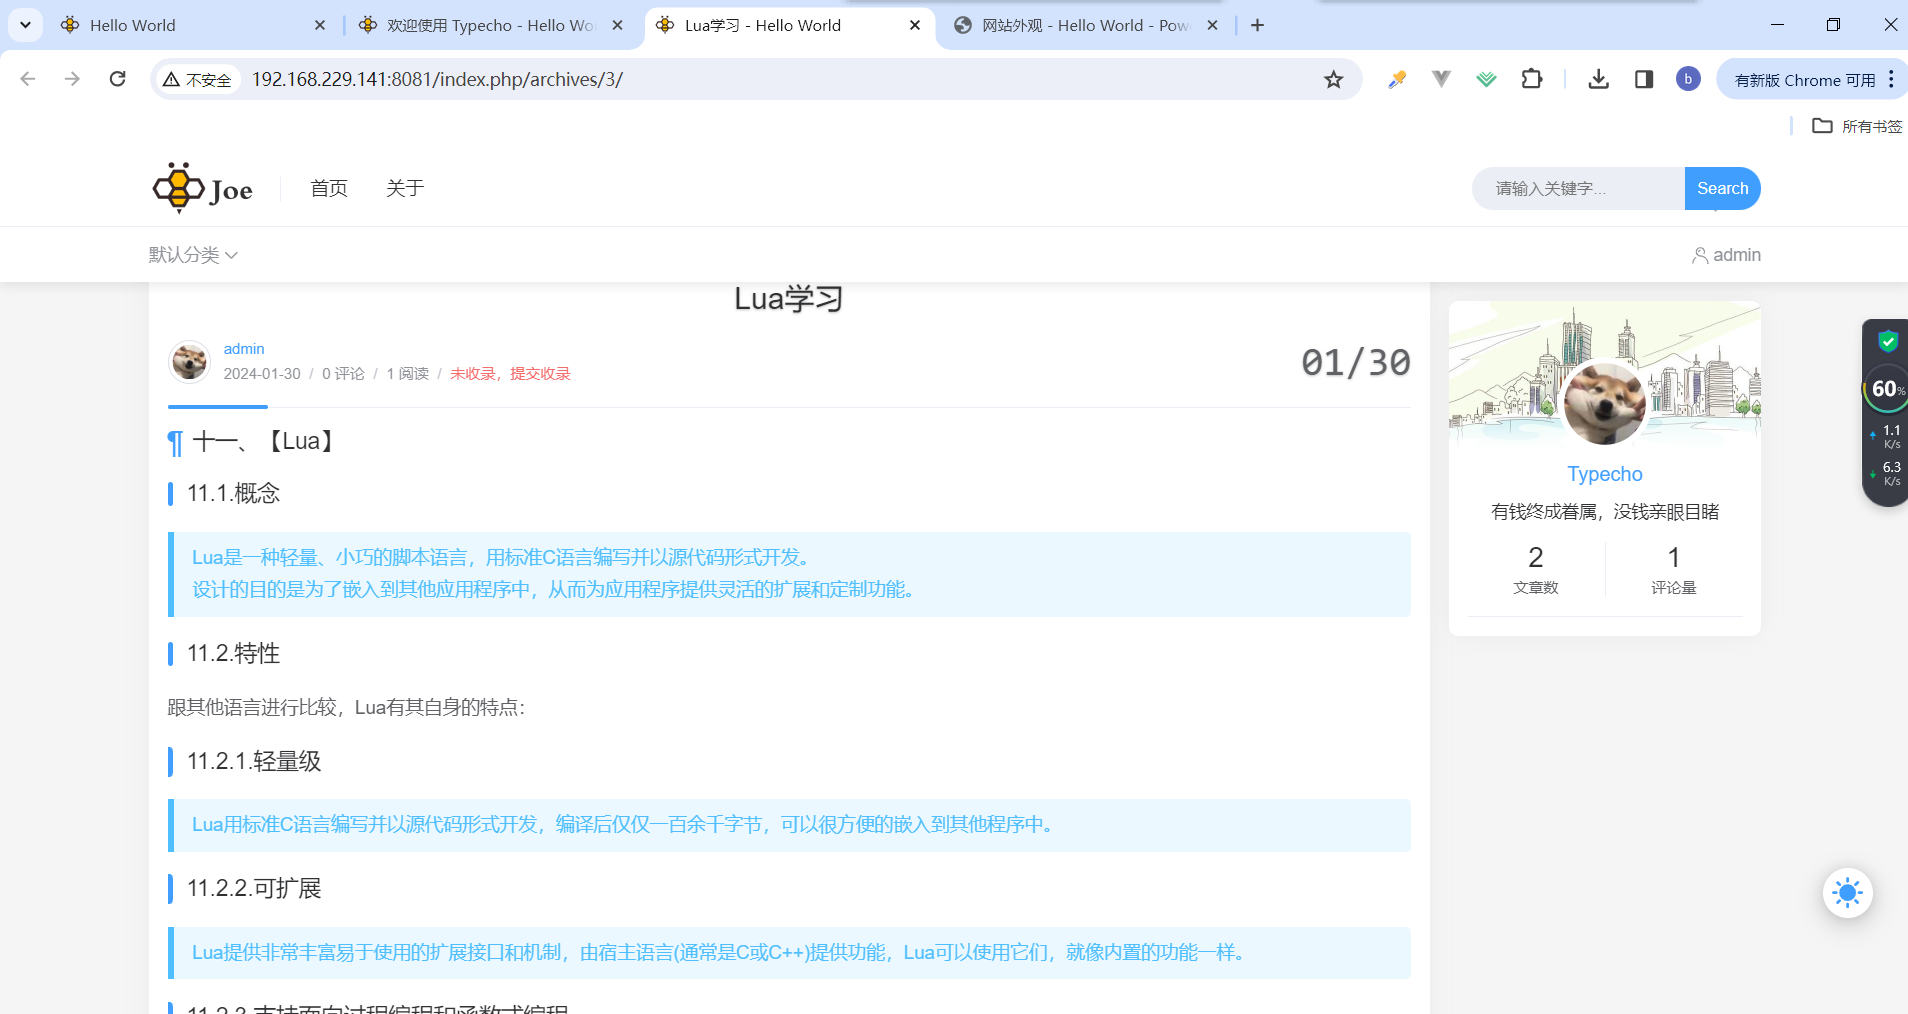
7.7.typecho只能打开主页,文章详细内容打不开
问题原因:PHP这块不支持pathinfo
修改为:
    server {

        listen 8081;
        server_name localhost;

        location / {

                #修改html路径为解压博客文件路径
                root /typecho;
                # 添加index.php
                index index.php index.html;
        }
        # pass the PHP scripts to FastCGI server listening on 127.0.0.1:9000

        location ~ .*\.php(\/.*)*$ {

                root /typecho;
                fastcgi_pass  127.0.0.1:9000;
                fastcgi_index index.php;
                fastcgi_split_path_info ^(.+?.php)(/.*)$;
                set $path_info "";
                set $real_script_name $fastcgi_script_name;
                if ($fastcgi_script_name ~ "^(.+?\.php)(/.+)$"){

                        set $real_script_name $1;
                        set $path_info $2;
                }
                fastcgi_param SCRIPT_FILENAME $document_root$fastcgi_script_name;
                fastcgi_param SCRIPT_NAME $real_script_name;
                fastcgi_param PATH_INFO $path_info;
                #fastcgi_pass  127.0.0.1:9000;
                include fastcgi_params;
        }
    }
完整版:nginx.conf
user www;
# 指令名        指令值;  #全局块,主要设置Nginx服务器整体运行的配置指令
worker_processes  1;  # 默认为1,表示开启一个业务进程

error_log  logs/error.log;

# events块,主要设置,Nginx服务器与用户的网络连接,这一部分对Nginx服务器的性能影响较大
events {
    # 事件驱动模块
        accept_mutex on; #设置Nginx网络连接序列化,防止多个进程对连接的争抢
        multi_accept on; #设置Nginx的worker进程是否可以同时接收多个网络请求
        worker_connections 1024; # 设置Nginx单个worker进程最大的连接数
        use epoll; #设置Nginx使用的事件驱动模型,使用epoll函数来优化Ngin
}

# http块,是Nginx服务器配置中的重要部分,代理、缓存、日志记录、第三方模块配置...
http {

    include       mime.types; # 引入http mime类型
    default_type  application/octet-stream; # 如果mime类型没有匹配上,默认使用二进制流的方式传输

    log_format  main  '$remote_addr - $remote_user [$time_local] "$request" '
                      '$status $body_bytes_sent "$http_referer" '
                      '"$http_user_agent" "$http_x_forwarded_for"';

    access_log  logs/access.log  main;

    sendfile        on; # 使用limux的sendfile(socket,file,len)高效网络传输,也就是数据0拷贝
    tcp_nopush      on; # 主要是用来提升网络包的传输效率
    tcp_nodelay     on; # 提高网络包传输的实时性
    keepalive_timeout  65;

    include nginx_gzip.conf;

	# server块,是Nginx配置和虚拟主机vhost相关的内容
    server {
    # 虚拟主机配置
        listen       80; # 监听端口号80
        server_name  localhost; # 域名、主机名
        #  location块,基于Nginx服务器接收请求字符串与location后面的值进行匹配,对特定请求进行处理
        location / {
    # 匹配路径
            root   html; # 文件根目录
            index  index.html index.htm; # 默认页名称
        }
        error_page   500 502 503 504  /50x.html; # 报编码错误对应页面
        location = /50x.html {

            root   html;
        }
    }

    server {

        listen 8081;
        server_name localhost;

        location / {

                #修改html路径为解压博客文件路径
                root /typecho;
                # 添加index.php
                index index.php index.html;
        }
        # pass the PHP scripts to FastCGI server listening on 127.0.0.1:9000

        location ~ .*\.php(\/.*)*$ {

                root /typecho;
                fastcgi_pass  127.0.0.1:9000;
                fastcgi_index index.php;
                fastcgi_split_path_info ^(.+?.php)(/.*)$;
                set $path_info "";
                set $real_script_name $fastcgi_script_name;
                if ($fastcgi_script_name ~ "^(.+?\.php)(/.+)$"){

                        set $real_script_name $1;
                        set $path_info $2;
                }
                fastcgi_param SCRIPT_FILENAME $document_root$fastcgi_script_name;
                fastcgi_param SCRIPT_NAME $real_script_name;
                fastcgi_param PATH_INFO $path_info;
                #fastcgi_pass  127.0.0.1:9000;
                include fastcgi_params;
        }
    }


}
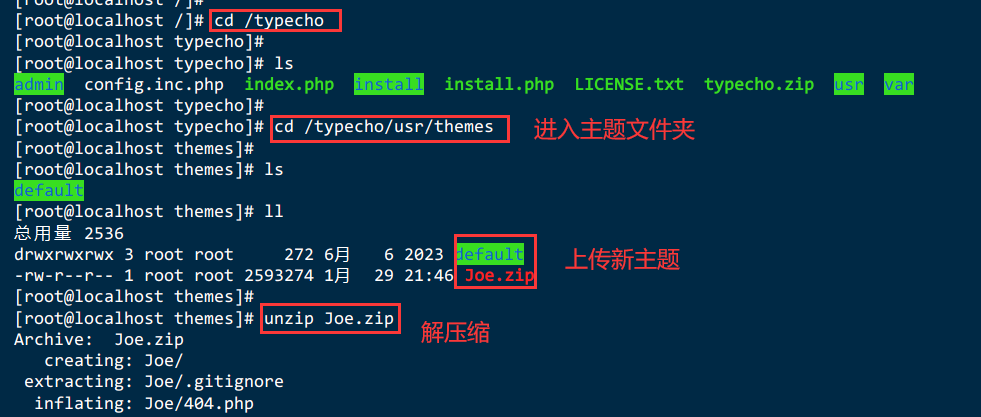
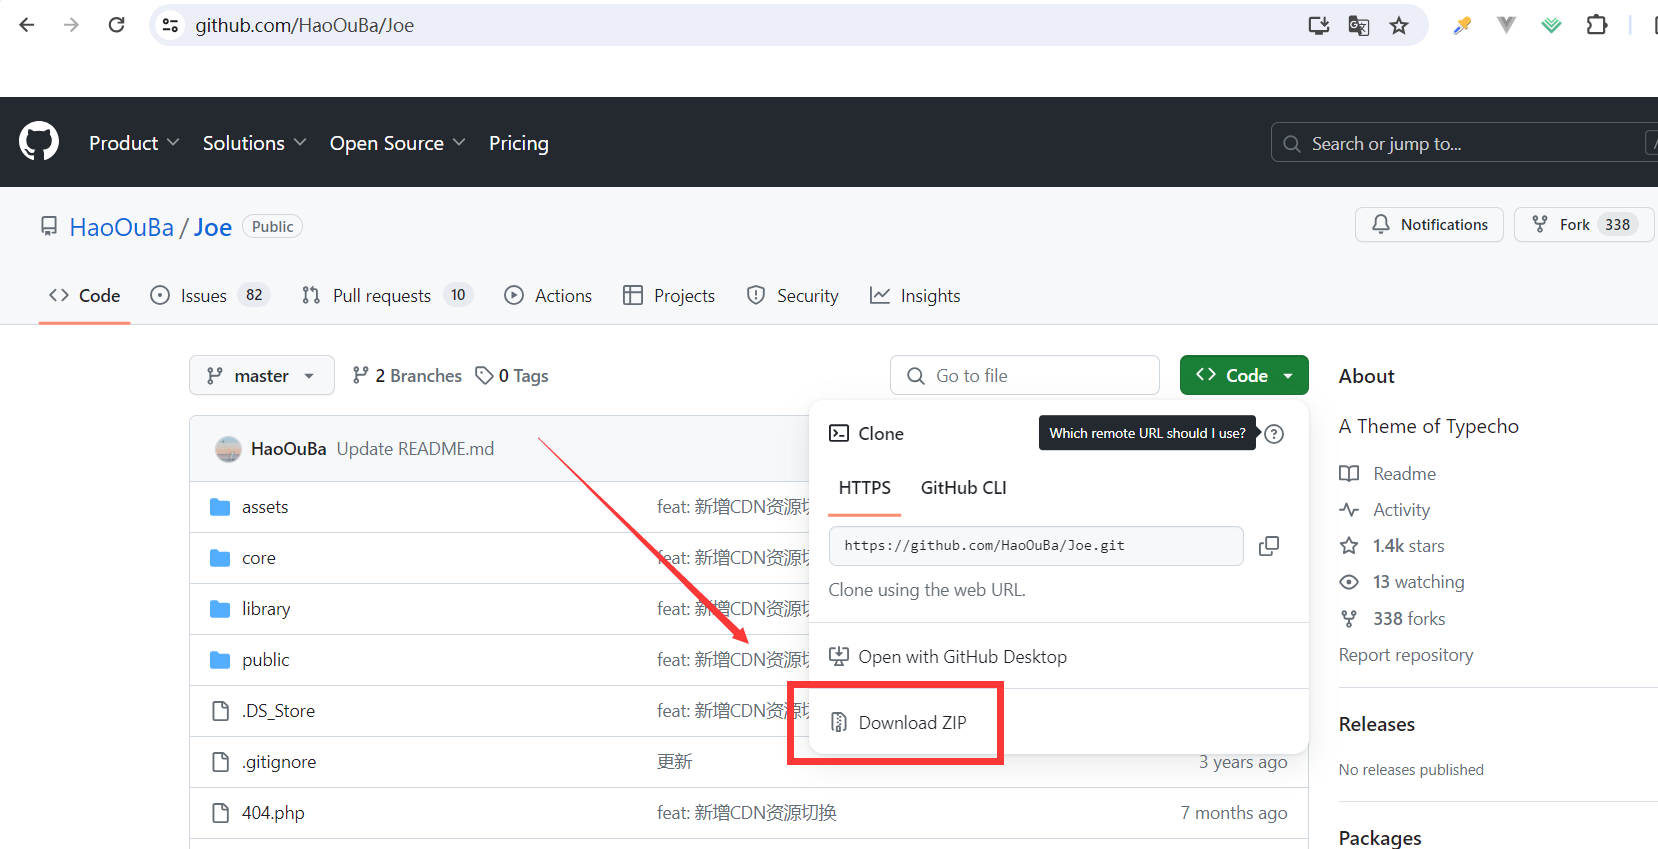
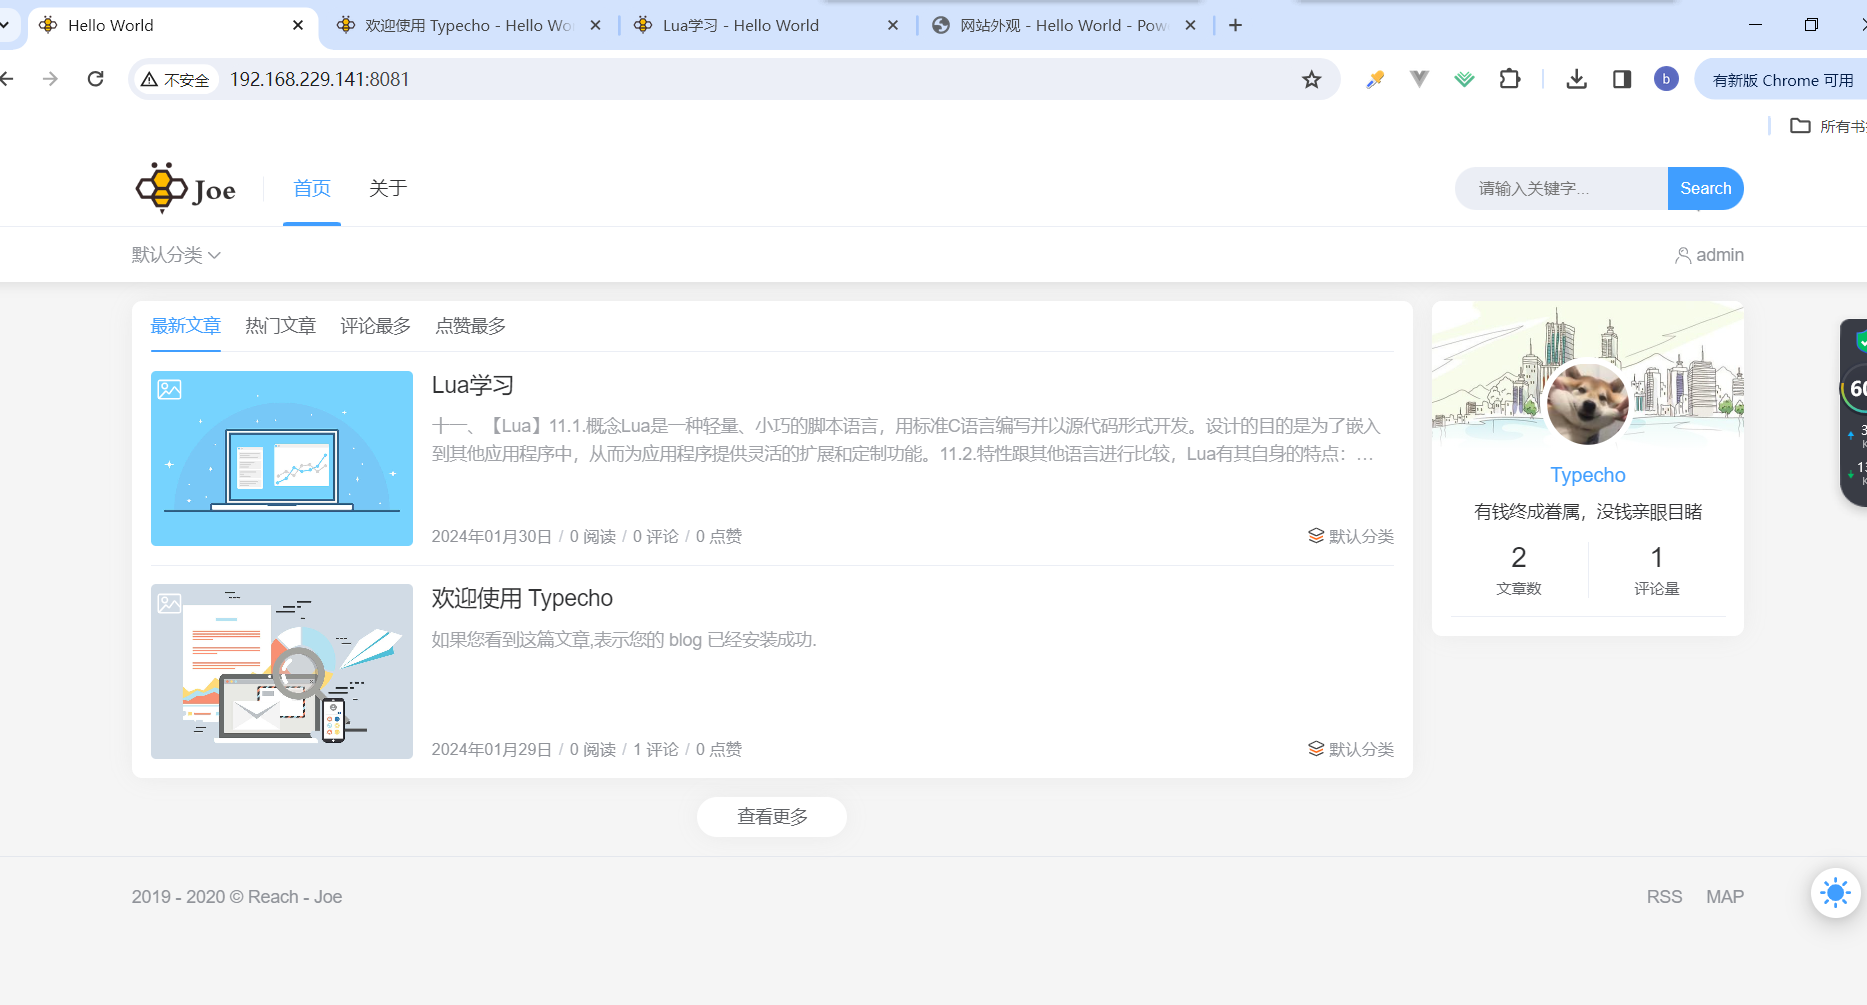
7.8.配置Joe主题
Joe主题网站:https://github.com/HaoOuBa/Joe.git
https://github.com/HaoOuBa/Joe.git

7.9.关闭【Bye Bye】
systemctl stop openresty

systemctl stop php74-php-fpm

systemctl stop mysqld

# 关机
shutdown now
endl 本文章下载链接
本文章下载链接:https://www.lanzv.com/i25up1myinba 密码:44ks