简言
compiler-core包是vue3源码代码编译的核心代码包,且与平台无关,这个包主要功能是将代码解析成ast、然后转换成codegenNode对象、再编译生成可执行代码(render渲染函数)。
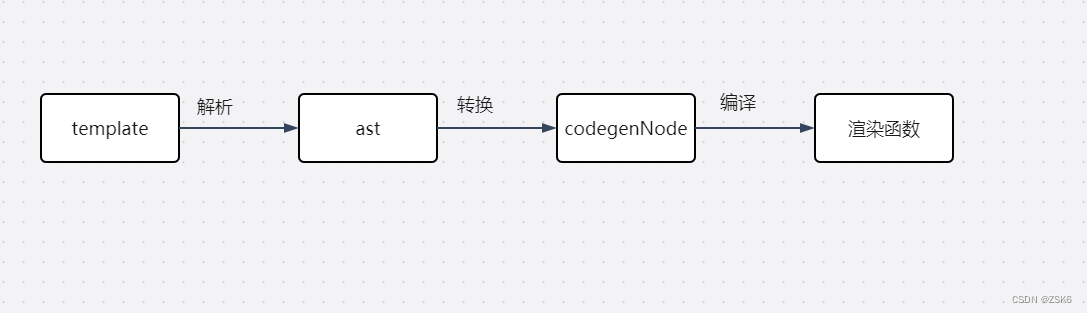
compiler-core将沿着上面流程进行探索。
compiler-core
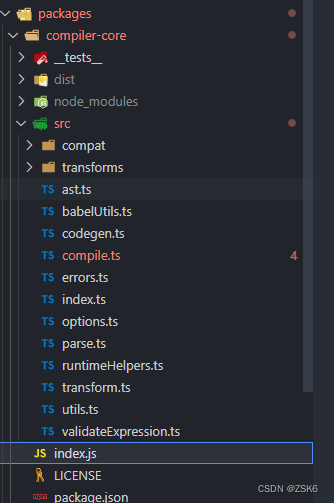
找到compiler-core/src/index.ts文件,可以看到它导出了baseCompile函数:

说明baseCompile是很重要的函数,它返回渲染函数。
然后进入改函数看代码:

看到了 baseParse函数、transform函数、generate函数,这个三个比较重要,将会围绕它们进行探索。
template解析
解析成ast的流程一般是词法分析+语法分析,然后解析实现代码由有限状态机模式实现,先逐个字符或片段进行词法分析,然后语法分析,得到ast树。
baseParse
template指的是有规则约束的代码字符串,compiler-core/src/parse.ts内的baseParse函数就是处理它的,返回ast树。
export function baseParse(
  content: string,
  options: ParserOptions = {
   }
): RootNode {

  const context = createParserContext(content, options)
  const start = getCursor(context)
  return createRoot(
    parseChildren(context, TextModes.DATA, []),
    getSelection(context, start)
  )
}
参数:
- content : template字符串
- options : 配置如何处理content字符串。
流程:
- createParserContext()函数,创建解析上下文context,这例存放源字符串、解析时的辅助信息和初始化配置。
- getCursor() : 获取当前读取位置信息。
- 创建根节点对象并返回,由createRoot()函数实现,根节点对象children属性存放的解析的上下文context的ast树啦。 由
createRoot(
parseChildren(context, TextModes.DATA, []),
getSelection(context, start)
)
实现。
示例:
const source = `
<div id="foo" :class="bar.baz">
  {
    { world.burn() }}
  <div v-if="ok">yes</div>
  <template v-else>no</template>
  <div v-for="(value, index) in list"><span>{
    { value + index }}</span></div>
</div>
`.trim();
const ast = baseParse(source);
console.log("ast:: ", ast);
结果:
ast::  {

  type: 0,
  children: [
    {

      type: 1,
      ns: 0,
      tag: 'div',
      tagType: 0,
      props: [Array],
      isSelfClosing: false,
      children: [Array],
      loc: [Object],
      codegenNode: undefined
    }
  ],
  helpers: Set(0) {
   },
  components: [],
  directives: [],
  hoists: [],
  imports: [],
  cached: 0,
  temps: 0,
  codegenNode: undefined,
  loc: {

    start: {
    column: 1, line: 1, offset: 0 },
    end: {
    column: 7, line: 6, offset: 196 },
    source: '<div id="foo" :class="bar.baz">\n' +
      '  {
   { world.burn() }}\n' +
      '  <div v-if="ok">yes</div>\n' +
      '  <template v-else>no</template>\n' +
      '  <div v-for="(value, index) in list"><span>{
   { value + index }}</span></div>\n' +
      '</div>'
  }
}
parseChildren
parseChildren函数是进行解析的函数,它是一个解析器,解析未知内容,然后给未知内容甄别打标签,分发给解析指定内容的函数处理返回节点树。整体以堆栈的形式解析成ast树。
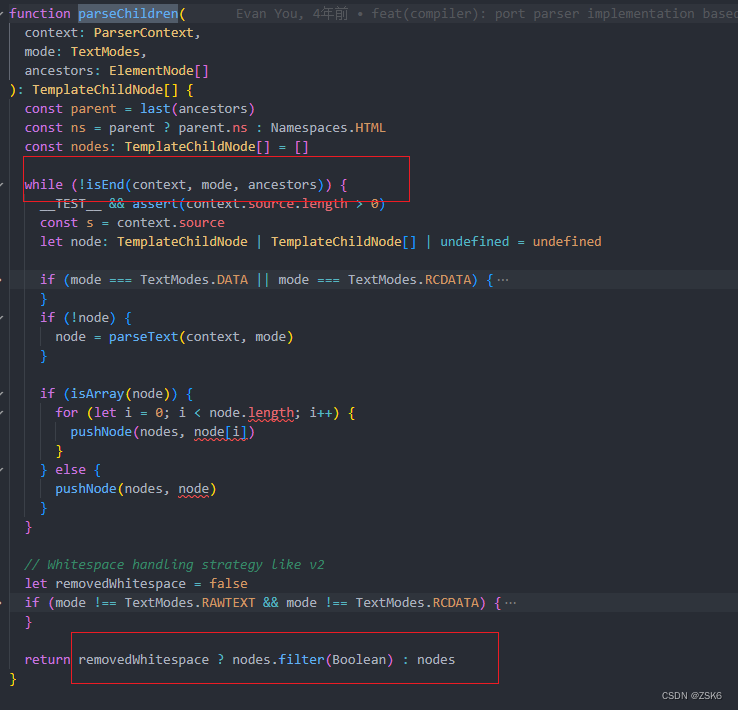
例如 : 它发现在解析的是文本,就用parseText函数处理,发现是注释就用parseComment函数处理,发现是元素就用 parseElement函数处理,发现是文本插值语法就用parseInterpolation函数处理。
codegenNode
codegenNode是什么?得到ast树之后,然后进行转换这一步,这一步就是生成codegenNode的。因为ast树只是将模板字符串读取了出来,你还要进行处理,处理得到codeenNode,才能编译成渲染函数执行。
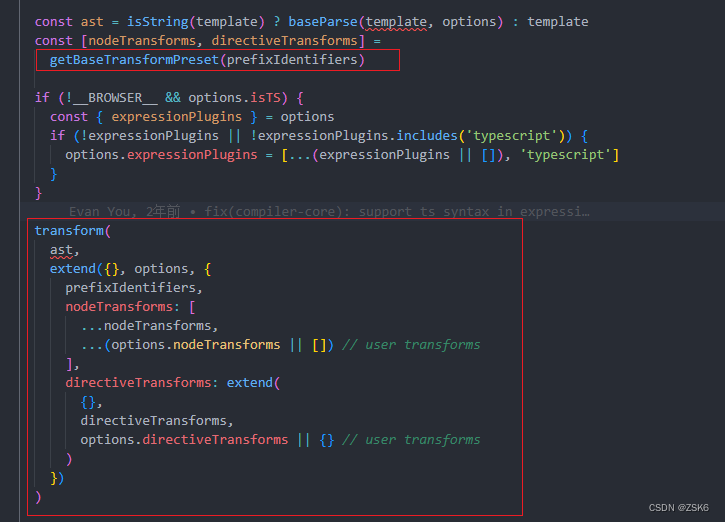
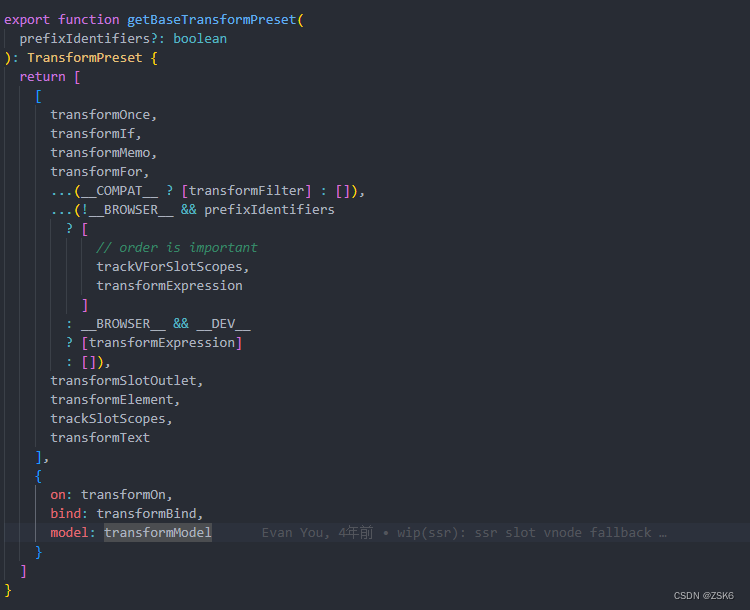
transform
transform是执行转换处理的函数。在此之前需要调用getBaseTransformPreset()函数获取各种转换处理函数和操作函数。
export function transform(root: RootNode, options: TransformOptions) {

  const context = createTransformContext(root, options)
  traverseNode(root, context)
  if (options.hoistStatic) {

    hoistStatic(root, context)
  }
  if (!options.ssr) {

    createRootCodegen(root, context)
  }
  // finalize meta information
  root.helpers = new Set([...context.helpers.keys()])
  root.components = [...context.components]
  root.directives = [...context.directives]
  root.imports = context.imports
  root.hoists = context.hoists
  root.temps = context.temps
  root.cached = context.cached

  if (__COMPAT__) {

    root.filters = [...context.filters!]
  }
}
参数 :
- root , 从baseCompile函数看传的的ast树(baseParse返回的),
- options,转换配置信息。
流程 :
- createTransformContext函数生成转换上下文。
- traverseNode函数执行转换,各种转换就是在这调用执行的,指令啊,文本插值之类的。
- 若可以静态提升就执行hoistStatic函数
- 执行 createRootCodegen函数,在相应的ast树中生成codegenNode。
- 在根ast节点中绑定节点、指令、组件、静态提升信息、缓存等全局信息。
渲染函数
最后一步,生成渲染函数。

例如:
const source = `
<div id="foo" :class="bar.baz">
{
{ world.burn() }}
<div v-if="ok">yes</div>
<template v-else>no</template>
<div v-for="(value, index) in list"><span>{
{ value + index }}</span></div>
</div>
`.trim();
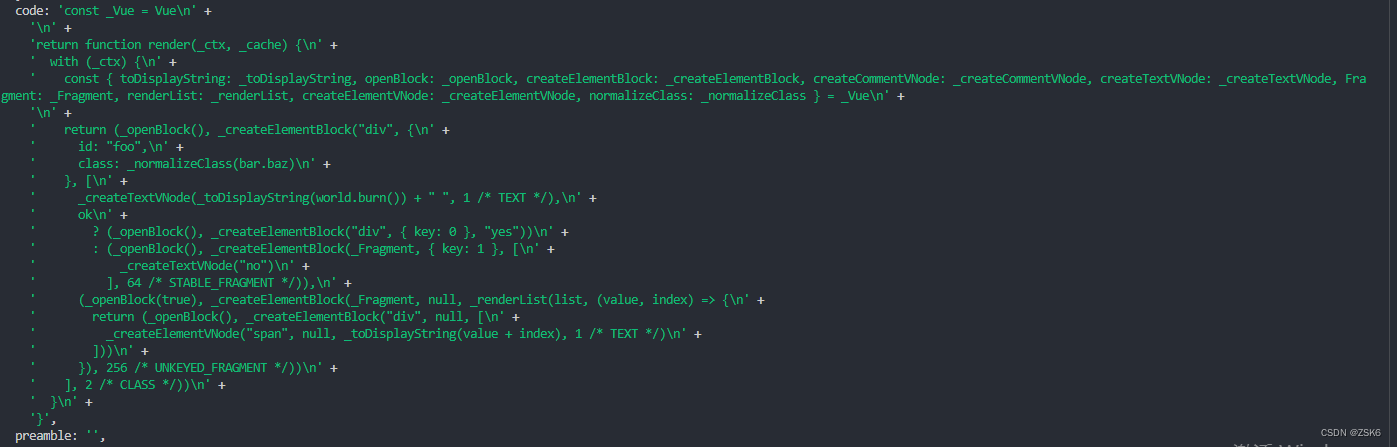
const render = baseCompile(source, {
sourceMap: true,
filename: `foo.vue`,
// mode: "module",
});
console.log(render);
结果:
generate
compiler-core/src/codegen.ts内的generate函数就是主要的生成渲染函数的地方。
export function generate(
  ast: RootNode,
  options: CodegenOptions & {

    onContextCreated?: (context: CodegenContext) => void
  } = {
   }
): CodegenResult {

  const context = createCodegenContext(ast, options)
  if (options.onContextCreated) options.onContextCreated(context)
  const {

    mode,
    push,
    prefixIdentifiers,
    indent,
    deindent,
    newline,
    scopeId,
    ssr
  } = context

  const helpers = Array.from(ast.helpers)
  const hasHelpers = helpers.length > 0
  const useWithBlock = !prefixIdentifiers && mode !== 'module'
  const genScopeId = !__BROWSER__ && scopeId != null && mode === 'module'
  const isSetupInlined = !__BROWSER__ && !!options.inline

  // preambles
  // in setup() inline mode, the preamble is generated in a sub context
  // and returned separately.
  const preambleContext = isSetupInlined
    ? createCodegenContext(ast, options)
    : context
  if (!__BROWSER__ && mode === 'module') {

    genModulePreamble(ast, preambleContext, genScopeId, isSetupInlined)
  } else {

    genFunctionPreamble(ast, preambleContext)
  }
  // enter render function
  const functionName = ssr ? `ssrRender` : `render`
  const args = ssr ? ['_ctx', '_push', '_parent', '_attrs'] : ['_ctx', '_cache']
  if (!__BROWSER__ && options.bindingMetadata && !options.inline) {

    // binding optimization args
    args.push('$props', '$setup', '$data', '$options')
  }
  const signature =
    !__BROWSER__ && options.isTS
      ? args.map(arg => `${
     arg}: any`).join(',')
      : args.join(', ')

  if (isSetupInlined) {

    push(`(${
     signature}) => {
    `)
  } else {

    push(`function ${
     functionName}(${
     signature}) {
    `)
  }
  indent()

  if (useWithBlock) {

    push(`with (_ctx) {
    `)
    indent()
    // function mode const declarations should be inside with block
    // also they should be renamed to avoid collision with user properties
    if (hasHelpers) {

      push(`const { ${
     helpers.map(aliasHelper).join(', ')} } = _Vue`)
      push(`\n`)
      newline()
    }
  }

  // generate asset resolution statements
  if (ast.components.length) {

    genAssets(ast.components, 'component', context)
    if (ast.directives.length || ast.temps > 0) {

      newline()
    }
  }
  if (ast.directives.length) {

    genAssets(ast.directives, 'directive', context)
    if (ast.temps > 0) {

      newline()
    }
  }
  if (__COMPAT__ && ast.filters && ast.filters.length) {

    newline()
    genAssets(ast.filters, 'filter', context)
    newline()
  }

  if (ast.temps > 0) {

    push(`let `)
    for (let i = 0; i < ast.temps; i++) {

      push(`${
     i > 0 ? `, ` : ``}_temp${
     i}`)
    }
  }
  if (ast.components.length || ast.directives.length || ast.temps) {

    push(`\n`)
    newline()
  }

  // generate the VNode tree expression
  if (!ssr) {

    push(`return `)
  }
  if (ast.codegenNode) {

    genNode(ast.codegenNode, context)
  } else {

    push(`null`)
  }

  if (useWithBlock) {

    deindent()
    push(`}`)
  }

  deindent()
  push(`}`)

  return {

    ast,
    code: context.code,
    preamble: isSetupInlined ? preambleContext.code : ``,
    // SourceMapGenerator does have toJSON() method but it's not in the types
    map: context.map ? (context.map as any).toJSON() : undefined
  }
}
参数:
- ast :转换后的ast树。
- options:编译时的配置。
流程:
- createCodegenContext函数创建代码生成上下文,包含配置信息和辅助操作函数。
- 根据编译模式(module或function)生成不同的渲染函数模板声明。
- 生成资产引用和优化
- 生成vnode表达式
- 返回包含ast、渲染函数、map映射信息、preamble信息的对象。
结语
compiler-core包的主要流程就是这样,是与平台无相关的实现解析编译vue模板的基础代码。