学习目标
了解SpringBoot的默认缓存
熟悉SpringBoot中Redis的缓存机制及实现
掌握SpringBoot整合Redis的缓存实现
缓存是分布式系统中的重要组件,主要解决数据库数据的高并发访问问题。在实际开发中,尤其是用户访问量较大的网站,为了提高服务器访问性能,减少数据库的压力,提高用户体验使用缓存显得尤为重要。SpringBoot对缓存提供了良好的支持。本章将针对SpringBoot的缓存管理进行介绍,并完成SpringBoot与Redis缓存中间件的整合使用。
6.1 SpringBoot默认缓存管理
Spring框架支持透明的向应用程序添加缓存并对缓存进行管理,其管理缓存的核心是将缓存应用于操作数据的方法中,从而减少操作数据的次数,同时不会对程序本身造成任何干扰。SpringBoot继承了Spring框架的缓存管理功能,通过使用@EnableCaching注解开启基于注解的缓存支持,SpringBoot可以启动缓存管理的自动化配置。
6.1.1 基础环境搭建
使用缓存的主要目的是减小数据库数据的访问压力,提供用户体验,为此,这里我们结合数据库的访问操作对SpringBoot的缓存管理进行演示说明。
准备数据
为了简便,这里使用第3章创建的springbootdata数据库,该数据库有两个表t_article和t_comment,这亮哥哥表预先插入了几条测试数据。
创建项目
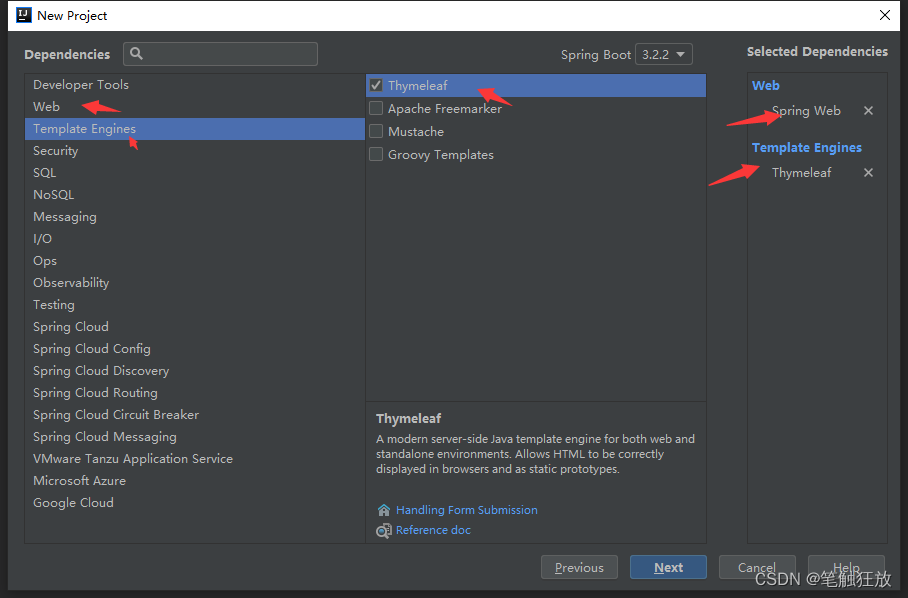
创建SpringBoot项目,引入相关依赖。使用SpringInitializr方式创建一个项目,在选择依赖的时候选择添加SQL模块中的JPA依赖,MySQL依赖和Web模块中的web依赖。


编写数据库表中对应的实体类,在项目中创建domain包,在该包下针对数据库表t_comment编写对应的实体类Comment,并使用JPA相关注解配置映射关系。
package com.example.demo6.domain;

import javax.persistence.*;

@Entity(name = "t_comment")  // 设置ORM实体类,并指定映射的表名
public class Comment  {
    @Id   // 表明映射对应的主键id
    @GeneratedValue(strategy = GenerationType.IDENTITY) // 设置主键自增策略
    private Integer id;
    private String content;
    private String author;
    @Column(name = "a_id")  // 指定映射的表字段名
    private Integer aId;

    public Integer getId() {
        return id;
    }

    public void setId(Integer id) {
        this.id = id;
    }

    public String getContent() {
        return content;
    }

    public void setContent(String content) {
        this.content = content;
    }

    public String getAuthor() {
        return author;
    }

    public void setAuthor(String author) {
        this.author = author;
    }

    public Integer getaId() {
        return aId;
    }

    public void setaId(Integer aId) {
        this.aId = aId;
    }

    @Override
    public String toString() {
        return "Comment{" +
                "id=" + id +
                ", content='" + content + '\'' +
                ", author='" + author + '\'' +
                ", aId=" + aId +
                '}';
    }
}
编写数据库操作的Repository接口文件,在项目中创建repository包,并在该包下创建一个用于操作Comment实体的Repository接口,该接口继承至JpaRepository,并且包含一个用于修改评论的方法updateComment()
package com.example.demo6.repository;

import com.example.demo6.domain.Comment;
import org.springframework.data.jpa.repository.JpaRepository;
import org.springframework.data.jpa.repository.Modifying;
import org.springframework.data.jpa.repository.Query;
import org.springframework.transaction.annotation.Transactional;


public interface CommentRepository extends JpaRepository<Comment,Integer> {
    // 根据评论id修改评论作者评论作者author
    @Transactional
    @Modifying
    @Query("UPDATE t_comment c SET c.author= 1 WHERE  c.id = 2")
    int updateComment(String author, Integer id);
}
编写业务操作类Service文件,在项目中创建service包,并在该包下创建一个用于Comment相关业务操作的Service实体类
package com.example.demo6.service;

import com.example.demo6.domain.Comment;
import com.example.demo6.repository.CommentRepository;
import org.springframework.beans.factory.annotation.Autowired;
import org.springframework.stereotype.Service;

import java.util.Optional;


@Service
public class CommentService {
    @Autowired
    private CommentRepository commentRepository;

    // 根据评论id查询评论信息
    public Comment findById(int comment_id){
        Optional<Comment> optional = commentRepository.findById(comment_id);
        if(optional.isPresent()){
            return optional.get();
        }
        return null;
    }

    // 更新评论信息
    public Comment updateComment(Comment comment){
        commentRepository.updateComment(comment.getAuthor(), comment.getaId());
        return comment;
    }
    // 删除评论信息
    public void deleteComment(int comment_id){
        commentRepository.deleteById(comment_id);
    }
}
以上代码自定义了一个CommentService业务操作类,使用注入的CommentRepository实例对象完成对Comment评论数据的查询,修改和删除操作。
编写Web访问层Controller文件。在项目中创建controller包,在该包下创建一个用于Comment访问控制的Controller实体类
package com.example.demo6.controller;

import com.example.demo6.domain.Comment;
import com.example.demo6.service.CommentService;
import org.springframework.beans.factory.annotation.Autowired;
import org.springframework.web.bind.annotation.GetMapping;
import org.springframework.web.bind.annotation.PathVariable;
import org.springframework.web.bind.annotation.RestController;


@RestController
public class CommentController {
    @Autowired
    private CommentService commentService;
	//浏览器使用默认的get请求访问服务器,{id}获得/get/请求地址后面携带的id数据,并传入给形参comment_id
    @GetMapping("/get/{id}")
    public Comment findById(@PathVariable("id") int comment_id){
        Comment comment = commentService.findById(comment_id);
        return comment;
    }

    @GetMapping("/update/{id}/{author}")
    public Comment updateComment(@PathVariable("id") int comment_id,
                                 @PathVariable("author") String author){
        Comment comment = commentService.findById(comment_id);
        comment.setAuthor(author);
        Comment updateComment = commentService.updateComment(comment);
        return updateComment;
    }

    @GetMapping("/delete/{id}")
    public void deleteComment(@PathVariable("id") int comment_id){
        commentService.deleteComment(comment_id);
    }
}
以上代码自定义 一个CommentController评论管理控制类,使用注入的CommentService实例对象完成对Comment评论数据的查询,修改和删除操作。
3.编写配置文件
在项目全局配置文件application.properties中编写对应的数据库连接配置
# MySQL数据库连接配置
spring.datasource.url=jdbc:mysql://localhost:3306/springbootdata?useUnicode=true&characterEncoding=UTF-8&serverTimezone=UTC&useSSL=false
spring.datasource.username=root
spring.datasource.password=admin

# 显示使用JPA进行数据库查询的SQL语句
spring.jpa.show-sql=true
先对MySQL的连接进行了配置,然后配置了“spring.jpa.show-sql=true”用于展示操作的SQL语句,方便后续开启缓存时进行效果演示。
4.测试项目
启动项目,项目启动后,在浏览器上访问“http://localhost:8080/get/1”查询id为1的用户评论信息,不论浏览器刷新多少次,访问同一个用户评论信息,页面的查询结果都会显示同一条数据,但是浏览器每刷新一次,控制台会新输出一条SQL语句

运行后,遇到新的错误

<!--数据库连接依赖-->
<dependency>
    <groupId>mysql</groupId>
    <artifactId>mysql-connector-java</artifactId>
    <version>8.0.11</version>
</dependency>
再次运行成功。


之所以出现上图的情况,这是因为没有再SpringBoot项目中开启缓存管理。再没有缓存管理的情况下,虽然数据表中的数据没有发生变化,但是每执行一次查询操作(本质是执行同样的SQL语句),都会访问一次数据库并执行一次SQL语句,随着时间的积累,系统的用户不断增加,数据规模越来越大,数据库的操作会直接影响用户的使用体验,此时使用缓存往往是解决这一问题非常好的一种手段。
6.1.2 SpringBoot默认缓存体验
在前面搭建的web应用基础上,开启SpringBoot默认支持的缓存,体验SpringBoot默认缓存的使用效果。
1.使用@EnableCaching注解开启基于注解的缓存支持,该注解通常会添加在项目启动类上

2.使用@Cacheable注解对数据操作方法进行缓存管理。将@Cacheable注解标注在Service类的查询方法上,对查询结果进行缓存。

上述代码中,在CommentService类中的findById(int comment_id)方法上添加了查询缓存注解@Cacheable,该注解的作用是将查询结果Comment存放在SpringBoot默认缓存中名称为comment的名称空间(namespace)中,对应缓存的唯一标识(即缓存数据对应的主键key),默认为方法参数comment_id的值。
3.SpringBoot默认缓存测试
启动项目,项目启动成功后,通过浏览器继续访问查询的请求地址查询id为1的用户评论信息。无论浏览器访问多少次,页面的查询结果都会显示同一条数据。说明项目开启的默认缓存支持已经生效。
6.2 SpringBoot缓存注解介绍
在上一节中,我们通过使用@EnableCaching,@Cacheable注解实现了SpringBoot默认的基于注解的缓存管理,除此之外,还有更多的缓存注解以及注解属性可以配置优化缓存管理。下面我们针对SpringBoot中的缓存注解及相关属性进行详细讲解。
1.@EnableCaching注解
@EnableCaching是由Spring框架提供的,SpringBoot框架对该注解进行了继承,该注解需要配置在类上(在SpringBoot中,通常配置在项目启动器上),用于开启基于注解的缓存支持。
2.@Cacheable注解
@Cacheable注解也是由Spring框架提供的,可以作用于类或方法(通常用在数据查询方法上),用于对方法的查询结果进行缓存存储。@Cacheable注解的执行顺序是,先进行缓存查询,如果为空则进行方法查询,并将结果进行缓存,如果缓存中由数据,不进行方法查询,而是直接使用缓存数据。
@Cacheable注解提供了多个属性,用于对缓存存储进行相关配置,具体属性及说明
| 属性名 | 说明 |
|---|---|
| value/cacheNames | 指定缓存空间的名称,必配属性,这两个属性二选一使用 |
| key | 指定缓存数据的key,默认使用方法参数值,可以使用SpEL表达式 |
| keyGenerator | 指定缓存数据的key的生成器,与key属性二选一使用 |
| cacheManager | 指定缓存管理器 |
| cacheResolver | 指定缓存解析器,与cacheManager属性二选一使用 |
| condition | 指定在符合某条件下,进行数据缓存 |
| unless | 指定在符合某条件下,不进行数据缓存 |
| sync | 指定是否使用异步缓存。默认false |
下面我们针对@Cacheable注解的属性进行具体讲解。
1.value/cacheNames属性
value和cacheNames属性作用相同,用于指定缓存的名称空间,可有同时指定多个名称空间(例如@Cacheable(cacheNames={"comment1","comment2"})).如果@Cachable注解只配置value(或者cacheNames)的一个属性,那么这两个属性名可以省略,例如,@Cacheable("comment")指定了缓存的名称空间为comment。
2.key属性
key属性的作用是指定缓存数据对应的唯一标识,默认使用注解标记的方法参数值,也可以使用SpEL表达式。缓存数据的本质是Map类型数据,key用于指定唯一的标识,value用于指定缓存的数据。
如果缓存数据时,没有只当key属性,SpringBoot默认提供的配置类SimpleKeyGenerator会通过generateKey(Object ...params)方法参数生成key值。默认情况下,如果generateKey()方法由一个参数,参数值就是key属性的值;如果generateKey()方法没有参数,那么key属性时一个空参的SimpleKey[]对象,如果由多个参数,那么key属性时一个带参的SimpleKey[params1,[params2,...]]对象。
除了使用默认key属性值外,还可以手动指定key属性值,或者时使用Spring框架提供的SpEL表达式。关于缓存中支持的SpEL表达式及说明如下
| 名称 | 位置 | 描述 | 示例 |
|---|---|---|---|
| methodName | root对象 | 当前被调用的方法名 | #root.methodName |
| method | root对象 | 当前被调用的方法 | #root.method.name |
| target | root对象 | 当前被调用的目标对象实例 | #root.target |
| targetClass | root对象 | 当前被调用的目标对象的类 | #root.targetClass |
| args | root对象 | 当前被调用的方法的参数列表 | #root.args[0] |
| caches | root对象 | 当前被调用的方法的缓存列表 | #root.caches[0].name |
| ArgumentName | 执行上下文 | 当前被调用的方法参数,可以用#参数名或者#a0,#p0的形式标识(0代表参数索引,从0开始) | #comment_id,#a0,#p0 |
| result | 执行上下文 | 当前方法执行后的返回结果 | #result |
3.keyGenerator属性
keyGenerator属性与key属性本质作用相同,都是用于指定缓存数据的key,只不过keyGenerator属性指定的不是具体的key值,而是key值的生成器规则,尤其中指定的生成器生成具体的key。使用时,keyGenerator属性与key属性要二者选一。关于自定义key值生成器的定义读者可以参考SpringBoot默认配置类SimplekeyGenerator的定义方式,这里不做具体说明了。
4.cacheManager/cacheResolver属性
cacheManager和cacheResolver属性分别用于指定缓存管理器和缓存解析器,这两个属性也是二选一使用,默认情况不需要配置,如果存在多个缓存管理器(如Redis,Ehcache等),可以使用这两个属性分别指定。
5.condition属性
condition属性用于对数据进行由条件的选择性存储,只有当指定条件为true时才会对查询结果进行缓存,可以使用SpEL表达式指定属性值。例如@Cacheable(cacheNames="comment",condition="#comment_id>10")表示方法参数comment_id的值大于10才会对结果数据进行缓存。
6.unless属性
unless属性的作用与condition属性相反,当指定的条件为true时,方法的返回值不会被缓存。unless属性可以使用SpEL表达式指定。例如@Cacheable(cacheNames="comment",unless="#result==null")
7.sync属性
sync属性表示数据缓存过程中是否使用异步模式,默认值为false。
3.@CachePut注解
@CachePut注解是由Spring框架提供的,可以作用于类或方法(通常用在数据更新方法上),该注解的作用时更新缓存数据。@CachePut注解的执行顺序是,先进行方法调用,然后将方法结果更新到缓存中。
4.CacheEvict注解
CacheEvict注解是由Spring框架提供的,可以作用于类或方法(通常用在数据删除方法上),该疏解的作用是删除缓存数据。CacheEvict注解的执行顺序是,先进行方法调用,然后清除缓存。
CacheEvict注解提供了多个属性,这些属性于@Cacheable注解的属性基本相同。除此之外,CacheEvict注解额外提供了两个特殊属性allEntries和beforeInvocation,其说明如下
allEntries属性
allEntries属性表示是否清除指定缓存空间中的所有缓存数据,默认值为false(即默认只删除指定key对应的缓存数据)。例如@CacheEvict(cacheNames="comment",allEntries=true)表示方法执行后会删除缓存空间comment中所有的数据
beforeInvocation属性
beforeInvocation属性表示是否在方法执行之前进行缓存清除,默认值false(即默认在执行方法后再进行缓存清除)。例如@CacheEvict(cacheNames="comment",beforeInvocation=true)表示会在方法执行之前进行混村清除。
需要注意的是,如果将@CacheEvict注解的beforeInvocation属性设置为true,会存在一定的弊端。例如在进行数据删除的方法中发生了异常,这会导致实际数据并没有被删除,但是缓存数据却被提前清除了。
5.@Caching注解
如果处理复杂规则的数据缓存可以使用@Caching注解,该注解作用域类或者方法。@Caching注解包含cacheable,put和evict三个属性,它们的作用等同于@Cacheable,@CachePut和@CacheEvict
@Caching(cacheable={@Cacheable(cacheNames="comment",key="#id")},put={@CachePut(cacheNames="comment",key="#result.author")})
public Comment getComment(int comment_id){
    return commentRepository.findById(commnet_id).get();
}
上述代码中,根据id执行查询操作,并将查询到的Comment对象进行缓存管理。从代码中可以看出,@Caching注解作用于getComment()方法上,并在@Caching注解中使用了cacheable和put两个属性,并且cacheable和put两个属性嵌套引入@Cacheable和@CachePut两个注解,在两个注解中分别使用#id和#result.author缓存key的值。
6.@CacheConfig注解
@CacheConfig注解作用于类,主要用于统筹管理类中所有使用@Cacheable,@CachePut和@CacheEvit注解标注的方法中的公共属性,这些公共属性包括cacheNames,keyGenerator,cacheManager和cacheResolver
@CacheConfig(cacheNames="comment")
@Service
public class CommentService{
    @Autowired
    private CommentRepository commentRepository ;
    @Cacheable
    public Commnet findById(int comment_id){
        Comment comment=commentRepository.findById(comment_id).get();
        return commnet;
    }
}
上述代码中,CommentService类上标注了@CacheConfig注解,同时使用cacheNames属性将缓存空间统一设置为commnet,这样在该类中所有方法上使用缓存注解时可以省略相应的cacheNames属性。
需要说明的是,如果在类上使用了@CacheConfig注解定义了某个属性(例如 cacheNames),同时又在该类方法中使用缓存注解定义了相同的属性,那么该属性值会使用“就近原则”,以方法上注解中的属性值为准。
6.3 SpringBoot整合Redis缓存实现
6.3.1 SpringBoot支持的缓存组件
在SpringBoot中,数据的管理存储依赖于Spring框架中cache相关的org.springframework.cache.Cache和org.springframework.cache.CacheManager缓存管理器接口。如果程序中没有定义类型为cacheManager的Bean组件或者是名为cacheResolver的cacheResolver缓存解析器,SpringBoot将尝试选择并启用一下缓存组件(按照指定的顺序)
Generic
JCache(JSR-107)
EhCache2.x
Hazelcast
Infinispan
Couchbase
Redis
Caffeine
Simple
上面我们按照SpringBoot缓存组件的加载顺序列举了支持的9中缓存组件,在项目中添加某个缓存管理组件(例如redis)后,SpringBoot项目会选择并启用对应的缓存管理器。如果项目中同时添加了多个缓存组件,且没有指定缓存管理器或者缓存解析器,那么SpringBoot会优先启动指定的缓存组件并进行缓存管理。
在6.1节讲解的SpringBoot默认缓存管理中,没有添加任何缓存管理组件却能实现缓存管理。这是因为开启缓存管理后,SpringBoot会按照上述列表顺序查找有效的缓存组件进行缓存管理,如果没有任何缓存组件,会默认使用最后一个Simple缓存组件进行管理。Simple缓存组件时SpringBoot默认的缓存管理组件,它默认使用内存中的ConcurrentHashMap进行缓存存储,所以在没有任何第三方缓存组件的情况下也可以实现内存中的缓存管理。
6.3.2 基于注解的Redis缓存实现
下面我们在6.1节SpringBoot默认缓存管理的基础上引入Redis缓存组件,使用基于注解的方式讲解SpringBoot整合Redis缓存的具体实现。
1.添加SpringDataRedis依赖启动器,在项目的pom.xml文件中添加SpringDataRedis依赖启动器
<!-- 引入整合Redis缓存的依赖启动器 -->
<dependency>
    <groupId>org.springframework.boot</groupId>
    <artifactId>spring-boot-starter-data-redis</artifactId>
</dependency>
2.Redis服务连接配置
使用类似Redis的第三方缓存组件进行缓存管理时,缓存数据并不是像SpringBoot默认缓存管理那样存储在内存中,而是需要预先搭建类似Redis服务的数据仓库进行缓存存储。所以,这里数显需要安装并开启Redis服务(具体可有参考第3章中3.4.2小节的说明),然后在项目的全局配置文件application.properties中添加Redis服务的连接配置。
# Redis服务地址
spring.redis.host=127.0.0.1
# Redis服务器连接端口
spring.redis.port=6379
# Redis服务器连接密码,默认为空
spring.redis.password=
3.使用@Cacheable,@CachePut,@CacheEvict注解定制缓存管理。
对CommentService类中的方法进行修改,使用@Cacheable,@CachePut,@CacheEvict3个注解定制缓存管理,分别演示缓存数据的存储,更新和删除,修改后的内容。
package com.example.demo6.service;

import com.example.demo6.domain.Comment;
import com.example.demo6.repository.CommentRepository;
import org.springframework.beans.factory.annotation.Autowired;
import org.springframework.cache.annotation.CacheEvict;
import org.springframework.cache.annotation.CachePut;
import org.springframework.cache.annotation.Cacheable;
import org.springframework.stereotype.Service;

import java.util.Optional;


@Service
public class CommentService {
    @Autowired
    private CommentRepository commentRepository;

    // 根据评论id查询评论信息
    @Cacheable(cacheNames = "comment",unless = "#result==null")
    public Comment findById(int comment_id){
        Optional<Comment> optional = commentRepository.findById(comment_id);
        if(optional.isPresent()){
            return optional.get();
        }
        return null;
    }

    // 更新评论信息
    @CachePut(cacheNames = "comment",key = "#result.id")
    public Comment updateComment(Comment comment){
        commentRepository.updateComment(comment.getAuthor(), comment.getaId());
        return comment;
    }
    // 删除评论信息
    @CacheEvict(cacheNames = "comment")
    public void deleteComment(int comment_id){
        commentRepository.deleteById(comment_id);
    }
}
其中,查询缓存@Cacheable注解中没有标记key值,将会使用默认参数值comment_id作为key进行数据保存,在进行缓存更新时必须使用同样的key,同时在查询缓存@Cacheable注解中,定义了unless = "#result==null"表示查询结果为空不进行缓存
4.将缓存对象实现序列化
开启服务器后,通过浏览器访问“http://localhost:8080/get/1”查询id为1的用户评论信息,记住一定需要开启Redis缓存服务器


5.基于注解的Redis查询缓存测试
重新开启服务器,再次启动项目访问


6.基于注解的Redis更新缓存测试
在浏览器上访问localhost:8080/update/1/shitou地址进行更新操作,shitou是传给服务器的数据

更新数据后,再访问查询数据的地址localhost:8080/get/1,发现控制台并没有执行查询的sql语句,说明更新后查询的操作是从缓存中查询的数据,而并非通过sql语句从mysql数据库中获得的数据。

7.基于注解的Redis删除缓存测试
通过浏览器访问localhost:8080/delete/1地址,效果如图
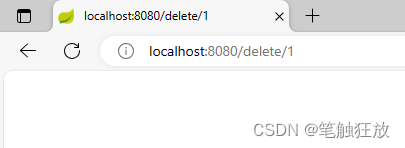
Redis缓存客户端中comment缓存文件也消失了,说明数据删除成功,缓存中也同步删除了。
6.3.3 基于API的Redis缓存实现
在SpringBoot整合Redis缓存实现中,除了基于注解形式的Redis缓存实现外,还有一种开发中常用的方式----基于API的Redis缓存实现。下面我们通过Redis API的方式讲解SpringBoot整合Redis缓存的具体实现。
(1)使用Redis API进行业务数据缓存管理。在项目中,在service包下编写一个进行业务处理的类ApiCommentService
package com.example.demo6.service;

import com.example.demo6.domain.Comment;
import com.example.demo6.repository.CommentRepository;
import org.springframework.beans.factory.annotation.Autowired;
import org.springframework.data.redis.core.RedisTemplate;
import org.springframework.stereotype.Service;


import java.util.Optional;
import java.util.concurrent.TimeUnit;

/**
 * @Classname ApiCommentService
 * @Description TODO
 * @Date 2019-3-4 14:28
 * @Created by CrazyStone
 */
@Service
public class ApiCommentService {
    @Autowired
    private CommentRepository commentRepository;
    @Autowired
    private RedisTemplate redisTemplate;

    public Comment findById(int comment_id){
        // 先从Redis缓存中查询数据
        Object object =  redisTemplate.opsForValue().get("comment_"+comment_id);
        if (object!=null){
            return (Comment)object;
        }else {
            // 缓存中没有,就进入数据库查询
            Optional<Comment> optional = commentRepository.findById(comment_id);
            if(optional.isPresent()){
                Comment comment= optional.get();
                // 将查询结果进行缓存,并设置有效期为1天
                redisTemplate.opsForValue().set("comment_"+comment_id, comment,1, TimeUnit.DAYS);

//                redisTemplate.opsForValue().set("comment_"+comment_id,comment);
//                redisTemplate.expire("comment_"+comment_id,90,TimeUnit.SECONDS);
                return comment;
            }else {
                return null;
            }
        }
    }

    public Comment updateComment(Comment comment){
        commentRepository.updateComment(comment.getAuthor(), comment.getaId());
        // 更新数据后进行缓存更新
        redisTemplate.opsForValue().set("comment_"+comment.getId(),comment);
        return comment;
    }

    public void deleteComment(int comment_id){
        commentRepository.deleteById(comment_id);
        // 删除数据后进行缓存删除
        redisTemplate.delete("comment_"+comment_id);
    }
}
以上代码,首先使用@Autowired注解将RedisTemplate作为组件注入Spring容器,然后定义了findById(),updateComment(),deleteComment()方法,分别用于查询缓存,更新缓存以及删除缓存。当对数据进行缓存管理时,为了避免与其他业务的缓存数据混淆,本案例在对Comment数据缓存管理时,手动设置了前缀“comment_”.
关于Redis API中的RedisTemplate的更多用法,具体介绍如下:
RedisTemplate时Spring Data Redis提供的直接进行Redis操作的Java API,可以直接注入使用,相对于传统的Jedis更见简便。
RedisTemplate可以操作<Object,Object>对象类型数据,而其子类StringRedisTemplate则时专门针对<String,String>字符串类型的数据进行操作。
RedisTemplate类中提供了很多进行数据缓存操作的方法,可以进行数据缓存查询,缓存更新,缓存修改,缓存删除以及设置缓存有效期等,本示例中知识对其部分方法进行了演示。
代码中,redisTemplate.opsForValue().set("comment_"+comment_id, comment,1, TimeUnit.DAYS);设置缓存数据的同时,将缓存有效期设置为1天时间(倒数第一个参数还可以设置其他时间单位,如天,小时,分钟,秒等),当然,还可以先设置缓存有效期,再设置缓存数据
redisTemplate.opsForValue().set("comment_"+comment_id,comment);
redisTemplate.expire("comment_"+comment_id,90,TimeUnit.SECONDS);
(2)编写Web访问层Controller文件。再项目的controller包下创建ApiCommentController实体类
package com.example.demo6.controller;


import com.example.demo6.domain.Comment;
import com.example.demo6.service.ApiCommentService;
import org.springframework.beans.factory.annotation.Autowired;
import org.springframework.web.bind.annotation.GetMapping;
import org.springframework.web.bind.annotation.PathVariable;
import org.springframework.web.bind.annotation.RequestMapping;
import org.springframework.web.bind.annotation.RestController;

/**
 * @Classname ApiCommentController
 * @Description TODO
 * @Date 2019-3-4 14:36
 * @Created by CrazyStone
 */
@RestController
@RequestMapping("/api")  // 窄化请求路径
public class ApiCommentController {
    @Autowired
    private ApiCommentService apiCommentService;

    @GetMapping("/get/{id}")
    public Comment findById(@PathVariable("id") int comment_id){
        Comment comment = apiCommentService.findById(comment_id);
        return comment;
    }

    @GetMapping("/update/{id}/{author}")
    public Comment updateComment(@PathVariable("id") int comment_id,
                                 @PathVariable("author") String author){
        Comment comment = apiCommentService.findById(comment_id);
        comment.setAuthor(author);
        Comment updateComment = apiCommentService.updateComment(comment);
        return updateComment;
    }

    @GetMapping("/delete/{id}")
    public void deleteComment(@PathVariable("id") int comment_id){
        apiCommentService.deleteComment(comment_id);
    }
}
上述代码中,@RequestMapping("/api")作用于ApiCommentController类,该类的所有方法都将映射为“/api”路径下的请求。@Autowired用于装配ApiCommentService对象,方便调用ApiCommentService中的相关方法进行数据查询,修改和删除。
(3)基于API的Redis缓存实现的相关配置。基于API的Redis缓存实现不需要@EnableCaching注解开启基于注解的缓存支持,所以这里可以选择将添加再项目启动类上的@EnableCaching进行删除或者注释(也可以不用管,不会影响基于API的Redis缓存实现演示效果)
另外,基于API的Redis缓存实现需要再SpringBoot项目的pom.xml文件中引入Redis依赖启动器,并再配置文件中进行Redis服务连接配置,同时为进行数据存储的Comment实体类实现序列化接口,这些配置与基于注解的Redis缓存实现擦欧总步骤相同,并且已经实现,这里不再重复。
再项目中,完成基于API的Redis缓存配置后,下面就可以进行缓存查询,缓存更新和缓存删除的效果测试了。这里和上一小节的效果是一样的,这里不再赘述。
相对使用注解的方式,使用Redis API进行数据缓存管理更加灵活,例如,手机验证码进行验证时,可以在缓存中设置验证等待时间。相比使用注解的方式进行缓存管理,使用Redis API的方式编写的代码量可能会更多。
6.4 自定义Redis缓存序列化机制
在上一节中我们已经实现了SpringBoot整合Redis进行数据的缓存管理,但缓存管理的实体类数据使用的是JDK序列化机制,不便于使用可视化管理工具进行查看和管理。接下来我们分别针对基于注解的Redis缓存实现和基于API的Redis缓存实现中的数据序列化机制进行介绍,并自定义JSON格式的数据序列化机制进行数据缓存管理。
6.4.1 自定义RedisTemple
在项目中创建config包,并在该包下创建Redis自定义配置类RedisConfig
package com.example.demo6.config;

import com.fasterxml.jackson.annotation.JsonAutoDetect;
import com.fasterxml.jackson.annotation.PropertyAccessor;
import com.fasterxml.jackson.databind.ObjectMapper;
import org.springframework.context.annotation.Bean;
import org.springframework.context.annotation.Configuration;
import org.springframework.data.redis.cache.RedisCacheConfiguration;
import org.springframework.data.redis.cache.RedisCacheManager;
import org.springframework.data.redis.connection.RedisConnectionFactory;
import org.springframework.data.redis.core.RedisTemplate;
import org.springframework.data.redis.serializer.Jackson2JsonRedisSerializer;
import org.springframework.data.redis.serializer.RedisSerializationContext;
import org.springframework.data.redis.serializer.RedisSerializer;
import org.springframework.data.redis.serializer.StringRedisSerializer;

import java.time.Duration;

/**
 * @Classname RedisConfig
 * @Description TODO
 * @Date 2019-3-4 15:50
 * @Created by CrazyStone
 */
@Configuration   // 定义一个配置类
public class RedisConfig {
    @Bean
    public RedisTemplate<Object, Object> redisTemplate(RedisConnectionFactory redisConnectionFactory) {
        RedisTemplate<Object, Object> template = new RedisTemplate();
        template.setConnectionFactory(redisConnectionFactory);
        // 使用JSON格式序列化对象,对缓存数据key和value进行转换
        Jackson2JsonRedisSerializer jacksonSeial = new Jackson2JsonRedisSerializer(Object.class);
        // 解决查询缓存转换异常的问题
        ObjectMapper om = new ObjectMapper();
        om.setVisibility(PropertyAccessor.ALL, JsonAutoDetect.Visibility.ANY);
        om.enableDefaultTyping(ObjectMapper.DefaultTyping.NON_FINAL);
        jacksonSeial.setObjectMapper(om);

        // 设置RedisTemplate模板API的序列化方式为JSON
        template.setDefaultSerializer(jacksonSeial);
        return template;
    }

}运行项目,通过浏览器访问http://localhost:8080/get/3查询id为3的用户评论信息,并重复刷新浏览器查看同一条数据信息,通过控制台查看结果


通过结果可以看到不管刷新多少次浏览器请求服务器,都是访问的缓存,只第一次访问了MySQL数据库。
6.4.2 自定义RedisCacheManager
我们针对基于Redis API的RedisTemple进行了自定义序列化机制的改进,从而实现了相对熟悉的JSON格式缓存数据,接下来我们针对基于注解的Redis缓存机制和自定义序列化方式的实现进行讲解。
在RedisConfig中添加定义以下方法:
    @Bean
    public RedisCacheManager cacheManager(RedisConnectionFactory redisConnectionFactory) {
        // 分别创建String和JSON格式序列化对象,对缓存数据key和value进行转换
        RedisSerializer<String> strSerializer = new StringRedisSerializer();
        Jackson2JsonRedisSerializer jacksonSeial =
                new Jackson2JsonRedisSerializer(Object.class);
        // 解决查询缓存转换异常的问题
        ObjectMapper om = new ObjectMapper();
        om.setVisibility(PropertyAccessor.ALL, JsonAutoDetect.Visibility.ANY);
        om.enableDefaultTyping(ObjectMapper.DefaultTyping.NON_FINAL);
        jacksonSeial.setObjectMapper(om);

        // 定制缓存数据序列化方式及时效
        RedisCacheConfiguration config = RedisCacheConfiguration.defaultCacheConfig()
                .entryTtl(Duration.ofDays(1))
                .serializeKeysWith(RedisSerializationContext.SerializationPair.fromSerializer(strSerializer))
                .serializeValuesWith(RedisSerializationContext.SerializationPair.fromSerializer(jacksonSeial))
                .disableCachingNullValues();

        RedisCacheManager cacheManager = RedisCacheManager.builder(redisConnectionFactory).cacheDefaults(config).build();
        return cacheManager;
    }
运行效果以上一节一样,自行运行。
本章小结
本章主要讲解了SpringBoot的缓存管理,首先体验了SpringBoot默认缓存管理,其次介绍了SpringBoot缓存的相关注解,最后介绍了SpringBoot与Redis整合实现缓存管理的方式以及自定义Redis缓存序列化机制。通过本章的学习,希望大家能够充分理解Springboot的缓存管理并学会使用SpringBoot整合Redis实现数据的缓存。
习题
一、填空题
SpringBoot中,()注解用于开启基于注解的缓存支持。
()注解是由Spring框架提供的,通常用在数据查询缓存方法上。
SpringBoot中进行缓存存储时,对于一个参数的方法,其key值是()。
Simple缓存组件时SpringBoot默认的缓存管理组件,它默认使用内存中的()进行缓存存储。
Redis操作客户端类中,()专门针对<String,String>字符串类型的数据进行操作。
二、判断题
@EnableCaching注解时SpringBoot框架提供的,用于开启基于注解的缓存支持。()
@Cacheable注解的cacheNames属性名可以省略。()
@Cacheable注解的unless属性在指定条件为true时,方法的返回值就不会被缓存。()
在对实体类数据进行Redis默认缓存存储时,如果没有实现序列化,就会出现类型转换异常的错误。()
自定义RedisTemplate组件时,方法名必须时redisTemplate。()
三、选择题
下列关于SpringBoot中提供的缓存管理的相关注解的说法,正确的是()。
A.@EnableCaching注解是SpringBoot框架提供的,用于开启基于注解的缓存支持
B.@Cacheable注解作用于方法上,用来对查询结果进行缓存
C.@CacheEvict注解用于更新缓存数据
D.@CacheConfig注解使用在类上,主要用于统筹管理类中所有使用@Cacheable,@CachePut和@CacheEvict注解标注的方法中的公共属性
下列关于SpringBoot中Redis缓存注解相关属性的说法,错误的是()。
A.value和cacheNames属性作用相同,用于指定缓存的名称空间
B.key属性的作用就是执行缓存数据对应的唯一标识,默认使用注解标记的方法参数值
C.unless属性的作用是当指定的条件为true时,方法的返回值就会被缓存
D.sync属性标识数据缓存过程中是否使用异步模式,默认值为false
下列关于SpringBoot中RedisTemplate进行数据缓存管理的说法,正确的是()。(多选)
A.RedisTemplate是Spring Data Redis提供的,可以对<Object,Object>类型数据进行操作
B.RedisTemplate类的set()方法进行数据缓存存储
C.RedisTemplate类的delete()方法可以进行缓存数据删除
D.RedisTemplate类的expire()方法可以设置缓存有效期
SpringBoot中支持的缓存组件包括由()。(多选)
A.Jcache
B.EhCache 2.x
C.Redis
D.Caffeine
下列关于将SpringBoot定制Redis缓存序列化机制的说法,错误的是()。
A.自定义redisTemplate组件时,方法名必须为redisTemplate
B.在定制序列化方式中,要定义一个ObjectMapper用于进行数据转换设置
C.SpringBoot 1.x版本中,定制RedisTemplate组件序列化配置后,就完成了基于API和注解方式Redis序列化的定制
D.使用自定义RedisTemplate序列化机制缓存存储实体类数据,实体类不用再实现序列化。