一、Home页面组件结构
结构拆分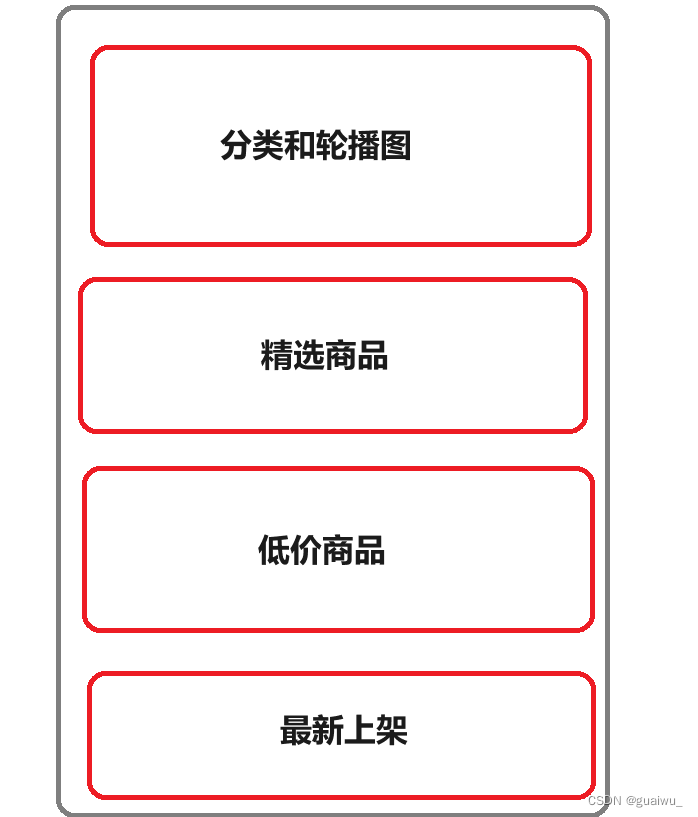
创建组件
在 views/Home 目录下创建component 目录, 然后在该目录下创建5个组件: 左侧分类(HomeCategory.vue)、Banner(HomeBanner.vue)、精选商品(HomeHot.vue)、低价商品(Homecheap.vue)、最新上架(HomeNew.vue)
引用组件
修改 views/Home/index.vue 的代码
<template>
  <div class="container">
    <HomeCategory></HomeCategory>
    <HomeBanner></HomeBanner>
  </div>
  <HomeHot></HomeHot>
  <HomeCheap></HomeCheap>
  <HomeNew></HomeNew>
</template>

<script>
import HomeBanner from './component/HomeBanner.vue'
import HomeCategory from './component/HomeCategory.vue'
import HomeHot from './component/HomeHot.vue'
import HomeNew from './component/HomeNew.vue'
import HomeCheap from './component/HomeCheap'
export default {
  components:{
    HomeBanner,
    HomeCategory,
    HomeHot,
    HomeNew,
    HomeCheap
  }

}
</script>

<style>

</style>
二、安装Pinia
添加依赖
pinia依赖和持久化插件
npm install pinia
npm install pinia-plugin-persist
创建文件
在 stores 目录下创建 category.js 文件
import { ref } from 'vue'
import { defineStore } from 'pinia'
引入
修改 main.js 文件
import { createApp } from 'vue'
import App from './App.vue'
import router from './router'
import store from './store'
import { createPinia } from 'pinia'
import piniaPersist from 'pinia-plugin-persist'
import ElementPlus from 'element-plus'
import "@/assets/iconfont/iconfont.js"
import "@/assets/iconfont/iconfont.css"

// import './styles/element/index.scss'

const pinia = createPinia()
pinia.use(piniaPersist)
const app = createApp(App)

app.use(store).use(router).use(pinia).use(ElementPlus).mount('#app')
三、分类功能实现

封装接口
在 api 目录下创建 home 目录然后创建 category.js 文件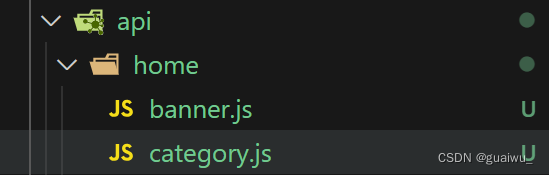
import http from '@/utils/http'

export function getCategoryAPI () {
  return http({
    url: '/home/category/list',
    method: 'get',
  })
}
前提: 后端要返回相应的数据
修改 /store/category.js
import { ref } from 'vue'
import { defineStore } from 'pinia'
import { getCategoryAPI } from '@/api/home/category'

export const useCategoryStore = defineStore('category', () => {
    // 导航列表数据管理
    //state 导航列表数据
    const categoryList = ref([])

    // action 获取导航数据的方法
    const getCategory = async () => {
        const res = await getCategoryAPI();
        console.log(res);
        categoryList.value = res.data;
    }

    return {
        categoryList, getCategory
    }
})
代码示范
HomeCategory.vue
<script setup>
import { useCategoryStore } from '@/store/category'
const categoryStore = useCategoryStore()
console.log(categoryStore);
</script>

<template>
  <div class="home-category">
    <ul class="menu">
      <li v-for="item in categoryStore.categoryList" :key="item.id">
        <i :class=item.icon></i>
        <router-link to="/">{
  { item.categoryName }}</router-link>
        <span class="more">
          <a href="/">></a>
        </span>
        <!-- 弹层layer位置 -->
        <!-- <div class="layer">
          <h4>分类推荐 <small>根据您的购买或浏览记录推荐</small></h4>
          <ul>
            <li v-for="i in 5" :key="i">
              <RouterLink to="/">
                <img alt="" />
                <div class="info">
                  <p class="name ellipsis-2">
                    男士外套
                  </p>
                  <p class="desc ellipsis">男士外套,冬季必选</p>
                  <p class="price"><i>¥</i>200.00</p>
                </div>
              </RouterLink>
            </li>
          </ul>
        </div> -->
      </li>
    </ul>
  </div>
</template>


<style scoped lang='scss'>
.home-category {
  width: 250px;
  height: 500px;
  background: #f2f2f2;
  position: relative;
  z-index: 99;

  .menu {
    li {
      padding-left: 40px;
      height: 55px;
      line-height: 55px;
      text-align: left;
      padding-right: 15px;

      border-bottom: solid .1px #000;
      .iconfont{
        font-size: 22px;
        line-height: 55px;
        margin-right: 10px;
        top: 5px;
        color: rgb(0, 110, 255);
      }
      &:hover {
        background: $lygColor;
      }

      a {
        position: absolute;
        margin-right: 4px;
        color: #000;

        &:first-child {
          font-size: 16px;
        }
      }
      .more{
        float: right;
        font-size: 18px;
      }

      .layer {
        width: 990px;
        height: 500px;
        background: rgba(255, 255, 255, 0.8);
        position: absolute;
        left: 250px;
        top: 0;
        display: none;
        padding: 0 15px;

        h4 {
          font-size: 20px;
          font-weight: normal;
          line-height: 80px;

          small {
            font-size: 16px;
            color: #666;
          }
        }

        ul {
          display: flex;
          flex-wrap: wrap;

          li {
            width: 310px;
            height: 120px;
            margin-right: 15px;
            margin-bottom: 15px;
            border: 1px solid #eee;
            border-radius: 4px;
            background: #fff;

            &:nth-child(3n) {
              margin-right: 0;
            }

            a {
              display: flex;
              width: 100%;
              height: 100%;
              align-items: center;
              padding: 10px;

              &:hover {
                background: #e3f9f4;
              }

              img {
                width: 95px;
                height: 95px;
              }

              .info {
                padding-left: 10px;
                line-height: 24px;
                overflow: hidden;

                .name {
                  font-size: 16px;
                  color: #666;
                }

                .desc {
                  color: #999;
                }

                .price {
                  font-size: 22px;
                  color: $priceColor;

                  i {
                    font-size: 16px;
                  }
                }
              }
            }
          }
        }
      }

      // 关键样式  hover状态下的layer盒子变成block
      &:hover {
        .layer {
          display: block;
        }
      }
    }
  }
}
</style>
四、banner功能实现

接口封装
在 api 目录下创建 home 目录然后创建 banner.js 文件
import http from '@/utils/http'

export function getBannerAPI () {
  return http({
    url: '/home/banner/list',
    method: 'get',
  })
}
代码示范
HomeBanner.vue
<script setup>
import { getBannerAPI } from '@/api/home/banner'
import { onMounted, ref } from 'vue'

const bannerList = ref([])

const getBanner = async () => {
  const res = await getBannerAPI()
  console.log(res)
  bannerList.value = res.data
}

onMounted(() => getBanner());
console.log(bannerList)
</script>

<template>
  <div class="home-banner">
    <el-carousel height="500px">
      <el-carousel-item v-for="item in bannerList" :key="item.id">
        <img :src="require(`@/assets/img/${item.img1}.jpg`)" alt="">
      </el-carousel-item>
    </el-carousel>
  </div>
</template>


<style scoped lang='scss'>
.home-banner {
  width: 1127px;
  height: 500px;
  position: absolute;
  left: 250px;
  top: 185px;
  z-index: 98;

  img {
    width: 100%;
    height: 500px;
  }
}
</style>
五、创建公共组件
创建文件
在 views/Home/components 路径下创建 HomePanel.vue 文件

<script setup>
//定义 Props,主标题和副标题
defineProps({
    title: {
        type: String
    },
    subTitle: {
        type: String
    }
})
</script>


<template>
  <div class="home-panel">
    <div class="container">
  <div class="head">
    <!-- 主标题和副标题 -->
    <h3>
      {
  {title}}<small>{
  { subTitle }}</small>
    </h3>
  </div>
  <!-- 主体内容区域 插槽-->
  <slot/>
</div>

  </div>
</template>

<style scoped lang='scss'>
.home-panel {
  background-color: #fff;

  .head {
    padding: 40px 0;
    display: flex;
    align-items: flex-end;

    h3 {
      flex: 1;
      font-size: 32px;
      font-weight: normal;
      margin-left: 6px;
      height: 35px;
      line-height: 35px;

      small {
        font-size: 16px;
        color: #999;
        margin-left: 20px;
      }
    }
  }
}
</style>
六、精选商品实现

接口封装
在 api 目录下创建 home 目录然后创建 hot.js 文件
代码示范
HomeHot.vue
<script setup>
import HomePanel from './HomePanel.vue';
import { ref, onMounted } from 'vue'
import { getHotAPI } from '@/api/home/hot'
const hotList = ref([])
const getHotList = async() => {
const res = await getHotAPI()
console.log(res)
hotList.value = res.data
}
onMounted(() => {
getHotList()
})
</script>
<template>
<HomePanel title="精选商品" sub-title="人气精选 不容错过">
<!-- 下面是插槽主体内容模版 -->
<ul class="goods-list">
<li v-for="item in hotList" :key="item.id">
<RouterLink to="/">
<img :src="require(`@/assets/img/${item.picture1}.jpg`)" :alt="item.alt" />
<p class="name">{
{ item.goodsName }}</p>
<p class="price">¥{
{ item.price }}</p>
</RouterLink>
</li>
</ul>
</HomePanel>
</template>
<style scoped lang='scss'>
.goods-list {
display: flex;
justify-content: space-between;
height: 406px;
width: 100%;
li {
width: 306px;
height: 406px;
background: #f0f9f4;
transition: all .5s;
&:hover {
transform: translate3d(0, -3px, 0);
box-shadow: 0 3px 8px rgb(0 0 0 / 20%);
}
img {
width: 306px;
height: 306px;
}
p {
font-size: 22px;
padding-top: 12px;
text-align: center;
text-overflow: ellipsis;
overflow: hidden;
white-space: nowrap;
color: #000;
}
.price {
color: $priceColor;
}
}
}
</style>
七、低价好物

接口封装
在 api 目录下创建 home 目录然后创建 cheap.js 文件
代码示范
HomeCheap.vue
<script setup>
import HomePanel from './HomePanel.vue';
import { ref, onMounted } from 'vue'
import { getCheapAPI } from '@/api/home/cheap'
const cheapList = ref([])
const getCheapList = async() => {
const res = await getCheapAPI()
console.log(res)
cheapList.value = res.data
}
onMounted(() => {
getCheapList()
})
</script>
<template>
<HomePanel title="低价好物" sub-title="价低质不低 不容错过">
<!-- 下面是插槽主体内容模版 -->
<ul class="goods-list">
<li v-for="item in cheapList" :key="item.id">
<RouterLink to="/">
<img :src="require(`@/assets/img/${item.picture1}.jpg`)" :alt="item.alt" />
<p class="name">{
{ item.goodsName }}</p>
<p class="price">¥{
{ item.price }}</p>
</RouterLink>
</li>
</ul>
</HomePanel>
</template>
<style scoped lang='scss'>
.goods-list {
display: flex;
justify-content: space-between;
height: 406px;
width: 100%;
li {
width: 306px;
height: 406px;
background: #f0f9f4;
transition: all .5s;
&:hover {
transform: translate3d(0, -3px, 0);
box-shadow: 0 3px 8px rgb(0 0 0 / 20%);
}
img {
width: 306px;
height: 306px;
}
p {
font-size: 22px;
padding-top: 12px;
text-align: center;
text-overflow: ellipsis;
overflow: hidden;
white-space: nowrap;
color: #000;
}
.price {
color: $priceColor;
}
}
}
</style>
八、最新上架

接口封装
在 api 目录下创建 home 目录然后创建 new.js 文件
代码示范
HomeNew.vue
<script setup>
import HomePanel from './HomePanel.vue';
import { ref, onMounted } from 'vue'
import { getNewAPI } from '@/api/home/new'
const newList = ref([])
const getNewList = async() => {
const res = await getNewAPI()
console.log(res)
newList.value = res.data
}
onMounted(() => {
getNewList()
})
</script>
<template>
<HomePanel title="最新上架" sub-title="新鲜出炉 品质保障">
<!-- 下面是插槽主体内容模版 -->
<ul class="goods-list">
<li v-for="item in newList" :key="item.id">
<RouterLink to="/">
<img :src="require(`@/assets/img/${item.picture1}.jpg`)" :alt="item.alt" />
<p class="name">{
{ item.goodsName }}</p>
<p class="price">¥{
{ item.price }}</p>
</RouterLink>
</li>
</ul>
</HomePanel>
</template>
<style scoped lang='scss'>
.goods-list {
display: flex;
justify-content: space-between;
height: 406px;
width: 100%;
li {
width: 306px;
height: 406px;
background: #f0f9f4;
transition: all .5s;
&:hover {
transform: translate3d(0, -3px, 0);
box-shadow: 0 3px 8px rgb(0 0 0 / 20%);
}
img {
width: 306px;
height: 306px;
}
p {
font-size: 22px;
padding-top: 12px;
text-align: center;
text-overflow: ellipsis;
overflow: hidden;
white-space: nowrap;
color: #000;
}
.price {
color: $priceColor;
}
}
}
</style>


![[Python练习]使用Python爬虫爬取豆瓣top250的电影的页面源码](https://img-blog.csdnimg.cn/direct/1e7f2a5a6b2f4251b7cde3a5be7970f7.png)
