写在前面
由于上一篇介绍 如何使用Fleck创建WebSocket服务器 ,感觉不够完善,因为生产环境中肯定是需要用到ssl的,而创建或申请ssl证书,相对而言是比较繁琐的事情,特别是本地如果要构建一个使用ssl的测试环境时,就难免要多费一番周折了。
本文介绍了如何创建一个 ssl 证书,用于test.com在本地环境中测试带安全验证的 WebSocket。
1.首先下载并安装 Win64 OpenSSL
建议把安装目录指定为 C:\OpenSSL-Win64\
2.然后创建openssl.cnf 并保存到如下目录:C:\OpenSSL-Win64\
内容如下:
[ req ]
default_bits        = 2048
default_keyfile     = server-key.pem
distinguished_name  = subject
req_extensions      = req_ext
x509_extensions     = x509_ext
string_mask         = utf8only

# The Subject DN can be formed using X501 or RFC 4514 (see RFC 4519 for a description).
#   Its sort of a mashup. For example, RFC 4514 does not provide emailAddress.
[ subject ]
countryName         = Country Name (2 letter code)
countryName_default     = US

stateOrProvinceName     = State or Province Name (full name)
stateOrProvinceName_default = NY

localityName            = Locality Name (eg, city)
localityName_default        = New York

organizationName         = Organization Name (eg, company)
organizationName_default    = Example, LLC

# Use a friendly name here because its presented to the user. The server's DNS
#   names are placed in Subject Alternate Names. Plus, DNS names here is deprecated
#   by both IETF and CA/Browser Forums. If you place a DNS name here, then you
#   must include the DNS name in the SAN too (otherwise, Chrome and others that
#   strictly follow the CA/Browser Baseline Requirements will fail).
commonName          = Common Name (e.g. server FQDN or YOUR name)
commonName_default      = Example Company

emailAddress            = Email Address
emailAddress_default        = test@test.com

# Section x509_ext is used when generating a self-signed certificate. I.e., openssl req -x509 ...
[ x509_ext ]

subjectKeyIdentifier        = hash
authorityKeyIdentifier  = keyid,issuer

# You only need digitalSignature below. *If* you don't allow
#   RSA Key transport (i.e., you use ephemeral cipher suites), then
#   omit keyEncipherment because that's key transport.
basicConstraints        = CA:FALSE
keyUsage            = digitalSignature, keyEncipherment
subjectAltName          = @alternate_names
nsComment           = "OpenSSL Generated Certificate"

# RFC 5280, Section 4.2.1.12 makes EKU optional
#   CA/Browser Baseline Requirements, Appendix (B)(3)(G) makes me confused
#   In either case, you probably only need serverAuth.
# extendedKeyUsage  = serverAuth, clientAuth

# Section req_ext is used when generating a certificate signing request. I.e., openssl req ...
[ req_ext ]

subjectKeyIdentifier        = hash

basicConstraints        = CA:FALSE
keyUsage            = digitalSignature, keyEncipherment
subjectAltName          = @alternate_names
nsComment           = "OpenSSL Generated Certificate"

# RFC 5280, Section 4.2.1.12 makes EKU optional
#   CA/Browser Baseline Requirements, Appendix (B)(3)(G) makes me confused
#   In either case, you probably only need serverAuth.
# extendedKeyUsage  = serverAuth, clientAuth

[ alternate_names ]

DNS.1       = test.com
DNS.2       = www.test.com
DNS.3       = mail.test.com
DNS.4       = ftp.test.com

# Add these if you need them. But usually you don't want them or
#   need them in production. You may need them for development.
# DNS.5       = localhost
# DNS.6       = localhost.localdomain
# DNS.7       = 127.0.0.1

# IPv6 localhost
# DNS.8     = ::1
详细步骤
打开命令提示符窗口:
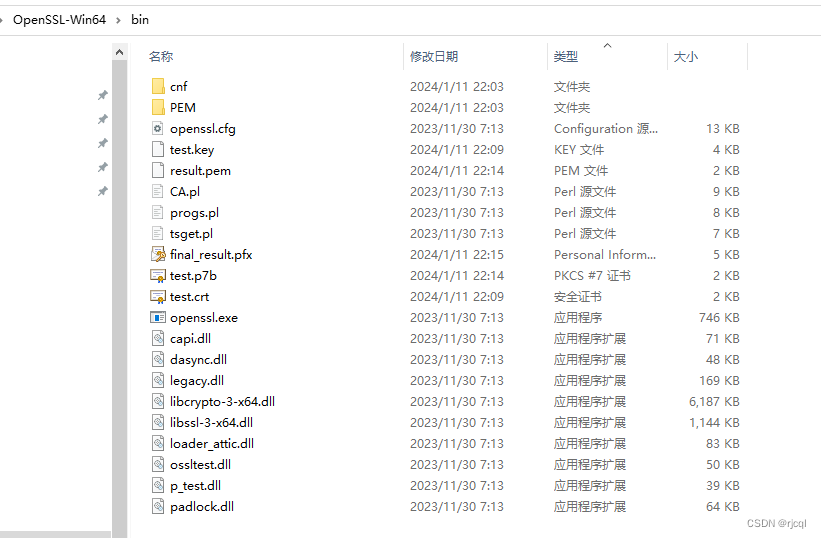
1.执行 cd "c:\OpenSSL-Win64\bin"
2.执行 set OPENSSL_CONF=c:\OpenSSL-Win64\openssl.cnf
3.执行 openssl req -x509 -newkey rsa:4096 -sha256 -nodes -keyout test.key -out test.crt -subj "/CN=test.com" -days 3650
如下图所示:

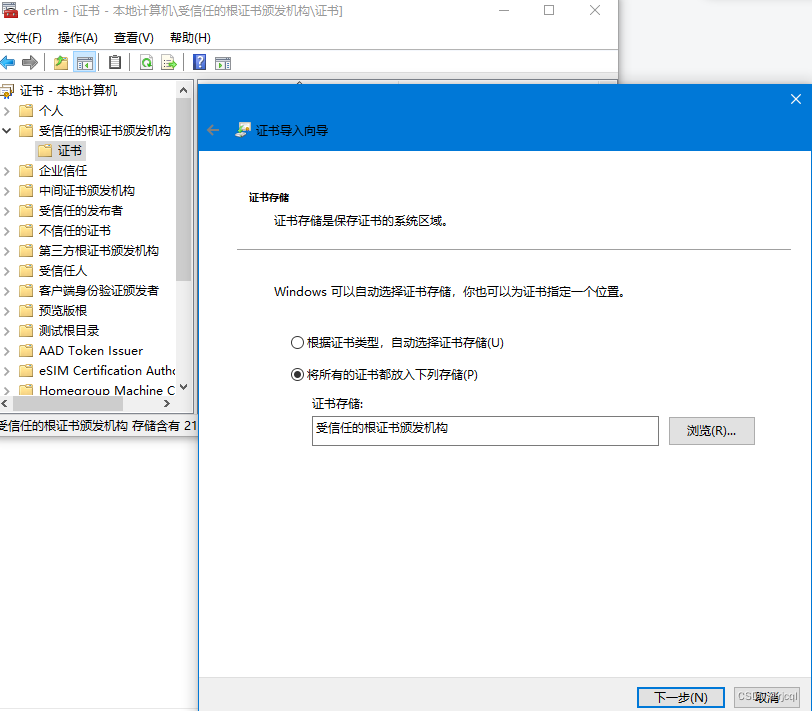
将C:\OpenSSL-Win64\bin目录下 test.crt 导入证书存储:
- 打开
certlm.msc - 转至受信任的根证书颁发机构 > 证书
- 右键单击某处,选择“所有任务”>“导入”
- 浏览刚刚创建的文件
test.crt(位于 C:\OpenSSL-Win32\bin 中) - 选择将所有证书放入以下存储中:受信任的根证书颁发机构
- 单击“完成”
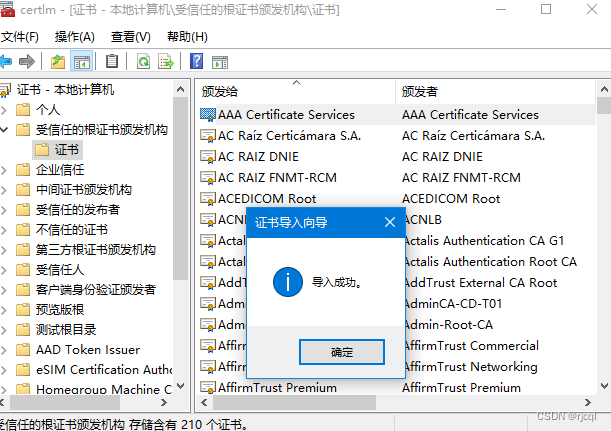
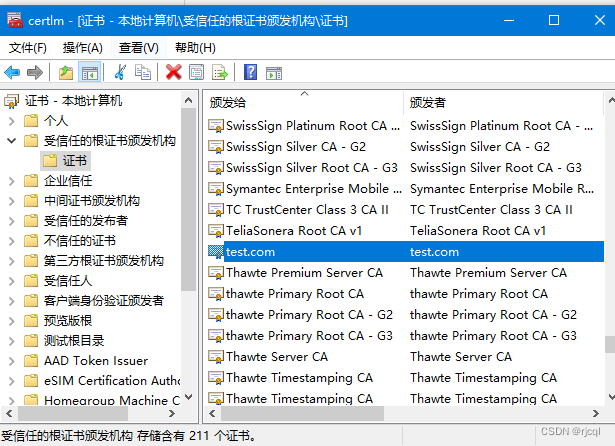
从证书列表中导出此证书:
- 刷新受信任的根证书颁发机构 > 证书,找到并右键单击 test.com 证书
- 选择所有任务 > 导出
- 导出为
test.p7b并保存在C:\OpenSSL-Win64\bin\ - 删除
test.com证书存储中当前的证书
接着执行:openssl pkcs7 -in test.p7b -inform DER -out result.pem -print_certs
在执行:openssl pkcs12 -export -inkey test.key -in result.pem -name test.com -out final_result.pfx
过程中需要输入密码,后面要用到不要忘掉,建议保存一下。
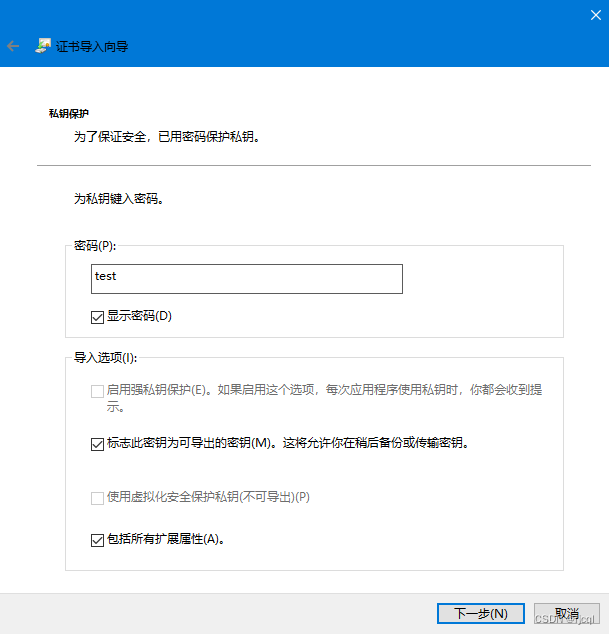
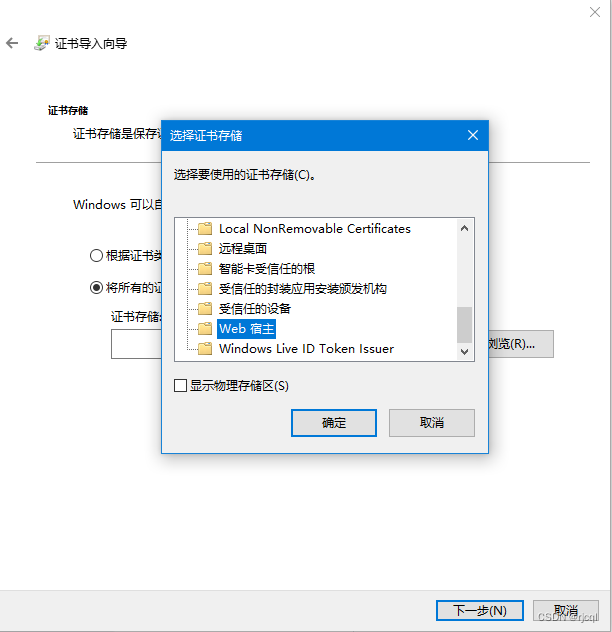
将“final_result.pfx”导入证书存储区:
- 双击生成的
final_result.pfx文件运行安装程序 - 选择本地机器
- 输入密码
- 选择将此密钥标记为可导出
- 选择包括所有扩展属性
- 选择将所有证书放入以下存储中:受信任的根证书颁发机构
- 单击“完成”
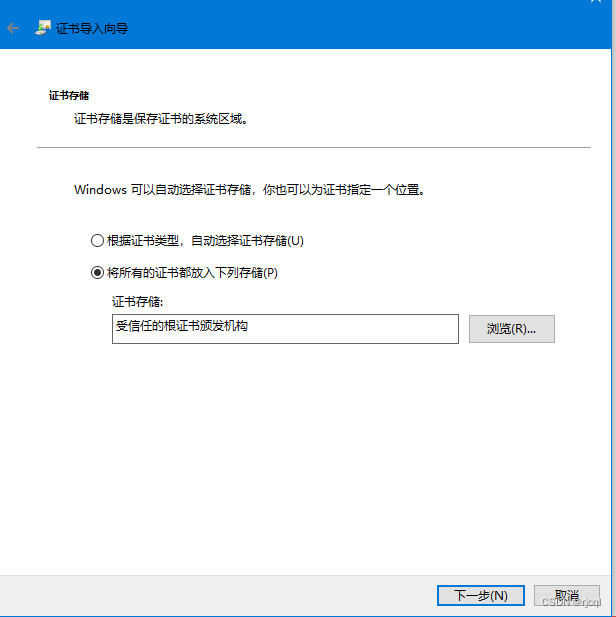
再次重复上述导入步骤 1 到 7,但这次在步骤 6 中,将证书放置在“Web宿主”证书存储中(以便 IIS 在绑定到 https 时可以看到该证书)
从存储中导出此证书(以在套接字服务器应用程序中使用):
- 刷新受信任的根证书颁发机构 > 证书,找到并右键单击该
test.com证书 - 选择所有任务 > 导出
- 选择yes,导出私钥
- 选择个人信息交换
- 如果可能,选择包括所有证书
- 选择导出所有扩展属性
- 选择启用证书隐私
- 添加密码
- 添加文件名
test.com.pfx(将其保存到 C:\ 或“套接字服务器应用程序”将引用它的位置,请参见下文)X509Certificate2 certificate = new X509Certificate2("C:\\test.com.pfx", "password");
将test.com与本地电脑 IP 一起添加到主机文件中,C:\Windows\System32\drivers\etc\hosts
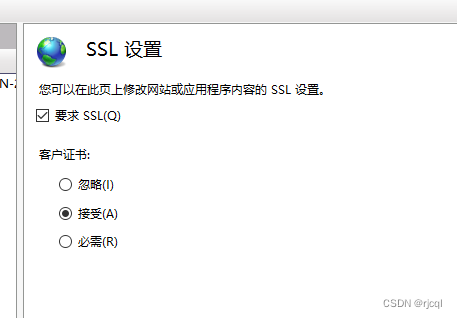
创建 IIS 网站并为 http 和 https 添加到 test.com 的绑定(并在 https 绑定中选择 test.com 证书)
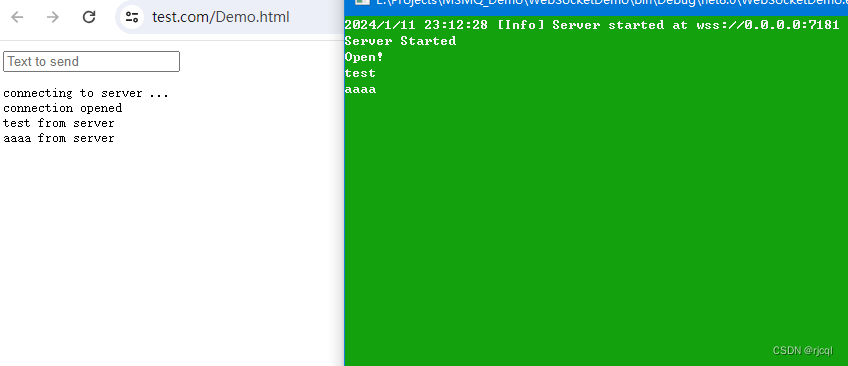
访问 https://test.com/your-socket-client.htm (在 Chrome/Edge 中,当提示 ssl 警告时单击高级 > 继续)
套接字客户端现在应该使用 wss 成功连接wss://test.com:xxxx
注意事项
如果是用 Chrome 进行测试,则可能需要使用 TLS 1.2。因为Chrome貌似加强了可以使用的安全协议。另外要在套接字服务器上使用 TLS 1.2,请设置:
server.EnabledSslProtocols = SslProtocols.Tls12;
或更多选项,比如:
server.EnabledSslProtocols = SslProtocols.Tls12 | SslProtocols.Ssl3 | SslProtocols.Tls11 | SslProtocols.Tls;
在套接字服务器上,尝试监听 0.0.0.0
var server = new WebSocketServer("wss://0.0.0.0:7181");
在客户端,如果使用wss,则需要使用ssl证书注册的域的url,而不是ip地址:
window.ws = new wsImpl('wss://test.com:7181/');
代码实现
控制台代码
using Fleck;
using System.Security.Authentication;
using System.Security.Cryptography.X509Certificates;
public class WebSocketServerDemo
{
    public static void Main(string[] args)
    {
        X509Certificate2 certificate = new X509Certificate2("C:\\test.com.pfx", "test");
        var server = new WebSocketServer("wss://0.0.0.0:7181");
        if (certificate != null)
        {
            server.Certificate = certificate;
            server.EnabledSslProtocols = SslProtocols.Ssl3 | SslProtocols.Tls | SslProtocols.Tls11 | SslProtocols.Tls12;
            //server.EnabledSslProtocols = SslProtocols.Tls12;
        }
        server.Start(socket =>
        {
            socket.OnOpen = () => Console.WriteLine("Open!");
            socket.OnClose = () => Console.WriteLine("Close!");
            socket.OnMessage = message =>
            {
                Console.WriteLine(message);
                socket.Send(message + " from server");
            };
        });
        Console.WriteLine("Server Started");

        Console.ReadLine();
    }
}
客户端代码
<!DOCTYPE html>
<html>
<head>
    <meta charset="utf-8" />
    <title>WebSocket Demo</title>
    <script type="text/javascript">
        var start = function () {
            var inc = document.getElementById('incomming');
            var wsImpl = window.WebSocket || window.MozWebSocket;
            var form = document.getElementById('sendForm');
            var input = document.getElementById('sendText');

            inc.innerHTML += "connecting to server ...<br/>";

            // 创建新的websocket新连接端口为7181
            window.ws = new wsImpl('wss://test.com:7181/');

            // 当数据从服务器服务中心发送后,继续向下运行过程
            ws.onmessage = function (evt) {
                inc.innerHTML += evt.data + '<br/>';
            };

            // 当链接对象找到服务端成功对接后,提示正常打开
            ws.onopen = function () {
                inc.innerHTML += 'connection opened<br/>';
            };

            // 当链接对象未找找到服务端成功对接后,提示打开失败,别切单项关闭
            ws.onclose = function () {
                inc.innerHTML += 'connection closed<br/>';
            }

            form.addEventListener('submit', function (e) {
                e.preventDefault();
                var val = input.value;
                ws.send(val);
                input.value = "";
            });
        }
        window.onload = start;
    </script>
</head>
<body>
    <form id="sendForm">
        <input id="sendText" placeholder="Text to send" />
    </form>
    <pre id="incomming"></pre>
</body>
</html>
调用示例
IIS 站点配置