本篇文章以MacOS环境开发iOS平台为例,记录一下在原生APP基础上集成React Native
React Native中文网 详细介绍了搭建环境和集成RN的步骤。
环境搭建
必须安装的依赖有:Node、Watchman、Xcode 和 CocoaPods。
安装Homebrew
Homebrew是一款Mac OS平台下的软件包管理工具,拥有安装、卸载、更新、查看、搜索等很多实用的功能。
- 安装brew
/bin/bash -c "$(curl -fsSL https://raw.githubusercontent.com/Homebrew/install/HEAD/install.sh)"
- 查看brew版本
brew -v
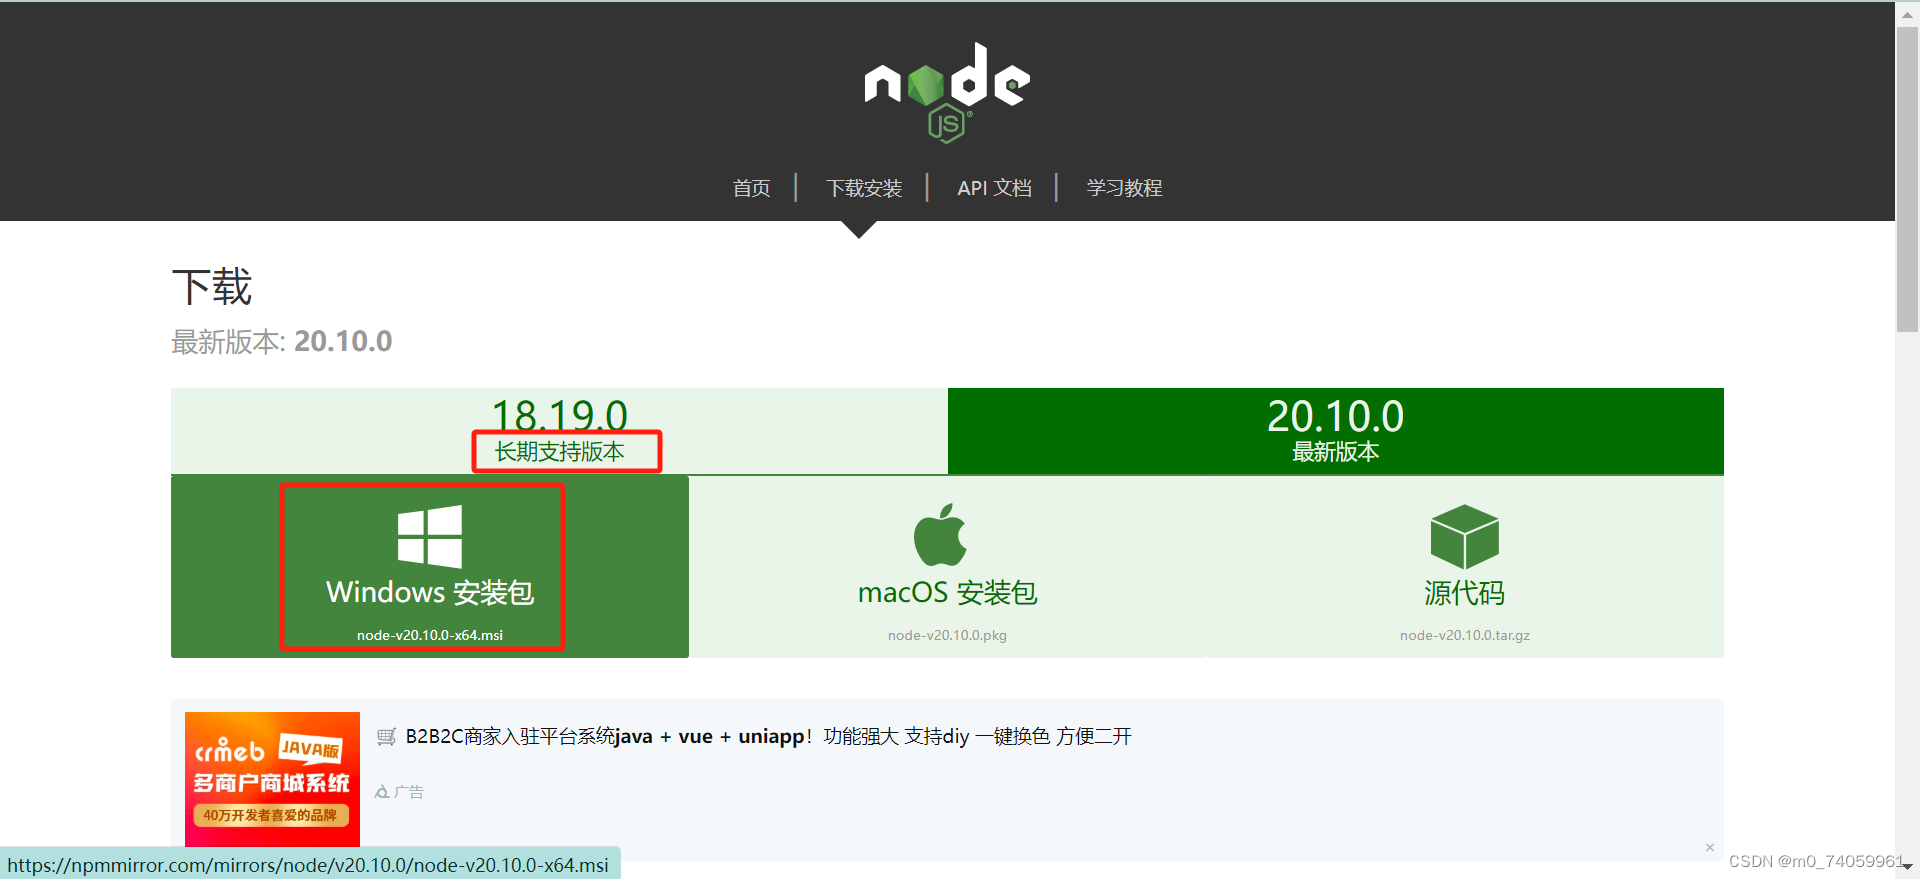
Node & Watchman
Node.js是在Google Chrome V8 JavaScript引擎的基础上构建的,一个开源的跨平台JavaScript运行时环境。
Watchman是由 Facebook 提供的监视文件系统变更的工具。安装此工具可以提高开发时的性能(packager 可以快速捕捉文件的变化从而实现实时刷新)。
- 安装
推荐使用Homebrew来安装 Node 和 Watchman。
brew install node
brew install watchman
- 查看版本
node -v
- 卸载node
brew uninstall node
安装完 Node 后建议设置 npm 镜像(淘宝源)
# 使用nrm工具切换淘宝源
npx nrm use taobao

# 如果之后需要切换回官方源可使用
npx nrm use npm
- 安装Yarn
Yarn是 Facebook 提供的替代 npm 的工具,可以加速 node 模块的下载。安装完 yarn 之后就可以用 yarn 代替 npm 了。
npm install -g yarn
Xcode & CocoaPods
这两个就不过多解释了。
CocoaPods安装
sudo gem install cocoapods
或者
brew install cocoapods
关于更多CocoaPods问题参考:CocoaPods安装 CocoaPods常见错误总结
集成React Native
其实有两种集成方案,第一种就是按照官方的步骤,在RN项目中添加自己原生的iOS和Android项目。
另一种就是在原生项目中以submodule或子组件的形式添加RN,个人认为后者的项目管理方式较好,不影响主项目的架构。

But,网上给的Podfile配置都是低版本的react-native,我使用的版本是0.73.0的,我配置Podfile一直出错,在官方GitHub或QQ群提问也没人理我,最后我就按第一种配置了,后面有哪位大神有第二种的配置方案,可以教我一下~
创建React Native新项目
默认会创建最新的版本
npx react-native init MyReactNative
或者安装指定版本
//最新版本
npx react-native@latest init MyReactNative

//注意版本号必须精确到两个小数点
npx react-native@0.68.0 init MyReactNative
安装完成后,不需要加载cocoaPods依赖

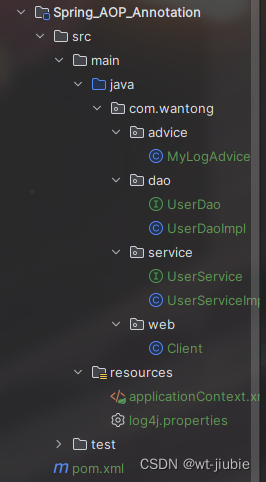
这是的项目目录如下图,每个文件做什么的,我做了标注。
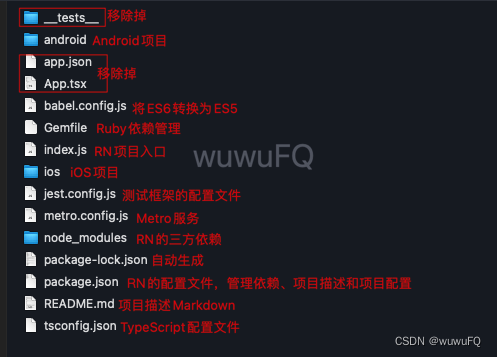
我们把android 和 ios 两个文件夹下的文件清空就行,把自己的项目放到对应的目录下。
配置CocoaPods
- 创建配置文件Podfile
在项目根目录下,来到/ios目录
cd ios
pod init
打开Podfile,键入以下内容
source 'https://github.com/CocoaPods/Specs.git'

# Resolve react_native_pods.rb with node to allow for hoisting
require Pod::Executable.execute_command('node', ['-p',
  'require.resolve(
    "react-native/scripts/react_native_pods.rb",
    {paths: [process.argv[1]]},
  )', __dir__]).strip

platform :ios, min_ios_version_supported
prepare_react_native_project!

# If you are using a `react-native-flipper` your iOS build will fail when `NO_FLIPPER=1` is set.
# because `react-native-flipper` depends on (FlipperKit,...) that will be excluded
#
# To fix this you can also exclude `react-native-flipper` using a `react-native.config.js`
# ```js
# module.exports = {

#   dependencies: {

#     ...(process.env.NO_FLIPPER ? { 'react-native-flipper': { platforms: { ios: null } } } : {}),
# ```
flipper_config = ENV['NO_FLIPPER'] == "1" ? FlipperConfiguration.disabled : FlipperConfiguration.enabled

linkage = ENV['USE_FRAMEWORKS']
if linkage != nil
  Pod::UI.puts "Configuring Pod with #{linkage}ally linked Frameworks".green
  use_frameworks! :linkage => linkage.to_sym
end

def common_pods
  # 网络请求
  pod 'AFNetworking'
  # 时间选择器
  pod 'FQDateTimePicker'
  # 锁屏
  pod 'FQLockSDK'
end

target 'MyReactNative(你的iOS项目名字)' do
# iOS原生的三方依赖
  common_pods

  config = use_native_modules!

  use_react_native!(
    :path => config[:reactNativePath],
    # Enables Flipper.
    #
    # Note that if you have use_frameworks! enabled, Flipper will not work and
    # you should disable the next line.
    :flipper_configuration => flipper_config,
    # An absolute path to your application root.
    :app_path => "#{Pod::Config.instance.installation_root}/.."
  )

  target 'MyReactNativeTests' do
    inherit! :complete
    # Pods for testing
  end

  post_install do |installer|
    # https://github.com/facebook/react-native/blob/main/packages/react-native/scripts/react_native_pods.rb#L197-L202
    react_native_post_install(
      installer,
      config[:reactNativePath],
      :mac_catalyst_enabled => false
    )
  end
end
然后下载三方依赖
pod install
iOS原生运行RN
配置Xcode
在Info.plist文件中配置本地运行的 Metro 服务。
<key>NSAppTransportSecurity</key>
<dict>
    <key>NSExceptionDomains</key>
    <dict>
        <key>localhost</key>
        <dict>
            <key>NSTemporaryExceptionAllowsInsecureHTTPLoads</key>
            <true/>
        </dict>
    </dict>
</dict>
编写index.js
iOS和RN交互的入口就是RN项目根目录下的index.js文件,官方给的index.js案例代码是:
import React from 'react';
import {
   AppRegistry, StyleSheet, Text, View} from 'react-native';

const RNHighScores = ({
    scores}) => {

  const contents = scores.map(score => (
    <Text key={
   score.name}>
      {
   score.name}:{
   score.value}
      {
   '\n'}
    </Text>
  ));
  return (
    <View style={
   styles.container}>
      <Text style={
   styles.highScoresTitle}>
        2048 High Scores!
      </Text>
      <Text style={
   styles.scores}>{
   contents}</Text>
    </View>
  );
};

const styles = StyleSheet.create({

  container: {

    flex: 1,
    justifyContent: 'center',
    alignItems: 'center',
    backgroundColor: '#FFFFFF',
  },
  highScoresTitle: {

    fontSize: 20,
    textAlign: 'center',
    margin: 10,
  },
  scores: {

    textAlign: 'center',
    color: '#333333',
    marginBottom: 5,
  },
});

// 模块名称
AppRegistry.registerComponent('RNHighScores', () => RNHighScores);
iOS原生跳转RN页面
在原生开发中,你可以通过一个点击事件或函数跳转到RN页面。
首先导入RCTRootView的头文件。
#import <React/RCTRootView.h>
- (void)highScoreButtonPressed {
    NSLog(@"High Score Button Pressed");
    //这里给的是localhost本地的服务地址,当你上线后要动态配置下你自己服务器的地址
    NSURL *jsCodeLocation = [NSURL URLWithString:@"http://localhost:8081/index.bundle?platform=ios"];

    RCTRootView *rootView =
      [[RCTRootView alloc] initWithBundleURL: jsCodeLocation
                                  moduleName: @"RNHighScores"
                           initialProperties:
                             @{
                               @"scores" : @[
                                 @{
                                   @"name" : @"Alex",
                                   @"value": @"42"
                                  },
                                 @{
                                   @"name" : @"Joel",
                                   @"value": @"10"
                                 }
                               ]
                             }
                               launchOptions: nil];
    UIViewController *vc = [[UIViewController alloc] init];
    vc.view = rootView;
    [self presentViewController:vc animated:YES completion:nil];
}
开启Metro服务
要运行应用,首先需要启动开发服务器(即 Metro,它负责实时监测 js 文件的变动并实时打包,输出给客户端运行,所以需要你有metro.config.js配置文件)。
进入到RN项目根目录中,然后运行:
yarn start
如果报错 yarn start Command react-native not found.

那是react-native-cli命令行工具影响的,先卸载掉。
npm uninstall -g react-native-cli
npm uninstall -g react-native-cli @react-native-community/cli
然后再执行yarn start,如果还报错,就主动安装下react-native-cli
yarn add react-native-cli
启动之后如下图:

这时候打开Xcode,选择模拟器(run)运行iOS项目就可以了。
如果遇到CocoaPods报错,比如RN依赖的某个文件找不到,来到RN根目录下拉取一下三方依赖。
npx pod-install ios
✿✿ヽ(°▽°)ノ✿✿✿ヽ(°▽°)ノ✿✿