前言
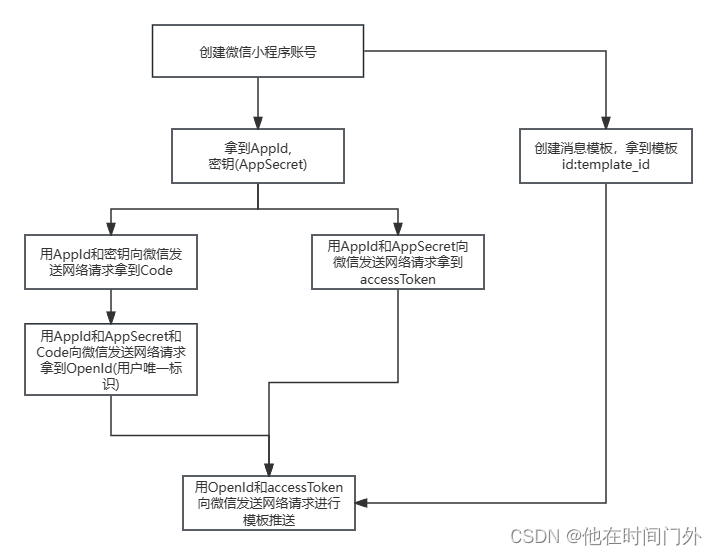
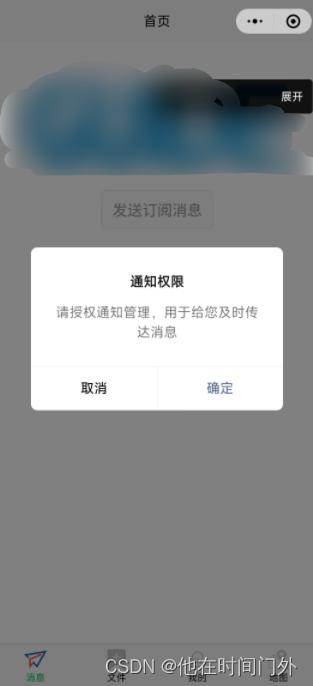
在发送模板消息之前我们要首先搞清楚微信小程序的逻辑是什么,这只是前端的一个demo实现,建议大家在后端处理,前端具体实现:如下图
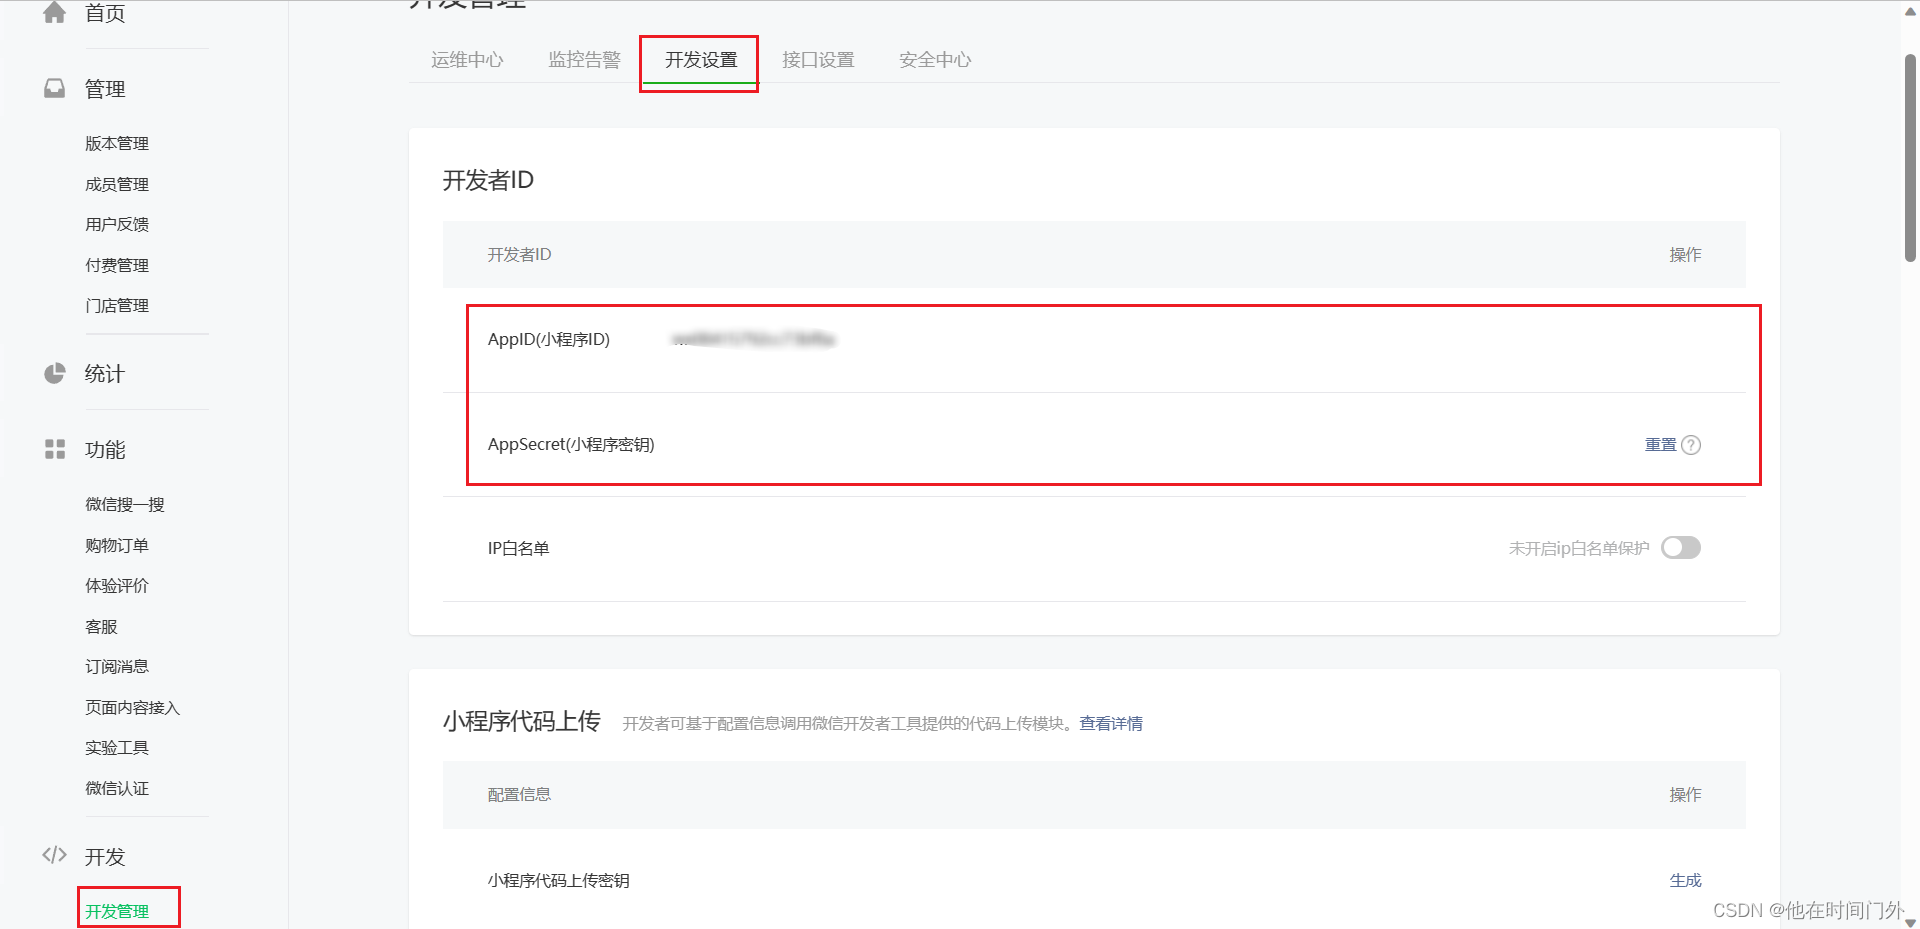
1.获取小程序Id和密钥
我们注册完微信小程序后,可以在开发设置中看到以下内容,注意,密钥只会在生成时显示
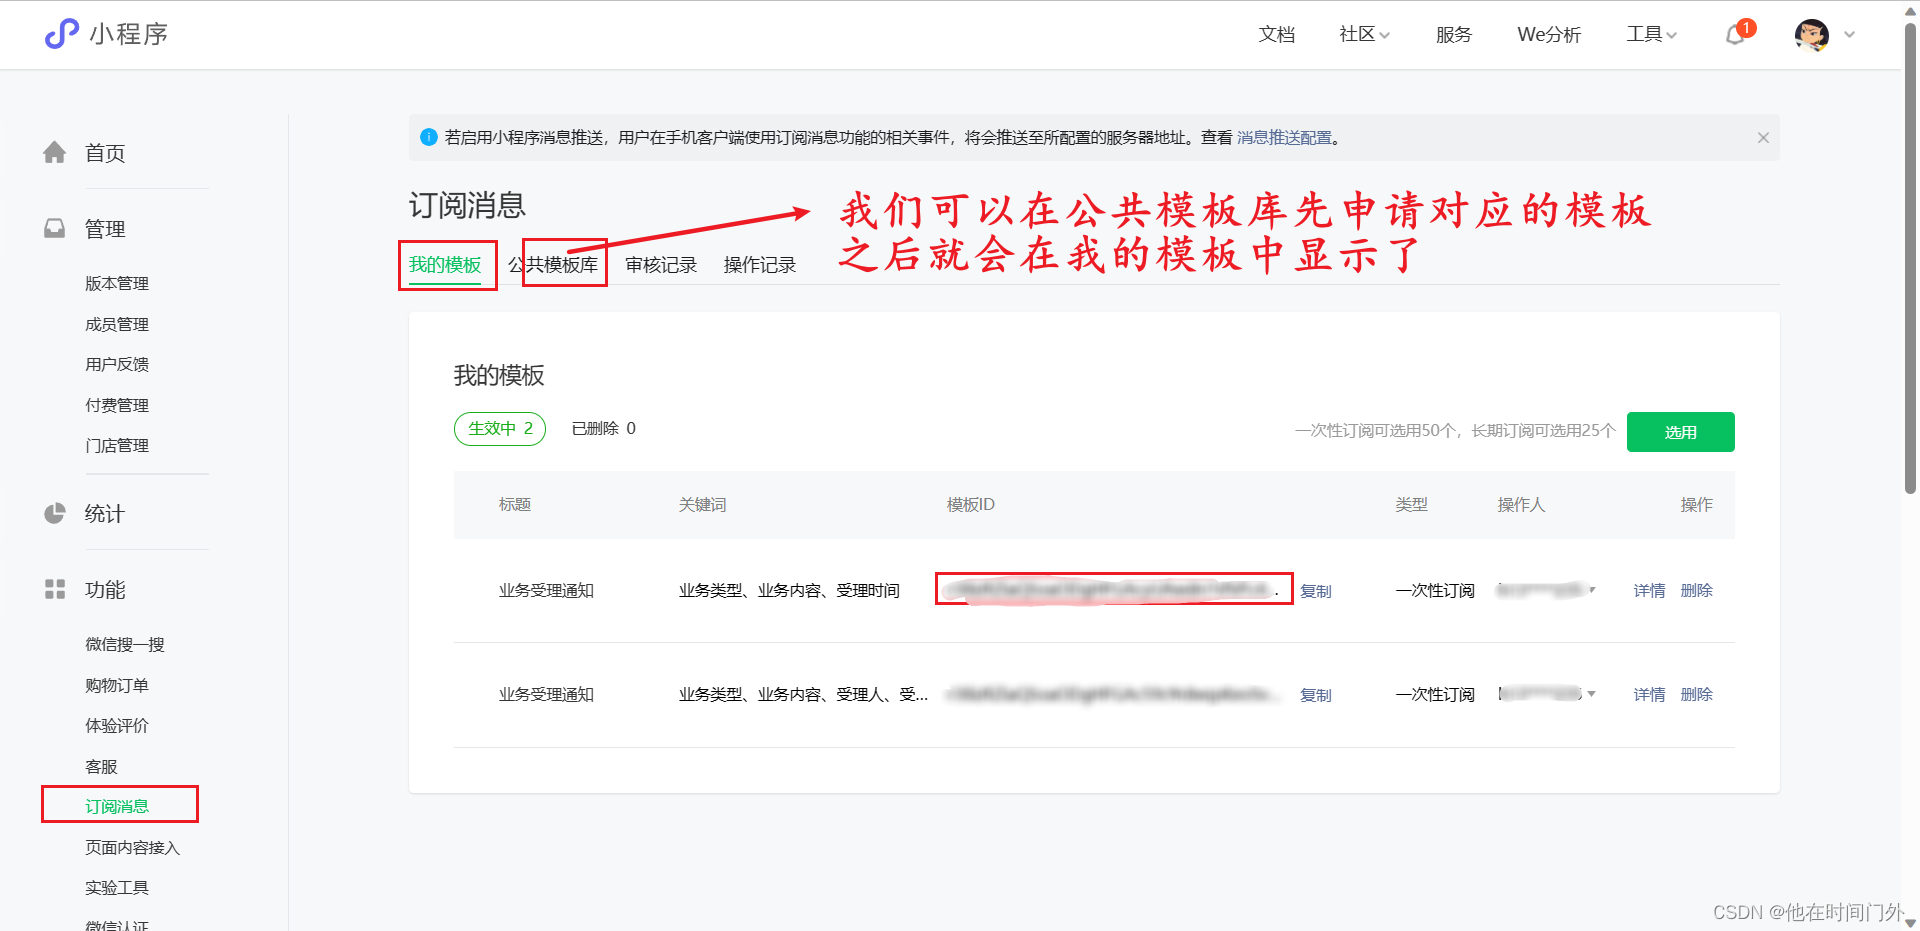
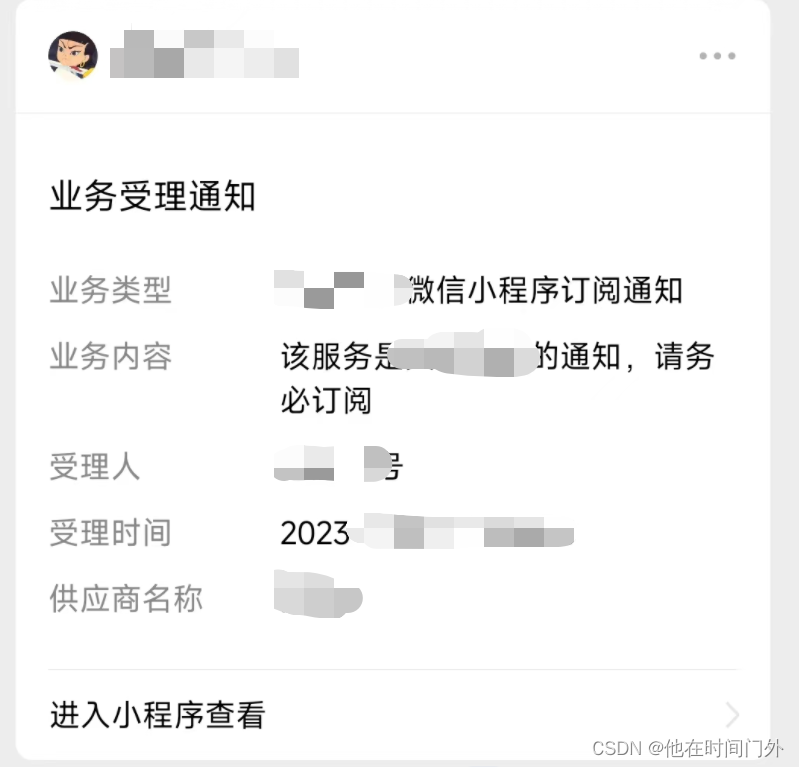
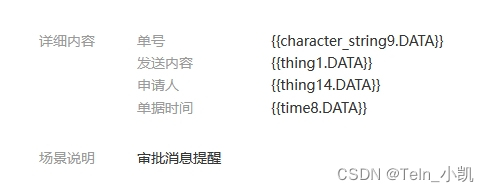
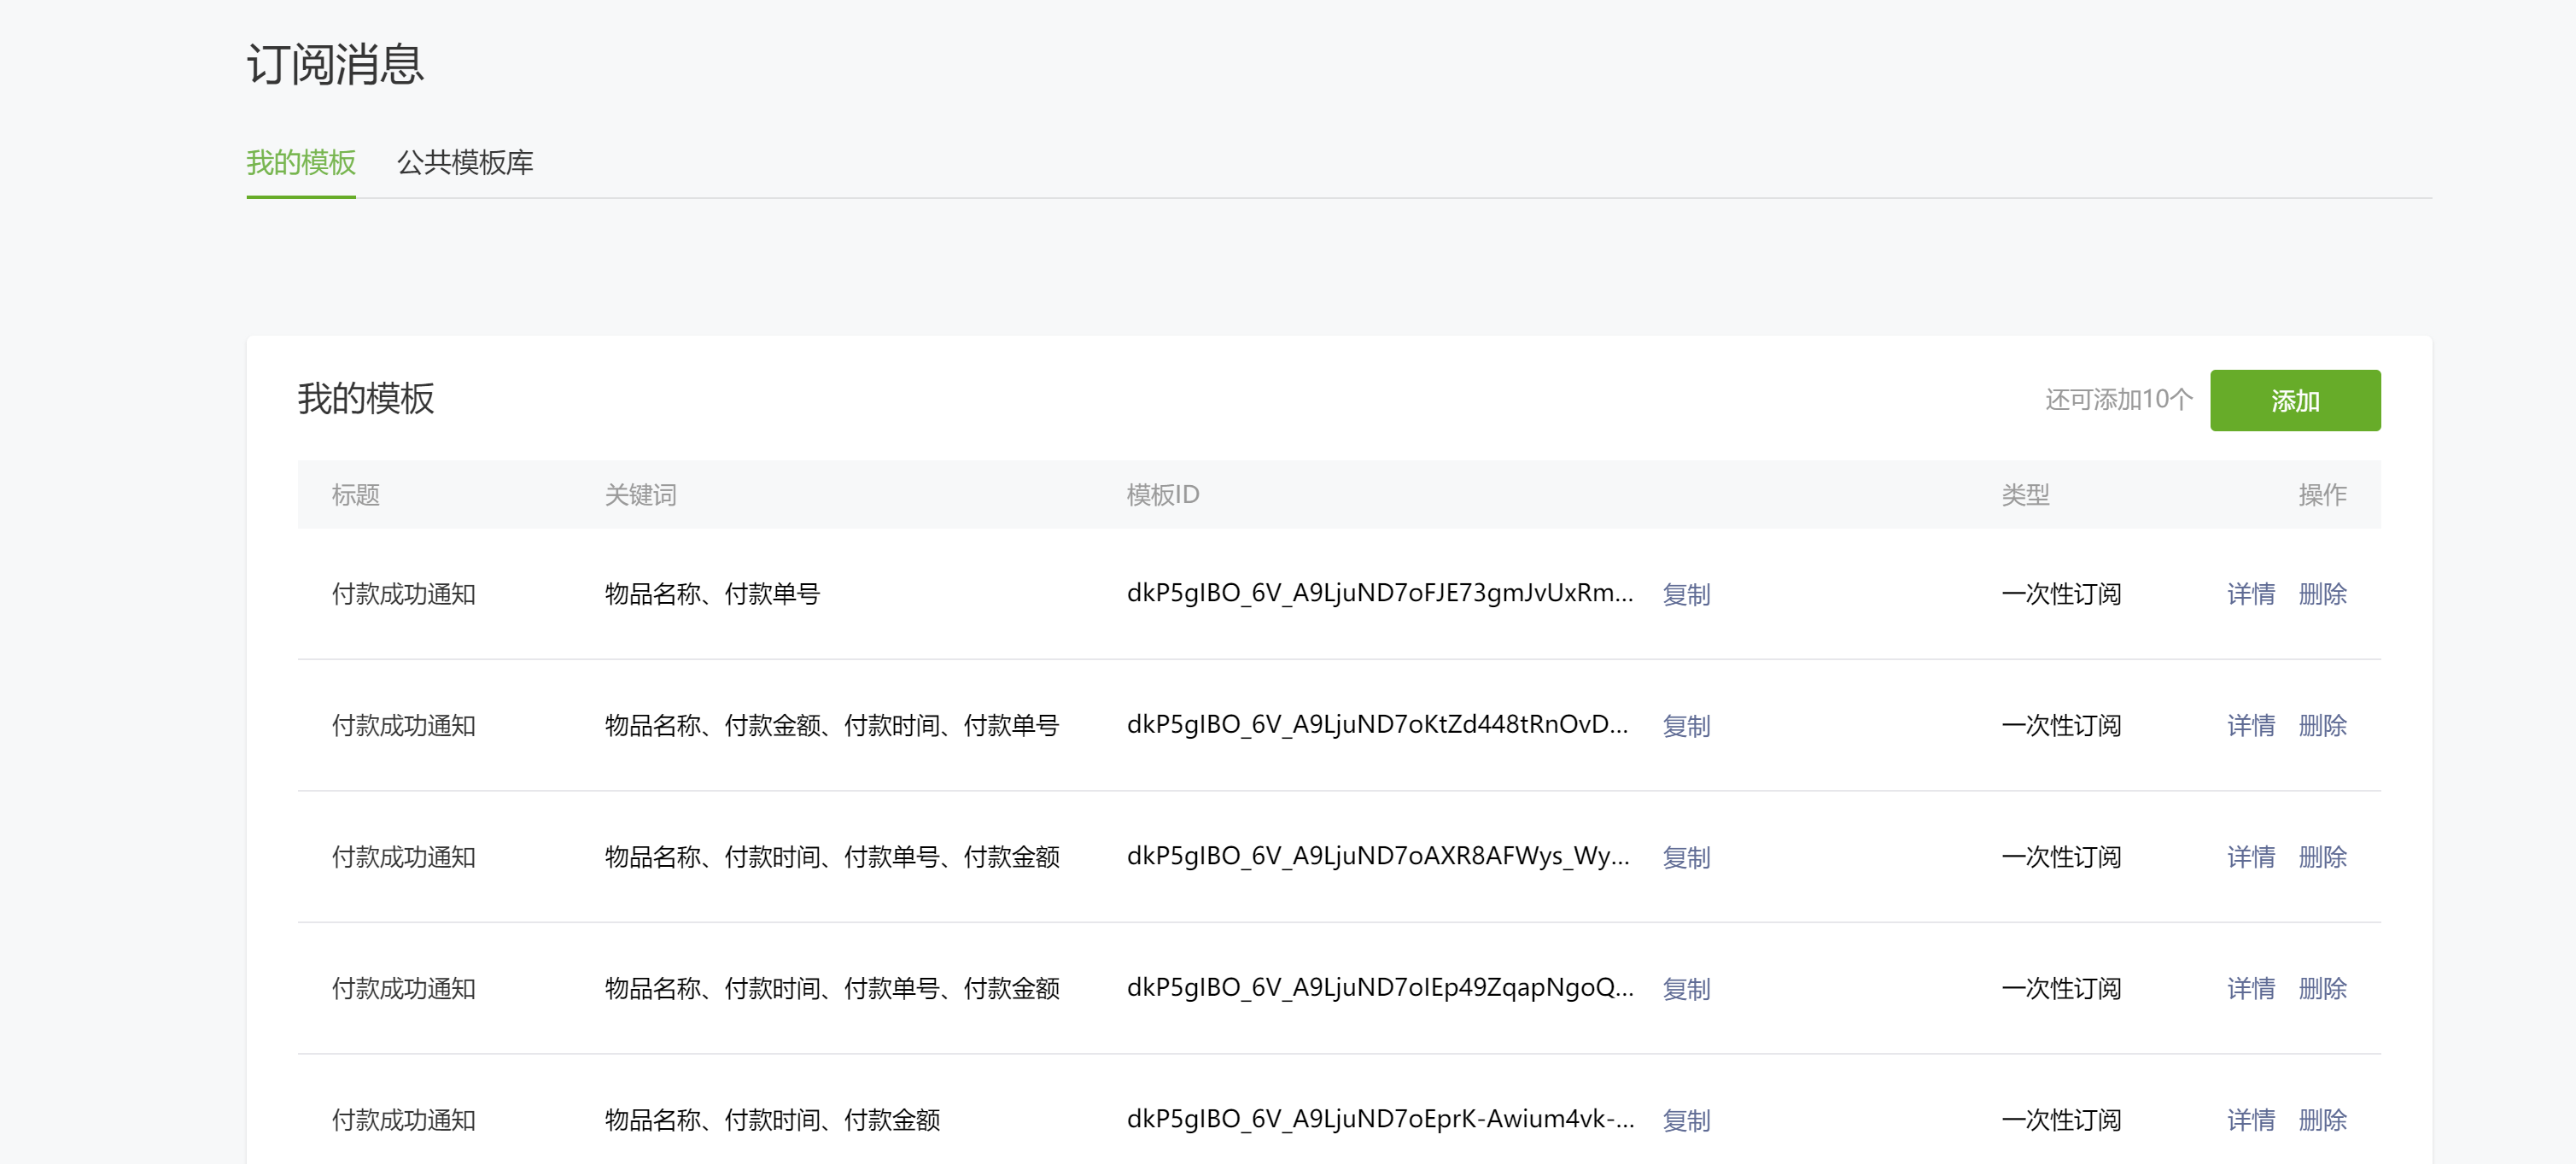
2.创建模板消息,拿到模板id
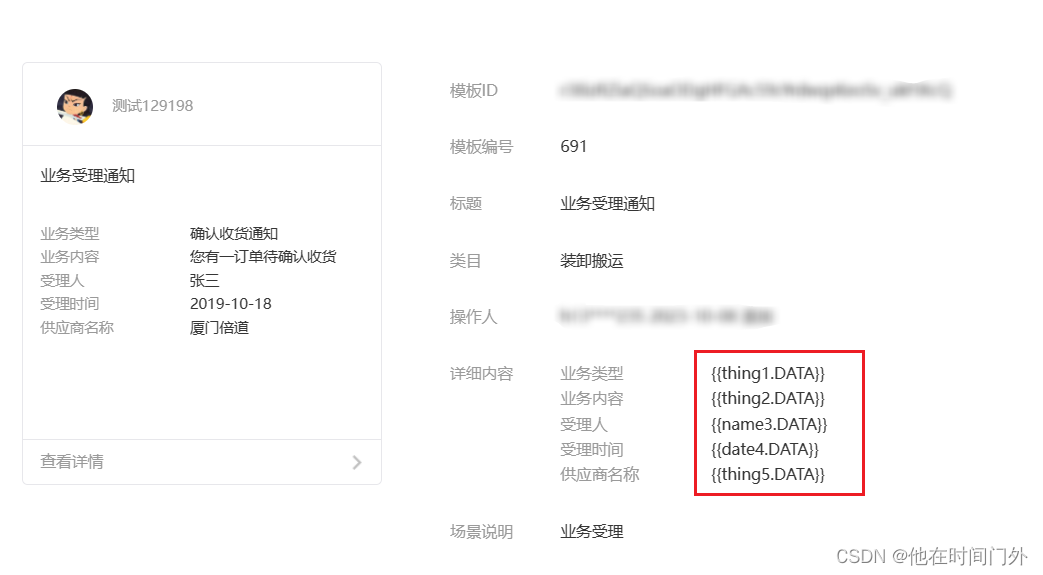
在右侧详情中我们可以看到具体要传输的数据对象,注意一一对应
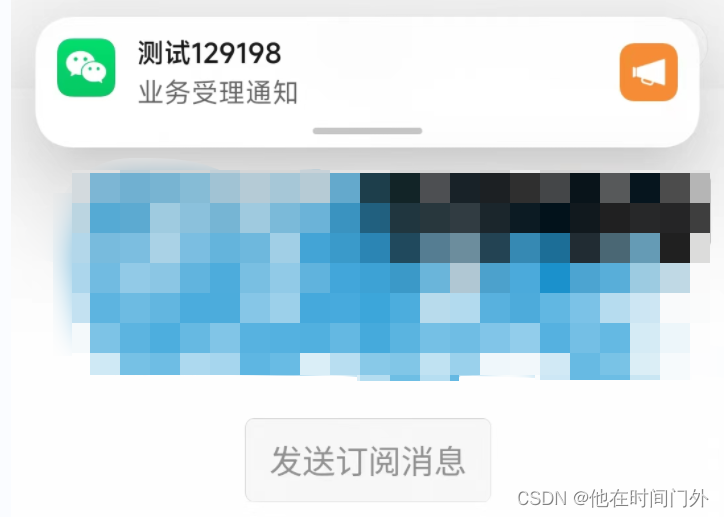
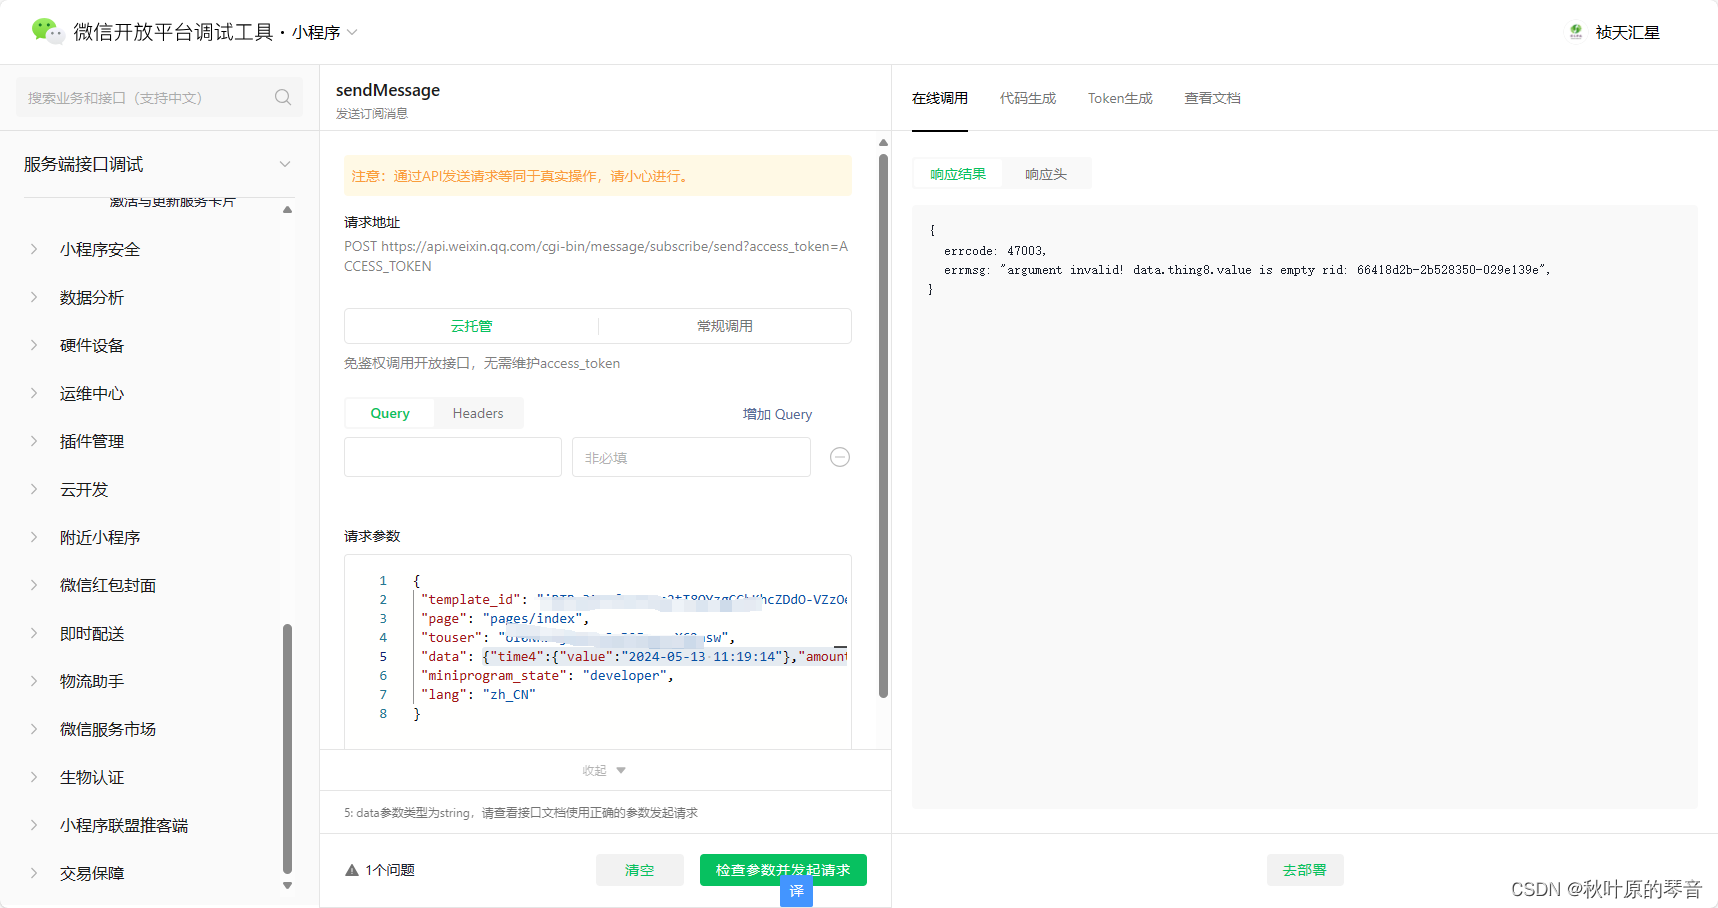
3.发送模板消息-完整代码
<template>
	<view class="content">
		<image class="logo" src="/static/guide1.png"></image>
		<view class="text-area">
			<button class="title" @click="btnclick">订阅消息</button>
		</view>
	</view>
</template>

<script setup>
	import {
    ref } from 'vue';
	import {
    parseTime } from "../../utils/ruoyi";

	const show = ref(true)
	const showModal = ref(false);

	function close() {

		show.value = false
	}


	function acc() {

		uni.showModal({

			title: '通知权限',
			content: '请授权通知管理,用于给您及时传达消息',
			success: function(res) {

				if (res.confirm) {

					console.log('点击了确认')
					btnclick()
				} else {

					console.log('点击了取消')
				}
			}
		})
	}


	function btnclick() {

		if (wx.requestSubscribeMessage) {

			wx.requestSubscribeMessage({

				tmplIds: ['模板Id'],
				success(res) {

					if (res['模板Id'] == 'accept') {

						console.log('用户订阅成功');
						btnSubscription()
					} else if (res['模板Id'] == 'reject') {

						console.log('用户拒绝订阅');
					}
				},
				fail(err) {

					console.error('订阅请求失败:', err);
				}
			});
		} else {

			console.error('此平台不支持订阅');
		}
	}

	async function btnSubscription() {

		let code = null;
		let accessToken = null;
		let openid = null;
		let time = parseTime(new Date())

		try {

			code = await getLoginCode();
			if (code) {

				openid = await requestOpenID(code);
				console.log('User OpenID:', openid);
			}
			accessToken = await requestAccessToken();
			console.log('Access Token:', accessToken);
		} catch (error) {

			console.error('errorerror', error);
		}
		uni.request({

			url: 'https://api.weixin.qq.com/cgi-bin/message/subscribe/send?access_token=' +
				accessToken,
			method: 'POST',
			data: {

				touser: openid,
				template_id: '模板Id',
				page: "pages/index/index",
				data: {

					thing1: {

						value: '测试小程序订阅通知'
					},
					thing2: {

						value: '该服务是测试通知,请务必订阅'
					},
					name3: {

						value: '测试一号'
					},
					date4: {

						value: time
					},
					thing5: {

						value: '测试'
					}
				}
			},
			success: (res) => {

				console.log("发送成功", res);
			}
		})
	}

	const getLoginCode = () => {

		return new Promise((resolve, reject) => {

			wx.login({

				success: (res) => {

					console.log('res.code', res.code);
					if (res.code) {

						resolve(res.code);
					} else {

						reject('Failed to obtain login code');
					}
				},
				fail: (err) => {

					reject(err);
				},
			});
		});
	};

	const requestOpenID = (code) => {

		return new Promise((resolve, reject) => {

			wx.request({

				url: 'https://api.weixin.qq.com/sns/jscode2session',
				data: {

					appid: '小程序AppId',
					secret: '小程序密钥',
					js_code: code,
					grant_type: 'authorization_code',
				},
				success: (res) => {

					console.log('resres', res);
					if (res.data.openid) {

						resolve(res.data.openid);
					} else {

						reject('Failed to obtain user OpenID');
					}
				},
				fail: (err) => {

					reject(err);
				},
			});
		});
	};

	const requestAccessToken = () => {

		return new Promise((resolve, reject) => {

			wx.request({

				url: 'https://api.weixin.qq.com/cgi-bin/token',
				data: {

					appid: '小程序AppId',
					secret: '小程序密钥',
					grant_type: 'client_credential',
				},
				success: (res) => {

					if (res.data.access_token) {

						resolve(res.data.access_token);
					} else {

						reject('Failed to obtain Access Token');
					}
				},
				fail: (err) => {

					reject(err);
				},
			});
		});
	};


	acc()
</script>

<style>
	.content {

		display: flex;
		flex-direction: column;
		align-items: center;
		justify-content: center;
	}

	.logo {

		height: 200rpx;
		width: 600rpx;
		margin-top: 100rpx;
		margin-left: auto;
		margin-right: auto;
		margin-bottom: 50rpx;
	}

	.text-area {

		display: flex;
		justify-content: center;
	}

	.title {

		font-size: 36rpx;
		color: #8f8f94;
	}
</style>
4.实现图片


![[Angular] 笔记 15:模板驱动表单 - 表单验证](https://img-blog.csdnimg.cn/direct/de7de0bc4d3e461eaabfc892d23da04a.png)