准备环境: 关闭防火墙和selinux
192.168.126.139 git-server #Gitlab服务器
192.168.126.140 git-client #gitlab客户端,用于拉取代码
我们是用ssh连接的,所以client创建秘钥,把公钥发给server
[root@client ~]# ssh-keygen    #生成秘钥
[root@client ~]# ssh-copy-id -i git@192.168.246.214   #将秘钥传输到git服务器中的git用户
然后两个机器都要下载安装git
1.配置yum源
[root@git-server ~]# cd /etc/yum.repos.d/
[root@git-server yum.repos.d]# vim gitlab-ce.repo
[gitlab-ce]
name=Gitlab CE Repository
baseurl=https://mirrors.tuna.tsinghua.edu.cn/gitlab-ce/yum/el$releasever
gpgcheck=0
enabled=1
安装相关依赖
[root@git-server yum.repos.d]# yum install -y postfix curl policycoreutils-python openssh-server
[root@git-server yum.repos.d]# systemctl enable sshd
[root@git-server yum.repos.d]# systemctl start sshd
安装postfix
[root@git-server yum.repos.d]# yum install postfix  -y   #安装邮箱
[root@git-server yum.repos.d]# systemctl start postfix
[root@git-server yum.repos.d]# yum install -y gitlab-ce  #将会安装gitlab最新版本
2.配置Gitlab登录链接
[root@git-server ~]# vim /etc/gitlab/gitlab.rb
1.# 添加对外的域名(gitlab.papamk.com请添加A记录指向本服务器的公网IP):将原来的修改为
external_url 'http://192.168.246.214'
2.设置地区
gitlab_rails['time_zone'] = 'Asia/Shanghai'


将数据路径的注释去掉,可以更改

开启ssh服务

然后保存退出
初始化Gitlab
[root@git-server ~]# gitlab-ctl reconfigure #重新加载,需要等很长时间echo $? 查看执行成功没有
然后启动Gitlab服务
[root@git-server ~]# gitlab-ctl start #启动在gitlab14版本以上,会有默认的root用户,密码存在/etc/gitlab/initial_root_password
cat etc/gitlab/initial_root_password
3.访问登录
访问ip 192.168.126.139

用户是root 密码是上面查看过的
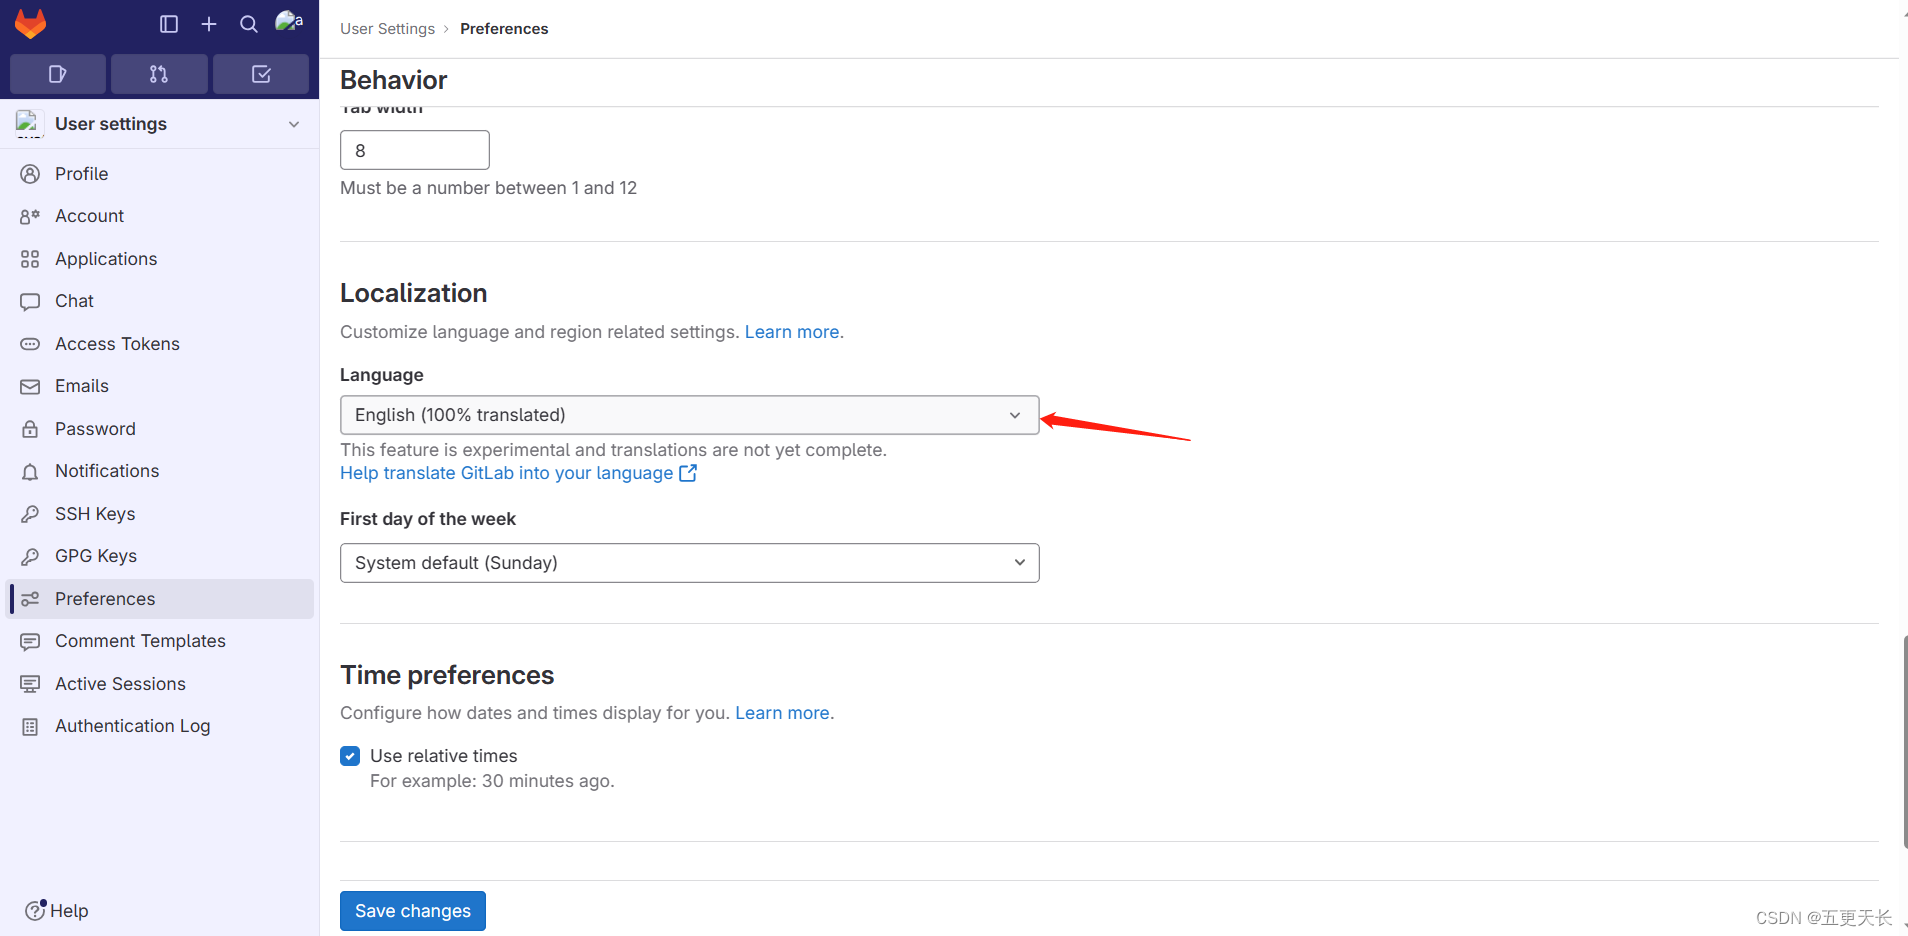
可以设置为中文
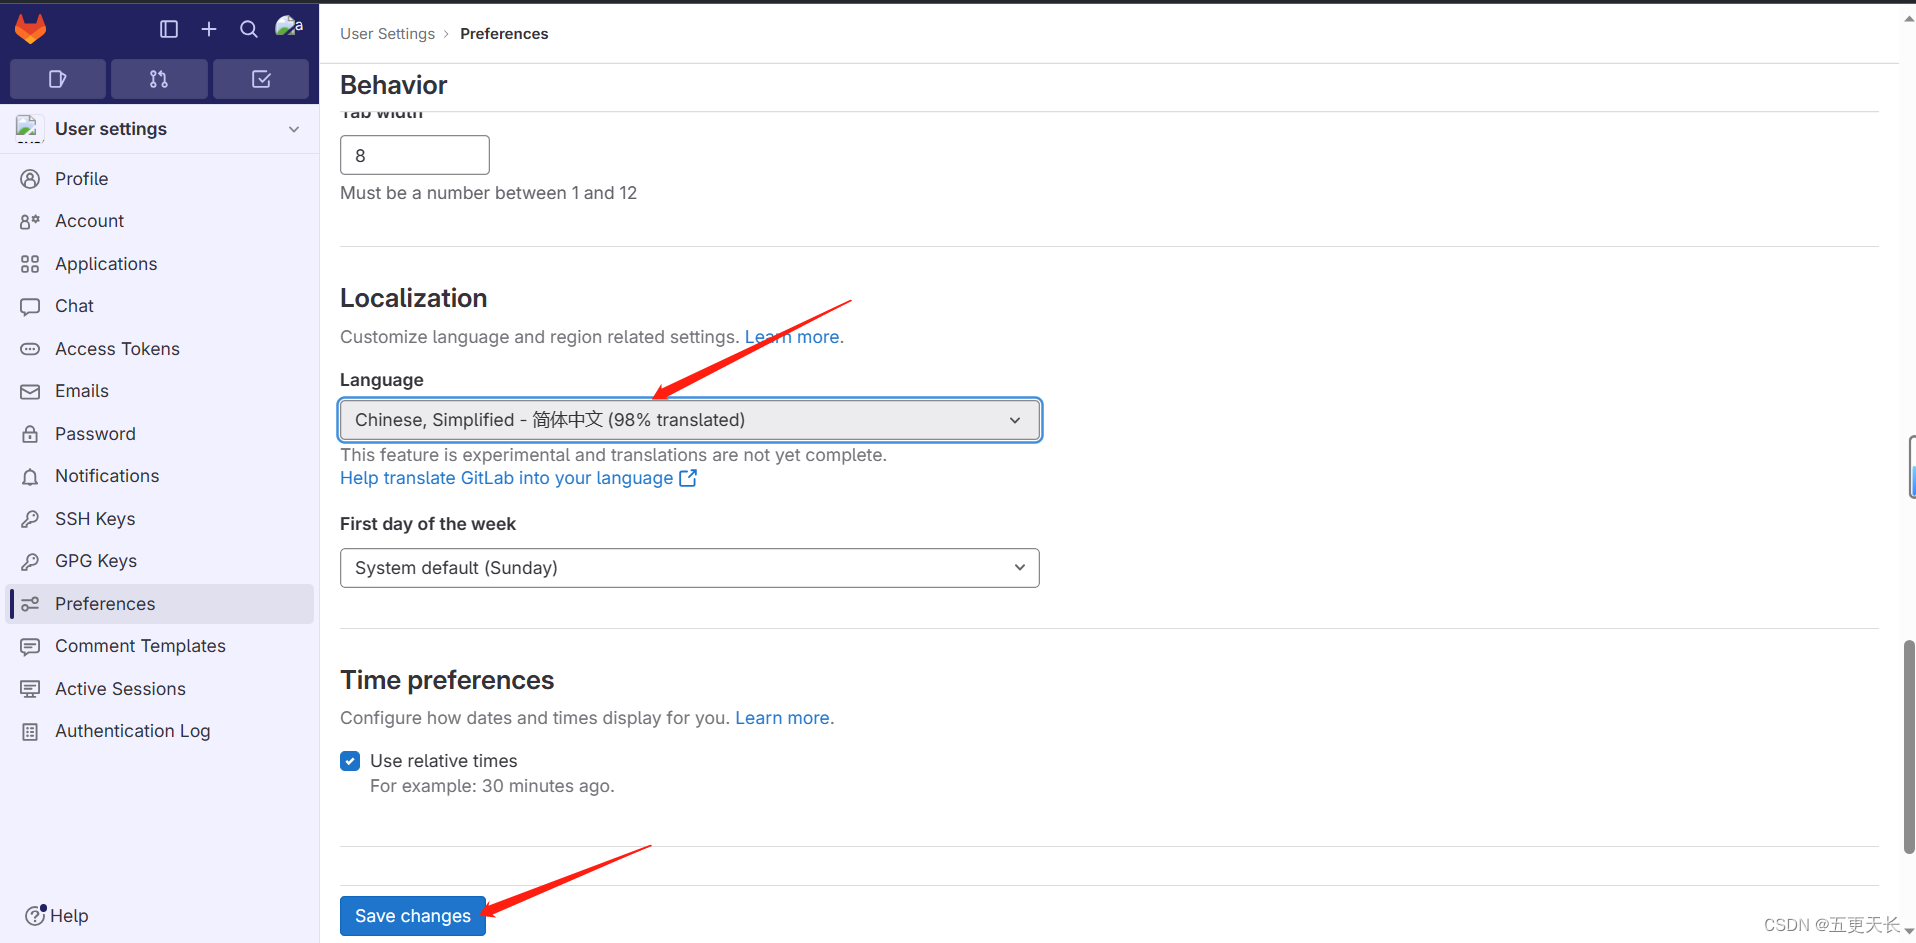
然后刷新一下就行
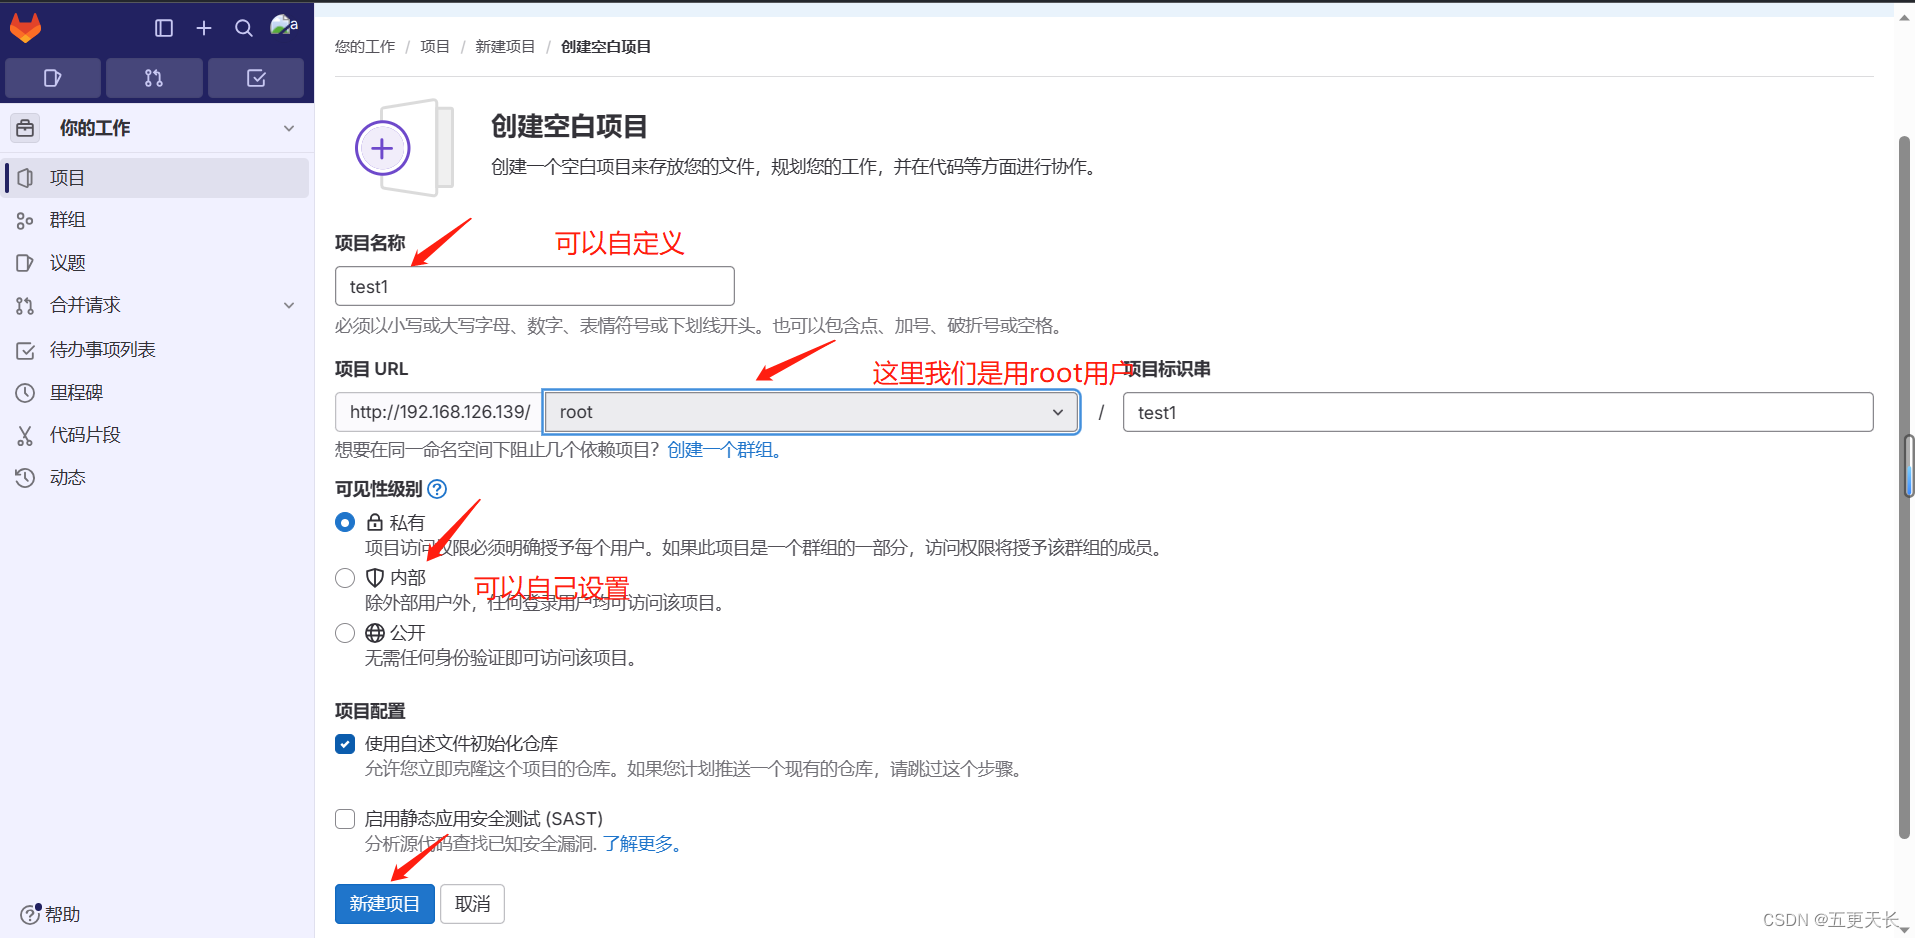
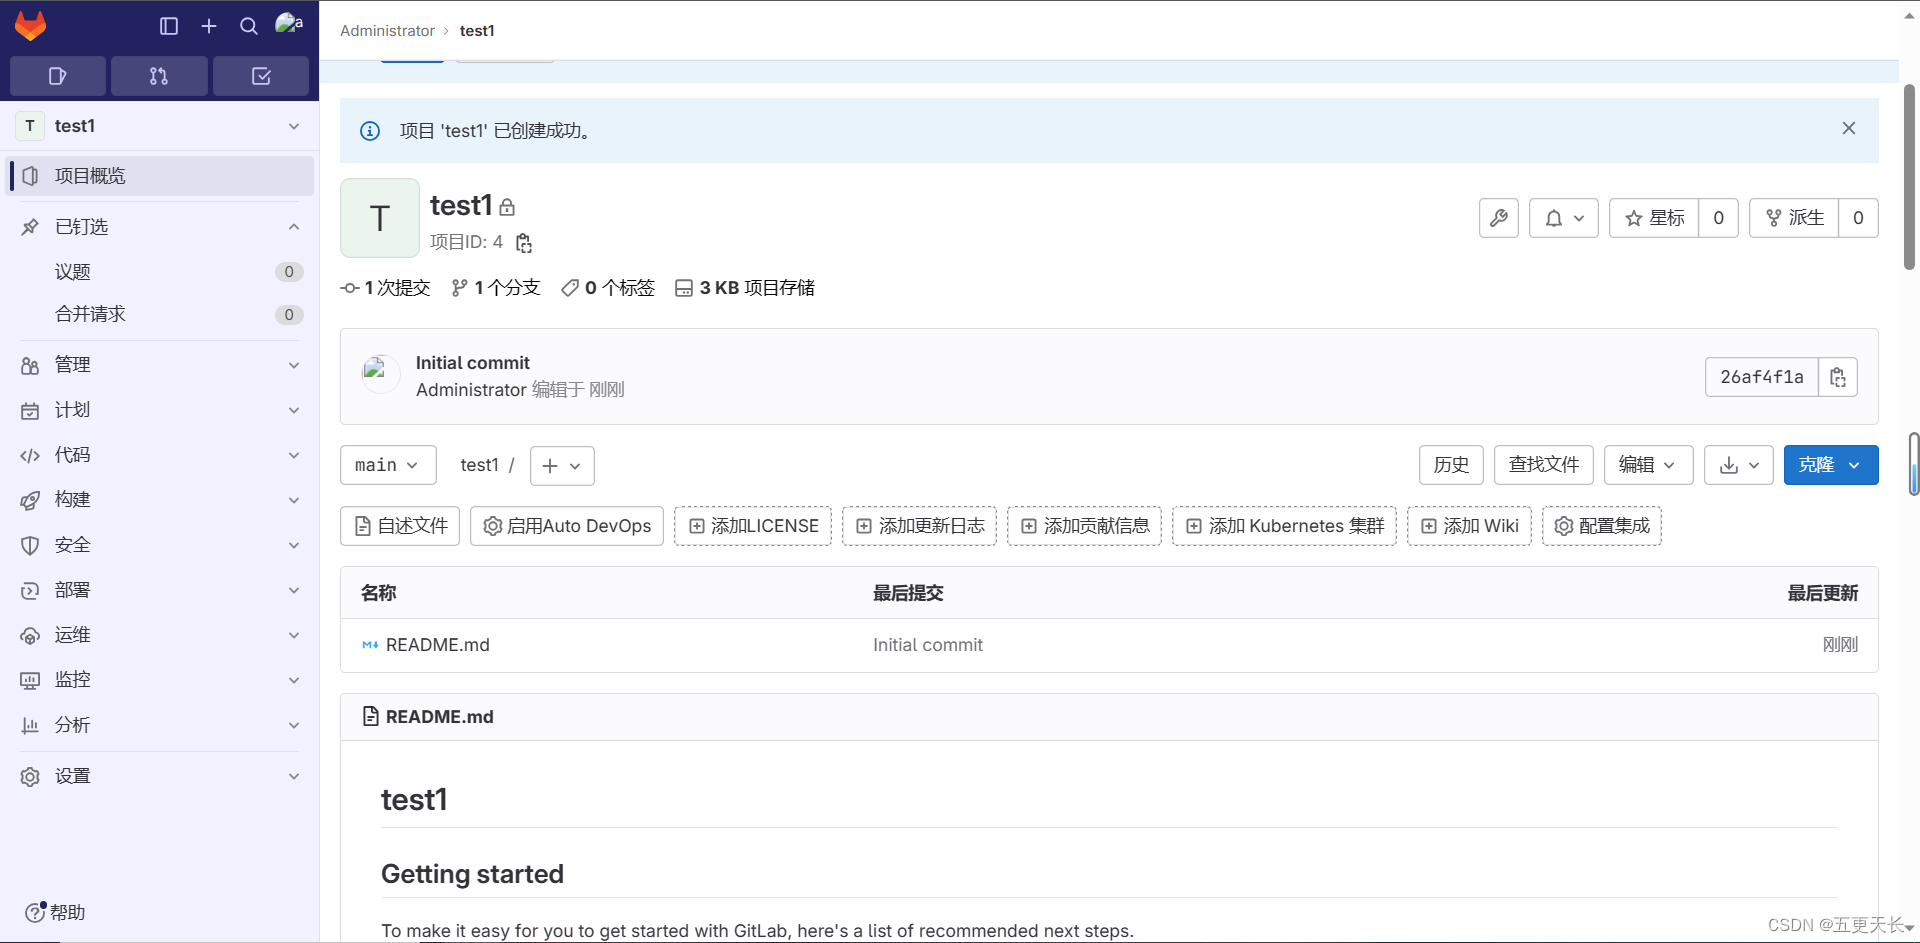
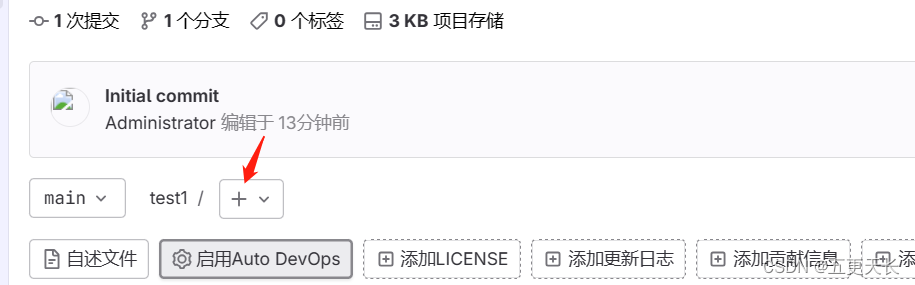
创建项目

我们要添加密钥,添加公钥即可

复制公钥拷贝到
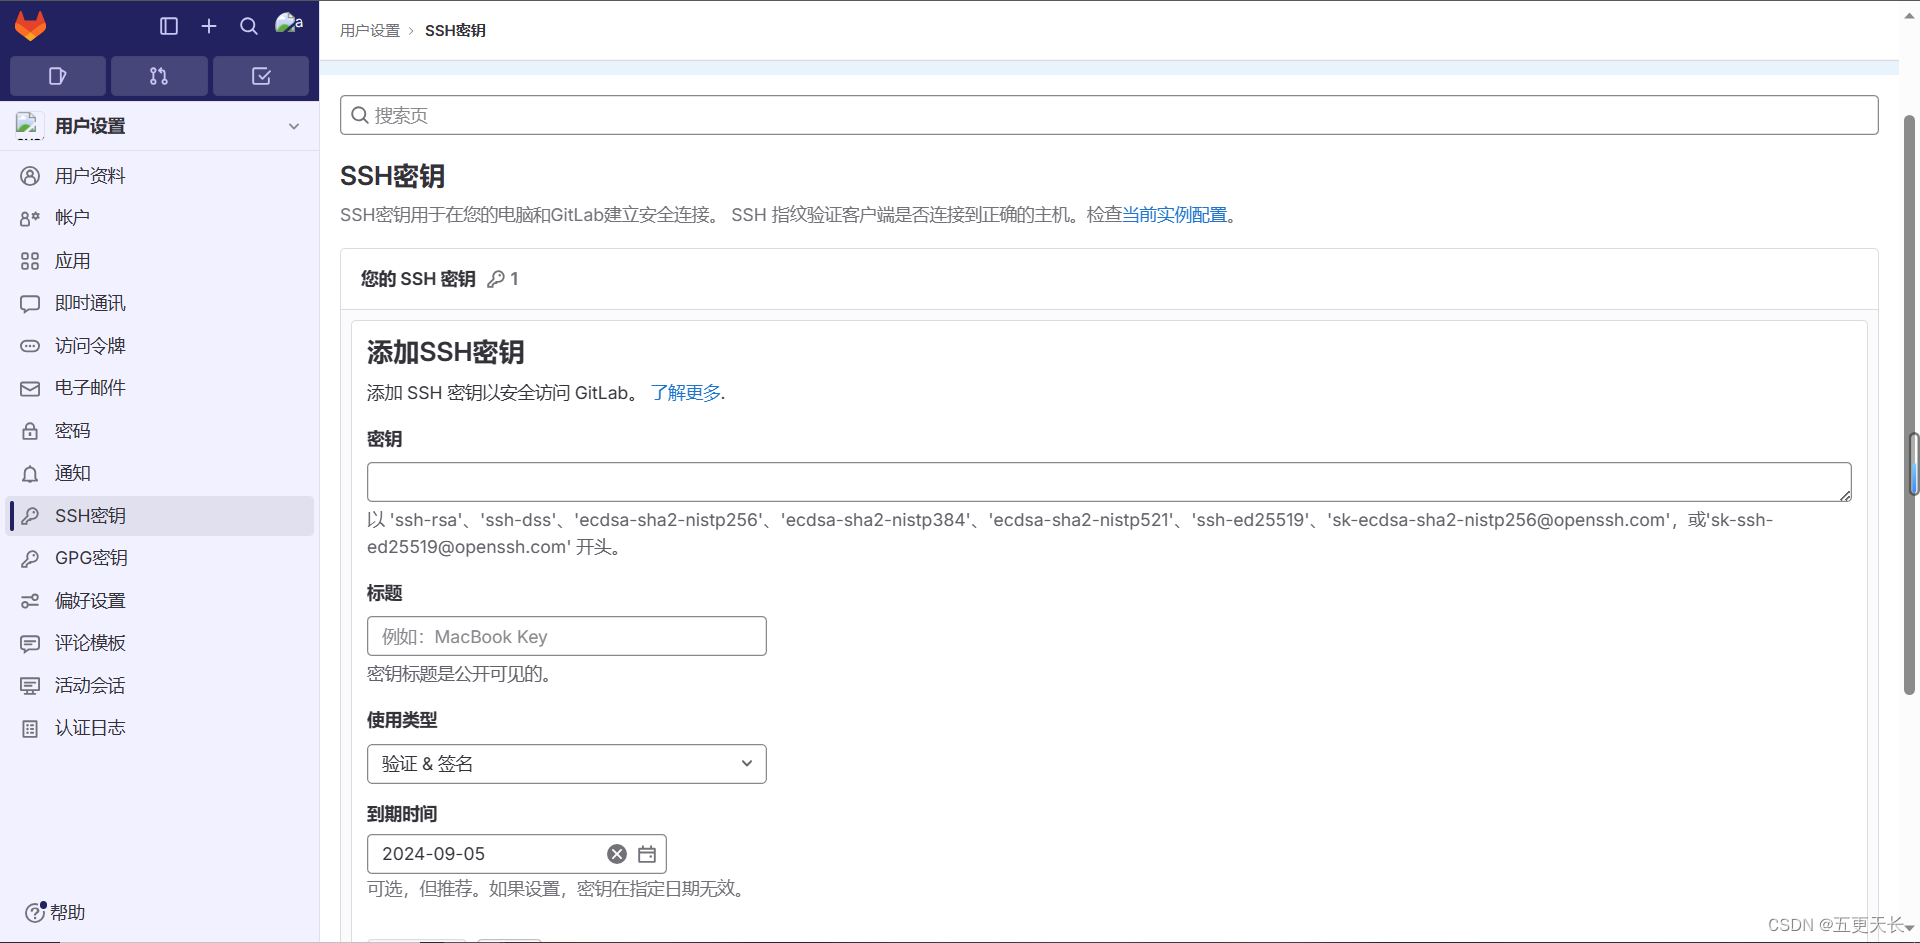
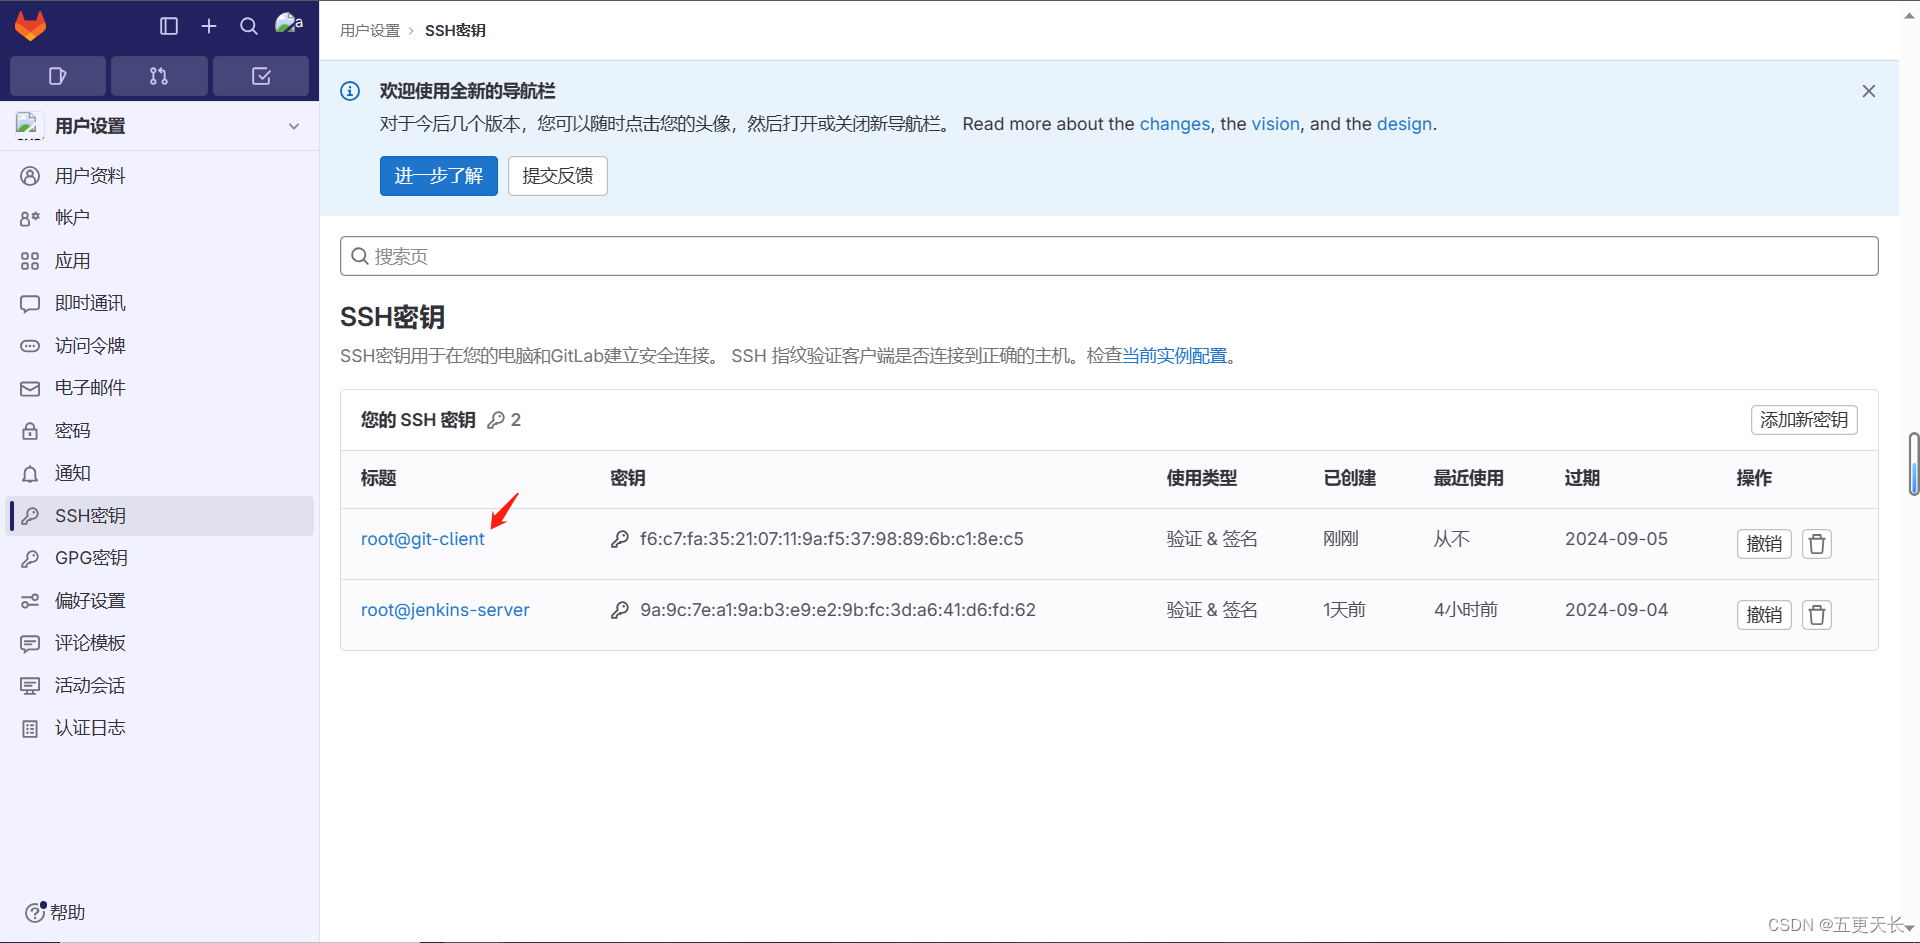
先创建一个文件

4.客户端拉取代码
用ssh方式拉取代码
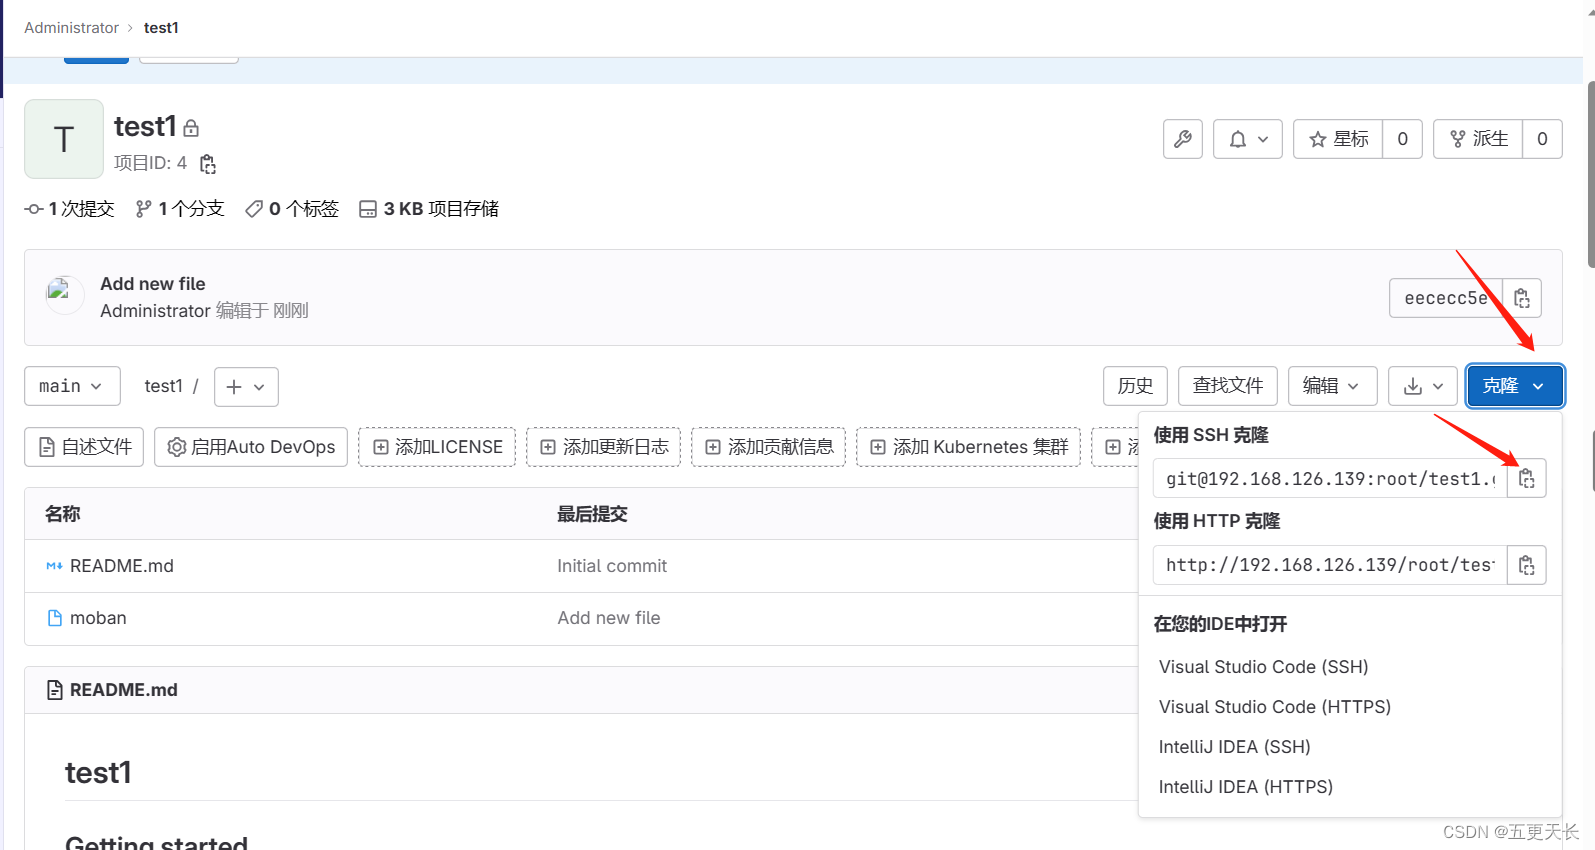
我们要先创建git用户,然后添加邮箱等,详情看:http://t.csdn.cn/kFE7H
[root@git-client ~]# git clone git@192.168.126.139:root/test1.git
正克隆到 'test1'...
git@192.168.126.139's password:
fatal: 'root/test1.git' does not appear to be a git repository
fatal: Could not read from remote repository.
Please make sure you have the correct access rights
and the repository exists.
[root@git-client ~]# git clone git@192.168.126.139:root/test1.git
正克隆到 'test1'...
remote: Enumerating objects: 6, done.
remote: Counting objects: 100% (6/6), done.
remote: Compressing objects: 100% (4/4), done.
remote: Total 6 (delta 0), reused 0 (delta 0), pack-reused 0
接收对象中: 100% (6/6), done.
[root@git-client ~]# ls
anaconda-ks.cfg play-book test1
percona-release-latest.noarch.rpm shell_set.sh
[root@git-client ~]# cd test1/
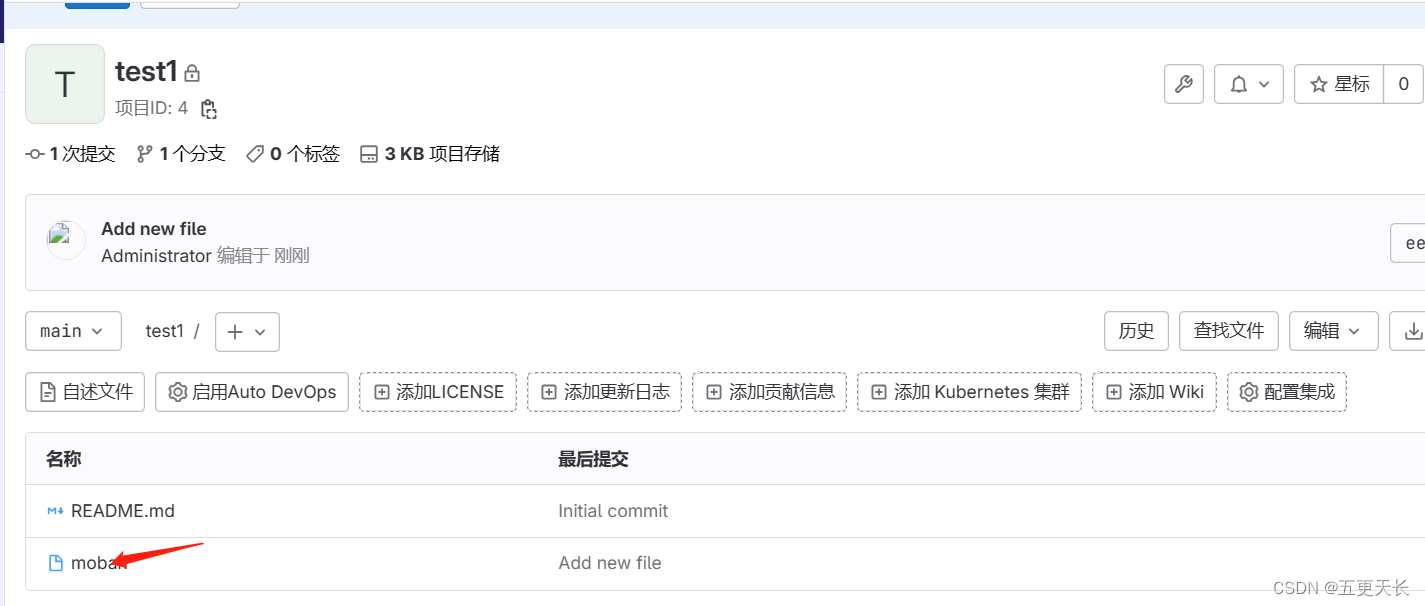
[root@git-client test1]# ls
moban README.md已经拉取成功了
用http方式拉取代码
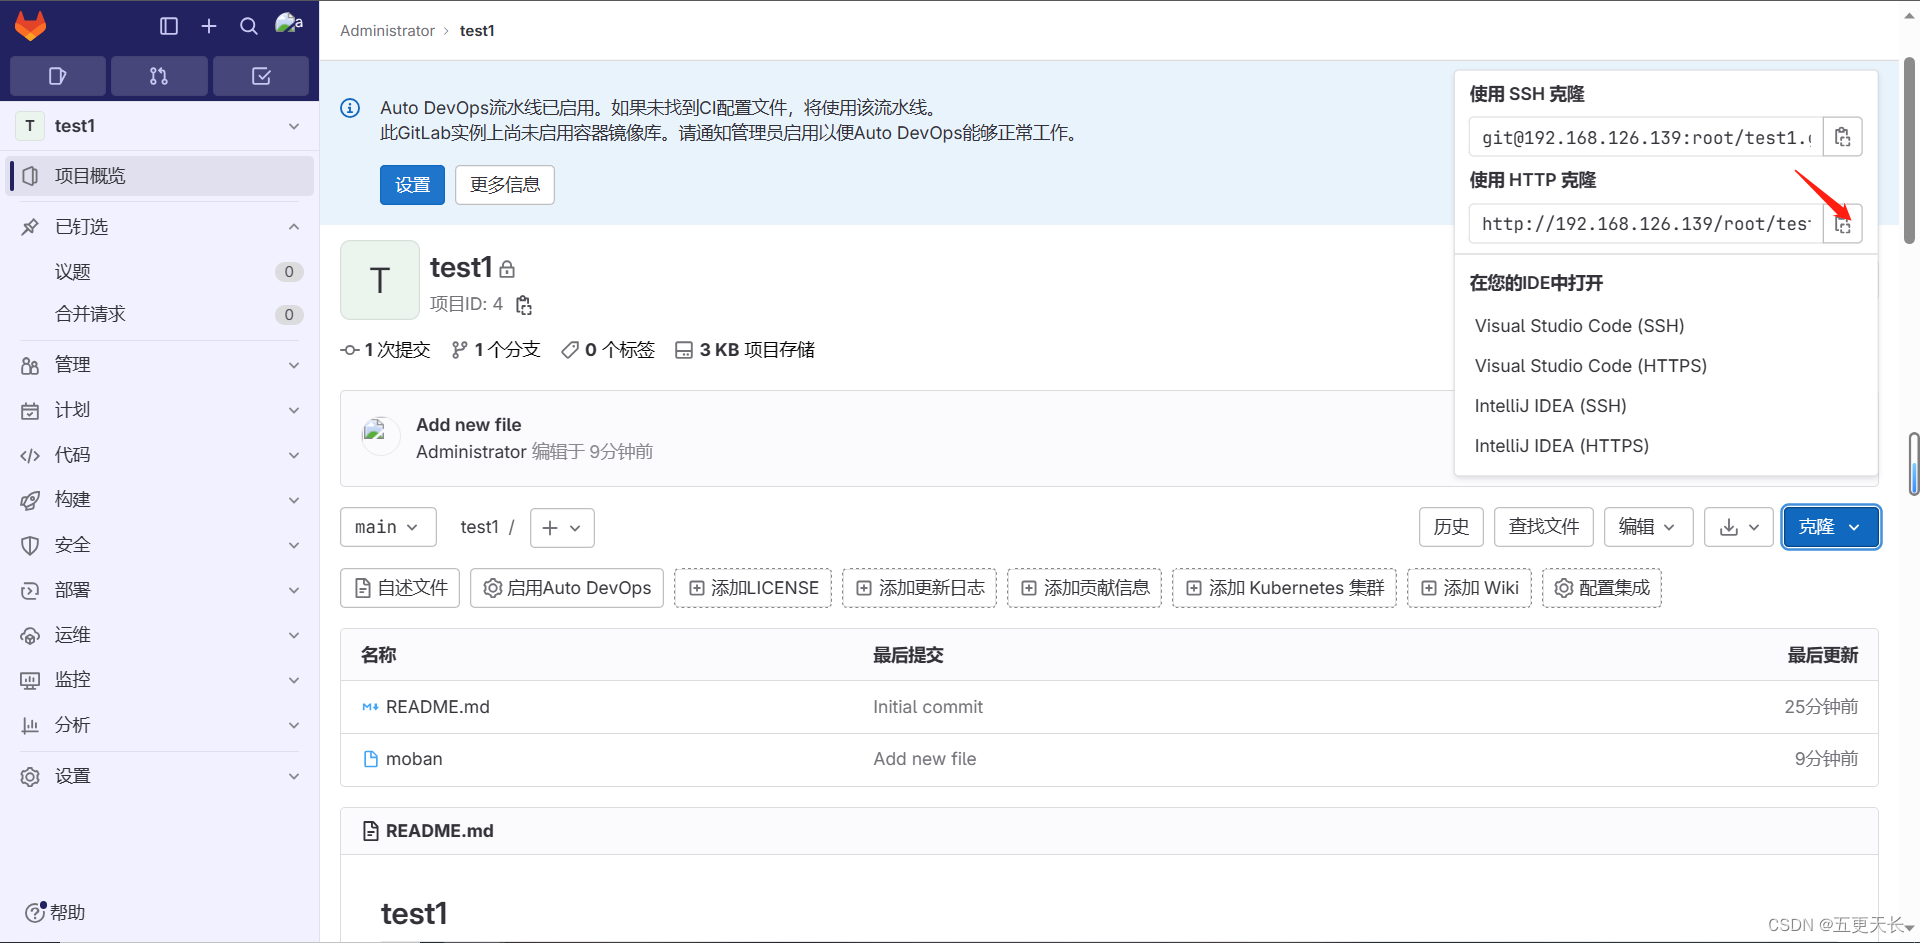
[root@git-client ~]# git clone http://192.168.126.139/root/test1.git
正克隆到 'test1'...
Username for 'http://192.168.126.139': root    #这里是root用户
Password for 'http://root@192.168.126.139':     #你自己设置的登录密码
remote: Enumerating objects: 6, done.
remote: Counting objects: 100% (6/6), done.
remote: Compressing objects: 100% (4/4), done.
remote: Total 6 (delta 0), reused 0 (delta 0), pack-reused 0
Unpacking objects: 100% (6/6), done.
[root@git-client ~]# ls
anaconda-ks.cfg                    play-book     test1
percona-release-latest.noarch.rpm  shell_set.sh
[root@git-client ~]# cd test1/
[root@git-client test1]# ls
moban  README.md
5.提交代码到gitlab仓库
[root@git-client ~]# cd test1/
[root@git-client test1]# ls
moban README.md
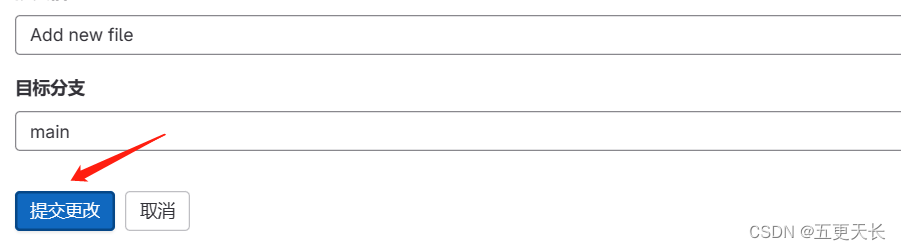
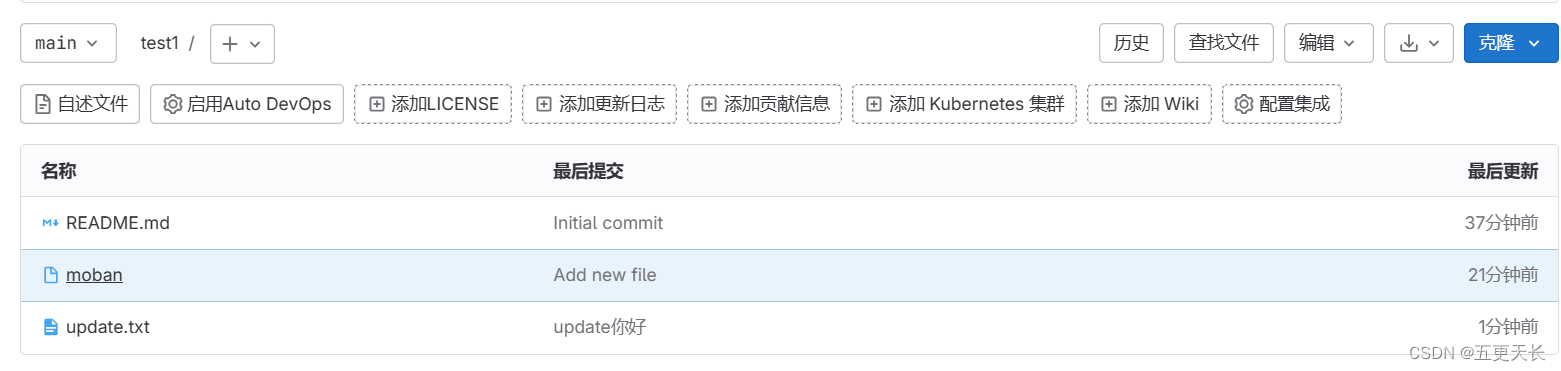
[root@git-client test1]# vim update.txt
[root@git-client test1]# cat update.txt
你好
[root@git-client test1]# git add *
[root@git-client test1]# git commit -m "update你好"
[main 3017a2f] update你好
1 file changed, 1 insertion(+)
create mode 100644 update.txt
[root@git-client test1]# git push origin main
Username for 'http://192.168.126.139': root
Password for 'http://root@192.168.126.139':
Counting objects: 4, done.
Delta compression using up to 4 threads.
Compressing objects: 100% (2/2), done.
Writing objects: 100% (3/3), 308 bytes | 0 bytes/s, done.
Total 3 (delta 0), reused 0 (delta 0)
To http://192.168.126.139/root/test1.git
eececc5..3017a2f main -> main
我们用哪种方式拉取的代码就是用哪种方式上传的
在gitlab上查看
6.tag版本推送
[root@git-client test1]# vim 1.txt
[root@git-client test1]# cat 1.txt
1111111
[root@git-client test1]# git add *
[root@git-client test1]# git commit -m "tag 1.txt"
[main 883df40] tag 1.txt
 1 file changed, 1 insertion(+)
 create mode 100644 1.txt
[root@git-client test1]# git tag -a "v1.0" -m "tag 1.txt"
[root@git-client test1]# git tag
v1.0
[root@git-client test1]# git push origin v1.0
Counting objects: 5, done.
Delta compression using up to 4 threads.
Compressing objects: 100% (3/3), done.
Writing objects: 100% (4/4), 438 bytes | 0 bytes/s, done.
Total 4 (delta 0), reused 0 (delta 0)
To git@192.168.126.139:root/test1.git
 * [new tag]         v1.0 -> v1.0


7.分支版本推送
[root@git-client test1]# git branch dev
[root@git-client test1]# git branch
  dev
* main
[root@git-client test1]# git checkout dev
切换到分支 'dev'
[root@git-client test1]# git branch
* dev
  main
[root@git-client test1]# vim dev.txt
[root@git-client test1]# cat dev.txt
dev ceshi
[root@git-client test1]# git add *
[root@git-client test1]# git commit -m "dev branch"
[dev e3e0ac2] dev branch
 1 file changed, 1 insertion(+)
 create mode 100644 dev.txt
[root@git-client test1]# git push origin dev
Counting objects: 4, done.
Delta compression using up to 4 threads.
Compressing objects: 100% (2/2), done.
Writing objects: 100% (3/3), 260 bytes | 0 bytes/s, done.
Total 3 (delta 1), reused 0 (delta 0)
remote:
remote: To create a merge request for dev, visit:
remote:   http://192.168.126.139/root/test1/-/merge_requests/new?merge_request%5Bsource_branch%5D=dev
remote:
To git@192.168.126.139:root/test1.git
 * [new branch]      dev -> dev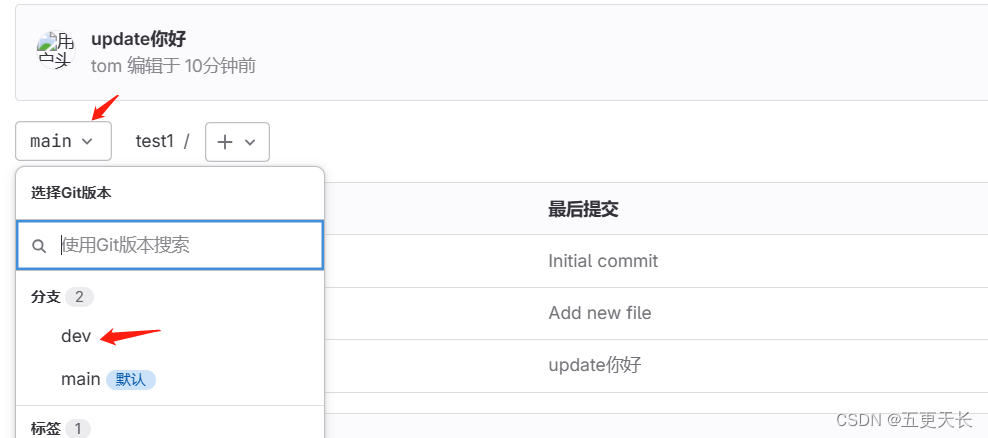

8.Gitlab备份与恢复
1.修改配置文件
打开/etc/gitlab/gitlab.rb配置文件,查看一个和备份相关的配置项:
[root@git-server backups]# vim /etc/gitlab/gitlab.rb
gitlab_rails['backup_path'] = "/var/opt/gitlab/backups"	#备份的路径
gitlab_rails['backup_archive_permissions'] = 0644		#备份文件的默认权限
gitlab_rails['backup_keep_time'] = 604800				#保留时长,秒为单位
重启服务
gitlab-ctl reconfigure
备份
[root@git-server ~]# cd /var/opt/gitlab/backups/
[root@git-server backups]# /opt/gitlab/bin/gitlab-rake gitlab:backup:create
[root@git-server backups]# ls
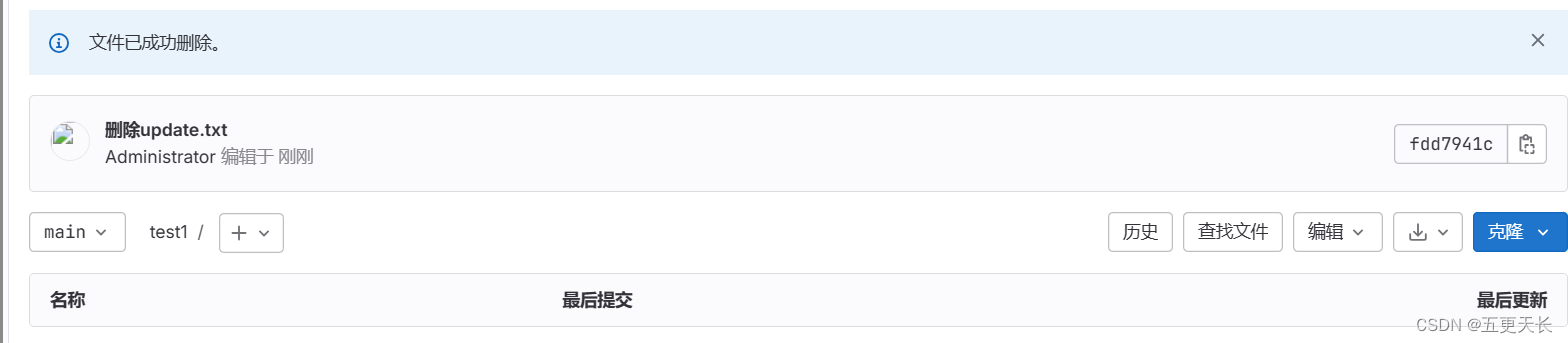
1694002200_2023_09_06_16.3.1_gitlab_backup.tar数据恢复,我们现在gitlab上把代码删掉,在进行恢复
[root@git-server backups]# /opt/gitlab/bin/gitlab-rake gitlab:backup:restore BACKUP=/var/opt/gitlab/backups/1694002200_2023_09_06_16.3.1_gitlab_backup.tar


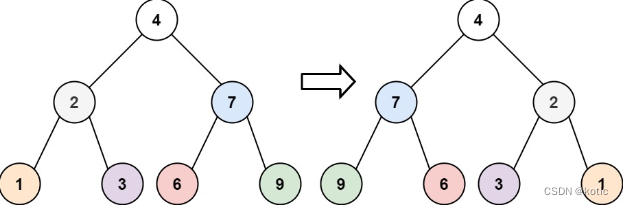


![读书笔记-《数据结构与算法》-摘要2[冒泡排序]](https://img-blog.csdnimg.cn/direct/8a9586947fb84380962af34dc60d0e3c.gif)