从纯H.264码流中提取图片的过程包括解码和JPEG编码两个主要步骤,以下是详细阐述
1.H264码流文件解码流程
关键流程
查找编解码器
初始化编解码器上下文—主要功能包括:
存储编解码器参数:包括视频宽度、高度、像素格式、音频采样率、通道数等参数。
存储编解码器状态:包括内部缓冲区、解码器状态、错误信息等。
配置编解码器:允许用户通过设置上下文的属性来配置编解码器的行为。
管理输入输出数据:负责管理编解码器的输入数据(如压缩视频流)和输出数据(如解码后的帧)。
打开编解码器
编解码
详细解码流程

详细步骤解析
初始化FFmpeg库:
av_register_all();
打开输入文件:
if ((ret = avformat_open_input(&format_ctx, input_filename, NULL, NULL)) < 0) {
    fprintf(stderr, "Could not open input file '%s'\n", input_filename);
    return ret;
}
找到输入文件的流信息:
if ((ret = avformat_find_stream_info(format_ctx, NULL)) < 0) {
    fprintf(stderr, "Failed to retrieve input stream information\n");
    return ret;
}
找到视频流索引:
for (int i = 0; i < format_ctx->nb_streams; i++) {
    if (format_ctx->streams[i]->codecpar->codec_type == AVMEDIA_TYPE_VIDEO) {
        video_stream_index = i;
        break;
    }
}

if (video_stream_index == -1) {
    fprintf(stderr, "Could not find video stream\n");
    return -1;
}
初始化解码器:
codec = avcodec_find_decoder(format_ctx->streams[video_stream_index]->codecpar->codec_id);
if (!codec) {
    fprintf(stderr, "Could not find decoder\n");
    return -1;
}

codec_ctx = avcodec_alloc_context3(codec);
if (!codec_ctx) {
    fprintf(stderr, "Could not allocate video codec context\n");
    return -1;
}

if ((ret = avcodec_parameters_to_context(codec_ctx, format_ctx->streams[video_stream_index]->codecpar)) < 0) {
    fprintf(stderr, "Could not copy codec parameters to context\n");
    return ret;
}

if ((ret = avcodec_open2(codec_ctx, codec, NULL)) < 0) {
    fprintf(stderr, "Could not open codec\n");
    return ret;
}
分配帧和初始化SWS上下文:
frame = av_frame_alloc();
if (!frame) {
    fprintf(stderr, "Could not allocate frame\n");
    return -1;
}

sws_ctx = sws_getContext(codec_ctx->width, codec_ctx->height, codec_ctx->pix_fmt,
                         codec_ctx->width, codec_ctx->height, AV_PIX_FMT_YUV420P,
                         SWS_BILINEAR, NULL, NULL, NULL);
读取帧并解码:
while (av_read_frame(format_ctx, &packet) >= 0) {
    if (packet.stream_index == video_stream_index) {
        ret = avcodec_send_packet(codec_ctx, &packet);
        if (ret < 0) {
            fprintf(stderr, "Error sending packet for decoding\n");
            break;
        }

        while (ret >= 0) {
            ret = avcodec_receive_frame(codec_ctx, frame);
            if (ret == AVERROR(EAGAIN) || ret == AVERROR_EOF)
                break;
            else if (ret < 0) {
                fprintf(stderr, "Error during decoding\n");
                return ret;
            }
            //处理帧,在这对Frame进行图片的编码
        }
    }
    av_packet_unref(&packet);
}
2.JPEG编码流程
与H264解码流程类似:均需要查找相关的编解码器,初始化上下文,打开编码器
详细编码流程

详细步骤解析
定义文件名:
- 使用
snprintf生成保存JPEG图片的文件名,格式为frame<number>.jpg。
char filename[1024]; snprintf(filename, sizeof(filename), "frame%d.jpg", frame_number);- 使用
寻找MJPEG编码器:
- 使用
avcodec_find_encoder函数查找MJPEG编码器。如果找不到,记录错误日志并返回。
AVCodec *jpeg_codec = avcodec_find_encoder(AV_CODEC_ID_MJPEG); if (!jpeg_codec) { av_log(NULL, AV_LOG_ERROR, "Could not find JPEG codec!\n"); return; }- 使用
分配编码器上下文:
- 使用
avcodec_alloc_context3函数为MJPEG编码器分配一个编码器上下文。如果分配失败,记录错误日志并返回。
AVCodecContext *codec_ctx = avcodec_alloc_context3(jpeg_codec); if (!codec_ctx) { av_log(NULL, AV_LOG_ERROR, "Could not alloc codec_ctx !\n"); return; }- 使用
设置编码器参数:
- 设置编码器的像素格式、视频高度、宽度和时间基准。
codec_ctx->pix_fmt = AV_PIX_FMT_YUVJ420P; codec_ctx->height = frame->height; codec_ctx->width = frame->width; codec_ctx->time_base = (AVRational){1, 25};打开编码器:
- 使用
avcodec_open2函数打开编码器。如果打开失败,记录错误日志并返回。
int ret = avcodec_open2(codec_ctx, jpeg_codec, NULL); if (ret < 0) { av_log(NULL, AV_LOG_ERROR, "Could not open jpeg codec !\n"); avcodec_free_context(&codec_ctx); return; }- 使用
初始化数据包:
- 初始化一个AVPacket来存储编码后的数据。
AVPacket packet; av_init_packet(&packet); packet.data = NULL; packet.size = 0;发送帧到编码器:
- 使用
avcodec_send_frame函数将帧发送到编码器。如果发送失败,记录错误日志并返回。
ret = avcodec_send_frame(codec_ctx, frame); if (ret < 0) { av_log(NULL, AV_LOG_ERROR, "Error sending frame to JPEG codec!\n"); avcodec_free_context(&codec_ctx); return; }- 使用
接收编码后的数据包:
- 使用
avcodec_receive_packet函数接收编码后的数据包。如果接收失败,记录错误日志并返回。
ret = avcodec_receive_packet(codec_ctx, &packet); if (ret < 0) { av_log(NULL, AV_LOG_ERROR, "Error receiving packet from JPEG codec !\n"); avcodec_free_context(&codec_ctx); return; }- 使用
写入文件:
- 打开一个文件,并将编码后的数据写入文件。如果文件打开失败,记录错误日志并返回。
FILE *pic = fopen(filename, "wb"); if (!pic) { av_log(NULL, AV_LOG_ERROR, "Could not open %s\n", filename); avcodec_free_context(&codec_ctx); av_packet_unref(&packet); return; } fwrite(packet.data, 1, packet.size, pic); fclose(pic);记录成功日志:
- 记录成功写入文件的日志信息。
av_log(NULL, AV_LOG_INFO, "write %s to jpeg success!\n", filename);释放资源:
- 释放数据包和编码器上下文。
av_packet_unref(&packet);
avcodec_free_context(&codec_ctx);
3.完整示例代码
#include <libavformat/avformat.h>
#include <libavcodec/avcodec.h>
#include <libswscale/swscale.h>
#include <libavutil/imgutils.h>
#include <libavutil/log.h>

/// @brief 编码为图片
/// @param frame
/// @param frame_number
void save_frame_as_jpeg(AVFrame *frame, int frame_number)
{
    int ret;
    char filename[1024];
    snprintf(filename, sizeof(filename), "frame%d.jpg", frame_number);
    // 寻找MJPEG编码器
    AVCodec *jpeg_codec = avcodec_find_encoder(AV_CODEC_ID_MJPEG);
    if (!jpeg_codec)
    {
        av_log(NULL, AV_LOG_ERROR, "Could not find JPEG codec!\n");
        return;
    }
    AVCodecContext *codec_ctx = avcodec_alloc_context3(jpeg_codec);
    if (!codec_ctx)
    {
        av_log(NULL, AV_LOG_ERROR, "Could not alloc codec_ctx !\n");
        return;
    }

    // 通过 AVCodecContext 设置jpeg codec 的参数
    codec_ctx->pix_fmt = AV_PIX_FMT_YUVJ420P;
    codec_ctx->height = frame->height;
    codec_ctx->width = frame->width;
    codec_ctx->time_base = (AVRational){1, 25};

    // 打开编码器
    ret = avcodec_open2(codec_ctx, jpeg_codec, NULL);
    if (ret < 0)
    {
        av_log(NULL, AV_LOG_ERROR, "Could not open jpeg codec !\n");
        return;
    }

    // 初始化数据包
    AVPacket packet;
    av_init_packet(&packet);
    packet.data = NULL;
    packet.size = 0;

    // 数据送入到编码器
    ret = avcodec_send_frame(codec_ctx, frame);
    if (ret < 0)
    {
        av_log(NULL, AV_LOG_ERROR, "Error sending frame to JPEG codec!\n");
        avcodec_free_context(&codec_ctx);
        return;
    }
    //接收编码后的数据包
    ret = avcodec_receive_packet(codec_ctx,&packet);
    if(ret<0){
        av_log(NULL, AV_LOG_ERROR, "Error receiving packet from JPEG codec !\n");
        avcodec_free_context(&codec_ctx);
        return;
    }

    //写入到图片文件
    FILE *pic =fopen(filename,"wb");
    if(!pic){
         av_log(NULL, AV_LOG_ERROR, "Could not open %s\n",filename);
         avcodec_free_context(&codec_ctx);
         av_packet_unref(&packet);
         return;
    }
    fwrite(packet.data, 1, packet.size, pic);
    fclose(pic);

    av_log(NULL, AV_LOG_INFO, "write %s to jpeg success!\n");
    av_packet_unref(&packet);
    avcodec_free_context(&codec_ctx);


}

int main(int argc, char *argv[])
{

    av_log_set_level(AV_LOG_DEBUG);
    av_log(NULL, AV_LOG_INFO, "FFMPEG DEBUG LOG BEGIN.....\n");
    if (argc < 2)
    {
        printf("Usage: %s <input file>\n", argv[0]);
        return -1;
    }
    const char *input_filename = argv[1]; // 输入H264码流文件名
    AVFormatContext *if_ctx = NULL;
    AVCodecContext *codec_ctx = NULL;
    AVCodec *codec = NULL;
    AVFrame *frame = NULL;
    AVPacket packet;
    struct SwsContext *sws_ctx = NULL; // 转换上下文
    int video_stream_index = -1;
    int ret = 0;
    int frame_count = 0;
    av_register_all(); // 初始化库
    ret = avformat_open_input(&if_ctx, input_filename, NULL, NULL);
    if (ret < 0)
    {
        av_log(NULL, AV_LOG_ERROR, "Open input file failed! %s\n", av_err2str(ret));
        return ret;
    }
    // 寻找流信息
    ret = avformat_find_stream_info(if_ctx, NULL);
    if (ret < 0)
    {
        av_log(NULL, AV_LOG_ERROR, "Find stream info  failed! %s\n", av_err2str(ret));
        return ret;
    }
    // 寻找视频流索引
    for (size_t i = 0; i < if_ctx->nb_streams; i++)
    {
        if (if_ctx->streams[i]->codecpar->codec_type == AVMEDIA_TYPE_VIDEO)
        {
            video_stream_index = i;
            break;
        }
    }
    if (video_stream_index == -1)
    {
        av_log(NULL, AV_LOG_ERROR, "Find video stream index  failed! \n");
        return ret;
    }

    // 寻找编码器
    codec = avcodec_find_decoder(if_ctx->streams[video_stream_index]->codecpar->codec_id);
    if (!codec)
    {
        av_log(NULL, AV_LOG_ERROR, "Find codec decoder  failed! \n");
        return ret;
    }
    // 分配解码器上下文
    codec_ctx = avcodec_alloc_context3(codec);
    if (!codec_ctx)
    {
        av_log(NULL, AV_LOG_ERROR, "Alloc codec ctx  failed!\n");
        return ret;
    }
    ret = avcodec_parameters_to_context(codec_ctx, if_ctx->streams[video_stream_index]->codecpar);
    if (ret < 0)
    {
        av_log(NULL, AV_LOG_ERROR, "Could not copy codec parameters to context %s\n", av_err2str(ret));
        return ret;
    }

    // 打开解码器
    ret = avcodec_open2(codec_ctx, codec, NULL);
    if (ret < 0)
    {
        av_log(NULL, AV_LOG_ERROR, "Could not open codec %s\n", av_err2str(ret));
        return ret;
    }

    frame = av_frame_alloc();
    if (!frame)
    {
        av_log(NULL, AV_LOG_ERROR, "Could not alloc frame\n");
        return -1;
    }

    sws_ctx = sws_getContext(codec_ctx->width, codec_ctx->height, codec_ctx->pix_fmt,
                             codec_ctx->width, codec_ctx->height, AV_PIX_FMT_YUV420P,
                             SWS_BILINEAR, NULL, NULL, NULL); // ;;用来转换帧的像素格式
    while (av_read_frame(if_ctx, &packet) >= 0)
    {
        if (packet.stream_index == video_stream_index)
        {
            ret = avcodec_send_packet(codec_ctx, &packet);
            if (ret < 0)
            {
                av_log(NULL, AV_LOG_ERROR, "Could not avcodec_send_packet %s\n", av_err2str(ret));
                break;
            }

            // 如果有B帧,可能有多个帧,因此使用while
            while (ret >= 0)
            {
                ret = avcodec_receive_frame(codec_ctx, frame);
                if (ret == AVERROR(EAGAIN) || ret == AVERROR_EOF)
                    break;
                else if (ret < 0)
                {
                    av_log(NULL, AV_LOG_ERROR, "Error during decoding %s\n", av_err2str(ret));
                    break;
                }

                // 处理解码后的帧,保存图片

                save_frame_as_jpeg(frame,frame_count);


                frame_count++;


                av_log(NULL, AV_LOG_DEBUG, "Decode success!\n");
            }
        }
        av_packet_unref(&packet);
    }
    av_frame_free(&frame);
    avcodec_free_context(&codec_ctx);
    avformat_close_input(&if_ctx);
    av_log(NULL, AV_LOG_INFO, "FFMPEG DEBUG LOG END.....\n");
    return 0;
}
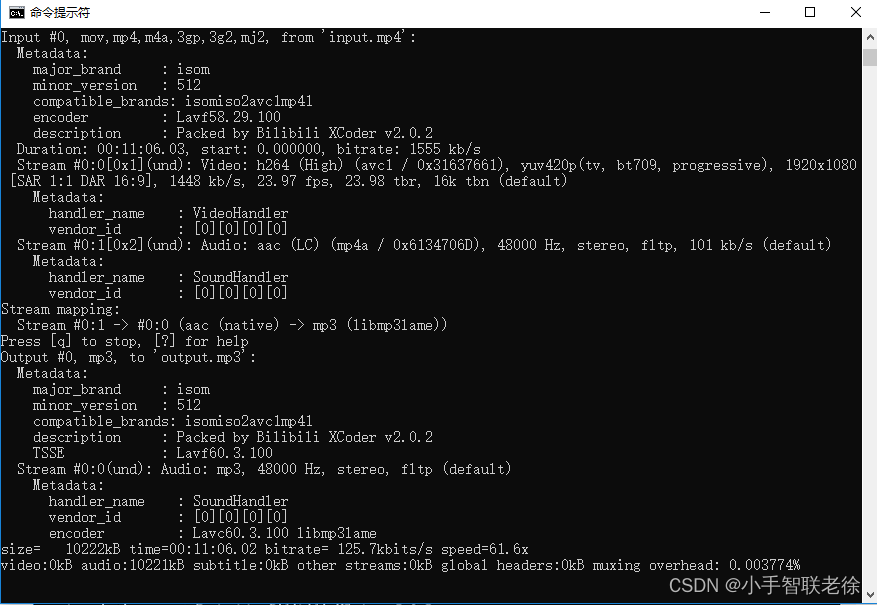
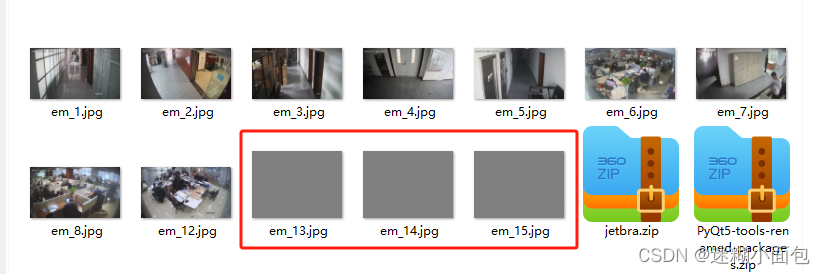
4.效果展示
当读取一个H264文件之后,将会逐帧对H264数据进行解码,并且对解码后的关键帧进行编码,成功之后将会提取出所有的图片


![[<span style='color:red;'>音</span><span style='color:red;'>视频</span>]<span style='color:red;'>H</span><span style='color:red;'>264</span><span style='color:red;'>码</span><span style='color:red;'>流</span>分析工具](https://img-blog.csdnimg.cn/img_convert/af6c45e5cd2eacd937a59d942f665c30.png)