源码安装,需要提前准备源码安装的rpm安装包。本文安装的是1.22.0版本。
源码安装和yum安装的区别:
- 源码安装的软件不能用 rpm -q 识别到,卸载只需要删除本地的安装目录即可;
- yum安装的软件可以用 rpm -q 识别到,卸载需要用yum -y remove 命令。
准备:关闭防火墙及安全机制,准备接收文件
systemctl stop firewalld		#关闭防火墙
setenforce 0					#关闭安全机制
rz -E							#接收文件
第一步:把源码包放入到系统之中。
使用ssh远程终端的可以直接从本机拖进虚拟机
第二步:安装编译过程中需要的依赖环境。
yum -y install gcc pcre-devel openssl-devel zlib-devel openssl openssl-devel
第三步:创建Nginx程序运行需要的用户和组
useradd -M -s /sbin/nologin nginx #不创建家目录,指定/sbin/nologin
第四步:编译安装
- 解压源码包
tar -xf nginx-1.22.0.tar.gz
cd nginx-1.22.0/
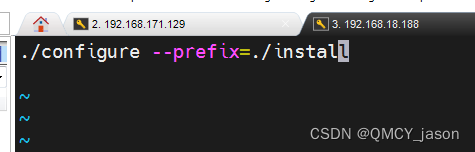
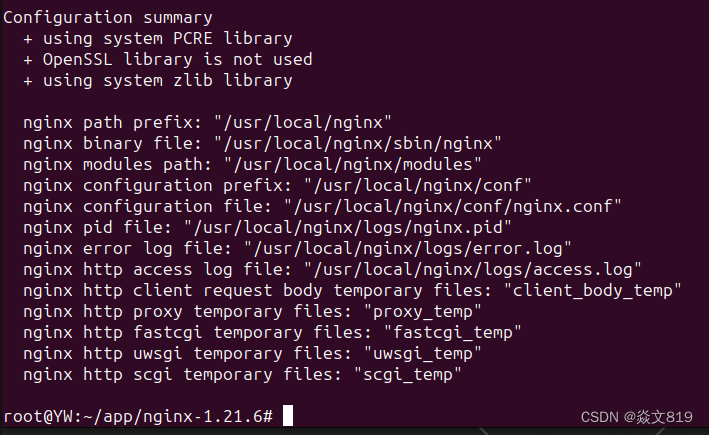
- 开始配置,配置程序的安装路径,安装基于程序需要的安装组件
./configure --prefix=/usr/local/nginx \	#配置安装路径
--user=nginx \							#配置用户
--group=nginx \							#配置组
--with-http_ssl_module \				#支持https的加密功能ssl/tsl
--with-http_v2_module \					#支持http2.0协议
--with-http_realip_module \				#支持Nginx获取客户端的真实IP地址
--with-http_stub_status_module \		#支持Nginx获取访问状态信息的功能
--with-http_gzip_static_module \		#支持页面压缩文本
--with-pcre \							#支持pcre库
--with-stream \							#支持4层代理的模块
--with-stream_ssl_module \				#支持对tcp连接的加密
--with-stream_realip_module				#持从代理协议中获取客户端的真实ip地址
#无注释的命令
./configure --prefix=/usr/local/nginx \
--user=nginx \
--group=nginx \
--with-http_ssl_module \
--with-http_v2_module \
--with-http_realip_module \
--with-http_stub_status_module \
--with-http_gzip_static_module \
--with-pcre \
--with-stream \
--with-stream_ssl_module \
--with-stream_realip_module
- 编译和安装
make -j 4 && make install	#第一个make:编译;第二个make install:安装
#make -j 4 启动4个CPU进行处理(加快安装速度)
第五步:后续配置,设置权限和系统管理配置
- 配置权限
cd /usr/local
chown -R nginx.nginx nginx		#对/usr/local目录下nginx目录更改所属
/usr/local/nginx目录下的四个目录的解释
conf:配置文件目录,主配置文件nginx.conf
html:工作目录:50x.html默认的访问操作打开的页面,index.html
logs:日志目录:访问日志、报错日志
sbin:二进制启动脚本nginx做一个软连接,让系统能够识别nginx的指令
ln -s /usr/local/nginx/sbin/nginx /usr/sbin (/usr/bin也行)
- 设置系统控制,系统能够对nginx这个软件的运行状态进行控制。
vim /lib/systemd/system/nginx.service
#对 nginx.service 内容进行修改如下
[Unit]
Description=nginx - high performance web server
Documentation=http://nginx.org/en/docs/
After=network-online.target remote-fs.target nss-lookup.target
#表示支持dns解析以及该软件依赖于网络。
Wants=network-online.target
#先启动网络服务,才能启动nginx
[Service]
Type=forking
PIDFile=/usr/local/nginx/run/nginx.pid
#注意文件位置,如果不对 启动不了
ExecStart=/usr/local/nginx/sbin/nginx -c /usr/local/nginx/conf/nginx.conf
#注意启动文件位置
ExecReload=/bin/kill -s HUP $MAINPID
ExecStop=/bin/kill -s TERM $MAINPID
[Install]
WantedBy=multi-user.target
#支持多用户模
- 修改nginx的配置文件,把pid文件的位置指向到设置的位置
cd  /usr/local/nginx
mkdir run
chown -R nginx.nginx /usr/local/nginx/run	#递归修改run目录所属
cd /usr/local/nginx/conf
vim nginx.conf				#编辑要修改的配置文件
修改 nginx.conf 文件的内容中 pid 指向的位置
pid /usr/local/nginx/run/nginx.pid;
修改完后
nginx -t					#检测nginx.conf当中的语法是否正确,提示OK则正常
systemctl daemon-reload		#重新加载systemd守护进程
systemctl restart nginx		#重启nginx服务
nginx -v					#查看nginx版本号
systemctl stop nginx		#停止nginx服务
在web页面访问虚拟机IP地址,可以看到“welcome to nginx”的默认页面。