Spring Boot 整合" 邮件任务" 实现 :

作者简介 :一只大皮卡丘,计算机专业学生,正在努力学习、努力敲代码中! 让我们一起继续努力学习!
该文章参考学习教材为:
《Spring Boot企业级开发教程》 黑马程序员 / 编著
文章以课本知识点 + 代码为主线,结合自己看书学习过程中的理解和感悟 ,最终成就了该文章文章用于本人学习使用 , 同时希望能帮助大家。
欢迎大家点赞👍 收藏⭐ 关注💖哦!!!(侵权可联系我,进行删除,如果雷同,纯属巧合)
- 在 实际开发中,邮件发送服务应该是网站的必备功能之一,例如 用户注册验证、忘记密码、给用户发送营销信息等。在早期开发过程中,开发人员通常会使用 JavaMail 相关 API 实现邮件发送功能,后来 Spring 推出 JavaMailSender 简化了邮件发送的过程和实现,Spring Boot 框架对 Spring提出 的 邮件发送服务 也进行了 整合支持。下面将对 Spring Boot 框架 整合 支持 的 邮件任务进行讲解。
一、发送 “纯文本邮件” :
- 邮件发送任务中,最简单的莫过于 纯文本邮件的发送。在 定制 纯文本邮件 时,只需要 指定收件人 ① 邮箱账号、
② 邮件标题 和 ③ 邮件内容即可。下面将先使用 Spring Boot 框架实现纯文本邮件的发送任务。
(1) 添加 “邮件服务” 依赖启动器
创建项目后,在项目的pom.xml文件中添加 "邮件服务" 依赖启动器 : spring-boot-starter-mail , 示例代码如下 :
<!--   "邮件服务"的 依赖启动器     -->
<dependency>
    <groupId>org.springframework.boot</groupId>
    <artifactId>spring-boot-starter-mail</artifactId>
</dependency>
当 添加上述依赖后,Spring Boot 自动配置的 邮件服务会生效,在 邮件发送任务 时,可以直接使用 Spring框架提供的 JavaMailSender 接口或者它的实现类 : JavaMailSenderlmpl 类。
(2) 添加 “邮件服务” 配置信息
在项目中添加邮件服务依赖启动器后,还需要在 application.properties : 配置文件中添加 邮件服务 "相关"的 配置,确保邮件服务正常发送。
application.properties :
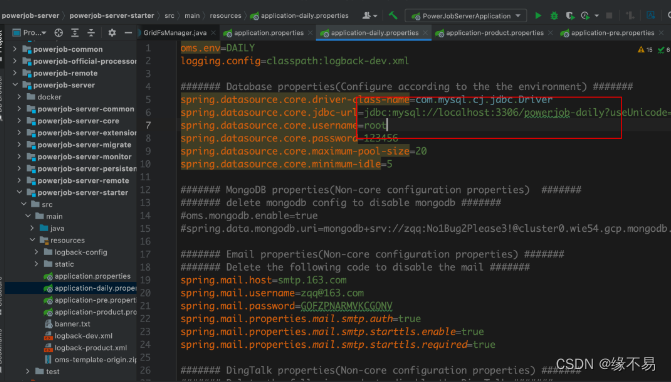
spring.application.name=chapter_27

#发件人邮箱服务器相关配置
spring.mail.host=smtp.qq.com
spring.mail.port=587

#配置 "个人qq账户"
spring.mail.username= 12345678@qq.com
#配置 "qq邮箱服务器授权码" --下面将介绍怎么获取这个"授权码"
spring.mail.password= abcdefdafdsfasdf

#邮件服务超时时间配置
spring.mail.properties.mail.smtp.connectiontimeout=5000
spring.mail.properties.mail.smtp.timeout=3000
spring.mail.properties.mail.smtp.writetimeout=5000
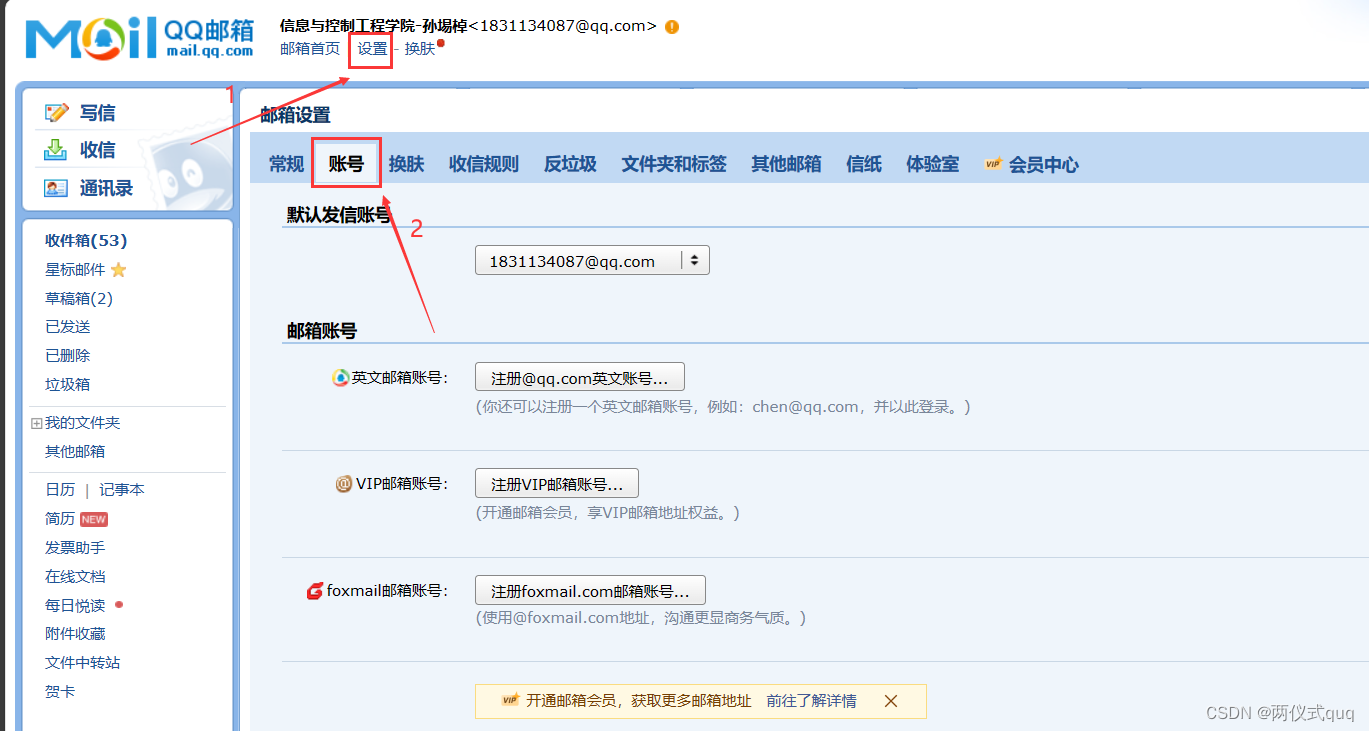
在上面的配置信息中主要添加了 发件人邮箱服务配置 和 邮件服务超时配置两部分内容。其中,发件人邮箱服务配置中,必须明确发件人邮箱对应的服务器主机(host)、端口号(port) 以及用于 发件人认证 的 用户名 ( username ) 和 qq邮箱服务器授权码 ( password )。获得 “qq邮箱服务器授权码” 步骤
本示例中配置 的发件人邮箱是 QQ 邮箱,如果要配置的是其他邮箱( 例如 163、搜狐等 ),必须更改对应的主机、端口号以及 用户名 和 授权码 ;邮件服务超时配置可以灵活更改 “超时时间”,如果 没有配置邮件服务超时的话,Spring Boot内部默认超时 是 无限制 的,这可能 会造成线程被无响应 的 邮件服务器长时间阻塞。
(3) 定制 “邮件发送服务”
在项目中创建service包,建立 邮件发送任务管理的业务处理类 : SendEmailService,并在该类中编写一个 发送纯文本邮件 的 业务方法。
import org.springframework.beans.factory.annotation.Autowired;
import org.springframework.beans.factory.annotation.Value;
import org.springframework.mail.MailException;
import org.springframework.mail.SimpleMailMessage;
import org.springframework.mail.javamail.JavaMailSenderImpl;
import org.springframework.stereotype.Service;

@Service //加入ioc容器
public class SendEmailService { //定制邮件发送业务的 "业务类"

    @Autowired
    private JavaMailSenderImpl MailSender; //定制"短信发送"的API类: JavaMailSenderImpl

    // @Value()注解 : 将application.properties : 配置文件中的 “属性值” 注入到下面的from属性中,给该属性充当"属性值"
    @Value("${spring.mail.username}")
    private String from; //发件人地址

    /**
     * @param to      收件人地址
     * @param subject 邮箱标题
     * @param text    邮箱内容
     */
    public void sendSimpleEmail(String to,String subject,String text) {
        //定制纯文本邮信息的 SimpleMailMessage对象
        SimpleMailMessage message = new SimpleMailMessage();
        message.setFrom(from); //设置"发件人"地址
        message.setTo(to); //设置"收件人"地址
        message.setSubject(subject); //设置"邮件标题"
        message.setText(text); //设置"邮件发送文本"

        try {
            //发送邮件
            MailSender.send(message);
        }catch (MailException e){
            System.out.println("纯文本邮件发送失败 "+e.getMessage());
        }
    }

}
(4) “纯文本” 邮件发送 测试效果
“纯文本” 邮件发送 测试效果 :
Chapter27ApplicationTests.java ( 测试类 ):
import org.junit.jupiter.api.Test;
import org.junit.runner.RunWith;
import org.springframework.beans.factory.annotation.Autowired;
import org.springframework.boot.test.context.SpringBootTest;
import org.springframework.test.context.junit4.SpringRunner;

@RunWith(SpringRunner.class)
@SpringBootTest
class Chapter27ApplicationTests {

    @Test
    void contextLoads() {
    }
      @Autowired
  private SendEmailService sendEmailService;

  @Test
  public void SendSimpleMailTest() {
      String to = "1262673963@qq.com";
      String subject = "【纯文本邮件】标题";
      String text = "Spring Boot纯文本邮件发送内容测试......";
      //发送纯文本邮件
      sendEmailService.sendSimpleEmail(to, subject, text);
      }
  }
运行SendSimpleMailTest( )方法,即可实现 "纯文本邮件"发送。
二、发送 带 “附件” 和 “图片” 的邮件 :
- 发送纯文本邮件任务的实现相对来说非常简单,但多数时候,我们可能需要在 发送邮件的内容中嵌入静态资源( 例如一张图片 ),而不是简单的文本内容,甚至是在 发送邮件的时候需要携带 “附件” 。针对上述这种需求,下面我们将 用 Spring Boot 框架 实现邮件 中 包含"静态资源" 和 附件 的复杂 邮件的发送任务。
(1) 添加 “邮件服务” 依赖启动器
创建项目后,在项目的pom.xml文件中添加 "邮件服务" 依赖启动器 : spring-boot-starter-mail , 示例代码如下 :
<!--   "邮件服务"的 依赖启动器     -->
<dependency>
    <groupId>org.springframework.boot</groupId>
    <artifactId>spring-boot-starter-mail</artifactId>
</dependency>
当 添加上述依赖后,Spring Boot 自动配置的 邮件服务会生效 ,在 邮件发送任务时,可以直接使用 Spring框架 提供的 JavaMailSender 接口 或者 它的实现类 : JavaMailSenderlmpl 类。
(2) 添加 “邮件服务” 配置信息
在项目中添加邮件服务依赖启动器后,还需要在 application.properties : 配置文件中添加 邮件服务 "相关"的 配置,确保邮件服务正常发送。
application.properties :
spring.application.name=chapter_27

#发件人邮箱服务器相关配置
spring.mail.host=smtp.qq.com
spring.mail.port=587

#配置 "个人qq账户"
spring.mail.username= 12345678@qq.com
#配置 "qq邮箱服务器授权码" --下面将介绍怎么获取这个"授权码"
spring.mail.password= abcdefdafdsfasdf

#邮件服务超时时间配置
spring.mail.properties.mail.smtp.connectiontimeout=5000
spring.mail.properties.mail.smtp.timeout=3000
spring.mail.properties.mail.smtp.writetimeout=5000
在上面的配置信息中主要添加了 发件人邮箱服务配置 和 邮件服务超时配置 两部分内容。其中,发件人邮箱服务配置中,必须明确 发件人邮箱对应的服务器主机(host)、端口号(port) 以及用 于发件人认证 的 用户名 ( username ) 和 qq邮箱服务器授权码 ( password )。获得 “qq邮箱服务器授权码” 步骤
本示例中配置 的发件人邮箱是 QQ 邮箱,如果要配置的是其他邮箱( 例如 163、搜狐等 ),必须更改对应的主机、端口号以及 用户名 和 授权码 ;邮件服务超时配置可以灵活更改 “超时时间”,如果 没有配置邮件服务超时的话,Spring Boot内部默认超时 是 无限制 的,这可能 会造成线程被无响应 的 邮件服务器长时间阻塞。
(3) 定制 “邮件发送服务”
在项目中创建service包,建立 邮件发送任务管理的业务处理类 : SendEmailService,并在该类中编写一个 发送带附件 和 图片 的 邮件的业务方法。
SendEmailService.java :
import jakarta.mail.MessagingException; import jakarta.mail.internet.MimeMessage; import org.springframework.beans.factory.annotation.Autowired; import org.springframework.beans.factory.annotation.Value; import org.springframework.core.io.FileSystemResource; import org.springframework.mail.MailException; import org.springframework.mail.SimpleMailMessage; import org.springframework.mail.javamail.JavaMailSenderImpl; import org.springframework.mail.javamail.MimeMailMessage; import org.springframework.mail.javamail.MimeMessageHelper; import org.springframework.stereotype.Service; import java.io.File; @Service //加入ioc容器 public class SendEmailService { //定制邮件发送业务的 "业务类" @Autowired private JavaMailSenderImpl MailSender; //定制"短信发送"的API类: JavaMailSenderImpl // @Value()注解 : 将application.properties : 配置文件中的 “属性值” 注入到下面的from属性中,给该属性充当"属性值" @Value("${spring.mail.username}") private String from; //发件人地址 /** * 发送复杂邮件 ( 包括静态资源和邮件 ) -发送带"附件"和"图片"的邮件 * @param to 收件人地址 * @param subject 邮件标题 * @param text 邮件内容 * @param racId 静态资源唯一标识 * @param rscPath 静态资源地址 * @param filepath 附件地址 */ public void sendComplexEmail(String to, String subject, String text, String racId, String rscPath,String filepath) { //定制复杂邮件信息类 : MimeMessage类 MimeMessage message = MailSender.createMimeMessage(); try { //使用 MimeMessageHelper 帮助类,并设置multipart多部件使用为true MimeMessageHelper helper = new MimeMessageHelper(message, true); helper.setFrom(from); //设置"发件人地址" helper.setTo(to); //设置"收件人"地址 helper.setSubject(subject); //设置"邮件"的标题 helper.setText(text,true); //设置"邮件"的文本内容 //设置"邮件静态资源" FileSystemResource res = new FileSystemResource(new File(rscPath)); helper.addInline(racId,res); /* substring() : 获取子串 lastIndexOf() : 返回与 "括号中字符串" 匹配的 "最后一个子串"的 "开始位置" File.separator : 表示为"文件路径分隔符" : 在 Windows 系统中,File.separator的值是反斜杠 \ (因为一个文件的路径在 Windows 中可能被表示为 "C:\\Users\\Username\\Documents\\file.txt" ) 在 Unix 或 Linux 系统中,File.separator的值是正斜杠 / (因为同一个文件的路径在这些系统上可能被表示为 "/home/username/Documents/file.txt" ) 经过已有的操作, filepath.substring()方法中的参数为: 附件名称String所在的"下标位置" , 所以该方法最后获得的是 :附件的名称 */ //设置"邮件附件" FileSystemResource file = new FileSystemResource(new File(filepath)); //获取附件的"名称" String fileName = filepath.substring(filepath.lastIndexOf(File.separator)); helper.addAttachment(fileName,file); //发送邮件 MailSender.send(message); System.out.println("复杂邮件发送成功!"); } catch (MessagingException e) { System.out.println("复杂邮件发送失败" + e.getMessage()); e.printStackTrace(); } } }上述代码中,sendComplexEmai( )方法需要接收的参数除了基本的发送信息外,还包括 静态资源唯一标识、静态资源路径和附件路径,具体信息在注释中都有说明。另外,在 定制复杂邮件信息时使用了 MimeMessageHelper类对邮件信息 “封装处理”,包括设置内嵌 “静态资源” 和 邮件附件。
其中设置邮件 内嵌静态资源 的 方法 为 addlnline ( String contentld,Resource resource )方法,设置 邮件附件 的方法为 :
addAttachment ( String attachmentFilename, InputStreamSource inputStreamSource )方法 。
(4) “复杂” 邮件发送 测试效果
“复杂” 邮件发送 测试效果 :
Chapter27ApplicationTests.java ( 测试类 ):
import org.junit.jupiter.api.Test;
import org.junit.runner.RunWith;
import org.springframework.beans.factory.annotation.Autowired;
import org.springframework.boot.test.context.SpringBootTest;
import org.springframework.test.context.junit4.SpringRunner;

@RunWith(SpringRunner.class)
@SpringBootTest
class Chapter27ApplicationTests {

    @Test
    void contextLoads() {
    }

    @Autowired
    private SendEmailService sendEmailService;

    @Test
    public void sendComplexEmailTest() {
        String to = "1262673963@qq.com";
        String subject = "【复杂邮件】标题";
        //定义邮件内容
        StringBuilder text = new StringBuilder(); //创建"字符串生成器"对象 , 可以不断往其中添加"字符串"
        text.append("<html><head></head>");
        text.append("<body><h1>祝大家元旦快乐!</h1>");

        // cid 为固定写法 , racId 是自定义的"资源唯一标识符"
        String rscId = "img001"; // 静态资源唯一标识
        text.append("<img src='cid:" +rscId+ "'/></body>");
        text.append("</html>");

        //指定静态资源文件 和 附近 的路径
        String rscpath = "C:\\Users\\86137\\Desktop\\1\\Java图片\\SpringBoot2.jpg"; //静态资源
        String filePath = "C:\\Users\\86137\\Desktop\\元旦放假注意事项.txt"; //附件

        //发送复杂邮件
        sendEmailService.sendComplexEmail(to,subject,text.toString(),rscId,rscpath,filePath);
    }
}
运行 sendComplexEmailTest( ) 方法,即可实现 "复杂邮件"发送。
上述代码中,根据前面定义的复杂邮件发送业务方法定制了 “各种参数”。其中,在定义邮件内容时使用了 Html 标签编辑邮件内容,并内嵌了一个 静态资源唯一标识 为 rscId 的图片,还为邮件指定了携带的 附件路径。在邮件发送之前,务必要保证指定路径下存放有对应的静态资源和附件文件。
需要说明的是,编写 内嵌 "静态资源文件"时,cid 为 嵌入式静态资源文件 “关键字” 的 固定写法,如果 改变将无法识别 ; rscId 则属于自定义的静态资源唯一标识,一个邮件内容中可能会包括 ”多个静态资源“,该属性用于区别唯一性。
三、 发送 “模板邮件” :
- 前面两个案例中,我们分别针对 纯文本邮件和 带附件及图片的 "复杂邮件"的使用进行了讲解和实现,这已经可以完成开发中通用邮件的发送任务了。
但是仔细思考可以发现,前面两种邮件的实现必须每次 “都手动” 定制邮件内容,这在一些特定邮件发送任务中是相当麻烦的,例如 用户注册验证邮件等,这些邮件的主体内容基本一样,主要是一些动态的用户名、验证码、激活码等有所不同,所以,针对类似这种需求,完全可以 定制一些通用邮件模板 进行 邮件发送。
(1) 添加 “邮件服务” + Thymeleaf 模板引擎" 依赖启动器
创建项目后,在项目的pom.xml文件中添加 "邮件服务" 依赖启动器 : spring-boot-starter-mail , 示例代码如下 :
<!--   "邮件服务"的 依赖启动器     -->
<dependency>
    <groupId>org.springframework.boot</groupId>
    <artifactId>spring-boot-starter-mail</artifactId>
</dependency>
当 添加上述依赖后,Spring Boot 自动配置的 邮件服务会生效,在 邮件发送任务 时,可以直接使用 Spring框架 提供的 JavaMailSender 接口 或者 它的 实现类 : JavaMailSenderlmpl 类。
既然提到了使用 定制 "邮件模板"的方式实现通用邮件的 发送,少不了需要 前端模板页面的支持,这里选择 Thymeleaf模板引擎定制模板邮件内容。在 pom.xml 文件中添加 “Thymeleaf 模板引擎” 依赖启动器 ,示例代码如下 :
<!--  Thymeleaf模板引擎的"依赖启动器"  -->
<dependency>
    <groupId>org.springframework.boot</groupId>
    <artifactId>spring-boot-starter-thymeleaf</artifactId>
</dependency>
(2) 添加 “邮件服务” 配置信息
在项目中添加邮件服务依赖启动器后,还需要在 application.properties : 配置文件中添加 邮件服务 "相关"的 配置,确保邮件服务正常发送。
application.properties :
spring.application.name=chapter_27

#发件人邮箱服务器相关配置
spring.mail.host=smtp.qq.com
spring.mail.port=587

#配置 "个人qq账户"
spring.mail.username= 12345678@qq.com
#配置 "qq邮箱服务器授权码" --下面将介绍怎么获取这个"授权码"
spring.mail.password= abcdefdafdsfasdf

#邮件服务超时时间配置
spring.mail.properties.mail.smtp.connectiontimeout=5000
spring.mail.properties.mail.smtp.timeout=3000
spring.mail.properties.mail.smtp.writetimeout=5000
在上面的配置信息中主要添加了 发件人邮箱服务配置 和 邮件服务超时配置 两部分内容。其中,发件人邮箱服务配置中,必须明确 发件人邮箱对应的 服务器主机(host)、端口号(port) 以及用 于发件人认证 的 用户名 ( username ) 和 qq邮箱服务器授权码 ( password )。获得 “qq邮箱服务器授权码” 步骤
本示例中配置 的发件人邮箱是 QQ 邮箱,如果要配置的是其他邮箱( 例如 163、搜狐等 ),必须更改对应的主机、端口号以及 用户名 和 授权码 ;邮件服务超时配置可以灵活更改 “超时时间”,如果 没有配置邮件服务超时的话,Spring Boot内部默认超时 是 无限制 的,这可能 会造成线程被无响应 的 邮件服务器长时间阻塞。
(3) 定制 “邮件模板” ( 模板页面 )
在项目的**模板页面文件夹** : templates 中添加**发送 "用户注册验证码"的模板页面**,代码如下所示 :
emailTemplate_vercode.html :
<!DOCTYPE html> <!-- 配置开启Thymeleaf页面开发 --> <html lang="en" xmlns:th="http://www/thymeleaf.org"> <head> <meta charset="UTF-8"> <title>用户验证码</title> </head> <body> <!-- th:text标签 表示动态显示/修改文本内容--> <!-- ${}表示从当前页面或从后端传递而来的参数中找"指定名称"的变量值--> <div> <span th:text="${username}">默认姓名</span> 先生/女生,您好: </div> <p style="text-indent: 2em"> 您的用户验证码为: <span th:text="${code}" style="color: cornflowerblue">默认验证码</span>,请妥善保管。 </p> </body> </html>上面代码中,模拟 向注册用户发送 一个 动态验证码。模板邮件页面包含两个变量 : username 和 code,它们将与 controller 后台交互时被动态填充。
(4) 定制 “模板邮件 发送服务”
在项目中创建service包,建立 邮件发送任务管理的业务处理类 : SendEmailService,并在该类中编写一个 发送HTML模板邮件的业务方法,示例代码如下所示 :
SendEmailService.java :
import jakarta.mail.MessagingException;
import jakarta.mail.internet.MimeMessage;
import org.springframework.beans.factory.annotation.Autowired;
import org.springframework.beans.factory.annotation.Value;
import org.springframework.core.io.FileSystemResource;
import org.springframework.mail.MailException;
import org.springframework.mail.SimpleMailMessage;
import org.springframework.mail.javamail.JavaMailSenderImpl;
import org.springframework.mail.javamail.MimeMailMessage;
import org.springframework.mail.javamail.MimeMessageHelper;
import org.springframework.stereotype.Service;

import java.io.File;

@Service //加入ioc容器
public class SendEmailService { //定制邮件发送业务的 "业务类"

    @Autowired
    private JavaMailSenderImpl MailSender; //定制"邮件发送"的API类: JavaMailSenderImpl

    // @Value()注解 : 将application.properties : 配置文件中的 “属性值” 注入到下面的from属性中,给该属性充当"属性值"
    @Value("${spring.mail.username}")
    private String from; //发件人地址

    public void sendTemplateEmail(String to,String subject,String content) {
        //定制"复杂邮件信息类" : MimeMessage类
        MimeMessage message = MailSender.createMimeMessage();
        try {
            //使用 MimeMessageHelper 帮助类,并设置multipart多部件使用为true
            MimeMessageHelper helper = new MimeMessageHelper(message, true);
            helper.setFrom(from); //设置"发件人地址"
            helper.setTo(to); //设置"收件人"地址
            helper.setSubject(subject); //设置"邮件"的标题
            helper.setText(content,true); //设置"邮件"的文本内容 --其中包含"模板邮件"的内容

            //发送邮件
            MailSender.send(message);
            System.out.println("模板邮件发送成功!");

        } catch (MessagingException e) {
            System.out.println("模板邮件发送失败" + e.getMessage());
            e.printStackTrace();
        }

    }
}
上述代码中 ,sendTemplateEmai( )方法主要用于处理 Html 内容 ( 包括 Thymeleaf 邮件模板 ) 的邮件发送,在定制 Html模板邮件信息时,使用了 MimeMessageHelper 类对 邮件信息 进行 封装处理。
(5) “模板” 邮件发送 测试效果
“模板” 邮件发送 测试效果 :
Chapter27ApplicationTests.java ( 测试类 ):
import org.junit.jupiter.api.Test; import org.junit.runner.RunWith; import org.springframework.beans.factory.annotation.Autowired; import org.springframework.boot.test.context.SpringBootTest; import org.springframework.test.context.junit4.SpringRunner; import org.thymeleaf.TemplateEngine; import org.thymeleaf.context.Context; @RunWith(SpringRunner.class) @SpringBootTest class Chapter27ApplicationTests { @Autowired private SendEmailService sendEmailService; //业务类 @Autowired private TemplateEngine templateEngine; //Thymeleaf提供的 TemplateEngine类 : 模板引擎解析器 , 用于解析"模板页面" @Test public void sendTemplateEmaiTest() { String to = "1262673963@qq.com"; String subject = "【模板邮件】标题"; //使用模板邮件 定制"邮件正文内容" Context context = new Context(); //设置用于"模板页面"中的"动态数据" context.setVariable("username","小明"); context.setVariable("code","456123"); //使用 "模板引擎解析器" 解析 "模板页面" , 让其变成 "发送邮件" 所需的"参数" String emailContent = templateEngine.process("emailTemplate_vercode", context);//将"动态数据" 用在"模板页面"上 //发送模板 (发送"模板邮件") sendEmailService.sendTemplateEmail(to,subject,emailContent); } }上述代码中,先使用 @Autowired 注解引入了 Thymeleaf 提供的模板引擎解析器 : TemplateEngine ( 用于 解析 “模板页面”),然后定制为 : 模板邮件发送 所需的参数。其中,在定制模板邮件内容时,先使用 Context 对象对模板邮件中涉及的变量 username 和 code 进行 动态赋值 ; 然后使用 模板引擎解析器的 process( String template,lContext context )方法解析模板 ( 让其变成 “发送邮件” 所需的"参数" ) , 该方法的第1个参数指的是要解析的 Thymeleaf 模板页面,第2个参数用于设置页面中的动态数据。
在前面几个案例邮件发送方法业务处理中,都只是演示 了 一个收件人的情况,如果要 演示一次 指定 多个收件人 时,将 收件人地址 转为 字符串类型 的 数组 即可,例如 : Stringll tos = new String [ ] {“itshitou@sohu.com”,“2127269781@q9.com”} 。