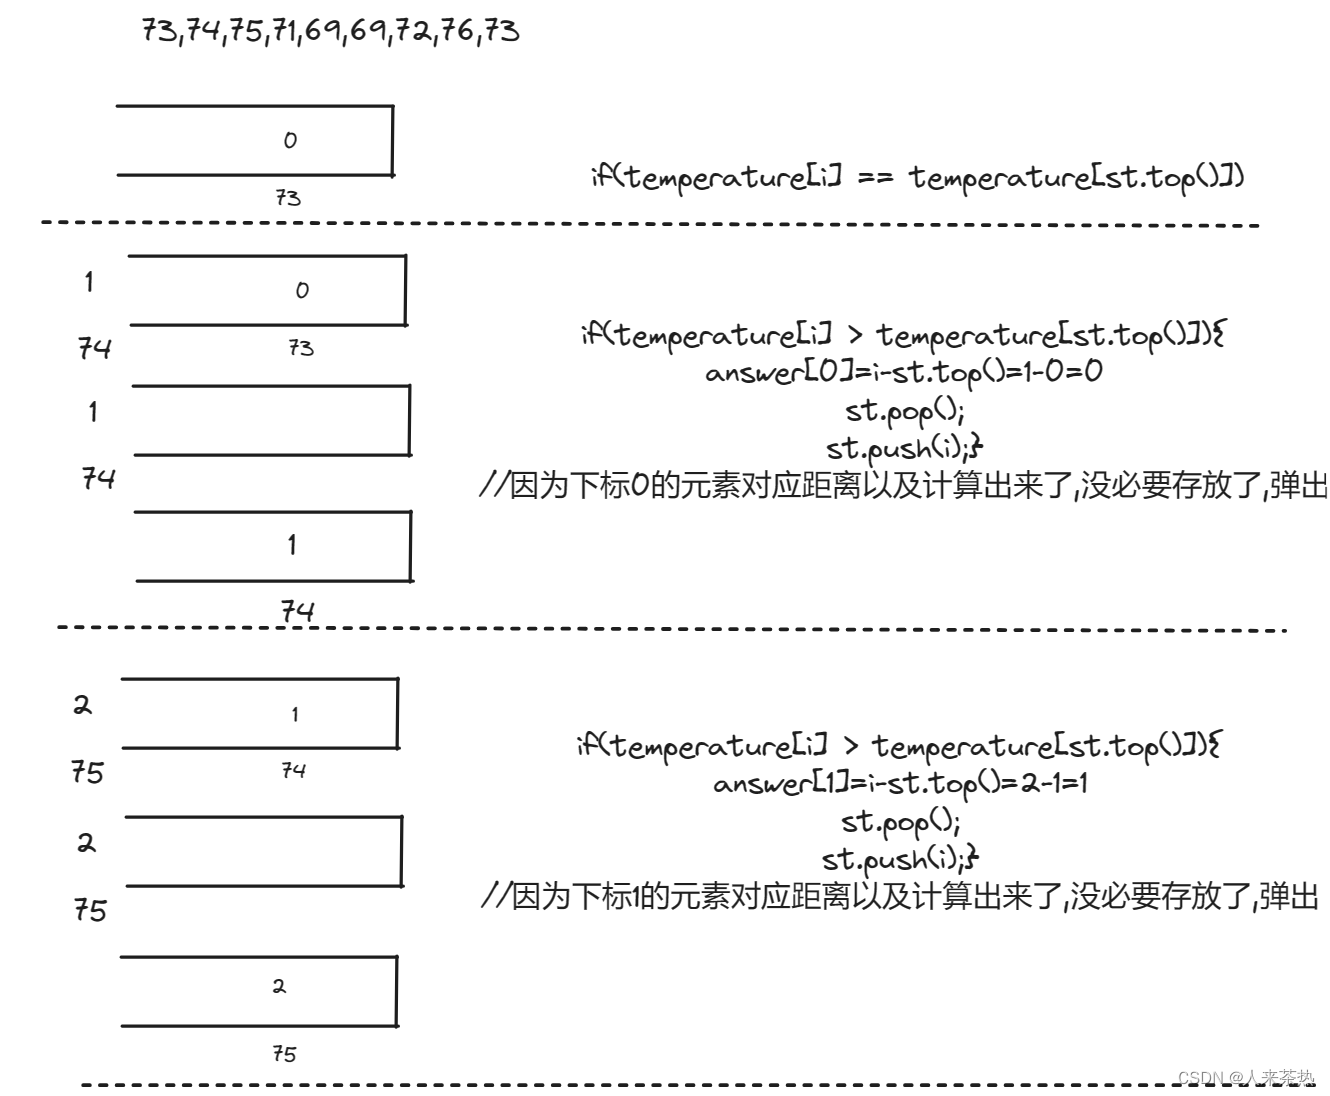
一、预处理流程
在把一张图像送入模型进行推理时,需要先进行预处理,预处理流程包括:
(1)读取图像
(2)尺寸调整,letter_box(不失真)
(3)通道调整:HWC->CHW
(4)格式调整: array -> tensor
(5)维度调整:CHW -> BCHW
(6)设备调整:to device
二、代码
import torch
import cv2
import numpy as np
from torchvision import transforms
# -------------------------------------------------------------------#
# letterbox:图片缩放,居中对齐,左右或者上下填充,通过仿射变换实现
# -------------------------------------------------------------------#
def letter_box(image, input_w=640, input_h=640):
scale = min(input_h / image.shape[0], input_w / image.shape[1])
ox = (-scale * image.shape[1] + input_w + scale - 1) * 0.5
oy = (-scale * image.shape[0] + input_h + scale - 1) * 0.5
M = np.array([
[scale, 0, ox],
[0, scale, oy]
], dtype=np.float32)
IM = cv2.invertAffineTransform(M)
image_prep = cv2.warpAffine(image, M, (input_w, input_h), flags=cv2.INTER_LINEAR, borderMode=cv2.BORDER_CONSTANT, borderValue=(114, 114, 114))
return image_prep, M, IM
#------------------#
# preprocess
#------------------#
def preprocess(image, input_size, device):
# ------------------#
# HWC->CHW
# array -> tensor
# CHW -> BCHW
# to device
# ------------------#
return torch.unsqueeze(transforms.ToTensor()(image), 0).to(device)
if __name__ == "__main__":
device = 'cpu'
model_input_size = [320, 320]
# -----------------#
# read image
# -----------------#
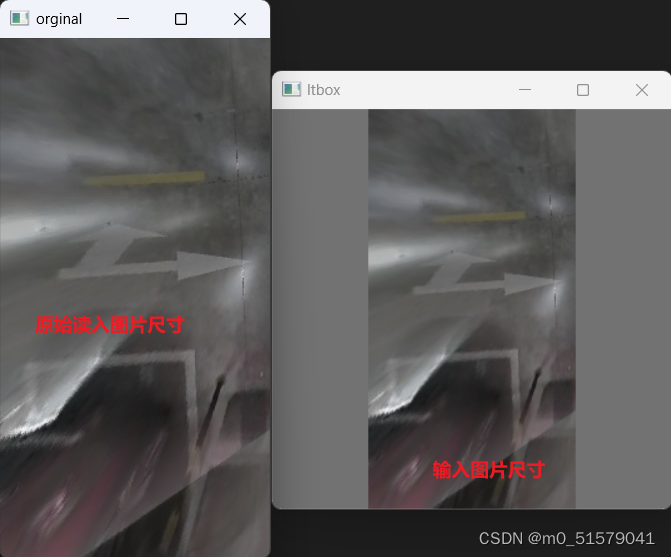
image=cv2.imread('demo.png')
cv2.imshow('orginal', image)
# -----------------#
# letter_box
# -----------------#
M = None
IM = None
ltbox = (image.shape[0] != model_input_size[0] or image.shape[1] != model_input_size[1])
if ltbox:
image, M, IM=letter_box(image, 320, 320)
cv2.imshow('ltbox', image)
cv2.waitKey(0)
# -----------------#
# preprocess
# -----------------#
image_in = preprocess(image, model_input_size, device)
二、代码逐行debug调试
运行letter_box后
运行preprocess后
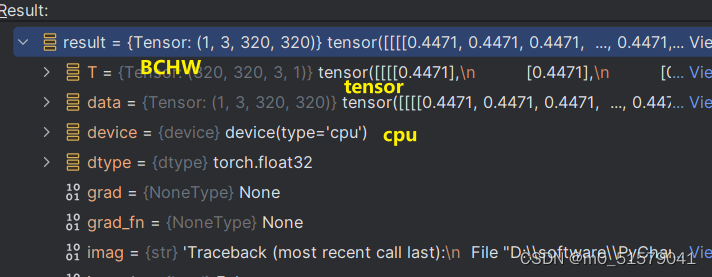
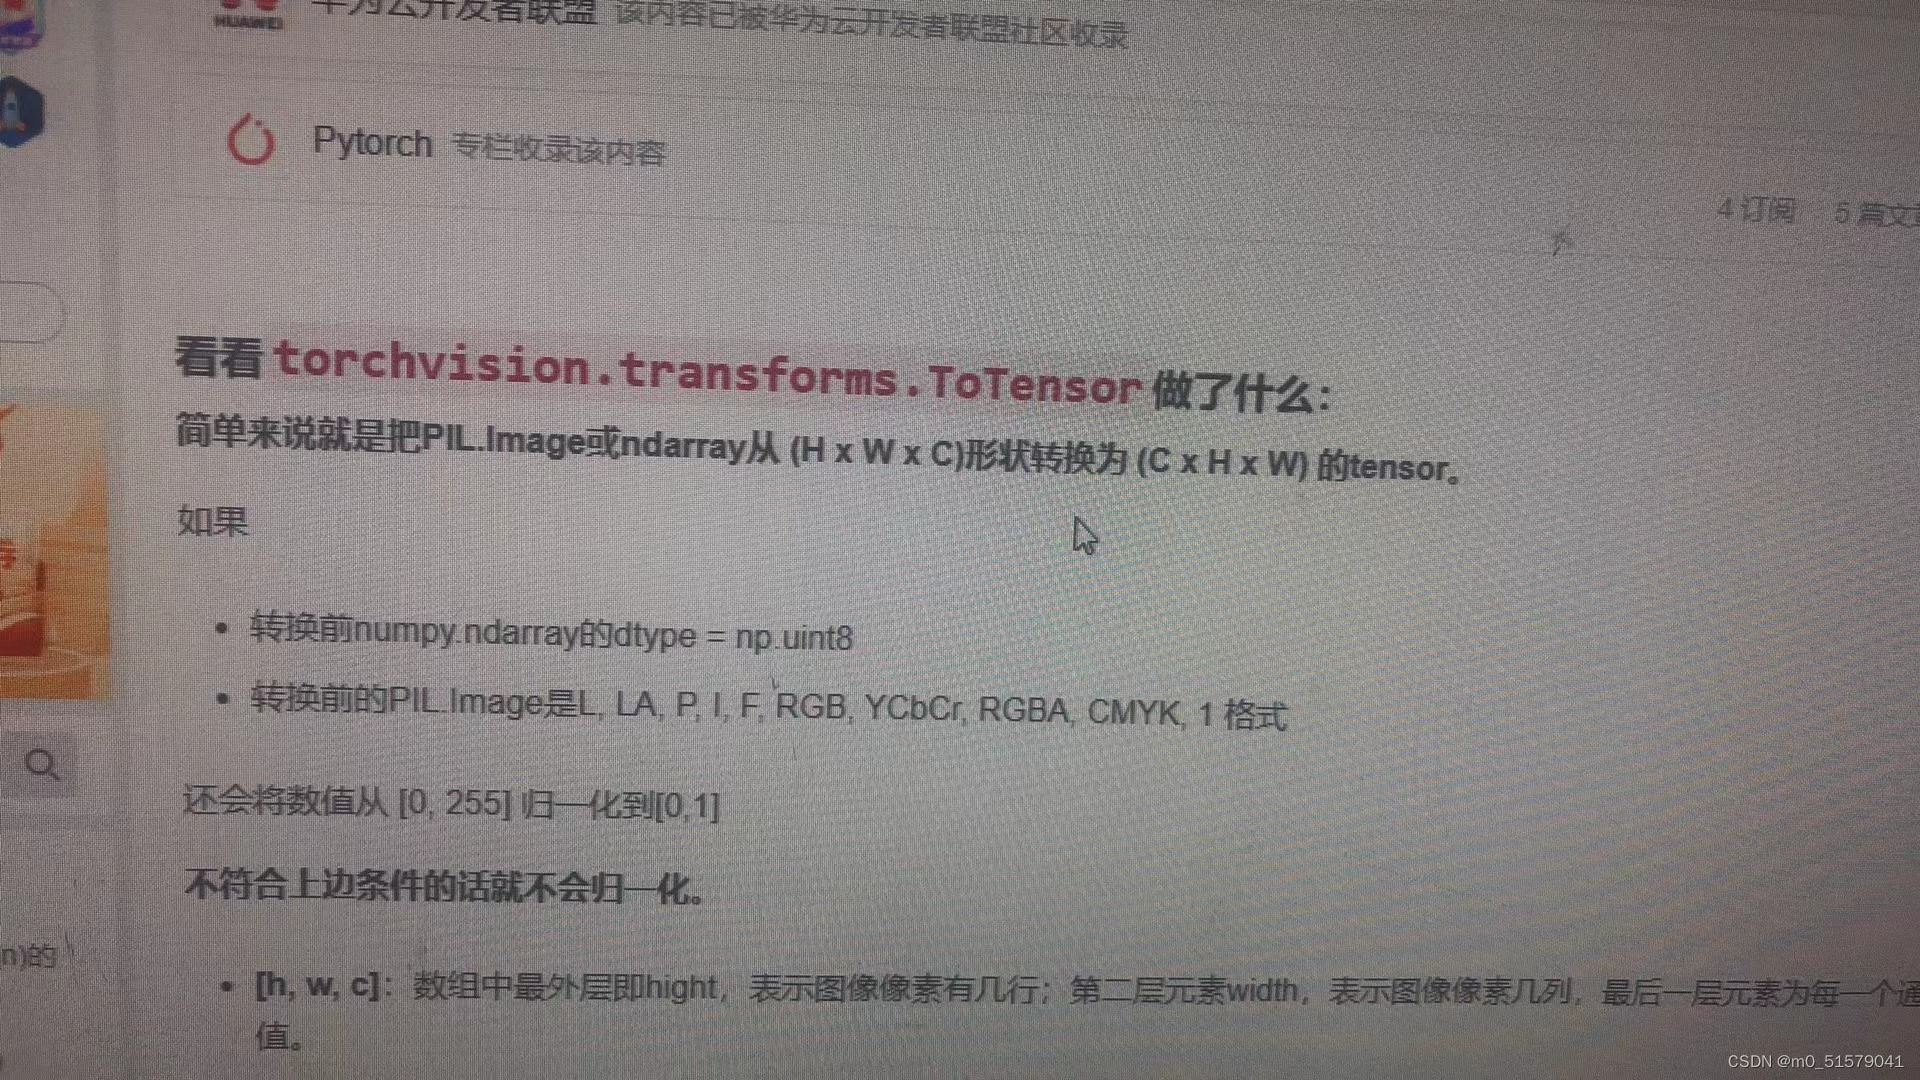
我们看看ToTensor对图像做了什么?
ToTensor之前:

类型:ndarray
通道:HWC
数值:[114,114,114] 未归一化
ToTensor之后:

类型:Tensor
通道:CHW
数值:[0.4471,0.4471,0.4471] 归一化 0.4471=114/256
通过debug,我们可以发现transforms.ToTensor()一共对图片做了三件事,分别是类型转换,通道调整,归一化。
查阅资料,确认一下