输入一个文档,怎么进行文档扫描,输出扫描后的图片呢?
今天学习了 opencv实战项目 文档扫描OCR
问题重构:输入图像 是一个含有文档的图像——> 目标是将其转化为 规则的扫描图片
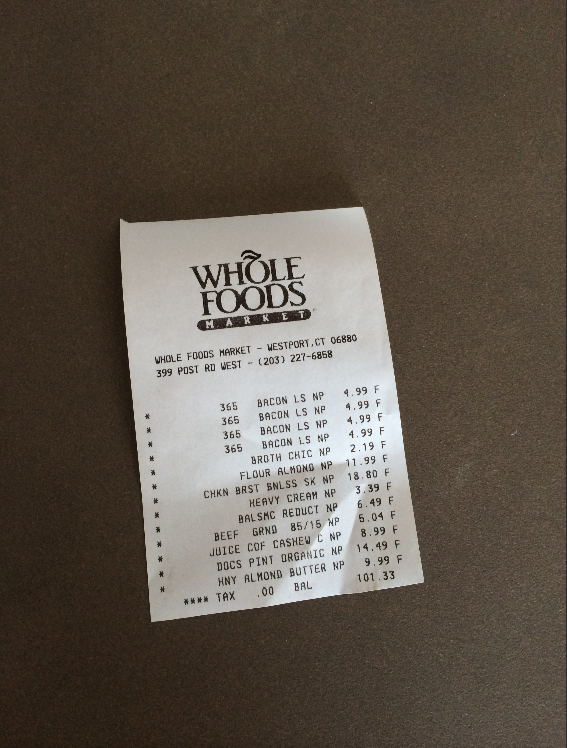

那么怎么实现呢?
问题分解:
1 边缘检测
2 获取轮廓
3 对获取到的轮廓进行透视变换
4 OCR
如何边缘检测?
1 把图片读入——预处理(计算坐标缩放比例以便以后使用原图的时候使用,copy原图,
2.获取灰度图——高斯滤波去除噪声,边缘检测)
如何获取需要扫描的轮廓?
1.轮廓检测 检测出所有轮廓,对检测出的所有轮廓按照面积大小分类
2遍历所有轮廓(计算轮廓近似使用到了
cv2.approxPolyDP 是一个用于多边形逼近的函数。它使用Douglas-Peucker算法来减少多边形的点数。 返回的是多边形的顶点坐标数组 详细解释opencv python中的 cv.approxPolyDP_cv::approxpolydp-CSDN博客
当坐标数组数是4的时候(是四边形的) 把返回结果拿出来
如何进行透视变换?
使用到了四点transformer函数(见后文) 变换 输入 image 原图 和上一步返回的坐标点 输出是变换后的结果
输入的坐标点可能是乱序的,怎么进行上下左右排序?
使用了 order_points 函数 思路:四个坐标 (a,b) a+b 最大的 是右下的点 最小的是左上 b-a z最小的是右上 最大的是左下 (假设h >w) 返回的是 排序好的rect
回到 四点transformer函数
怎么计算透视变换的变换矩阵M ?需要得到原坐标点 和变换后的坐标点
如何将四边形转化为 矩形?计算上w 和下w 的值 方法 两点间距离公式 取最大,同理 取左h 右h 取最大的高和宽 得到变换后坐标位置
计算变换矩阵
用到了cv2.getPerspectiveTransform
opencv透视变换:GetPerspectiveTransform、warpPerspective函数的使用-CSDN博客
得到了变换矩阵,怎么进行透视变换?
使用到了cv2.warpPerspective函数,warpPerspective():对图像进行透视变换。简单来说,就是有这么一副图像,它的拍摄视角不是从正面拍摄的,而是带有一定的角度,我们希望能得到从正面观察的视角。 【Python+OpenCV 图像透视变换 warpPerspective函数】-CSDN博客
返回变换后结果warped
得到的warped 是这样的
还要进行二值处理、结果保存
warped = cv2.cvtColor(warped, cv2.COLOR_BGR2GRAY)
ref = cv2.threshold(warped, 100, 255, cv2.THRESH_BINARY)[1]
cv2.imwrite('scan.jpg', ref)
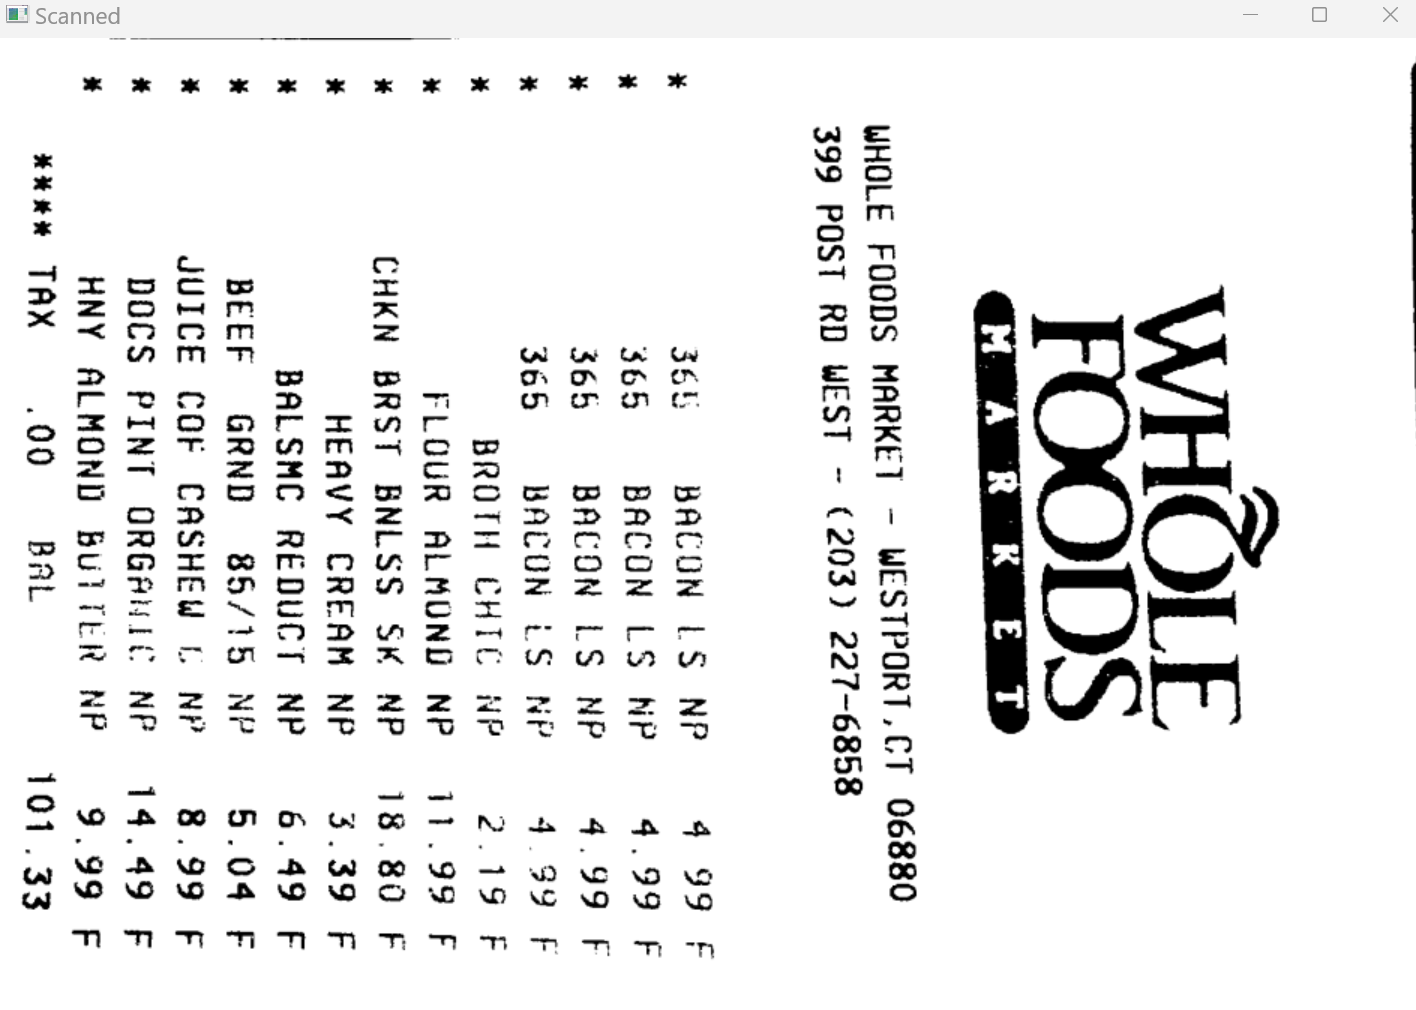
最后得到的输出结果如下
代码:
# 导入工具包
import numpy as np
import argparse
import cv2

# 设置参数
ap = argparse.ArgumentParser()
ap.add_argument("-i", "--image", required = True,
	help = "Path to the image to be scanned")
args = vars(ap.parse_args())

def order_points(pts):
	# 一共4个坐标点
	rect = np.zeros((4, 2), dtype = "float32")

	# 按顺序找到对应坐标0123分别是 左上,右上,右下,左下
	# 计算左上,右下
	s = pts.sum(axis = 1)
	rect[0] = pts[np.argmin(s)]
	rect[2] = pts[np.argmax(s)]

	# 计算右上和左下
	diff = np.diff(pts, axis = 1)
	rect[1] = pts[np.argmin(diff)]
	rect[3] = pts[np.argmax(diff)]

	return rect

def four_point_transform(image, pts):
	# 获取输入坐标点
	rect = order_points(pts)
	(tl, tr, br, bl) = rect

	# 计算输入的w和h值
	widthA = np.sqrt(((br[0] - bl[0]) ** 2) + ((br[1] - bl[1]) ** 2))
	widthB = np.sqrt(((tr[0] - tl[0]) ** 2) + ((tr[1] - tl[1]) ** 2))
	maxWidth = max(int(widthA), int(widthB))

	heightA = np.sqrt(((tr[0] - br[0]) ** 2) + ((tr[1] - br[1]) ** 2))
	heightB = np.sqrt(((tl[0] - bl[0]) ** 2) + ((tl[1] - bl[1]) ** 2))
	maxHeight = max(int(heightA), int(heightB))

	# 变换后对应坐标位置
	dst = np.array([
		[0, 0],
		[maxWidth - 1, 0],
		[maxWidth - 1, maxHeight - 1],
		[0, maxHeight - 1]], dtype = "float32")

	# 计算变换矩阵
	M = cv2.getPerspectiveTransform(rect, dst)
	warped = cv2.warpPerspective(image, M, (maxWidth, maxHeight))

	# 返回变换后结果
	return warped

def resize(image, width=None, height=None, inter=cv2.INTER_AREA):
	dim = None
	(h, w) = image.shape[:2]
	if width is None and height is None:
		return image
	if width is None:
		r = height / float(h)
		dim = (int(w * r), height)
	else:
		r = width / float(w)
		dim = (width, int(h * r))
	resized = cv2.resize(image, dim, interpolation=inter)
	return resized

# 读取输入
image = cv2.imread(args["image"])
#坐标也会相同变化
ratio = image.shape[0] / 500.0
orig = image.copy()

image = resize(orig, height = 500)
# 预处理
gray = cv2.cvtColor(image, cv2.COLOR_BGR2GRAY)
gray = cv2.GaussianBlur(gray, (5, 5), 0)
edged = cv2.Canny(gray, 75, 200)

# 展示预处理结果
print("STEP 1: 边缘检测")
cv2.imshow("Image", image)
cv2.imshow("Edged", edged)
cv2.waitKey(0)
cv2.destroyAllWindows()

# 轮廓检测
cnts = cv2.findContours(edged.copy(), cv2.RETR_LIST, cv2.CHAIN_APPROX_SIMPLE)[0]
cnts = sorted(cnts, key = cv2.contourArea, reverse = True)[:5]

# 遍历轮廓
for c in cnts:
	# 计算轮廓近似
	peri = cv2.arcLength(c, True)
	# C表示输入的点集
	# epsilon表示从原始轮廓到近似轮廓的最大距离,它是一个准确度参数
	# True表示封闭的
	approx = cv2.approxPolyDP(c, 0.02 * peri, True)

	# 4个点的时候就拿出来
	if len(approx) == 4:
		screenCnt = approx
		break

# 展示结果
print("STEP 2: 获取轮廓")
cv2.drawContours(image, [screenCnt], -1, (0, 255, 0), 2)
cv2.imshow("Outline", image)
cv2.waitKey(0)
cv2.destroyAllWindows()

# 透视变换
warped = four_point_transform(orig, screenCnt.reshape(4, 2) * ratio)

# 二值处理
warped = cv2.cvtColor(warped, cv2.COLOR_BGR2GRAY)
ref = cv2.threshold(warped, 100, 255, cv2.THRESH_BINARY)[1]
cv2.imwrite('scan.jpg', ref)
# 展示结果
print("STEP 3: 变换")
cv2.imshow("Original", resize(orig, height = 650))
cv2.imshow("Scanned", resize(ref, height = 650))
cv2.imshow("warped", resize(warped, height = 650))
cv2.waitKey(0)


