Building and Orchestrating ETL Pipelines by Using Athena and Step Functions
Lab overview and objectives
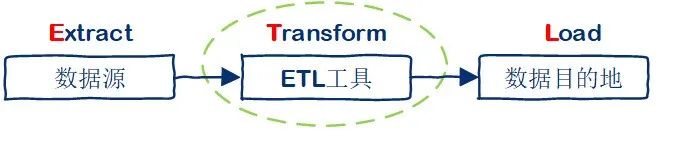
In this lab, you will use AWS Step Functions to build an extract, transform, and load (ETL) pipeline that uses Amazon Simple Storage Service (Amazon S3), an AWS Glue Data Catalog, and Amazon Athena to process a large dataset.
Step Functions can help you automate business processes by creating workflows, also referred to as state machines. In this lab, you will use Step Functions to build a workflow that invokes Athena to take a series of actions. An example of an action is running a query to discover if AWS Glue tables exist.
The AWS Glue Data Catalog provides a persistent metadata store, including table definitions, schemas, and other control information. This information will help you to create the ETL pipeline.
Athena is a serverless interactive query service that simplifies analyzing data in Amazon S3 by using standard SQL.
You will design the workflow so that if AWS Glue tables don't exist, the workflow will invoke additional Athena queries to create them. If the tables do exist, the workflow will run an additional AWS Glue query to create a view in Athena that combines data from two tables. You can then query that view to make interesting time-based and location-based discoveries in the large dataset.
After completing this lab, you should be able to do the following:
- Create and test a Step Functions workflow by using Step Functions Studio.
- Create an AWS Glue database and tables.
- Store data on Amazon S3 in Parquet format to use less storage space and to promote faster data reads.
- Partition data that is stored on Amazon S3 and use Snappy compression to optimize performance.
- Create an Athena view.
- Add an Athena view to a Step Functions workflow.
- Construct an ETL pipeline by using Step Functions, Amazon S3, Athena, and AWS Glue.
Duration
This lab will require approximately 120 minutes to complete.
AWS service restrictions
In this lab environment, access to AWS services and service actions might be restricted to the ones that are needed to complete the lab instructions. You might encounter errors if you attempt to access other services or perform actions beyond the ones that are described in this lab.
Scenario
Previously, you created a proof of concept (POC) to demonstrate how to use AWS Glue to infer a data schema and manually adjust column names. Then, you used Athena to query the data. Although Mary likes this approach, each time that she starts a new project she must complete many manual steps. She has asked you to create a reusable data pipeline that will help her to quickly start building new data processing projects.
One of Mary's projects is to study New York City taxi data. She knows the column names for the table data and has already created views and ingestion SQL commands for you. She wants to study taxi usage patterns in New York City in the early part of 2020.
Mary has requested that you store the table data partition by month in Parquet format with Snappy compression. This will promote efficiency and cost. Because it is a POC, Mary is OK with you using hard-coded values for column names, partitions, views, and S3 bucket information.
Mary has provided the following:
- Links to access the taxi data
- The partitions that she would like to create (pickup_year and pickup_month)
- SQL ingestion scripts
- A script that will create a view in SQL that she wants to use for this particular project
When you start the lab, the environment will contain the resources that are shown in the following diagram.
By the end of the lab, you will have created the architecture that is shown in the following diagram.
After doing some research, you decided to take advantage of the flexibility of Step Functions to create the ETL pipeline logic. With Step Functions, you can handle initial runs where the table data and SQL view don't exist, in addition to subsequent runs where the tables and view do exist.
OK, let's get started!
Accessing the AWS Management Console
- At the top of these instructions, choose Start Lab.
- The lab session starts.
- A timer displays at the top of the page and shows the time remaining in the session.
Tip: To refresh the session length at any time, choose Start Lab again before the timer reaches 0:00.
-
- Before you continue, wait until the circle icon to the right of the AWS link in the upper-left corner turns green. When the lab environment is ready, the AWS Details panel will also display.
- To connect to the AWS Management Console, choose the AWS link in the upper-left corner.
- A new browser tab opens and connects you to the console.
Tip: If a new browser tab does not open, a banner or icon is usually at the top of your browser with the message that your browser is preventing the site from opening pop-up windows. Choose the banner or icon, and then choose Allow pop-ups.
Task 1: Analyzing existing resources and loading the source data
In this first task, you will analyze an AWS Identity and Access Management (IAM) role and an S3 bucket that were created for you. Then, you will copy the source taxi data from a public S3 bucket into your bucket. You will use this data later in the lab when you create a Step Functions workflow.
- Open all the AWS service consoles that you will use during this lab.
Tip: Since you will use the consoles for many AWS services throughout this lab, it will be easier to have each console open in a separate browser tab.
-
- In the search box to the right of Services, search for Step Functions
- Open the context menu (right-click) on the Step Functions entry which appears in the search results and choose the option to open the link in a new tab.
- Repeat this same process to open the AWS service consoles for each of these additional services:
- S3
- AWS Glue
- Athena
- Cloud9
- IAM
- Confirm that you now have each of the six AWS services consoles open in different browser tabs.
- Analyze the existing IAM role that is named StepLabRole.
- In the IAM console and in the navigation pane, choose Roles.
- Search for StepLabRole and choose the link for the role when it appears.
- On the Permissions tab, expand and view the Policy-For-Step IAM policy that is attached to the role.
Analysis: When you create the Step Functions workflow, you will associate this role with the workflow. This policy will allow the workflow to make calls to the Athena, Amazon S3, AWS Glue, and AWS Lake Formation services.
- Analyze the existing S3 bucket.
- In the S3 console, in the list of buckets, choose the link for the bucket that has gluelab in its name.
Notice that it doesn't currently hold any objects. Later in this lab, you will reference this bucket in the Step Functions workflow that you configure.
-
- Copy the bucket name to a text file.
You will use this name multiple times later in this lab.
- Connect to the AWS Cloud9 IDE.
- In the Cloud9 console, in the Your environments page, under Cloud9 Instance, choose Open IDE.
- Load data into your bucket from the source dataset.
- Run the following commands in the Cloud9 bash terminal. Replace <FMI_1> with your actual bucket name (the one with gluelab in the name).
Important: Be sure to keep the quotes around the bucket name.
mybucket="<FMI_1>"
echo $mybucket
Tip: You might be prompted about safely pasting multiline text. To disable this prompt for the future, clear Ask before pasting multiline code. Choose Paste.
Analysis: With these commands, you assigned your bucket name to a shell variable. You then echoed the value of that variable to the terminal. Saving the bucket name as a variable will be useful when you run the next few commands.
-
- Copy the yellow taxi data for January into a prefix (folder) in your bucket called nyctaxidata/data.
wget -qO- https://aws-tc-largeobjects.s3.us-west-2.amazonaws.com/CUR-TF-200-ACDENG-1/step-lab/yellow_tripdata_2020-01.csv | aws s3 cp - "s3://$mybucket/nyctaxidata/data/yellow_tripdata_2020-01.csv"
Note: The command takes about 20 seconds to complete. The file that you are copying is approximately 500 MB in size. Wait for the terminal prompt to display again before continuing.
-
- Copy the yellow taxi data for February into a prefix in your bucket called nyctaxidata/data.
wget -qO- https://aws-tc-largeobjects.s3.us-west-2.amazonaws.com/CUR-TF-200-ACDENG-1/step-lab/yellow_tripdata_2020-02.csv | aws s3 cp - "s3://$mybucket/nyctaxidata/data/yellow_tripdata_2020-02.csv"
Tip: Much more taxi data is available, and in a production solution, you would likely want to include many years of data. However, for POC purposes, using 2 months of data will suffice.
-
- Copy the location information (lookup table) into a prefix in your bucket called nyctaxidata/lookup.
Important: The space in the taxi _zone_lookup.csv file name is intentional.
wget -qO- https://aws-tc-largeobjects.s3.us-west-2.amazonaws.com/CUR-TF-200-ACDENG-1/step-lab/taxi+_zone_lookup.csv | aws s3 cp - "s3://$mybucket/nyctaxidata/lookup/taxi _zone_lookup.csv"
- Analyze the structure of the data that you copied.
The data in the lookup table has the following structure. The following are the first few lines of the file:
"LocationID","Borough","Zone","service_zone"
1,"EWR","Newark Airport","EWR"
2,"Queens","Jamaica Bay","Boro Zone"
3,"Bronx","Allerton/Pelham Gardens","Boro Zone"
4,"Manhattan","Alphabet City","Yellow Zone"
5,"Staten Island","Arden Heights","Boro Zone"
6,"Staten Island","Arrochar/Fort Wadsworth","Boro Zone"
7,"Queens","Astoria","Boro Zone"
8,"Queens","Astoria Park","Boro Zone"
...truncated
Analysis: The structure is defined by listing the column names on the first line. Mary is familiar with these column names; therefore, the SQL commands that she provided will work without modification later in the lab.
The yellow taxi data file structure for January and February is similar to the following:
VendorID,tpep_pickup_datetime,tpep_dropoff_datetime,passenger_count,trip_distance,RatecodeID,store_and_fwd_flag,PULocationID,DOLocationID,payment_type,fare_amount,extra,mta_tax,tip_amount,tolls_amount,improvement_surcharge,total_amount,congestion_surcharge
1,2020-01-01 00:28:15,2020-01-01 00:33:03,1,1.20,1,N,238,239,1,6,3,0.5,1.47,0,0.3,11.27,2.5
1,2020-01-01 00:35:39,2020-01-01 00:43:04,1,1.20,1,N,239,238,1,7,3,0.5,1.5,0,0.3,12.3,2.5
1,2020-01-01 00:47:41,2020-01-01 00:53:52,1,.60,1,N,238,238,1,6,3,0.5,1,0,0.3,10.8,2.5
...truncated
As with the lookup table file, the first line in each file defines the column names.
Congratulations! In this task, you successfully loaded the source data. Now, you can start building.
Task 2: Automating creation of an AWS Glue database
In this task, you will create a Step Functions workflow that will use Athena to check whether an AWS Glue database exists. If the database doesn't already exist, Athena will create it.
- Begin to create a workflow.
- In the Step Functions console, to open the navigation pane, choose the menu icon (), and then choose State machines.
- Choose Create state machine.
- Keep Design your workflow visually selected.
- For Type, keep Standard selected, and choose Next.
The Step Functions Workflow Studio interface displays.
- Design the workflow by using the Workflow Studio interface.
- If a Welcome to Workflow Studio message appears, dismiss it by choosing the X icon.
Notice that a starter workflow, with Start and End tasks, is already defined, as shown in the following image.
-
- In the Actions panel on the left, search for Athena
- Drag the StartQueryExecution task to the canvas between the Start and End tasks, as shown in the following image.
Analysis: Athena uses the AWS Glue Data Catalog to store and retrieve table metadata for data that is stored in Amazon S3. The table metadata indicates to the Athena query engine how to find, read, and process the data that you want to query.
-
- In the Inspector panel on the right:
- Change State name to Create Glue DB
- Keep the Integration type as Optimized.
- For API Parameters, replace the default JSON code with the following. Replace <FMI_1> with your actual bucket name (the one with gluelab in the name).
- In the Inspector panel on the right:
{
"QueryString": "CREATE DATABASE if not exists nyctaxidb",
"WorkGroup": "primary",
"ResultConfiguration": {
"OutputLocation": "s3://<FMI_1>/athena/"
}
}
-
-
- Select Wait for task to complete.
-
Note: This ensures that the workflow will wait until the task is complete before continuing to any additional downstream tasks. This particular task is complete when Athena verifies that the database exists or creates it.
-
- Keep Next state as Go to end.
- At the top of the page, choose Next.
- Review the settings and finish creating the workflow.
The Review generated code page shows the JSON code that was created as a result of the settings that you chose in the Workflow Studio interface.
Analysis: In the JSON code, notice how Step Functions will invoke Athena to run a query. The query will check if a database named nyctaxidb already exists. If it doesn't, the query will create the database. The database will be stored in the gluelab S3 bucket in a folder named athena.
-
- Choose Next.
- For State machine name, enter WorkflowPOC
- For Permissions, select Choose an existing role, and ensure that StepLabRole is selected.
- Keep the other default settings, and choose Create state machine.
- Test the workflow.
Now that you have created a workflow, run it and see what happens on this first run.
-
- Choose Start execution.
- For Name, enter TaskTwoTest and then choose Start execution.
Important: Be sure to name your Start execution tests exactly as documented in these lab instructions, otherwise you may not receive full credit for your work later when you submit the lab for a score.
On the Details tab at the top of the page, the status first shows as Running.
The initial Graph inspector view shows the Create Glue DB step in blue, as shown in the following image.
-
- Wait a minute or two while the workflow runs.
When the Create Glue DB step turns green, as shown in the following image, the step succeeded.
- Verify that a result file was created in the S3 bucket.
- In the S3 console, choose the link for the gluelab bucket, or if you are already on that page, use the refresh icon to refresh the page.
You should see a new athena prefix (folder) in the bucket.
-
- Choose the athena link to view the contents.
The folder contains a text file. Notice that the size of the file is 0 B, which indicates that the file is empty.
- Verify that the AWS Glue database was created.
- In the AWS Glue console, in the navigation pane, under Data Catalog, choose Databases.
- Select the nyctaxidb database.
Notice that the database currently doesn't have any tables. This is expected. You will add steps to the workflow later to create tables. However, this is great progress for now!
In this task, you successfully created an AWS Glue database by using a Step Functions workflow.
Task 3: Creating the task to check whether tables exist in the AWS Glue database
In this task, you will update the workflow so that it will check whether tables exist in the AWS Glue database that you just created.
- Add another task to your workflow.
- In the Step Functions console, choose the WorkflowPOC state machine, and then choose Edit.
- Choose Workflow Studio on the right side of the page.
- In the Actions panel, search for Athena
- Drag another StartQueryExecution task to the canvas between the Create Glue DB task and the End task.
- Configure the task and save the change.
- With the new StartQueryExecution task selected, in the Inspector panel, change State name to Run Table Lookup
After you rename the state, the workflow displays as shown in the following image.
-
- For API Parameters, replace the default JSON code with the following. Replace <FMI_1> with your actual bucket name (the one with gluelab in the name).
{
"QueryString": "show tables in nyctaxidb",
"WorkGroup": "primary",
"ResultConfiguration": {
"OutputLocation": "s3://<FMI_1>/athena/"
}
}
-
- Select Wait for task to complete.
- Keep Next state as Go to end.
- At the top of the page, choose Apply and exit.
Confirm the definition. It should look similar to the following JSON code.
{
"Comment": "A description of my state machine",
"StartAt": "Create Glue DB",
"States": {
"Create Glue DB": {
"Type": "Task",
"Resource": "arn:aws:states:::athena:startQueryExecution.sync",
"Parameters": {
"QueryString": "CREATE DATABASE if not exists nyctaxidb",
"WorkGroup": "primary",
"ResultConfiguration": {
"OutputLocation": "s3://<your-gluelab-bucket-name>/athena/"
}
},
"Next": "Run Table Lookup"
},
"Run Table Lookup": {
"Type": "Task",
"Resource": "arn:aws:states:::athena:startQueryExecution.sync",
"Parameters": {
"QueryString": "show tables in nyctaxidb",
"WorkGroup": "primary",
"ResultConfiguration": {
"OutputLocation": "s3://<your-gluelab-bucket-name>/athena/"
}
},
"End": true
}
}
}
-
- Choose Save.
- When prompted about how the IAM role might need new permissions, choose Save anyway.
Note: Recall that you previously reviewed the permissions that are granted to this IAM role. The permissions are sufficient to complete all the tasks in this lab.
- Test the updated workflow.
- Choose Start execution.
- For Name, enter TaskThreeTest and then choose Start execution.
Watch as the workflow runs each task and the tasks change from white to blue to green in the Graph inspector section. The following image shows the graph after the workflow succeeds.
In the Execution event history section, notice that the status of each task is provided in addition to the time that each took to run.
The workflow takes about 1 minute to run, and it will not find any tables.
-
- After the workflow completes, in the Graph inspector section, choose the Run Table Lookup task.
- In the Details panel to the right, choose the Step output tab.
On or about line 9, notice that the task generated a QueryExecutionId. You will use this in the next task.
-
- In the Amazon S3 console, choose the link for the gluelab bucket, and then choose the athena link.
Notice that the folder (prefix) has more files now.
Tip: You may need to refresh the browser tab to see them.
The .txt files are blank, but a metadata file now exists and contains some data. AWS Glue will use the metadata file internally.
Congratulations! In this task, you updated the workflow by adding a task that checks whether tables exist in the AWS Glue database.
Task 4: Adding routing logic to the workflow based on whether AWS Glue tables exist
In this task, you will reference the execution ID that the Run Table Lookup task returns to check for existing tables in the AWS Glue database. You will also use a choice state to determine the logical route to follow based on the result of the previous task.
- Update the workflow to look up query results.
- In the Step Functions console, choose the WorkflowPOC state machine, and then choose Edit.
- Choose Workflow Studio on the right side of the page.
- In the Actions panel, search for Athena
- Drag a GetQueryResults task to the canvas between the Run Table Lookup task and the End task.
Do not use a GetQueryExecution task.
-
- With the GetQueryResults task selected, change State name to Get lookup query results
- For API Parameters, replace the existing contents with what is in the code block below.
{
"QueryExecutionId.$": "$.QueryExecution.QueryExecutionId"
}
Analysis: This task will use the query execution ID that the prior task made available as an output value. By passing the value along, the next task (which you haven't added yet) can use the value to evaluate whether tables were found.
Note: You don't need to internally poll for this task to complete, so you don't need to select Wait for task to complete.
-
- Choose Apply and exit.
Confirm the definition. It should look similar to the following JSON code where the <FMI_1> placeholders contain your actual gluelab bucket name.
{
"Comment": "A description of my state machine",
"StartAt": "Create Glue DB",
"States": {
"Create Glue DB": {
"Type": "Task",
"Resource": "arn:aws:states:::athena:startQueryExecution.sync",
"Parameters": {
"QueryString": "CREATE DATABASE if not exists nyctaxidb",
"WorkGroup": "primary",
"ResultConfiguration": {
"OutputLocation": "s3://<FMI_1>/athena/"
}
},
"Next": "Run Table Lookup"
},
"Run Table Lookup": {
"Type": "Task",
"Resource": "arn:aws:states:::athena:startQueryExecution.sync",
"Parameters": {
"QueryString": "show tables in nyctaxidb",
"WorkGroup": "primary",
"ResultConfiguration": {
"OutputLocation": "s3://<FMI_1>/athena/"
}
},
"Next": "Get lookup query results"
},
"Get lookup query results": {
"Type": "Task",
"Resource": "arn:aws:states:::athena:getQueryResults",
"Parameters": {
"QueryExecutionId.$": "$.QueryExecution.QueryExecutionId"
},
"End": true
}
}
}
-
- Choose Save, and then choose Save anyway.
- Add a choice state to the workflow.
- Choose Workflow Studio on the right side of the page.
- In the Actions panel, choose the Flow tab.
- Drag a Choice state to the canvas between the Get lookup query results task and the End task.
- With the Choice state selected, change State name to ChoiceStateFirstRun
- In the Choice Rules section, for Rule #1, choose the edit icon and configure the following:
- Choose Add conditions.
- Keep the default Simple condition.
- For Not, choose NOT.
- For Variable, enter the following:
$.ResultSet.Rows[0].Data[0].VarCharValue
-
-
- For Operator, choose is present.
- Ensure that your settings match the following image.
-
-
-
- Choose Save conditions.
-
- Add two pass states to the workflow.
- Drag a Pass state to the canvas after the ChoiceStateFirstRun state, on the left side under the arrow that is labeled not....
- With the Pass state selected, change State name to REPLACE ME TRUE STATE
Note: This is a temporary name, which you will update later.
-
- Drag another Pass state to the canvas after the ChoiceStateFirstRun state, on the right side under the arrow that is labeled Default.
- With the Pass state selected, change State name to REPLACE ME FALSE STATE
Your workflow canvas should now look like the following image:
-
- Choose Apply and exit.
- Choose Save, and then choose Save anyway.
Analysis: When you run the workflow and the Get lookup query results task is complete, the choice state will evaluate the results of the last query.
If tables aren't found (the $.ResultSet.Rows[0].Data[0].VarCharValue logic evaluates this), the workflow will go the REPLACE ME TRUE STATE route. In the next task, you will replace this state with a process to create tables.
Otherwise, if tables are found, the workflow will go the Default route (the REPLACE ME FALSE STATE route). Later in this lab, you will replace this state with a process to check for any new data (for example, February taxi data) and then insert it into an existing table.
- Congratulations! In this task, you successfully added a choice state to support evaluating the results of the Get lookup query results task.
Task 5: Creating the AWS Glue table for the yellow taxi data
In this task, you will define logic in the workflow that will create AWS Glue tables if they don't exist.
- Add another Athena StartQueryExecution task to the workflow and configure it to create a table.
- To return to the canvas, choose Workflow Studio.
- In the Actions panel, search for athena
- Drag a StartQueryExecution task to the canvas between the ChoiceStateFirstRun state and the REPLACE ME TRUE STATE state.
- With the StartQueryExecution task selected, change State name to Run Create data Table Query
- For Integration type, keep Optimized selected.
- For API Parameters, replace the default JSON code with the following. Replace <FMI_1> and <FMI_2> with your actual bucket name (the one with gluelab in the name).
{
"QueryString": "CREATE EXTERNAL TABLE nyctaxidb.yellowtaxi_data_csv( vendorid bigint, tpep_pickup_datetime string, tpep_dropoff_datetime string, passenger_count bigint, trip_distance double, ratecodeid bigint, store_and_fwd_flag string, pulocationid bigint, dolocationid bigint, payment_type bigint, fare_amount double, extra double, mta_tax double, tip_amount double, tolls_amount double, improvement_surcharge double, total_amount double, congestion_surcharge double) ROW FORMAT DELIMITED FIELDS TERMINATED BY ',' STORED AS INPUTFORMAT 'org.apache.hadoop.mapred.TextInputFormat' OUTPUTFORMAT 'org.apache.hadoop.hive.ql.io.HiveIgnoreKeyTextOutputFormat' LOCATION 's3://<FMI_1>/nyctaxidata/data/' TBLPROPERTIES ( 'skip.header.line.count'='1')",
"WorkGroup": "primary",
"ResultConfiguration": {
"OutputLocation": "s3://<FMI_2>/athena/"
}
}
Analysis: Recall that you reviewed the structure of the source data files that you copied into your gluelab bucket. The yellow_tripdata_2020-01.csv and yellow_tripdata_2020-02.csv source files are in comma-separated value (CSV) format.
The first line in each file defines the columns of data that are contained in the file. The columns include vendorid, tpep_pickup_datetime, and the other columns that are defined in the CREATE EXTERNAL TABLE SQL statement that you just entered for the task.
The CSV file doesn't define data types for each column of data, but your AWS Glue table does define them (for example, as bigint and string). Note that, by defining the table as EXTERNAL, you indicate that the table data will remain in Amazon S3, in the location defined by the LOCATION part of the command (s3://<gluelab-bucket>/nyctaxidata/data/).
The QueryString that you are sending to Athena in this task uses the Create Table as Select (CTAS) feature of Athena. CTAS statements use standard SELECT queries to create new tables. By using this feature, you can extract, transform, and load data into Amazon S3 for processing. For more information, see "Using CTAS and INSERT INTO for ETL and Data Analysis" at Using CTAS and INSERT INTO for ETL and data analysis - Amazon Athena.
-
- Select Wait for task to complete.
Note: It is important for the table to be fully created before the workflow continues.
-
- For Next state, choose Go to end.
- On the canvas, select the REPLACE ME TRUE STATE state and delete it by pressing the Delete key.
Important: Verify that the REPLACE ME TRUE STATE state is no longer on the canvas.
Your workflow canvas should now look like the following image:
-
- Choose Apply and exit.
- Choose Save, and then choose Save anyway.
- Test the workflow.
- Choose Start execution.
- For Name, enter TaskFiveTest and then choose Start execution.
It will take a few minutes for each step in the workflow to go from white, to blue, to green. Wait for the workflow to complete successfully.
This run will not create a new database. However, because it won't find any tables in the database, it should take the route with the Run Create data Table Query task, as shown in the following image.
- Verify that the updated workflow created a table in the AWS Glue database the first time that you ran it.
- In the Amazon S3 console, navigate to the contents of the athena folder in your gluelab bucket.
Notice that the folder contains another metadata file and additional empty text files.
Note: The empty text files are basic output files from Step Functions tasks. You can ignore them.
-
- In the AWS Glue console, in the navigation pane, choose Tables.
Notice that a yellowtaxi_data_csv table now exists. This is the AWS Glue table that Athena created when your Step Function workflow invoked the Run Create data Table Query task.
-
- To view the schema details, choose the link for the yellowtaxi_data_csv table.
The schema looks like the following image.
- Run the workflow again to test the other choice route.
- In the Step Functions console, choose the link for the WorkflowPOC state machine.
- Choose Start execution.
- For Name, enter NewTest and then choose Start execution again.
- Wait for the workflow to complete successfully.
Analysis: You want to ensure that, if the workflow finds the new table (as it should this time), the workflow will take the other choice route and invoke the REPLACE ME FALSE STATE state.
The following image shows the completed workflow.
This run didn't re-create the database or try to overwrite the table that was created during the previous run. Step Functions did generate some output files in Amazon S3 with updated AWS Glue metadata.
In this task, you successfully created an AWS Glue table that points to the yellow taxi data.
Task 6: Creating the AWS Glue table for location lookup data
In this task, you will create another AWS Glue table by updating and running the Step Functions workflow. The new table will reference the taxi _zone_lookup.csv source data file in Amazon S3. After you create this table, you will be able to join the yellow taxi data table with the lookup table in a later task. Joining the two tables will help you to make more sense of the data.
Recall that the lookup table holds taxi activity location information. The following text box shows the column names from the first line of the CSV-formatted source data file. The following also shows the first line of data in the file and provides an example of the data types that appear in each column.
"LocationID","Borough","Zone","service_zone"
1,"EWR","Newark Airport","EWR"
The query will again use CTAS to have Athena create an external table.
- Update the workflow to create the lookup table.
- Still in the Step Functions console, use the method that you used in previous steps to open the WorkflowPOC state machine in Workflow Studio.
- In the Actions panel, search for athena
- Drag a StartQueryExecution task between the Run Create data Table Query task and the End task.
- With the StartQueryExecution task selected, change State name to Run Create lookup Table Query
- For API Parameters, replace the default JSON code with the following. Replace <FMI_1> and <FMI_2> with your actual bucket name.
{
"QueryString": "CREATE EXTERNAL TABLE nyctaxidb.nyctaxi_lookup_csv( locationid bigint, borough string, zone string, service_zone string, latitude double, longitude double)ROW FORMAT DELIMITED FIELDS TERMINATED BY ',' STORED AS INPUTFORMAT 'org.apache.hadoop.mapred.TextInputFormat' OUTPUTFORMAT 'org.apache.hadoop.hive.ql.io.HiveIgnoreKeyTextOutputFormat'LOCATION 's3://<FMI_1>/nyctaxidata/lookup/' TBLPROPERTIES ( 'skip.header.line.count'='1')",
"WorkGroup": "primary",
"ResultConfiguration": {
"OutputLocation": "s3://<FMI_2>/athena/"
}
}
-
- Select Wait for task to complete.
- Choose Apply and exit.
- Choose Save, and then choose Save anyway.
Important: Don't run the workflow yet. First, you need to remove the table that the workflow created previously. If you don't remove that table, the workflow will take the default path from the choice state and not get to the task that you just added to the workflow.
- Delete the existing AWS Glue table.
- In the AWS Glue console, in the navigation pane, choose Tables.
- Select the yellow taxi_data_csv table.
- Choose Delete.
- When prompted to proceed, choose Delete.
- Run the latest workflow.
- In the Step Functions console, use the method that you used in previous steps to run the WorkflowPOC state machine. Name the test TaskSixTest
- Wait for the workflow to complete successfully.
The following image shows the completed workflow.
-
- In the AWS Glue console, in the navigation pane, choose Tables.
The AWS Glue database now has two tables. The latest run of the workflow re-created the yellowtaxi_data_csv table and created the nyctaxi_lookup_csv table.
Note: It might take a minute or two for the tables to appear.
Observe the schema for the lookup table, which looks like the following image.
Congratulations! In this task, you successfully used a Step Functions workflow to create both tables in the AWS Glue database.
Task 7: Optimizing the data format and using compression
In this task, you will optimize the tables so that they will be more efficient for stakeholders to work with. Specifically, you will modify the data storage to use the Parquet format and Snappy compression. These updates will help users to work with the data more quickly and cost-effectively.
The taxi data goes back several years and is updated over time, so it makes sense to compartmentalize the data by time series.
You will create the table by using the nyctaxi_lookup_csv table as the source. You decide to build a Parquet version of the table that has same column names as the csv version of the table. You also decide to declare Snappy as the compression type.
To accomplish this, you will create a task in Step Functions to run the following command to create a Parquet file from the source CSV data.
CREATE table if not exists nyctaxidb.nyctaxi_lookup_parquet WITH (format='PARQUET',parquet_compression='SNAPPY', external_location = 's3://<FMI_1>/nyctaxidata/optimized-data-lookup/') AS SELECT locationid, borough, zone , service_zone , latitude ,longitude FROM nyctaxidb.nyctaxi_lookup_csv
- Update the WorkflowPOC state machine to create a Parquet table with Snappy compression.
- In the Step Functions console, use the method that you used in previous steps to open the WorkflowPOC state machine in Workflow Studio.
- In the Actions panel, search for athena
- Drag a StartQueryExecution task to the canvas between the Run Create lookup Table Query task and the End task.
- With the StartQueryExecution task selected, change State name to Run Create Parquet lookup Table Query
- For API Parameters, replace the default JSON code with the following. Replace <FMI_1> and <FMI_2> with your actual bucket name.
{
"QueryString": "CREATE table if not exists nyctaxidb.nyctaxi_lookup_parquet WITH (format='PARQUET',parquet_compression='SNAPPY', external_location = 's3://<FMI_1>/nyctaxidata/optimized-data-lookup/') AS SELECT locationid, borough, zone , service_zone , latitude ,longitude FROM nyctaxidb.nyctaxi_lookup_csv",
"WorkGroup": "primary",
"ResultConfiguration": {
"OutputLocation": "s3://<FMI_2>/athena/"
}
}
-
- Select Wait for task to complete.
- For Next state, keep Go to end selected.
- Choose Apply and exit.
- Choose Save, and then choose Save anyway.
- Test by removing the existing tables from AWS Glue, running the workflow, and verifying the results.
- In the AWS Glue console, in the navigation pane, choose Tables.
- Delete both of the tables in the AWS Glue database.
This will ensure that the correct path is taken in the workflow when you run it next.
-
- In the Step Functions console, use the method that you used in previous steps to run the WorkflowPOC state machine. Name the test TaskSevenTest
- Wait for the workflow to complete successfully.
The following image shows the completed workflow.
-
- Check the AWS Glue console to see that a new nyctaxi_lookup_parquet table was created.
The following image shows the schema for the table.
Wonderful! In this task, you successfully created the lookup table in Parquet format with Snappy compression. You will create another Parquet table, and then you will be able to combine the information from both tables.
Task 8: Optimizing with partitions
In this task, you will create a yellowtaxi_data_parquet table that uses the Parquet format and Snappy compression, similar to what you did with the lookup table.
However, you will also make another change. Because the data in the taxi data table is time specific, it makes sense to partition the data. You will create a prefix in Amazon S3 named optimized-data so that you can partition through the pickup year and pickup month.
With partitions, you can restrict the amount of data that each query scans, which improves performance and reduces costs. Partitioning divides a table into parts and keeps related data together based on column values.
By using partitions, as new data is added, it will be compartmentalized. Queries that include a pickup date will be much more efficient to run. With the Parquet format and Snappy compression in place, the data storage will be fully optimized.
- Update the workflow with a new step that creates the yellow taxi_data_parquet table.
- In the Step Functions console, use the method that you used in previous steps to open the WorkflowPOC state machine in Workflow Studio.
- In the Actions panel, search for athena
- Drag a StartQueryExecution task between the Run Create Parquet lookup Table Query task and the End task.
- With the StartQueryExecution task selected, change State name to Run Create Parquet data Table Query
- For API Parameters, replace the default JSON code with the following. Replace <FMI_1> and <FMI_2> with your actual bucket name.
{
"QueryString": "CREATE table if not exists nyctaxidb.yellowtaxi_data_parquet WITH (format='PARQUET',parquet_compression='SNAPPY',partitioned_by=array['pickup_year','pickup_month'],external_location = 's3://<FMI_1>/nyctaxidata/optimized-data/') AS SELECT vendorid,tpep_pickup_datetime,tpep_dropoff_datetime,passenger_count,trip_distance,ratecodeid,store_and_fwd_flag,pulocationid,dolocationid,fare_amount,extra,mta_tax,tip_amount,tolls_amount,improvement_surcharge,total_amount,congestion_surcharge,payment_type,substr(\"tpep_pickup_datetime\",1,4) pickup_year, substr(\"tpep_pickup_datetime\",6,2) AS pickup_month FROM nyctaxidb.yellowtaxi_data_csv where substr(\"tpep_pickup_datetime\",1,4) = '2020' and substr(\"tpep_pickup_datetime\",6,2) = '01'",
"WorkGroup": "primary",
"ResultConfiguration": {
"OutputLocation": "s3://<FMI_2>/athena/"
}
}
-
- Select Wait for task to complete.
- Choose Apply and exit.
- Choose Save, and then choose Save anyway.
- Test by removing the existing tables in AWS Glue, running the workflow, and then verifying the results.
- In the AWS Glue console, delete all three of the existing tables.
This will ensure that the workflow takes the correct path when you run it next.
-
- In the S3 console, navigate to the contents of the athena folder in your gluelab bucket.
- Choose the nyctaxidata prefix.
- Select the optimized-data-lookup prefix, and choose Delete.
- On the Delete objects page, enter permanently delete in the field at the bottom of the page, and then choose Delete objects.
- Choose Close.
Explanation: The permissions that were granted to Athena don't allow Athena to delete table information that is stored in Amazon S3. Therefore, you need to manually remove the optimized-data-lookup prefix in your S3 bucket before running the workflow. If you don't, the workflow will fail during the Create Parquet lookup Table Query task. This wasn't a problem with the other tables because they were defined as external tables; however, the Parquet tables are defined as internal tables.
-
- In the Step Functions console, use the method that you used in previous steps to run the WorkflowPOC state machine. Name the test TaskEightTest
The following image shows the completed workflow.
- Verify that the new table was created.
- In the Athena console, in the navigation pane, choose Query editor.
Tip: If the navigation pane is collapsed, open it by choosing the menu icon ().
Note: Because this is your first time using Athena, a message at the top of the page indicates that you need to set up a query result location in Amazon S3.
-
- Choose the Settings tab.
- Choose Manage and configure the following:
- Choose Browse S3.
- Choose the link for your gluelab bucket.
- Choose the option for the athena prefix.
- Select Choose.
- Choose Save.
- Choose the Editor tab.
- In the Data panel, for Database, choose nyctaxidb.
- Expand the yellowtaxi_data_parquet table.
The following image shows the expanded view.
Notice the Partitioned label for the table.
Tip: You might need to scroll down to see the last two columns of the database, which will store data as partitioned strings.
Excellent! In this task, you successfully re-created the two AWS Glue tables in the Parquet format and with Snappy compression. Furthermore, you configured the yellowtaxi_data_parquet table to be partitioned, and you confirmed that you can load the table in the Athena query editor.
Task 9: Creating an Athena view
In this task, you will create a view of the data in the Athena query editor. The view will combine data from both tables that are stored in the Parquet format.
- Create a new view of the data by using the Athena query editor.
- In the Data panel, in the Tables and views section, choose Create > CREATE VIEW.
The following SQL commands populate in a query tab to help you get started.
-- View Example
CREATE OR REPLACE VIEW view_name AS
SELECT column1, column2
FROM table_name
WHERE condition;
-
- Replace the default commands with the following code.
create or replace view nyctaxidb.yellowtaxi_data_vw as select a.*,lkup.* from (select datatab.pulocationid pickup_location ,pickup_month, pickup_year, sum(cast(datatab.total_amount AS decimal(10, 2))) AS sum_fare , sum(cast(datatab.trip_distance AS decimal(10, 2))) AS sum_trip_distance , count(*) AS countrec FROM nyctaxidb.yellowtaxi_data_parquet datatab WHERE datatab.pulocationid is NOT null GROUP BY datatab.pulocationid, pickup_month, pickup_year) a , nyctaxidb.nyctaxi_lookup_parquet lkup where lkup.locationid = a.pickup_location
Note: In this scenario, Mary provided these SQL commands.
-
- Choose Run.
The query completes successfully. In the Data panel, in the Views section, a yellowtaxi_data_vw view is now listed.
-
- Expand the details of the new view.
The following image shows the expanded view.
Notice how the view contains sum_fare and sum_trip_distance columns.
-
- To the right of the view name, choose the three-dot icon () and then choose Preview View.
The results display and are similar to the following image.
This view looks like it could be quite useful for the team. You are getting close to completing the POC!
Great progress! In this task, you successfully created a view of the data that was obtained by querying both of the Parquet tables.
Task 10: Adding the view to the Step Functions workflow
You know how to create the view manually by using the Athena query editor. The next step is to add a task to the workflow so that the ETL pipeline will create the view when it doesn't already exist. You will add this new task to run after the tables are created so that you don't need to re-create the view each time that you add new data.
- Remove the view that you created manually.
Note: These instructions assume that you don't need the complete step-by-step instructions because you have completed similar actions earlier in the lab.
-
- In the Amazon S3 console, then navigate to the contents of the nyctaxidata folder in your gluelab bucket.
- Delete both of the prefixes that contain optimized in their names.
- In the AWS Glue console, and delete all five tables.
- Add a step to the Step Functions workflow to create the view.
- In the Step Function console, use the method that you used in previous steps to open the WorkflowPOC state machine in Workflow Studio.
- In the Actions panel, search for athena
- Drag a StartQueryExecution task between the Run Create Parquet data Table Query task and the End task.
- With the StartQueryExecution task selected, change State name to Run Create View
- For API Parameters, replace the default JSON code with the following. Replace <FMI_1> with your actual bucket name.
{
"QueryString": "create or replace view nyctaxidb.yellowtaxi_data_vw as select a.*,lkup.* from (select datatab.pulocationid pickup_location ,pickup_month, pickup_year, sum(cast(datatab.total_amount AS decimal(10, 2))) AS sum_fare , sum(cast(datatab.trip_distance AS decimal(10, 2))) AS sum_trip_distance , count(*) AS countrec FROM nyctaxidb.yellowtaxi_data_parquet datatab WHERE datatab.pulocationid is NOT null GROUP BY datatab.pulocationid, pickup_month, pickup_year) a , nyctaxidb.nyctaxi_lookup_parquet lkup where lkup.locationid = a.pickup_location",
"WorkGroup": "primary",
"ResultConfiguration": {
"OutputLocation": "s3://<FMI_1>/athena/"
}
}
Notice that the QueryString contains the same query that you ran to create the view by using the Athena query editor in the previous task.
-
- Select Wait for task to complete.
- Choose Apply and exit.
- Choose Save, and then choose Save anyway.
- Test the workflow.
- Use the method that you used in previous steps to run the WorkflowPOC state machine. Name the test TaskTenTest
The following image shows the completed workflow.
Excellent! You now have an entire ETL pipeline as a POC. The POC is constructed to be easy to use for a new project. To use the workflow, someone would only need to swap in the new bucket locations and update queries for the format of the data and how they want to partition it and condition it.
The only remaining issue that this implementation doesn't yet handle is when someone wants to process new time-sequence data (for example, February data). That is what you will work to handle next.
Task 11: Adding the new workflow for data injection
In this task, you will add the February data to the workflow.
The following command, which Mary provided, will insert the data for February (02).
INSERT INTO nyctaxidb.yellowtaxi_data_parquet select vendorid,tpep_pickup_datetime,tpep_dropoff_datetime,passenger_count,trip_distance,ratecodeid,store_and_fwd_flag,pulocationid,dolocationid,fare_amount,extra,mta_tax,tip_amount,tolls_amount,improvement_surcharge,total_amount,congestion_surcharge,payment_type,substr(\"tpep_pickup_datetime\",1,4) pickup_year, substr(\"tpep_pickup_datetime\",6,2) AS pickup_month FROM nyctaxidb.yellowtaxi_data_csv where substr(\"tpep_pickup_datetime\",1,4) = '2020' and substr(\"tpep_pickup_datetime\",6,2) = '02'"
You could run this command for each file; however, that would result in two CSV files and two Parquet files. You want to add data to only the Parquet table for the yellow taxi data.
You decide that an effective approach is to use a Step Functions map flow step, because this type of step can iterate over all five of the AWS Glue tables and pass over (skip) the tables that you don't want to update. In this way, you can run the statement on only the yellow taxi data Parquet file.
- Add a map state to the workflow.
- Use the method that you used in previous steps to open the WorkflowPOC state machine in Workflow Studio.
- In the Actions panel, choose the Flow tab.
- Drag a Map state to the canvas between the REPLACE ME FALSE STATE task and the End task.
- Delete the REPLACE ME FALSE STATE task from the workflow.
- With the Map state selected, change State name to Check All Tables
- For Path to items array, enter $.Rows
- Choose the Input tab.
- Select Filter input with InputPath, and for the InputPath, enter $.ResultSet
Analysis: The InputPath defines what data will be analyzed during each iteration.
-
- Make sure that Transform array item with Parameters isn't selected.
- Choose the Configuration tab.
- For Next state, keep Go to end selected.
Important: Don't apply the changes yet. You will add more to the workflow in the next step.
- Add a choice state to the workflow.
- From the Flow panel, drag a Choice state to the canvas where "Drop state here" appears after the Check All Tables state.
- With the Choice state selected, change State name to CheckTable
- In the Choice Rules section, for Rule #1, choose the edit icon and configure the following:
- Choose Add conditions.
- Keep the default Simple condition.
- Keep Not blank. (Don't select an option.)
- For Variable, enter $.Data[0].VarCharValue
- For Operator, choose matches string.
- For Value, enter *data_parquet
Analysis: Each iteration through the AWS Glue table names will check whether the name matches the pattern that ends in data_parquet. If you look at the table names in the AWS Glue console, you will find that this pattern matches only one table, which is the desired logic.
-
- Choose Save conditions.
Important: Don't apply the changes yet. You will add more to the workflow in the next step.
- Add a pass state to the workflow and configure the default choice logic.
- From the Flow panel, drag a Pass state to the canvas after the CheckTable state, on the right side under the arrow that is labeled Default.
- With the Pass state selected, change State name to Ignore File
- On the canvas, choose the Default label on the arrow under the CheckTable state.
- In the Inspector panel, in the Choice Rules section, open the Default rule details.
- For Default state, verify that Ignore File is selected.
Important: Don't apply the changes yet. You will add more to the workflow in the next step.
Analysis: The default rule will be invoked for any AWS Glue table that isn't the one that you want to modify (which is all of the tables except the yellowtaxi_data_parquet table).
- Add a StartQueryExecution task to the workflow to update the taxi Parquet table.
- In the Flow panel, choose the Actions tab, and search for athena
- Drag a StartQueryExecution task to the canvas after the CheckTable state, on the left side.
- With the StartQueryExecution task selected, change State name to Insert New Parquet Data
- For API Parameters, replace the default JSON code with the following. Replace <FMI_1> with your actual bucket name.
Note: Mary provided this SQL statement to insert the February data. Notice the 02 at the end of the QueryString.
{
"QueryString": "INSERT INTO nyctaxidb.yellowtaxi_data_parquet select vendorid,tpep_pickup_datetime,tpep_dropoff_datetime,passenger_count,trip_distance,ratecodeid,store_and_fwd_flag,pulocationid,dolocationid,fare_amount,extra,mta_tax,tip_amount,tolls_amount,improvement_surcharge,total_amount,congestion_surcharge,payment_type,substr(\"tpep_pickup_datetime\",1,4) pickup_year, substr(\"tpep_pickup_datetime\",6,2) AS pickup_month FROM nyctaxidb.yellowtaxi_data_csv where substr(\"tpep_pickup_datetime\",1,4) = '2020' and substr(\"tpep_pickup_datetime\",6,2) = '02'",
"WorkGroup": "primary",
"ResultConfiguration": {
"OutputLocation": "s3://<FMI_1>/athena/"
}
}
-
- Select Wait for task to complete.
- For Next state, keep Go to end selected.
- Confirm that the new logic that you added to the workflow looks like the following image:
-
- Choose Apply and exit.
- Choose Save, and then choose Save anyway.
Excellent! You successfully added the final bit of logic to the workflow. This logic will process the additional month of taxi data.
Task 12: Testing the complete solution
In this last task, you will test the completed POC solution.
- Test the latest workflow results in the Step Functions console.
- Use the method that you used in previous steps to run the WorkflowPOC state machine. Name the test TaskTwelveTest
The following image shows the completed workflow.
Tip: In the Graph inspector section, to make the graph larger, drag the bar with the three horizontal dots toward the bottom of the page.
- Verify that the iterator is working as expected.
- In the Graph Inspector section, choose the CheckTable step.
At the top of the section, two dropdown menus appear for Iteration status and Index. By default, the first iteration with an index value of 0 is selected.
-
- In the Details panel to the right, verify that the first iteration succeeded.
- Change Index to 1, and verify that the iteration succeeded.
- Repeat these steps for iterations 2, 3, and 4. They should all have succeeded.
- Change Index back to 0.
- Choose the Step input tab, and verify that the JSON code looks like the following image. VarCharValue should be set to nyctaxi_lookup_csv.
-
- While you stay on the Step input tab, change Index until VarCharValue in the JSON code is equal to yellowtaxi_data_parquet.
- In the graph, choose the Insert New Parquet Data step.
- Choose the Step output tab.
Here you see the query that created the view in addition to other step run details.
- Test in the Athena console.
- In the Athena console, open the query editor, and ensure that nyctaxidb is selected for Database.
- In the Views section, choose the three-dot icon () for the listed view, and then choose Preview View.
The first 10 records from the results display. Notice that the view is now scanning data that includes the month 02 (February).
-
- To verify that the February taxi data is also in the dataset, run the following query in the query editor:
SELECT * FROM "nyctaxidb"."yellowtaxi_data_vw" WHERE pickup_month = '02'
The first 100 results display as shown in the following image.
Excellent! The ETL pipeline can now also handle the additional data and integrate it into the view so that the data can be queried from Athena.
Update from the team
After building the complete POC, you provided a quick demonstration to Mary. She was quite impressed!
Mary said that she is confident that she can duplicate this POC and adjust the hardcoded values in it as needed for each project. She can't wait to start using the ETL pipeline that you created to accelerate her data processing across her many projects.
Submitting your work
- To record your progress, choose Submit at the top of these instructions.
- When prompted, choose Yes.
After a couple of minutes, the grades panel appears and shows you how many points you earned for each task. If the results don't display after a couple of minutes, choose Grades at the top of these instructions.
Tip: You can submit your work multiple times. After you change your work, choose Submit again. Your last submission is recorded for this lab.
- To find detailed feedback about your work, choose Submission Report.
Lab complete
Congratulations! You have completed the lab.
- At the top of this page, choose End Lab, and then choose Yes to confirm that you want to end the lab.
A message panel indicates that the lab is terminating.
- To close the panel, choose Close in the upper-right corner.
© 2022, Amazon Web Services, Inc. and its affiliates. All rights reserved. This work may not be reproduced or redistributed, in whole or in part, without prior written permission from Amazon Web Services, Inc. Commercial copying, lending, or selling is prohibited.