之前的章节中有讲过如何制作管道效果,使用了TubeGeometry对象,先通过多个点绘制曲线,通过这个曲线使用TubeGeometry绘制管道,不过要绘制水流效果就需要有动态的效果,这里通过贴图的位移来实现;下面开始详细的绘制步骤:
首先新建场景,相机,灯光,渲染器等
initScene(){
scene = new THREE.Scene();
},
initCamera(){
this.camera = new THREE.PerspectiveCamera(45, window.innerWidth / window.innerHeight, 0.1, 10000);
this.camera.position.set(200,200,200);
},
initLight(){
//添加两个平行光
const directionalLight1 = new THREE.DirectionalLight(0xffffff, 1.5);
directionalLight1.position.set(-300,-300,600)
scene.add(directionalLight1);
const directionalLight2 = new THREE.DirectionalLight(0xffffff, 1.5);
directionalLight2.position.set(600,200,600)
scene.add(directionalLight2);
},
initRenderer(){
this.renderer = new THREE.WebGLRenderer({ antialias: true });
this.container = document.getElementById("container")
this.renderer.setSize(this.container.clientWidth, this.container.clientHeight);
this.renderer.setClearColor('#FFFFFF', 1.0);
this.container.appendChild(this.renderer.domElement);
},
initControl(){
this.controls = new OrbitControls(this.camera, this.renderer.domElement);
this.controls.enableDamping = true;
this.controls.maxPolarAngle = Math.PI / 2.2; // // 最大角度
},
initAnimate() {
requestAnimationFrame(this.initAnimate);
this.renderer.render(scene, this.camera);
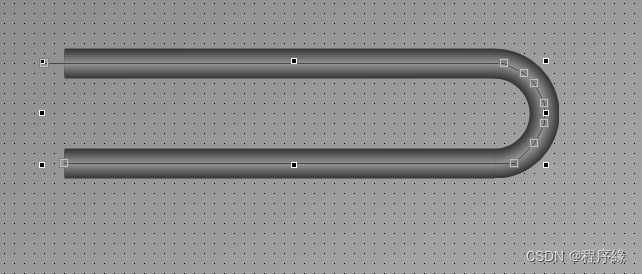
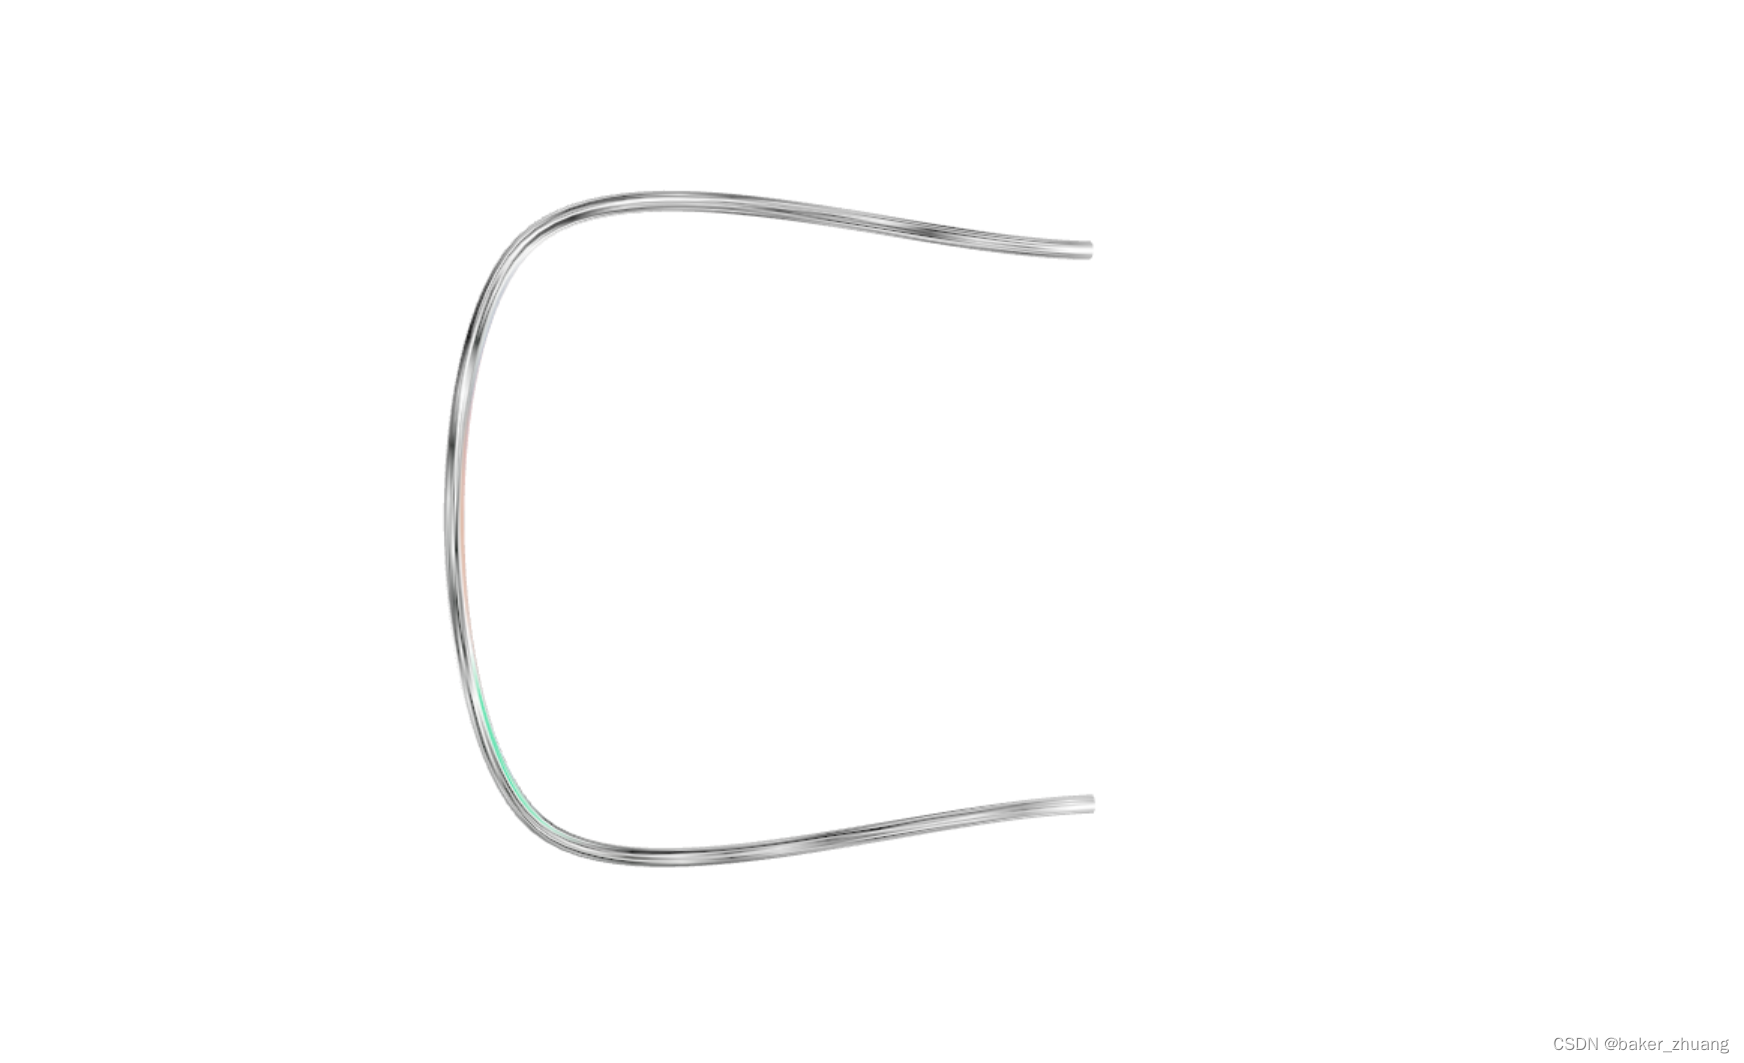
},此时得到一个雪白的场景,里面什么都没有。首先开始创建一个管道,同样是先取一些点,通过这些点连接为曲线,通过曲线创建将这些点连起来的管道TubeGeometry对象,这里要给管道添加贴图,大家可以根据需要选择适合的贴图,我这里用的是一个二维码作为演示,
 const path = new THREE.CatmullRomCurve3([
        new THREE.Vector3(60, 60, 0),
        new THREE.Vector3(-60, 60, 10),
        new THREE.Vector3(-60, -60, 0),
        new THREE.Vector3(60, -60, 10),
      ]);
      let geometry1 = new THREE.TubeGeometry(path, 100, 2, 25, false);

      let textureLoader = new THREE.TextureLoader();
      let texture = textureLoader.load('/static/images/qrcode.png')
      texture.wrapS = texture.wrapT = THREE.RepeatWrapping;

      this.material = new THREE.MeshBasicMaterial({
        map:texture,
        transparent: false,
      }); //材质对象Material
      let mesh1 = new THREE.Mesh(geometry1, this.material); //网格模型对象Mesh
      scene.add(mesh1); //网格模型添加到场景
添加好管道后就得到这样一个画面,这是一个U型管,二维码被拉伸变形,已经看不出来是二维码了,大家可以用蓝白相间的贴做,做出冷水流动效果,或者红白相间做出热水流动效果。
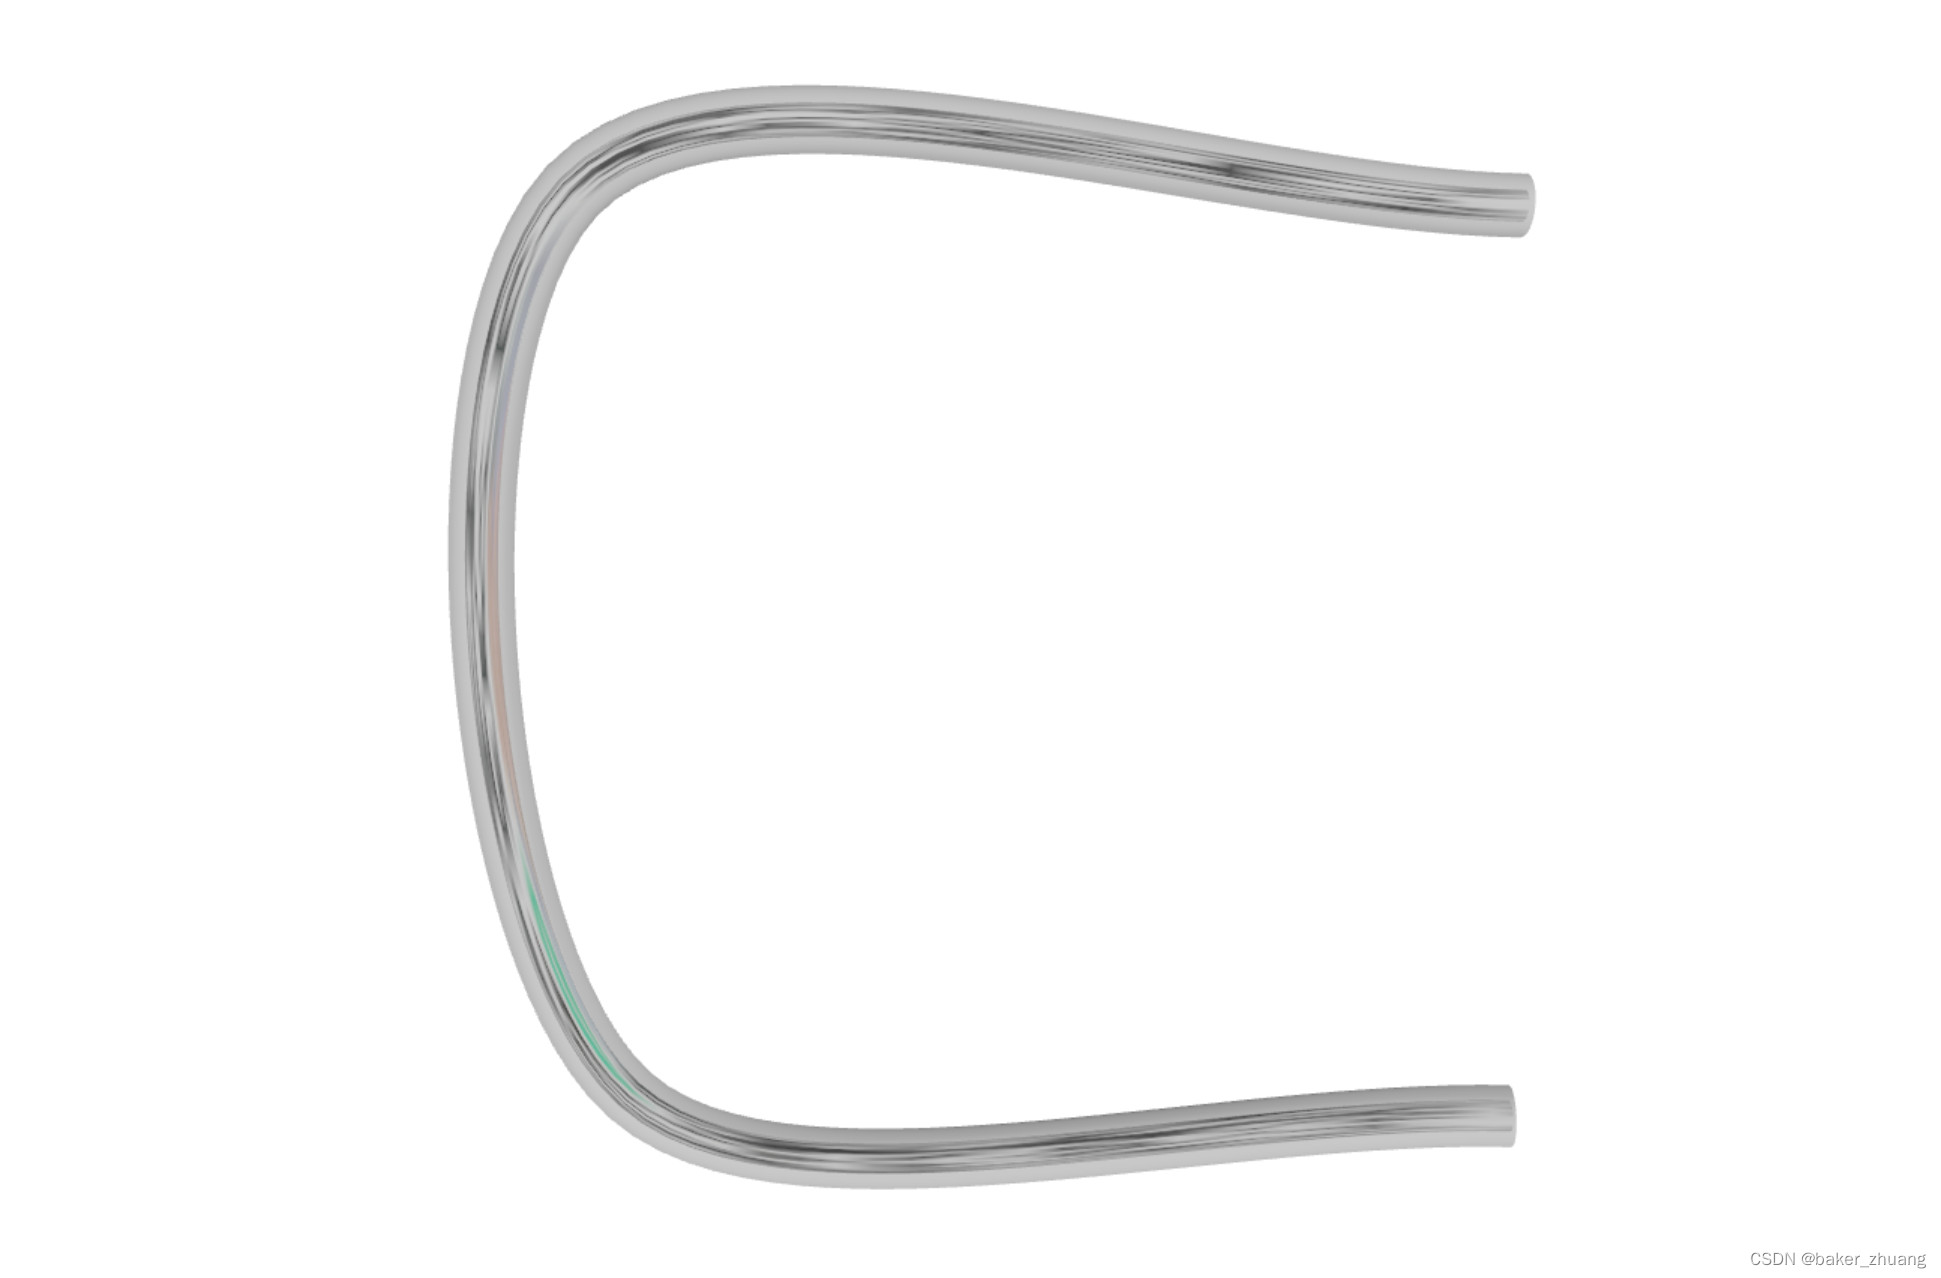
不过此时贴图是紧贴管壁的,不像是在内部流动,所以要给这个管道外面再套一层透明的管道,比这个管道稍微粗一点,留出管壁的空隙,
 let tubeGeometry2 = new THREE.TubeGeometry(path, 100, 4, 25, false);
      let tubeMaterial2 = new THREE.MeshPhongMaterial({
        color: 0xaaaaaa,
        transparent: true,
        opacity: 0.5,
      });
      let tube2 = new THREE.Mesh(tubeGeometry2, tubeMaterial2);
      scene.add(tube2);
这里仔细看,可以发现,水流和管壁之间已经有了一些空隙,空隙的宽度由两个管道的半径差决定。
下面就可以做水流动的效果了,让贴图动起来就需要不断的让贴图位移,可以在requestAnimationFrame中加入贴图位移的方法,
      this.offset ++;
      this.material.map.offset.x =  0.005 * this.offset;
      this.material.map.repeat.set(1, 1);
管道流动效果