概述
轻量级的HTTP服务器
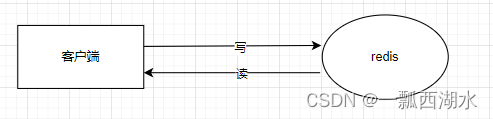
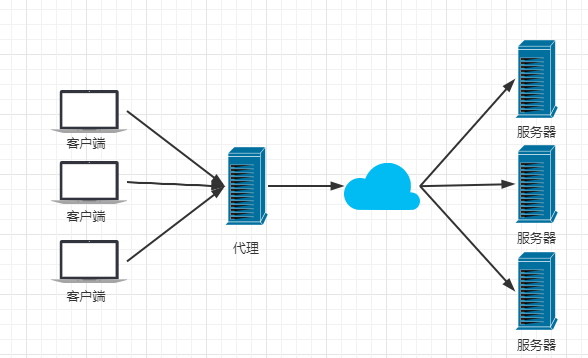
高性能的HTTP和反向代理服务器,同时也是一个IMAP/P0P3/SMTP代理服务器
模块化:功能众多,需要什么功能就下载安装什么功能,不需要就不安装
安装
一、源码部署
程序运行时,需要权限的支持,需要用户权限来支持它(用户有什么权限,程序就有什么权限)
# 安装编译工具、依赖包
[root@proxy ~]# yum -y install gcc make pcre-devel openssl-devel
[root@proxy ~]# wget https://nginx.org/download/nginx-1.24.0.tar.gz
[root@proxy ~]# tar -xf nginx-1.24.0.tar.gz
[root@proxy ~]# cd nginx-1.24.0/
[root@proxy nginx-1.24.0]# ./configure --prefix=/usr/local/nginx --user=nginx --group=nginx --with-http_ssl_module
[root@proxy nginx-1.24.0]# make && make install
[root@proxy nginx-1.24.0]# cd /usr/local/nginx/
[root@proxy nginx]# ls
conf  html  logs  sbin
# 创建用户
[root@proxy nginx]# useradd -s /sbin/nologin nginx
# 起服务
[root@proxy nginx]# sbin/nginx
[root@proxy nginx]# ss -ntulp | grep 80
tcp   LISTEN 0      128          0.0.0.0:80        0.0.0.0:*    users:(("nginx",pid=7767,fd=6),("nginx",pid=7766,fd=6))
# 查看软件信息
[root@proxy nginx]# sbin/nginx -V
nginx version: nginx/1.24.0
built by gcc 8.5.0 20210514 (Red Hat 8.5.0-10) (GCC)
built with OpenSSL 1.1.1k  FIPS 25 Mar 2021
TLS SNI support enabled
configure arguments: --prefix=/usr/local/nginx --user=nginx --group=nginx --with-http_ssl_module
二、客户端访问测试
[root@client ~]# curl 192.168.88.5
<!DOCTYPE html>
<html>
<head>
<title>Welcome to nginx!</title>
... ...

[root@proxy nginx]# echo test-nginx > html/index.html

[root@client ~]# curl 192.168.88.5
test-nginx
用户认证
一、修改配置文件
[root@proxy nginx]# vim conf/nginx.conf
... ...
    server {
        listen       80;
        server_name  localhost;
        auth_basic "Input Password";                    # 认证提示符信息
        auth_basic_user_file "/usr/local/nginx/pass";   # 认证的密码文件
... ...
二、生成密码文件,创建用户密码
[root@proxy nginx]# yum -y install httpd-tools
[root@proxy nginx]# htpasswd -c /usr/local/nginx/pass tom
New password:
Re-type new password:
Adding password for user tom
三、重新加载配置
[root@proxy nginx]# sbin/nginx -s reload
[root@proxy nginx]# ss -ntulp | grep 80
tcp   LISTEN 0      128          0.0.0.0:80        0.0.0.0:*    users:(("nginx",pid=8265,fd=6),("nginx",pid=7766,fd=6))
四、追加账户
[root@proxy nginx]# htpasswd /usr/local/nginx/pass jerry
New password:
Re-type new password:
Adding password for user jerry
虚拟主机
一、基于域名的虚拟主机
1、修改配置文件
[root@proxy nginx]# vim conf/nginx.conf
... ...
    server {
        listen 80;
        server_name www.a.com;
        location / {
            root html_a;
            index index.html index.htm;
        }
    }
    server {
        listen 80;
        server_name www.b.com;
        location / {
            root html_b;
            index index.html index.htm;
        }
    }
... ...
[root@proxy nginx]# sbin/nginx -s reload
2、创建网站根目录以及对应的首页文件
[root@proxy nginx]# mkdir html_a
[root@proxy nginx]# echo hello aaa > html_a/index.html
[root@proxy nginx]# mkdir html_b
[root@proxy nginx]# echo hello bbb > html_b/index.html
3、修改hosts文件添加ip和域名的映射关系
[root@proxy nginx]# vim /etc/hosts
... ...
192.168.88.5 www.a.com www.b.com

[root@proxy nginx]# curl www.a.com
hello aaa
[root@proxy nginx]# curl www.b.com
hello bbb
二、基于端口的虚拟主机
    server {
            listen       8080;
            server_name  www.a.com;
            ......
    }
        server {
            listen       8000;
            server_name  www.a.com;
          .......
    }
三、基于IP的虚拟主机
    server {
            listen       192.168.88.5:80;
            server_name  www.a.com;
      ... ...
    }
        server {
            listen       192.168.99.5:80;
            server_name  www.a.com;
    ... ...
    }
HTTPS加密网站
一、概述
该站点通过https访问
通过私钥、证书对该站点所有数据加密
二、密钥
1、对称密钥
AES、DES
应用案例:RAR、ZIP压缩加密(单机加密)
相同的加密解密
2、非对称加密
RSA、DSA
应用案例:网络加密(https、ssh)
3、Hash值
MD5、SHA256、SHA512
应用案例:数据完整性校验
三、SSL虚拟主机
1、设置加密网站的虚拟主机
SSL加密网站的核心技术是非对称生成密钥
[root@proxy ~]# vim /usr/local/nginx/conf/nginx.conf
... ...
    server {
        listen       443 ssl;            # 指定端口,开启SSL
        server_name  localhost;

        ssl_certificate      cert.pem;    # 这里是证书文件
        ssl_certificate_key  cert.key;    # 这里是私钥文件

        ssl_session_cache    shared:SSL:1m;
        ssl_session_timeout  5m;

        ssl_ciphers  HIGH:!aNULL:!MD5;
        ssl_prefer_server_ciphers  on;

        location / {
            root   https;    # 加密网站根目录
            index  index.html index.htm;
        }
    }
... ...
[root@proxy ~]# mkdir /usr/local/nginx/https
2、生成私钥和证书
[root@proxy ~]# openssl genrsa > /usr/local/nginx/conf/cert.key
Generating RSA private key, 2048 bit long modulus (2 primes)
.......+++++
...........................................+++++
e is 65537 (0x010001)
[root@proxy ~]# openssl req -x509 -key /usr/local/nginx/conf/cert.key > /usr/local/nginx/conf/cert.pem
You are about to be asked to enter information that will be incorporated
into your certificate request.
What you are about to enter is what is called a Distinguished Name or a DN.
There are quite a few fields but you can leave some blank
For some fields there will be a default value,
If you enter '.', the field will be left blank.
-----
Country Name (2 letter code) [XX]:cn
State or Province Name (full name) []:tg
Locality Name (eg, city) [Default City]:yn
Organization Name (eg, company) [Default Company Ltd]:gs
Organizational Unit Name (eg, section) []:xx
Common Name (eg, your name or your server's hostname) []:bg
Email Address []:xx@xx.com
[root@proxy ~]# ls /usr/local/nginx/conf/cert.*
/usr/local/nginx/conf/cert.key  /usr/local/nginx/conf/cert.pem
3、验证
[root@proxy ~]# echo nginx-https~~ > /usr/local/nginx/https/index.html
[root@proxy ~]# /usr/local/nginx/sbin/nginx -s reload
[root@proxy ~]# curl -k https://192.168.88.5
nginx-https~~


![[从0开始AIGC][Transformer相关]:Transformer中的激活函数:Relu、GELU、GLU、Swish](https://img-blog.csdnimg.cn/img_convert/ec2bb6a0da2ecf247d9e004b419eb2b8.png)