一、引言
作者最近新的平台项目是需要用react的,和vue区别还是比较大的,这里记录下踩坑和使用经验。
二、环境
框架:antd
依赖:
"dependencies": {
        "@ant-design/icons": "^4.7.0",
        "@ant-design/plots": "^1.0.9",
        "@aws-sdk/token-providers": "3.501.0",
        "@babel/helper-string-parser": "^7.22.5",
        "@loadable/component": "5.15.3",
        "@rjsf/antd": "^5.13.0",
        "@rjsf/core": "^5.13.0",
        "@rjsf/utils": "^5.13.0",
        "@rjsf/validator-ajv8": "^5.13.0",
        "@testing-library/jest-dom": "^4.2.4",
        "@testing-library/react": "^9.3.2",
        "@testing-library/user-event": "^7.1.2",
        "ajv": "^8.12.0",
        "antd": "^4.20.0",
        "axios": "^0.21.1",
        "babel-eslint": "^10.1.0",
        "bignumber.js": "^9.1.2",
        "core-js": "^3.20.3",
        "cross-env": "^7.0.2",
        "customize-cra": "^1.0.0",
        "diff_match_patch": "^0.1.1",
        "ejs": "^3.1.3",
        "enzyme": "^3.11.0",
        "express": "^4.17.1",
        "json-bigint": "^1.0.0",
        "lodash": "^4.17.21",
        "mockjs": "^1.1.0",
        "moment": "^2.29.4",
        "nodemon": "^2.0.4",
        "qrcode": "^1.5.1",
        "qrcode.react": "^3.1.0",
        "rc-queue-anim": "^2.0.0",
        "rc-texty": "^0.2.0",
        "rc-tween-one": "^3.0.6",
        "react": "^17.0.2",
        "react-app-rewired": "^2.1.8",
        "react-dom": "^17.0.2",
        "react-router-dom": "^5.2.0",
        "react-scripts": "4.0.2",
        "react-transition-group": "^4.4.2",
        "styled-components": "^6.1.8",
        "tslib": "^2.4.0",
        "typescript": "~3.7.2",
        "xlsx": "^0.18.5",
        "yarm": "^0.4.0",
        "yarn": "^1.22.19"
    },
三、React踩坑
1、编译
不知道是react本身编译规则严苛,还是公司的pipline设定,代码里面编译的时候不允许有未使用的变量,不允许使用未导入的组件
举个例子,如果使用了分页,但是没有导入Pagination,编译报错
import {Button, Modal, Layout, messag, Space, Table, Cascader, Input} from 'antd';


<Pagination onChange={this.onPageChange} total={this.state.totalSize}/>
如果标识了参数但是没有用,编译报错
onPageChange = (page, size) => {
        this.setState({page: page});
        this.loadList();
    };
2、变量延迟
这是很坑的,设置变量值之后居然没有变,是有延迟的,所以当设置完之后需要间隔一下再去使用,作者就出现了点击第二页显示第一页
onPageChange = (page, size) => {
this.setState({size: size});
this.setState({page: page});
setTimeout(() => {
this.loadList();
}, 5);
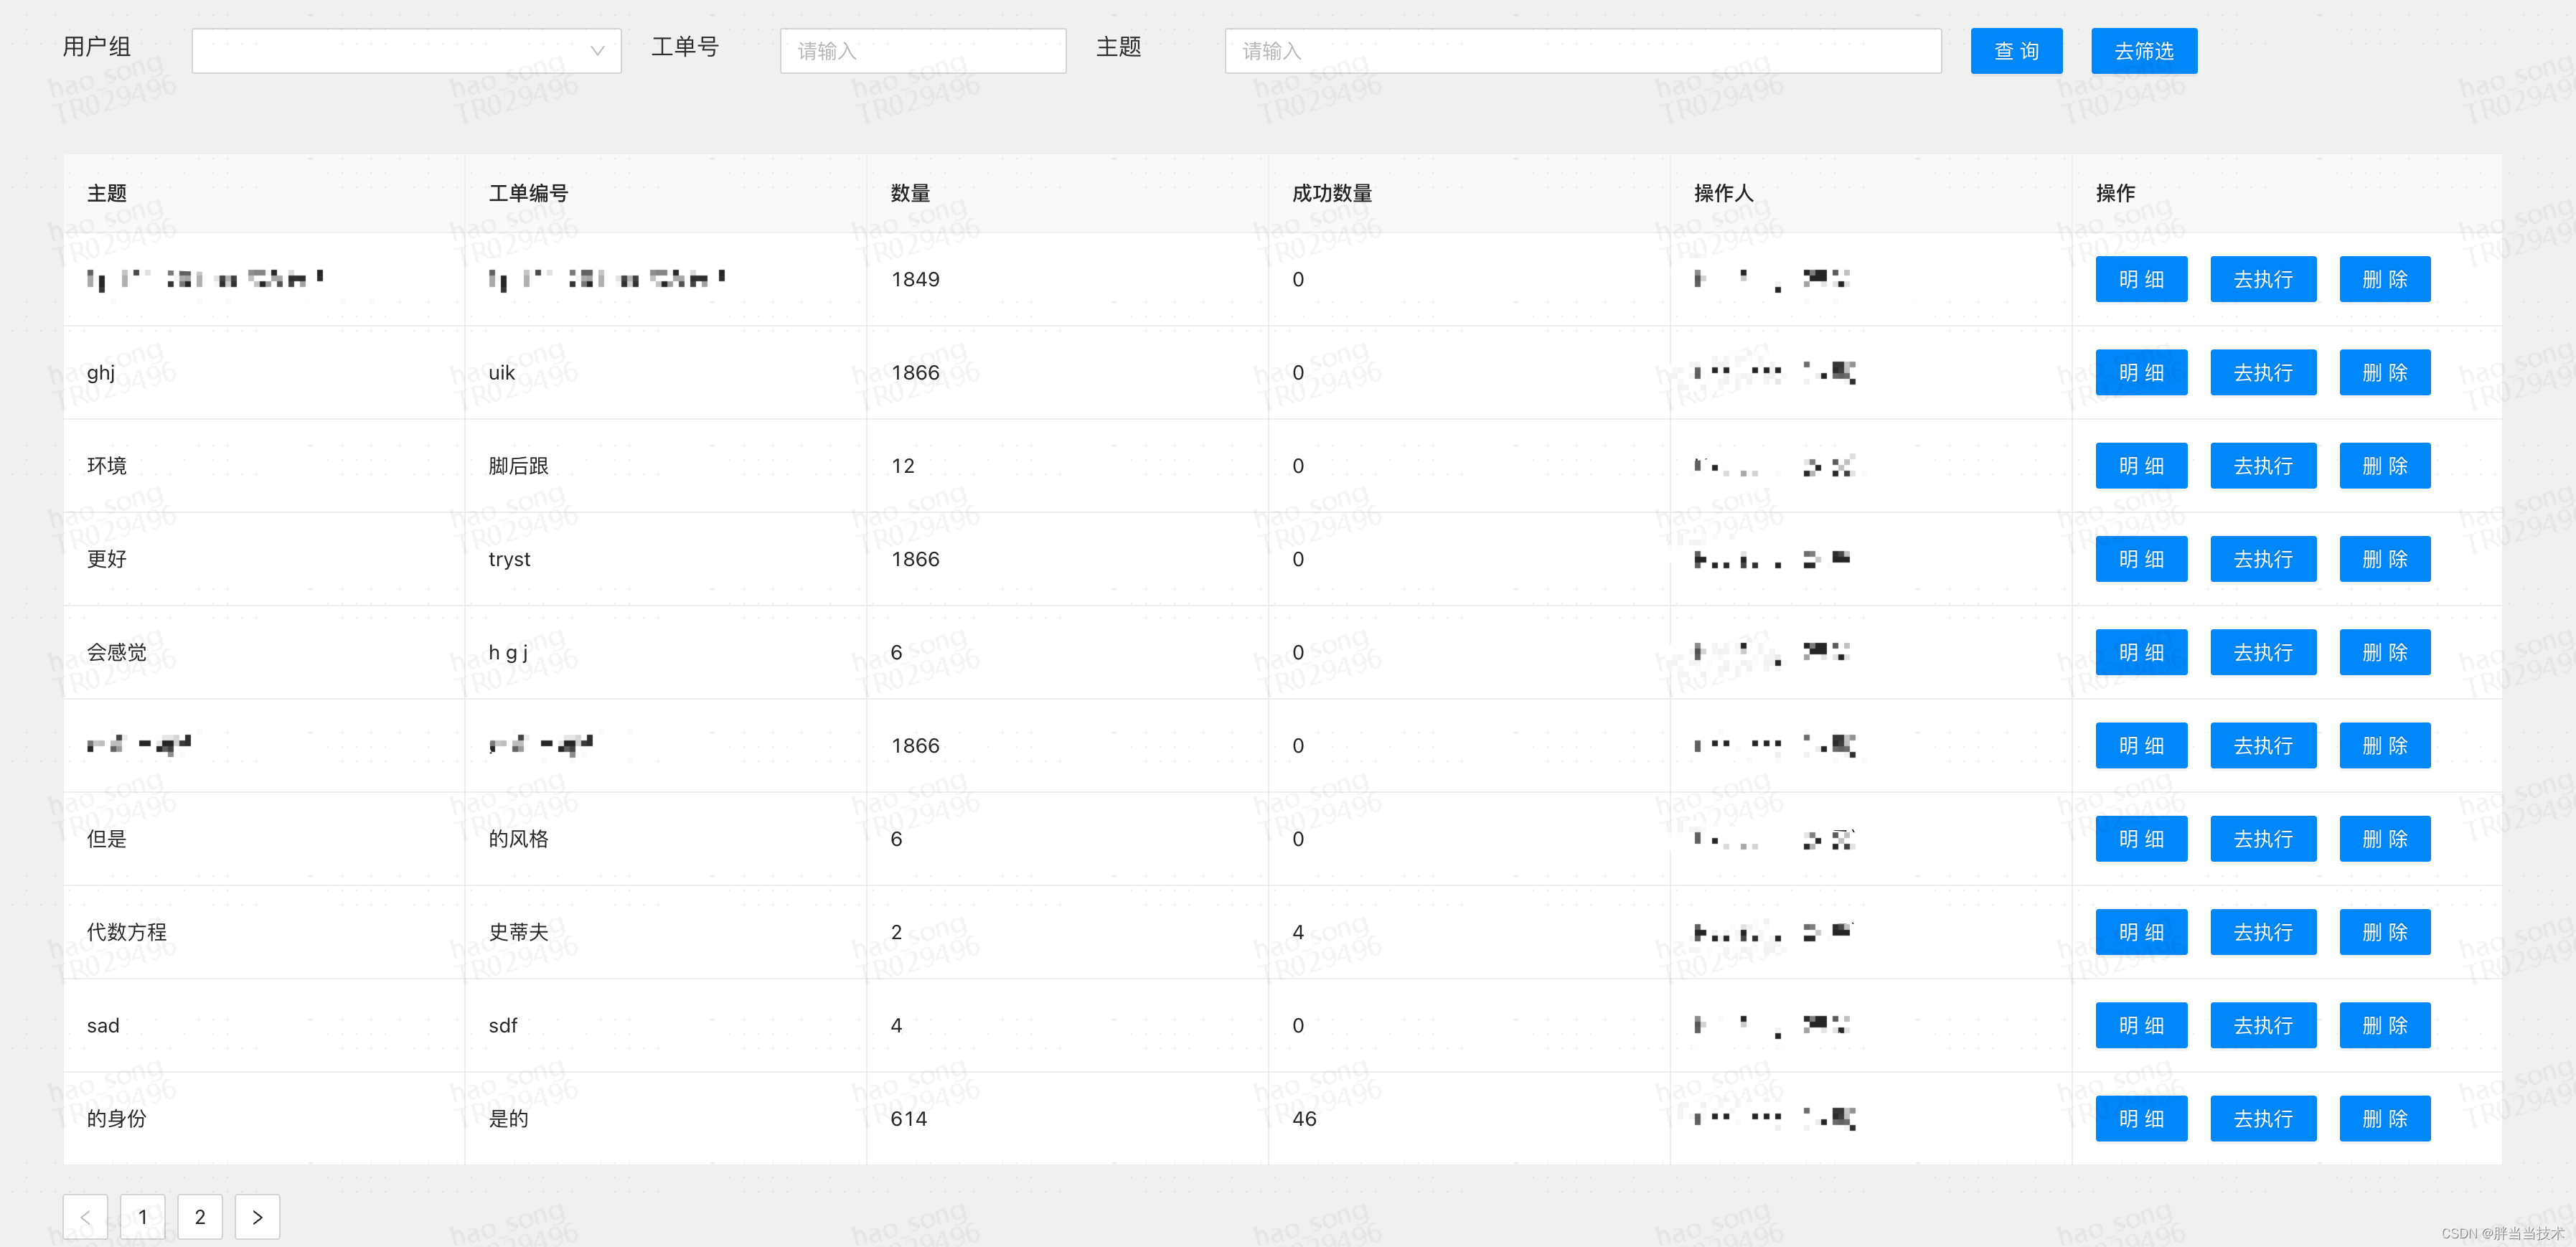
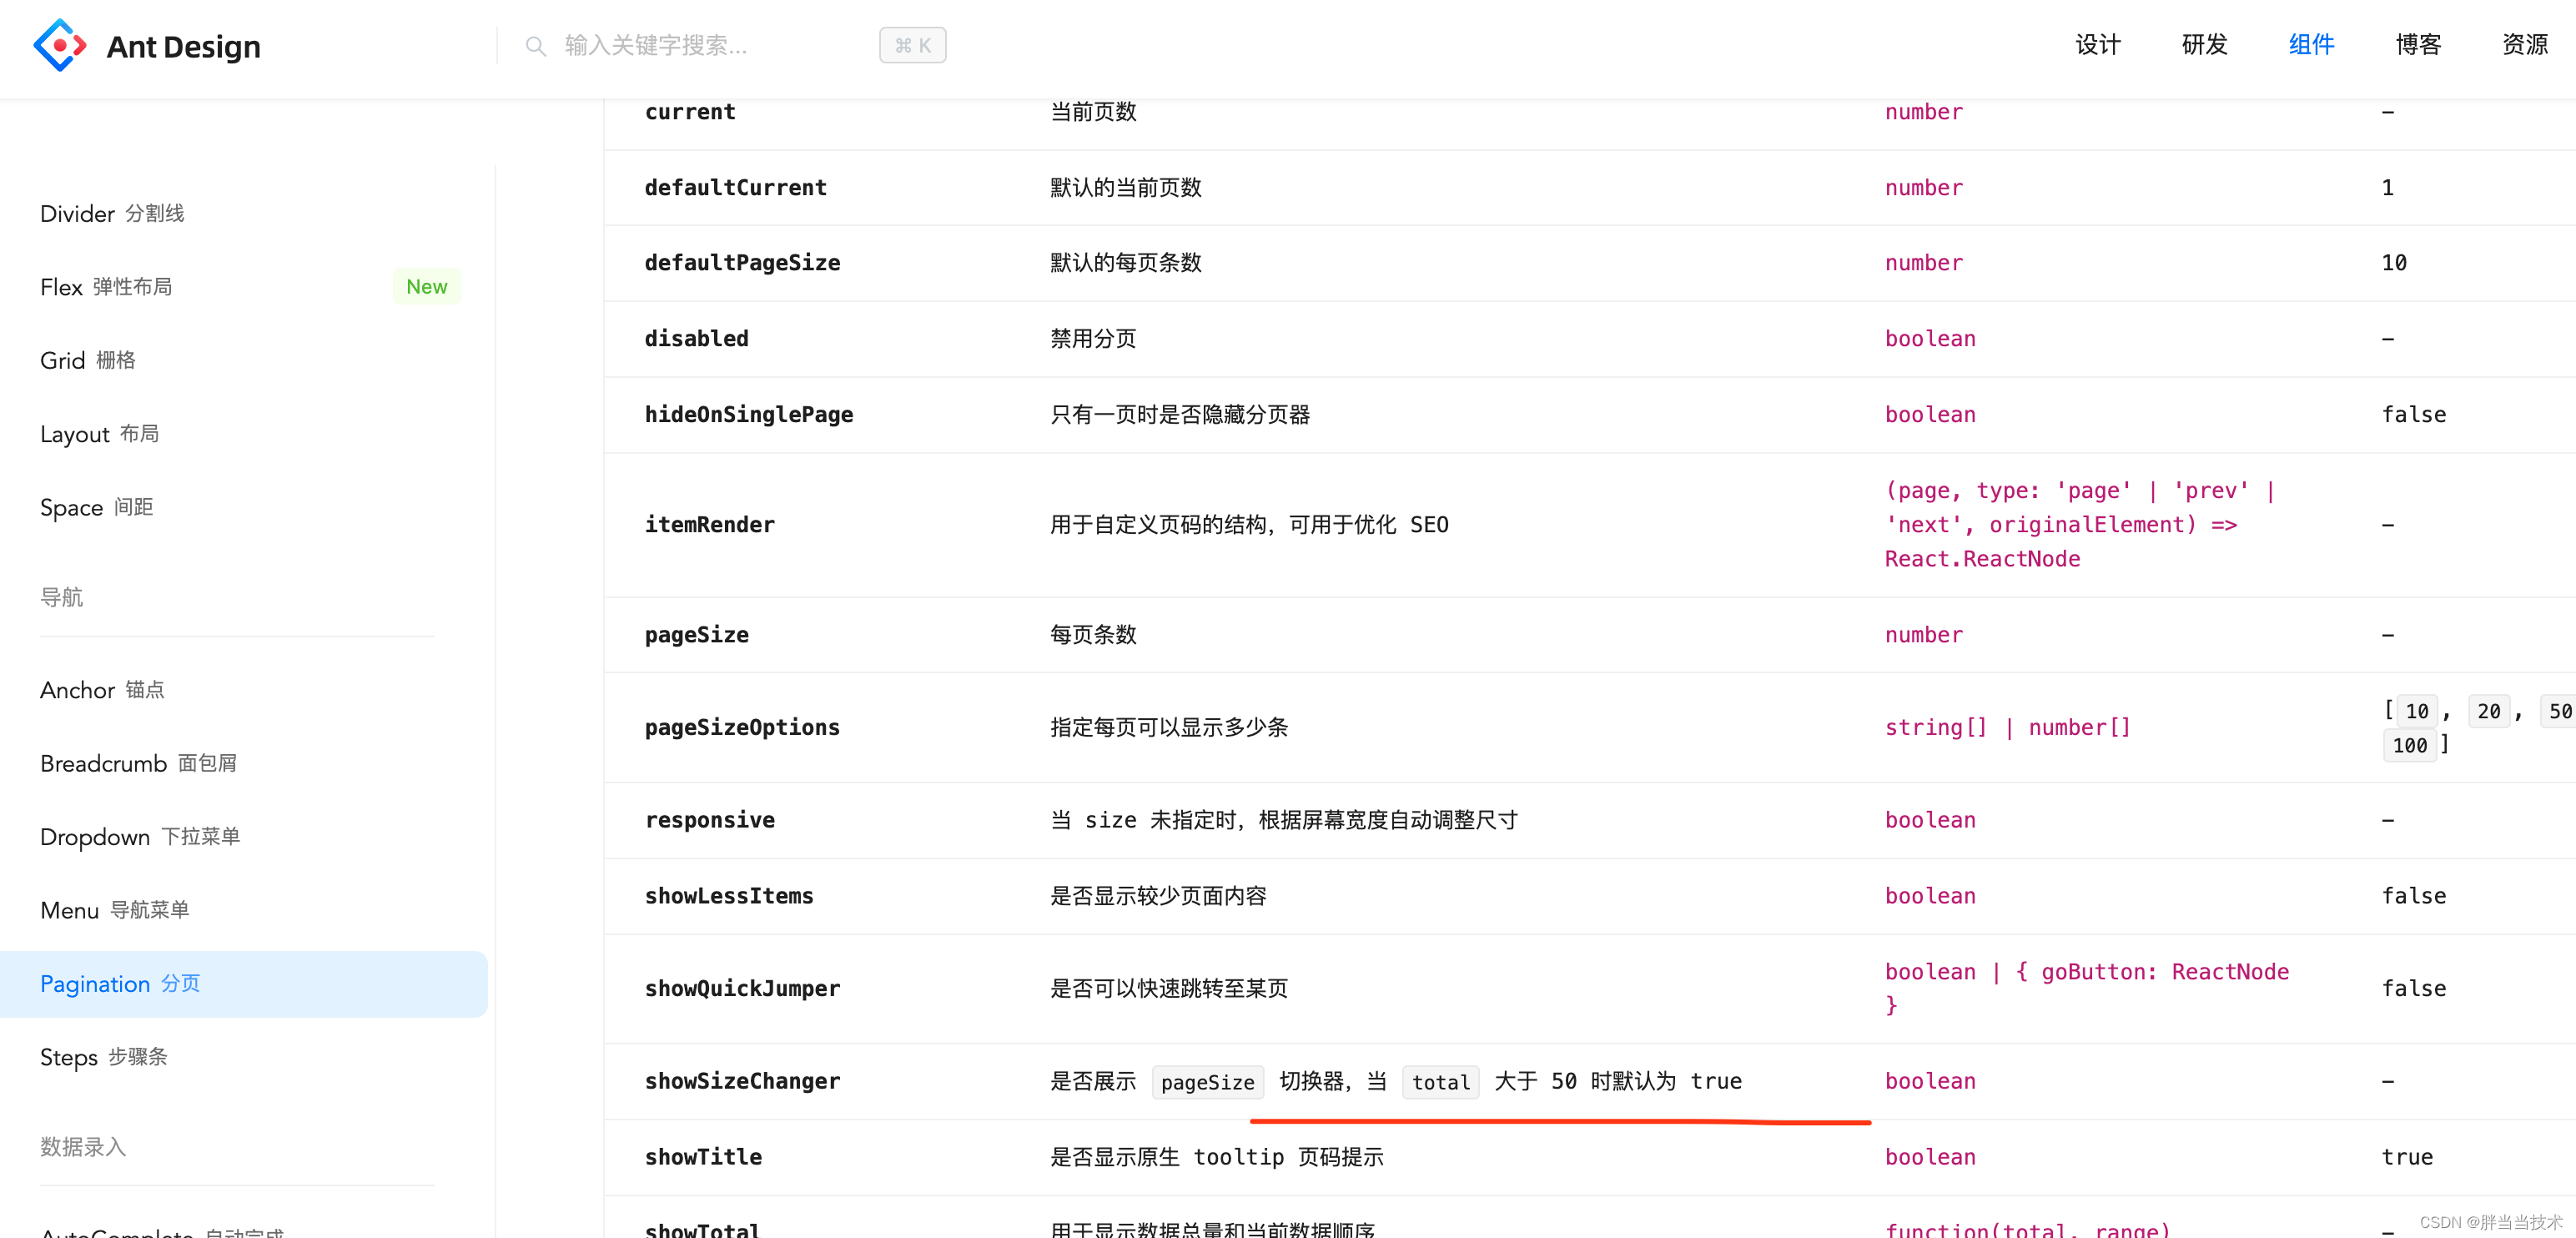
};3、分页
根据官网显示,列表数量超过50才会显示数量选择器,除非你显式指定,但是问题是有必要组件自己做这种判断吗,看的人一头雾水
4、上传文件多次触发
这里就是上传组件里面嵌套了一个按钮,不知道为什么选中文件之后会多次触发fileChange
,fileChange调用upload然后后面两次的文件还是空的,然后就告警两次
<Upload
                                        loading={this.state.uploadLoading}
                                        id='modify-excel-input'
                                        className='modify-excel-input'
                                        accept='.xls,.xlsx'
                                        action={getUploadFileUrl()}
                                        beforeUpload={this.checkFile}
                                        onRemove={this.deleteFile}
                                        onChange={this.fileChange}
                                        maxCount={1}
                                    >
                                        <Button
                                            loading={this.state.uploadLoading}
                                            icon={<UploadOutlined/>}>上传</Button>
                                    </Upload>


upload = () => {
        console.log('RetrySelect upload');
        if (this.state.fileList == null || this.state.fileList.length <= 0
            || this.state.fileList[0].response == null || this.state.fileList[0].response.length <= 0) {
            message.error("请上传文件");
            return;
        }
 }
所以作者就在fileChange里面加了判断看文件是否为空
fileChange = ({fileList: newFileList}) => {
        if (newFileList == null || newFileList.length <= 0
            || newFileList[0].response == null || newFileList[0].response.length <= 0) {
            return;
        }
        console.log("文件列表: ", newFileList);
        this.state.fileList = newFileList;
        this.upload();
    }
5、绑定本地变量
输入框、选择框之类的组件需要和本地变量进行绑定,但是他就不像vue简单的设置v-model就可以,他需要识别变更方法
还必须bind(this),不然绑定本地变量的话根本没法写进输入框,官网也没什么说法,chatGpt也不知道,让人一头雾水
<Input
                                       maxLength={100}
                                       value={this.state.subject}
                                       style={{width: '350px'}}
                                       onChange={this.changeSubject.bind(this)}
                                       placeholder="请输入"/>

changeSubject = (event) => {
        this.setState({subject: event.target.value});
    };
四、使用
这里再介绍一些基础使用
1、动态列
如果表格数据不固定,就可以后端返回列名
const processedColumns = resData.columns.map(column => {
                return {
                    ...column,
                    dataIndex: column.dataIndex,
                    title: column.title,
                    width: '200px',
                };
            });


            this.setState({columns: processedColumns})


<Table
                                columns={this.state.columns}
                                dataSource={this.state.list}
                                bordered
                                scroll={{x: 1500, y: 'calc(100vh - 350px)'}}
                                pagination={false}
                            />
2、超长展示
超过一定长度展示省略号,悬浮展示所有
{
                title: 'response',
                dataIndex: 'response',
                width: '180px',
                render: (text) => {
                    return <Tooltip placement="top" title={text}>
                        <div style={{
                            width: 150,
                            overflow: "hidden",
                            textOverflow: "ellipsis",
                            whiteSpace: "nowrap"
                        }}>{text}</div>
                    </Tooltip>

                }
            },
3、跳转携带参数
原始页面把参数直接缀在路径后面就可以,如果是很多参数可以用json转字符串,到目标页面进行解析
const w = window.open('about:blank');
        w.location.href = '#/detail/' + record.id;
目标页面通过匹配参数拿到
constructor(props) {
        super(props);
        this.state = {
            loadingExecute: false,
            id: props.match.params.id,
参数的名字是由配置url页面决定的
{
        path: '/detail/:id?',
        name: 'detail',
        pageId: '1010',
        authPass: true,
    },
4、弹窗
他的弹窗使用visible属性判断是否展示的,在render里面定义号,然后通过更新本地变量进行展示隐藏
<Modal visible={this.state.executeVisible} onOk={this.goExecute.bind(this)}
                               onCancel={this.handleCancel.bind(this)}
                               footer={[
                                   <Button key="submit" type="primary" onClick={this.goExecute.bind(this)}>
                                       确认
                                   </Button>,
                                   <Button key="back" onClick={this.handleCancel.bind(this)}>
                                       取消
                                   </Button>
                               ]}>
                            <div style={{marginTop: '20px'}}>
                                <span style={{width: '80px', marginRight: '10px'}}>工单</span>
                                <Input
                                       maxLength={100}
                                       value={this.state.woCode}
                                       style={{width: '350px', marginRight: '20px'}}
                                       onChange={this.changeWoCode.bind(this)}
                                       placeholder="请输入"/>
                            </div>
                            <div style={{marginTop: '20px'}}>
                                <span style={{width: '80px', marginRight: '10px'}}>主题</span>
                                <Input
                                       maxLength={100}
                                       value={this.state.subject}
                                       style={{width: '350px'}}
                                       onChange={this.changeSubject.bind(this)}
                                       placeholder="请输入"/>
                            </div>
                        </Modal>
5、获取浏览器信息
主要是获取域名和cokkie
const cookie = document.cookie.split(';')

const host = document.domain.toLowerCase()
五、总结
不同的前端使用起来区别挺大的,作者感觉还是vue好用一些,不过react好像更加国际化一些,公司整体还是偏向用react。