文章目录
Spring注解
@Bean
1、@Bean 概述
@Configuration
public class BeanAttribute {


    /**
     * 通过@Bean注解声明bean
     */
    @Bean
    public Animal cat() {

        return new Cat();
    }

    /**
     * name属性:设置bean的name/id(默认是带有@Bean注解的方法名)
     */
    @Bean(name = "husky")
    public Animal dog() {

        return new Dog();
    }

    /**
     * autowireCandidate属性:是否作为自动装配的候选项。(默认为true)
     *
     * autowireCandidate = false  ->  Spring IoC 容器将不会自动将其注入到其他 bean 中。
     *
     * 解决自动装配歧义性:
     * 当存在多个候选项符合自动装配的条件时,会抛出 NoUniqueBeanDefinitionException 异常
     * 这个时候可以将 autowireCandidate 属性设置为 false,以解决自动装配的歧义性。
     *
     * 注意事项:这个属性只影响byType,不影响byName.
     * 1)不影响 getBeanByName --> 根据name:dog2,可以获取type=Dog.class的bean
     * 2)会影响 getBeanByType --> 根据type:Dog.class,无法获取name=dog2的bean
     * 3)不影响 byName的注入 --> @Resource会注入dog2
     * 4)会影响 byType的注入 --> @Autowired只会注入husky,不会注入dog2(如果设置为true,通过@Autowired注入会报错)
     */
    @Bean(autowireCandidate = false)
    public Animal dog2() {

        return new Dog();
    }

    /**
     * autowire属性:这个bean自动注入的方式(默认为NO),已被标记为@Deprecated
     *
     * 1)autowire = Autowire.NO         不自动注入,使用@Autowired/@Resource注入
     * 2)autowire = Autowire.BY_TYPE    根据名称,调用set方法注入
     * 3)autowire = Autowire.BY_NAME    根据类型,调用set方法注入
     */
    @Bean(autowire = Autowire.BY_NAME)
    public Animal pig() {

        return new Pig();
    }
}
2、Bean 的声明
1)搭配 @Configuration
@Configuration
public class Config {

    @Bean
    public User user() {

        return new User();
    }
}
2)搭配 @Component
@Component
public class Config {

    @Bean
    public User user() {

        return new User();
    }
}
3)搭配 ApplicationContext
public class Config {

    @Bean
    public User user() {

        return new User();
    }
}
AnnotationConfigApplicationContext 读取 Config 对象,作用和 @Configuration 一致。
public class ApplicationContextTest {

    public static void main(String[] args) {

        AnnotationConfigApplicationContext context = new AnnotationConfigApplicationContext(Config.class);
        User user = (User) context.getBean("user");
    }
}
3、Bean 的注入
可以看到,@Bean的autowire属性已经被打上了@Deprecated,这里重点关注default Autowire.NO,其他的做一个了解。
@Target({
   ElementType.METHOD, ElementType.ANNOTATION_TYPE})
@Retention(RetentionPolicy.RUNTIME)
@Documented
public @interface Bean {

    @Deprecated
	Autowire autowire() default Autowire.NO;
}
public enum Autowire {

	/**
	 * Constant that indicates no autowiring at all.
	 */
	NO(AutowireCapableBeanFactory.AUTOWIRE_NO),

	/**
	 * Constant that indicates autowiring bean properties by name.
	 */
	BY_NAME(AutowireCapableBeanFactory.AUTOWIRE_BY_NAME),

	/**
	 * Constant that indicates autowiring bean properties by type.
	 */
	BY_TYPE(AutowireCapableBeanFactory.AUTOWIRE_BY_TYPE);

    // ...
}
1)NO(主要关注这个)
autowire 这个属性已经过期了,所以我们主要关注 default Autowire.NO(也就是不指定该属性),其余两个了解一下即可。
【1】同一配置类
同一配置类中,可以直接引用依赖对象的@Bean方法进行注入(必须在同一配置类中)
@Configuration
public class Config {


    /**
     * orderService()方法上添加了@Bean注解,Spring将会拦截所有对它的调用,
     * 确保直接返回该方法所创建的bean,而不是每次都对其进行实际的调用。
     */
    @Bean
    public OrderService orderService() {

        return new OrderService();
    }

    @Bean
    public UserService userService() {

        return new UserService(orderService());
    }

}
注意:看起来 UserService 对应的bean 是通过调用 orderService() 得到的,但情况并非完全如此。
默认情况下,@Configuration标记的Config是代理对象,因此调用的 orderService() 是代理类调用的
- 如果 OrderService 对应的bean不存在,会创建对应的bean
- 如果 OrderService 对应的bean已存在,会直接返回已存在的bean
也就是说,每次调用 orderService() 方法,得到的都是同一个bean
【2】不同配置类
不同配置类中,可以通过@Bean修饰方法的参数进行注入(不需要在统一配置类也可以)
@Configuration
public class Config1 {

    @Bean
    public OrderService orderService() {

        return new OrderService();
    }
}
@Configuration
public class Config2 {

    // 创建UserService的bean时,会自动装配一个OrderService
    @Bean
    public UserService userService(OrderService orderService) {

        return new UserService(orderService);
    }
}
这样在构建UserService的bean时,Spring会找到OrderService的bean,并传入@Bean方法构建UserService的bean。
2)BY_NAME(了解)
@Configuration
public class BeanInjectConfig {


    /**
     * autowire = Autowire.BY_NAME    根据set方法注入(name 根据 setXxx 的 Xxx)
     * 1、没有set方法 -> 注入失败(属性为null,不报错)
     * 2、根据name没找到 -> 注入失败(属性为null,不报错)
     * 3、根据name找到了 -> 注入成功
     */
    @Bean(autowire = Autowire.BY_NAME)
    public BeanInjectService beanInjectService() {

        return new BeanInjectService();
    }

}
public class BeanInjectService {


    private OneBeanObject oneBeanObject;
    private NoBeanObject noBeanObject;
    private Color color;

    /**
     * 根据name找到了 -> 注入成功
     */
    public void setOneBeanObject(OneBeanObject oneBeanObject) {

        this.oneBeanObject = oneBeanObject;
    }

    /**
     * 根据name没找到 -> 注入失败(属性为null,不报错)---> 存在bean,但是set后面的name不匹配
     */
    //    public void setOneBeanObject123(OneBeanObject oneBeanObject) {

    //        this.oneBeanObject = oneBeanObject;
    //    }

    /**
     * 根据name没找到 -> 注入失败(属性为null,不报错)---> 本来就没有bean
     */
    public void setNoBeanObject(NoBeanObject noBeanObject) {

        this.noBeanObject = noBeanObject;
    }

    /**
     * 根据name没找到 -> 注入失败(属性为null,不报错)---> 存在bean,但是set后面的name不匹配
     */
    public void setColor(Color color) {

        this.color = color;
    }

    /**
     * 根据name找到了 -> 注入成功
     */
//    public void setBlue(Color color) {

//        this.color = color;
//    }

}
3)BY_TYPE(了解)
@Configuration
public class BeanInjectConfig {


    /**
     * autowire = Autowire.BY_TYPE    根据方法的参数类型注入(必须是set开头的方法)
     * 1、没有set开头的方法 -> 注入失败(属性为null,不报错)
     * 2、根据type没找到 -> 注入失败(属性为null,不报错)
     * 3、根据type找到一个 -> 注入成功
     * 4、根据type找到多个 -> 报错 NoUniqueBeanDefinitionException
     */
    @Bean(autowire = Autowire.BY_TYPE)
    public BeanInjectService beanInjectService() {

        return new BeanInjectService();
    }

}
public class BeanInjectService {


    private OneBeanObject oneBeanObject;
    private NoBeanObject noBeanObject;
    private Color color;

    /**
     * 根据type找到一个 -> 注入成功(必须是set开头的方法)
     */
    public void set123(OneBeanObject oneBeanObject) {

        this.oneBeanObject = oneBeanObject;
    }

    /**
     * 根据type没找到 -> 注入失败(属性为null,不报错)---> 本来就没有bean
     */
    public void setNoBeanObject(NoBeanObject noBeanObject) {

        this.noBeanObject = noBeanObject;
    }

    /**
     * 根据type找到一个 -> 注入成功(必须是set开头的方法)
     */
    public void setBlue(Blue color) {

        this.color = color;
    }

    /**
     * 根据type找到多个 -> 报错 NoUniqueBeanDefinitionException
     */
//    public void setColor(Color color) {

//        this.color = color;
//    }

}
4、基于@Bean的扩展注解
@Configuration
public class BeanConfig {


    @Bean
    @Scope("prototype")
    public OrderService orderService() {

        return new OrderService();
    }

}
如果有很多地方都要注册为多例bean,可以基于这两个注解做扩展
@Target({
   ElementType.METHOD, ElementType.ANNOTATION_TYPE})
@Retention(RetentionPolicy.RUNTIME)
@Bean
@Scope("prototype")
public @interface PrototypeBean {


}
@Configuration
public class BeanConfig {


    @PrototypeBean
    public OrderService orderService() {

        return new OrderService();
    }

}
@Autowired
1、基本使用
/**
 * 依赖注入之 @Autowired
 *  先byType
 *      1)根据type有一个 -> 直接注入
 *      2)根据type有多个 -> 再根据name筛选
 *  再byName
 *      1)根据name有一个 -> 直接注入
 *      2)根据name没找到 -> 项目启动就会报错 NoUniqueBeanDefinitionException(type有多个,name不存在)
 *      3)根据name有多个 -> 项目启动就会报错 ConflictingBeanDefinitionException
 *
 *  required属性(默认为true)
 *      1)required=false -> 允许找不到bean注入,值为null
 *      2)required=true  -> 必须找到bean注入
 */
@Component
public class InjectByAutowired {


    /**
     * 先根据type -> 找到多个 -> 再根据name -> 找到一个 -> 注入blue
     */
    @Autowired
    private Color blue;

    /**
     * 启动就报错 NoUniqueBeanDefinitionException(和上面的区别是,有blue,但是没有green)
     */
//    @Autowired
//    private Color green;

    /**
     * 先根据type
     *   1)required = true  --> 抛错
     *   2)required = false --> 不抛错,noBeanObject = null
     */
    @Autowired(required = false)
    private NoBeanObject noBeanObject;

    public void testInject() {

        blue.printName();
        System.out.println("noBeanObject = " + noBeanObject);	// null
    }

}
2、搭配 @Qualifier
@Qualifier 注解用于限定注入的是哪个bean。
使用@Autowired时,「type有多个,name不存在」会导致启动报错,通过 @Qualifier 可以解决
@Component
public class InjectWithQualifier {


    /**
     * 不加 @Qualifier -> 启动就报错 NoUniqueBeanDefinitionException(type有多个,name不存在)
     * 加了 @Qualifier -> 从多个Color中选择red注入
     */
    @Autowired
    @Qualifier("red")
    private Color green;

    public void testInject() {

        green.printName();
    }

}
2、三种注入方式
1)Filed变量注入
@Component
public class OrderService {

    @Autowired
    private DependencyA dependencyA;

    @Autowired
    private DependencyB dependencyB;

    @Autowired
    private DependencyC dependencyC;
}
2)Setter方法注入
@Component
public class OrderService {

    // 待注入的属性
    private DependencyA dependencyA;
    private DependencyB dependencyB;
    private DependencyC dependencyC;

    // 参数是 要注入的对象
    @Autowired
    public void setDependencyA(DependencyA dependencyA) {

        this.dependencyA = dependencyA;
    }

    @Autowired
    public void setDependencyB(DependencyB dependencyB) {

        this.dependencyB = dependencyB;
    }

    @Autowired
    public void setDependencyC(DependencyC dependencyC) {

        this.dependencyC = dependencyC;
    }
}
3)构造器注入(推荐)
@Component
public class OrderService {

    // 待注入的属性
    private DependencyA dependencyA;
    private DependencyB dependencyB;
    private DependencyC dependencyC;

    // 参数是 要注入的对象
    @Autowired
    public OrderService(DependencyA dependencyA, DependencyB dependencyB, DependencyC dependencyC) {

        this.dependencyA = dependencyA;
        this.dependencyB = dependencyB;
        this.dependencyC = dependencyC;
    }
}
在 Spring4.3 之后,如果我们的类中只有单个构造函数,那么Spring就会实现一个隐式的自动注入。
@Component
public class OrderService {

    // 待注入的属性
    private DependencyA dependencyA;
    private DependencyB dependencyB;
    private DependencyC dependencyC;

    // 省略了@Autowired
    public OrderService(DependencyA dependencyA, DependencyB dependencyB, DependencyC dependencyC) {

        this.dependencyA = dependencyA;
        this.dependencyB = dependencyB;
        this.dependencyC = dependencyC;
    }
}
如果有多个构造方法,请看后面的「构造器注入 案例分析」
4、构造器注入 案例分析
1)单个构造
在 Spring4.3 之后,如果我们的类中只有单个构造函数,那么Spring就会实现一个隐式的自动注入(可省略@Autowired)
/**
 * 使用空参构造实例化
 */
@Component
public class UserService {


    private User user;

    public UserService() {

    }

}
/**
 * 使用有参构造实例化
 */
@Component
public class UserService {


    private User user;

    public UserService(User user) {

        this.user = user;
    }

}
2)空参构造 + 有参构造
/**
 * 空参构造 + 有参构造
 * ① 没有@Autowired --> 默认使用空参构造(不会注入InjectService)
 * ② 一个@Autowired --> 使用@Autowired标记的构造方法
 * ③ 多个@Autowired --> 报错:Invalid autowire-marked constructor ...
 *							 Found constructor with 'required' Autowired annotation already
 */
@Component
public class ManyConstruction1 {


    public InjectService injectService;

    public ManyConstruction1() {

    }

    public ManyConstruction1(InjectService injectService) {

        this.injectService = injectService;
    }

}
3)多个有参构造
/**
 * 多个有参构造
 * ① 没有@Autowired --> 报错:No default constructor found;
 *							 nested exception is java.lang.NoSuchMethodException:
 *							 com.demo.spring.ioc.inject.construct.ManyConstruction2.<init>()
 * ② 一个@Autowired --> 使用@Autowired标记的构造方法
 * ③ 多个@Autowired --> 报错:Invalid autowire-marked constructor ...
 *							 Found constructor with 'required' Autowired annotation already
 */
@Component
public class ManyConstruction2 {


    public InjectService injectService;
    public InjectService2 injectService2;

    @Autowired
    public ManyConstruction2(InjectService injectService) {

        this.injectService = injectService;
    }

    public ManyConstruction2(InjectService injectService1, InjectService2 injectService2) {

        this.injectService = injectService1;
        this.injectService2 = injectService2;
    }

}
4)多个 @Autowired(false)
/**
 * 如果多个@Autowired都声明了required = false,不会报错
 * ① 优先使用参数最多的构造方法
 * ② 如果参数多的构造方法的参数bean不存在/找不到 --> 使用参数第二多的构造方法(以此类推)
 * ③ 如果存在参数一样多的构造方法 --> 使用声明在上面的构造方法
 */
@Component
public class ManyConstruction3 {


    public InjectService injectService;
    public InjectService2 injectService2;
    public NoBeanObject noBeanObject;

    public ManyConstruction3() {

    }

    @Autowired(required = false)
    public ManyConstruction3(InjectService injectService) {

        System.out.println("使用了1个参数的构造方法1");
        this.injectService = injectService;
    }

    @Autowired(required = false)
    public ManyConstruction3(InjectService2 injectService2) {

        System.out.println("使用了1个参数的构造方法2");
        this.injectService2 = injectService2;
    }

    @Autowired(required = false)
    public ManyConstruction3(InjectService injectService, InjectService2 injectService2) {

        System.out.println("使用了2个参数的构造方法");
        this.injectService = injectService;
        this.injectService2 = injectService2;
    }

    @Autowired(required = false)
    public ManyConstruction3(InjectService injectService, InjectService2 injectService2, NoBeanObject noBeanObject) {

        System.out.println("使用了3个参数的构造方法");
        this.injectService = injectService;
        this.injectService2 = injectService2;
        this.noBeanObject = noBeanObject;
    }

}
5、注意事项
父类中 @Autowired 修饰的会被注入
public class BaseService {


    // 是否会被注入??
    @Autowired
    public UserService userService;

}

@Component
public class OrderService extends BaseService {


    private void test() {

        System.out.println(userService); // 会被注入!
    }

}
static修饰的属性不会被注入
@Component
public class OrderService {


    // 是否会被注入??
    @Autowired
    private static UserService userService;

    private void test() {

        System.out.println(userService); // null 不会被注入
    }

}
@Resource
1、基本使用
/**
 * 依赖注入之 @Resource
 *  1. 指定name(根据name)
 *      1)根据name有一个 -> 直接注入
 *      2)根据name没找到 -> 项目启动就会报错 NoSuchBeanDefinitionException
 *      3)根据name有多个 -> 项目启动就会报错 ConflictingBeanDefinitionException
 *
 *  2. 指定type(先根据type,再根据name)
 *      1)根据type有一个 -> 直接注入
 *      2)根据type没找到 -> 抛错
 *      3)根据type有多个 -> 再根据name找
 *
 *  3. 都不指定(先根据name,再根据type)
 *      1)根据name有一个 -> 直接注入
 *      2)根据name没找到 -> 再根据type找
 *						-> 根据type有一个 -> 直接注入
 *						-> 根据type有多个 -> 抛错 NoUniqueBeanDefinitionException
 *      3)根据name有多个 -> 项目启动就会报错 ConflictingBeanDefinitionException
 */
@Component
public class InjectByResource {


    /**
     * 先根据name -> 注入的是Red
     */
    @Resource(name = "red")
    private Color blue;

    /**
     * 先根据type -> 找到多个 -> 再根据name -> 注入white
     */
    @Resource(type = Color.class)
    private Color white;

    /**
     * 默认先根据name -> 找不到 -> 再根据type -> 找到多个 -> 抛错 NoUniqueBeanDefinitionException
     */
//    @Resource
//    private Color green;

    /**
     * 默认先根据name -> 找不到 -> 再根据type -> 找到一个 -> 注入oneBeanObject
     */
    @Resource
    private OneBeanObject oneBeanObj;

    public void testInject() {

        blue.printName();
        white.printName();
    }

}
2、注意事项
@Resource 注解不是Spring提供的,是由JDK提供的(javax.annotation.Resource),但是解析是由Spring负责的。
@Configuration
@Configuration修饰的类,首先是一个bean,其次是一个配置bean
对于配置bean,不光会放到Spring容器中,Spring还回去解析配置bean(例如为配置bean中的@Bean注解生成对应的bean)
@Target(ElementType.TYPE)
@Retention(RetentionPolicy.RUNTIME)
@Documented
@Component
public @interface Configuration {

    /**
     * 配置bean的beanName
     */
    @AliasFor(annotation = Component.class)
    String value() default "";

    /**
     * proxyBeanMethods = true		配置bean对应的是配置类的「代理对象」
     * proxyBeanMethods = false		配置bean对应的是配置类的「普通对象」
     */
    boolean proxyBeanMethods() default true;
}
1、proxyBeanMethods = true
/**
 * proxyBeanMethods = true   --->  Full配置bean(代理对象)
 */
@Configuration(proxyBeanMethods = true)
public class ConfigurationWithProxy {


    @Bean
    public ConfigurationTestBeanA configurationTestBeanA() {

        return new ConfigurationTestBeanA();
    }

    /**
     * 此时@Configuration标记的是代理对象,调用的也是代理类的 configurationTestBeanA()
     * 1)如果 ConfigurationTestBeanA 对应的bean 不存在,会创建对应的bean
     * 2)如果 ConfigurationTestBeanA 对应的bean 已存在,会直接返回已存在的bean
     * 也就是说,每次调用 configurationTestBeanA() 方法,得到的都是同一个bean
     */
    public void test() {

        // 返回的都是同一个对象
        System.out.println(configurationTestBeanA());
        System.out.println(configurationTestBeanA());
        System.out.println(configurationTestBeanA());
    }

}
2、proxyBeanMethods = false
/**
 * proxyBeanMethods = false  --->  Lite配置bean(普通对象)
 */
@Configuration(proxyBeanMethods = false)
public class ConfigurationWithoutProxy {


    @Bean
    public ConfigurationTestBeanB configurationTestBeanB() {

        return new ConfigurationTestBeanB();
    }

    /**
     * 此时@Configuration标记的是普通对象
     * 每次调用 configurationTestBeanB 方法,都会执行 configurationTestBeanB 方法的逻辑(新new一个对象)
     */
    public void test() {

        // 返回的都是不同的对象
        System.out.println(configurationTestBeanB());
        System.out.println(configurationTestBeanB());
        System.out.println(configurationTestBeanB());
    }
}
@Primary
自动装配出现多个Bean候选者时,会抛出异常 NoUniqueBeanDefinitionException
@Primary注解:自动装配出现多个Bean候选者时,被注解为@Primary的Bean将作为首选者。
- 注意:
@Primary注解只能使用一次,不能使用@Primary标记多个相同类型的bean,否则会报错
@Configuration
public class PrimaryConfig {


    @Bean("primaryTestBean1")
    public PrimaryTestBean primaryTestBean1() {

        return new PrimaryTestBean("primaryTestBean-1");
    }

    @Primary
    @Bean("primaryTestBean2")
    public PrimaryTestBean primaryTestBean2() {

        return new PrimaryTestBean("primaryTestBean-2");
    }

}
@Component
public class PrimaryTest {


    /**
     * 没加 @Primary --> 抛错(此处也可以用@Qualifier解决)
     * 加了 @Primary --> 优先注入@Primary修饰的primaryTestBean2
     */
    @Autowired
    private PrimaryTestBean primaryTestBean;

    /**
     * 没加 @Primary --> 根据name注入primaryTestBean1
     * 加了 @Primary --> 优先注入@Primary修饰的primaryTestBean2
     */
    @Autowired
    private PrimaryTestBean primaryTestBean1;

    public void testPrimary() {

        System.out.println(primaryTestBean.getName());
        System.out.println(primaryTestBean1.getName());
    }

}
@Lazy
@Lazy 可以使对应的bean懒加载(Spring启动时不会加载,只有在被调用的时候才会进行初始化)
- 减少SpringIOC容器启动的加载时间
- 解决循环依赖
1、加在类上
/**
 * 没加@Lazy --> 在Spring启动时就会加载
 * 加了@Lazy --> 在Spring启动时不会加载,只有在被调用的时候才会加载
 */
@Lazy
@Component
public class LazyOnClass {


}
2、加在配置类上
/**
 * 加了@Lazy --> 内部所有@Bean定义的Bean都是懒加载的bean
 */
@Lazy
@Configuration
public class LazyOnConfiguration {


    @Bean
    public A a() {

        return new A();
    }

    @Bean
    public B b() {

        return new B();
    }

}
3、加在字段上
@Component
public class LazyOnField {


    /**
     * 没加@Lazy --> 注入的是Bean对象
     * 加了@Lazy --> 注入的是CGLIB代理对象
     *          --> 在代理对象执行某方法时,才会从Spring容器去找对应bean对象,并执行bean对象对应的方法
     */
    @Lazy
    @Autowired
    public LazyInjectBean lazyInjectBean;

    public void test() {

        // xxx.LazyInjectBean$$EnhancerBySpringCGLIB$$fd9085ec
        System.out.println(lazyInjectBean.getClass());
        // 执行代理对象的逻辑 --> 找到bean对象 --> 执行bean对象的test
        lazyInjectBean.test();
    }

}
4、加在构造方法上
@Component
public class LazyOnConstruction {


    private LazyInjectBean lazyInjectBean;

    /**
     * 加了@Lazy的构造方法的参数,是代理对象
     */
    @Lazy
    @Autowired
    public LazyOnConstruction(LazyInjectBean lazyInjectBean) {

        // lazyInjectBean是代理对象
        this.lazyInjectBean = lazyInjectBean;
    }
}
5、加在方法上
@Component
public class LazyOnMethod {


    private LazyInjectBean lazyInjectBean;

    /**
     * 加了@Lazy的方法的所有参数,都是代理对象
     */
    @Lazy
    @Autowired
    public void setLazyInjectBean(LazyInjectBean lazyInjectBean1, LazyInjectBean lazyInjectBean2) {

        // lazyInjectBean1 和 lazyInjectBean2 都是代理对象
    }

}
6、加在参数前
@Component
public class LazyBeforeParam {


    private LazyInjectBean lazyInjectBean;

    /**
     * 前面有@Lazy的方法参数是代理对象
     */
    @Autowired
    public void setLazyInjectBean(@Lazy LazyInjectBean lazyInjectBean1,
                                  LazyInjectBean lazyInjectBean2) {

        // lazyInjectBean1 是 代理对象
        // lazyInjectBean2 是 bean对象
    }

}
@Import
@Import 用于在配置类中引入其他配置类,从而将多个配置类组合在一起。
使用 @Import 注解可以实现模块化开发,将一个大型应用程序拆分成多个小的配置类,分别管理不同功能模块的配置信息,从而提高代码的可读性、可维护性和复用性。
以下是一个简单的示例,演示了如何使用 @Import 注解引入其他配置类:
@Configuration
@Import({
   AppConfig1.class, AppConfig2.class})
public class MainConfig {


}
MainConfig 是一个配置类,通过 @Import 注解引入了 AppConfig1 和 AppConfig2 两个配置类。当 Spring IoC 容器加载 MainConfig 配置类时,会一并加载 AppConfig1 和 AppConfig2 配置类,并将它们一起注册到容器中。
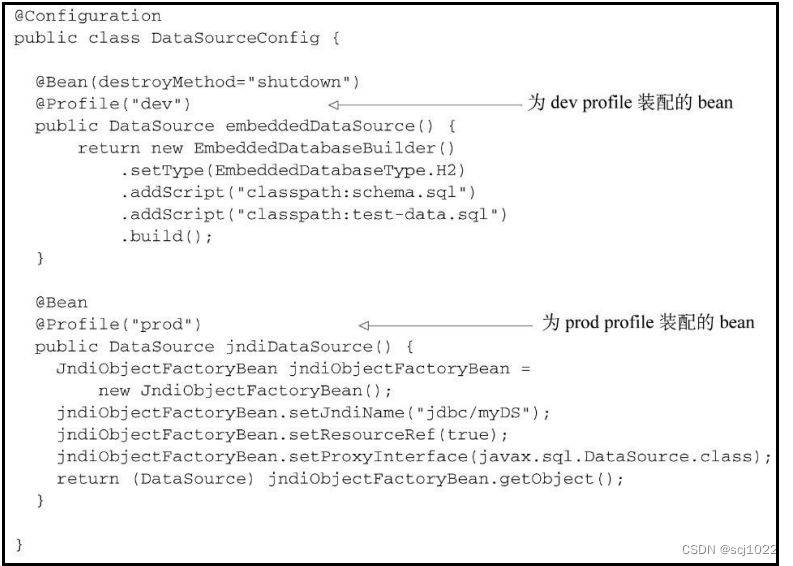
@Profile
1、配置profile
根据环境决定该创建哪个bean。Spring并不是在构建的时候确定的,而是等到运行时再来确定。
/**
 * 告诉Spring这个配置类中的bean只有在哪些profile激活时才会创建
 */
@Profile({
   "local", "dev", "test"})
public class DevelopmentProfileConfig {
   }
注意:没有指定profile的bean始终都会被创建
在Spring 3.1之前,只能在类级别上使用@Profile注解。
从Spring 3.2开始,可以在方法级别上使用@Profile注解, 与@Bean注解一同使用。
2、激活profile
Spring确定哪个profile处于激活状态时,需要依赖两个属性:spring.profiles.active 和 spring.profiles.default
- 如果设置了spring.profiles.active属性的话,那么它的值就会用来确定 哪个profile是激活的。
- 如果没有设置spring.profiles.active属性,那Spring将会查找spring.profiles.default的值。
- 如果两个属性都没有设置,那就没有激活的profile,只会创建那些没有定义在profile中的bean。
有多种方式来设置这两个属性:
- 作为DispatcherServlet的初始化参数;
- 作为Web应用的上下文参数;
- 作为JNDI条目;
- 作为环境变量;
- 作为JVM的系统属性;
- 在集成测试类上,使用 @ActiveProfiles 注解设置。
@Lookup
@Target(ElementType.METHOD)	// 可以看到,@Lookup只能在方法上使用
@Retention(RetentionPolicy.RUNTIME)
@Documented
public @interface Lookup {

    String value() default "";
}
@Lookup的作用:
- 给某个方法赋值一个bean(@Lookup修饰的方法会被重写,在调用时,会返回方法返回值的对象)
- 抽象类是不能成为bean对象的,但是在抽象类的方法上标注@LookUp,就可以让这个抽象类被注入到容器中
1、抽象类注入
/**
 * 正常情况下,抽象类是不能成为bean对象的
 *  1)不加@Lookup --> 注入DefineAbstractBean会报错
 *  2)加上@Lookup --> 可以正常注入DefineAbstractBean
 */
@Component
public abstract class DefineAbstractBean {


    /**
     * Spring在遇到LookUp标注的方法时,会重写此方法。
     * 因此返回值为null,对程序也没有影响。
     */
    @Lookup
    public PrototypeBean getPrototypeBean() {

        return null;
    }

}
2、单例bean中使用多例bean
@Component
@Scope("prototype")
public class PrototypeBean {


}
@Component
public class GetPrototypeBean {


    @Autowired
    private PrototypeBean prototypeBean;

    public void compareLookUpAndAutowired() {

        System.out.println("获取两次@Autowired注入的对象 ---> 相同的对象");
        System.out.println("@Autowired--->" + prototypeBean);
        System.out.println("@Autowired--->" + prototypeBean);
    }

}
虽然 PrototypeBean 是多例bean,但是 GetPrototypeBean 是单例bean,在Spring容器启动时,已经注入了prototypeBean(固定了),所以即使是多例,每次取到的也是同一个对象。
可以使用 @Lookup 修饰的方法,每次都获取一个新的对象。(不需要注入了,也不会有循环依赖了)
@Component
public class GetPrototypeBean {


    @Lookup
    public PrototypeBean getPrototypeBean() {

        return null;
    }

    public void usePrototypeBean() {

        System.out.println("获取两次@Lookup返回的对象 ---> 不同的对象");
        System.out.println("@Lookup--->" + getPrototypeBean());
        System.out.println("@Lookup--->" + getPrototypeBean());
    }

}
@Conditional
如果希望一个或多个bean只有在指定条件下才创建,可以使用 @Conditional 注解
1、相关类
@FunctionalInterface
public interface Condition {

    boolean matches(ConditionContext var1, AnnotatedTypeMetadata var2);
}
/**
 * Spring容器相关信息
 */
public interface ConditionContext {


	/**
	 * 检查bean定义
	 */
	BeanDefinitionRegistry getRegistry();

    /**
	 * 检查bean是否存在,以及bean的属性
	 */
	@Nullable
	ConfigurableListableBeanFactory getBeanFactory();

    /**
	 * 检查环境变量是否存在,以及它的值是什么
	 */
	Environment getEnvironment();

    /**
	 * 加载的资源
	 */
	ResourceLoader getResourceLoader();

    /**
	 * 检查是否存在某个类
	 */
	@Nullable
	ClassLoader getClassLoader();

}
/**
 * 能够让我们检查带有@Bean注解的方法上还有什么其他的注解
 */
public interface AnnotatedTypeMetadata {


	boolean isAnnotated(String annotationName);

	@Nullable
	Map<String, Object> getAnnotationAttributes(String annotationName);

	@Nullable
	Map<String, Object> getAnnotationAttributes(String annotationName, boolean classValuesAsString);

	@Nullable
	MultiValueMap<String, Object> getAllAnnotationAttributes(String annotationName);

	@Nullable
	MultiValueMap<String, Object> getAllAnnotationAttributes(String annotationName, boolean classValuesAsString);

}
2、基本使用
/**
 * 只有满足@Conditional中指定的,Condition接口的实现类的match方法,才会注册这个bean
 */
@Component
@Conditional(value = {
   ConditionImpl.class})
public class ConditionalBean {


}
/**
 * 自定义Condition实现类,重写match方法
 */
public class ConditionImpl implements Condition {


    /**
     * 被@Conditional标记的bean,必须满足matches方法才会被放到IOC容器
     *
     * @param context  Spring容器相关信息
     * @param metadata @Conditional所在类的元数据信息
     * @return 是否满足条件
     */
    @Override
    public boolean matches(ConditionContext context, AnnotatedTypeMetadata metadata) {


        try {

            // 是否包含某个注解(注解的类全名)
            if (!metadata.isAnnotated("org.springframework.stereotype.Component")) {

                return false;
            }

            // 是否能够加载某个类
            context.getClassLoader().loadClass("com.demo.spring.ioc.annotation.conditional.Tomcat");
            return true;
        } catch (ClassNotFoundException e) {

            return false;
        }
    }
}
@Value
@Value()注解的value属性可以有三种表现形式:
1、字符串
import org.springframework.core.io.Resource;

/**
 * 静态属性值:普通字符串、URL资源、文件资源
 */
@Component
public class StaticValue {


    /**
     * 注入普通字符串,相当于直接给属性默认值
     */
    @Value("hello")
    private String value;

    /**
     * 注入URL资源,将对应的URL字符串转换成URL
     */
    @Value("https://www.baidu.com")
    private URL url;

    /**
     * 注入Resource文件资源,将对应的字符串值转换成对应的资源文件
     * 注意Resource全限定名:org.springframework.core.io.Resource)
     */
    @Value("classpath:test.text")
    private Resource resource;

    public void printStrValue() {

        System.out.println("value = " + value);
        System.out.println("url = " + url);
        System.out.println("resource = " + resource);
    }

}
2、${} - 属性占位符
# application.yaml
book:
  author: 鲁迅

colors: red, yellow, green
/**
 * 配置文件属性值
 *  1)格式:${}
 *  2)使用:注入配置文件的值,可以使用冒号指定默认值
 */
@Component
public class PropertyValue {


    /**
     * 注入配置文件中的配置(如:book.author=Albert)
     */
    @Value("${book.author}")
    public String author;

    /**
     * 注入数组(自动根据","分割)
     */
    @Value("${colors}")
    private String[] colorArray;

    /**
     * 注入列表形式(自动根据","分割)
     */
    @Value("${colors}")
    private List<String> colorList;

    /**
     * 找不到相关配置,会报错 Could not resolve placeholder 'name' in value "${name}"
     */
//    @Value("${name}")
    private String name;

    /**
     * 配置名称加上 冒号: 来指定默认值
     *      1)找到了配置 -> 使用配置的值
     *      2)没找到配置 -> 使用冒号后的默认值
     */
    @Value("${name:default}")
    private String defaultName1;

    /**
     * 冒号后边为空,则表示空串
     */
    @Value("${name:}")
    private String defaultName2;

    public void printStrValue() {

        System.out.println("author = " + author);
        System.out.println("colorArray = " + colorArray[0]);
        System.out.println("colorList = " + colorList);
        System.out.println("defaultName1 = " + defaultName1);
        System.out.println("defaultName2 = " + defaultName2);
    }

}
author = 鲁迅
colorArray = red
colorList = [red, yellow, green]
defaultName1 = default
defaultName2 =
3、#{} - SpEL表达式
# application.yaml
book:
  author: 鲁迅

colors: red, yellow, green

nums: 1|2|3|4|5|6
/**
 * SpEL表达式
 *  1)格式:#{}
 *  2)使用:大括号内可以为 环境变量、其他bean、bean的属性、bean的方法调用 等
 */
@Component
public class SpELValue {


    /**
     * 注入操作系统属性,如:Mac OS X
     */
    @Value("#{systemProperties['os.name']}")
    private String systemPropertiesName;

    /**
     * 如果系统属性中未获取到port的值,则使用8888。
     */
    @Value("#{systemProperties['port']?:'8888'}")
    private String port;

    /**
     * 注入表达式结果
     */
    @Value("#{ T(java.lang.Math).random() * 100.0 }")
    private double randomNumber;

    /**
     * 注入其他Bean属性:注入staticValue对象的属性value(必须是public的,否则会报错)
     */
    @Value("#{propertyValue.author}")
    private String author;

    /**
     * #{}和${}的组合注入属性并进行分割处理(根据"|"分割,默认是根据","分割)
     */
    @Value("#{'${nums}'.split('\\|')}")
    private List<String> numList;

    public void printStrValue() {

        System.out.println("systemPropertiesName = " + systemPropertiesName);
        System.out.println("port = " + port);
        System.out.println("randomNumber = " + randomNumber);
        System.out.println("author = " + author);
        System.out.println("numList = " + numList);
    }


}
systemPropertiesName = Mac OS X
port = 8888
randomNumber = 1.61735503976147
author = 鲁迅
numList = [1, 2, 3, 4, 5, 6]
4、@Value的扩展注解
@Component
public class ValueService {


    @Value("${server.port}")
    private String port;

}
如果有很多地方都要用到这个配置值,可以基于@Value做扩展
@Target({
   ElementType.FIELD, ElementType.METHOD, ElementType.PARAMETER, ElementType.ANNOTATION_TYPE})
@Retention(RetentionPolicy.RUNTIME)
@Documented
public @interface Value {

    String value();
}
@Target({
   ElementType.FIELD, ElementType.METHOD, ElementType.PARAMETER, ElementType.ANNOTATION_TYPE})
@Retention(RetentionPolicy.RUNTIME)
@Value("${server.port}")
public @interface ServerPort {

}
@Component
public class ValueService {


    @ServerPort
    private String port;

}
AOP 相关的注解
1. @EnableAspectJAutoProxy
		开启AOP注解
2. @Aspect
		声明当前类使用切面类(通知类)
3. @Before
		前置通知:目标方法执行之前执行
4. @AfterReturning
		后置通知:目标方法执行完成之后执行
5. @AfterThrowing
		异常通知:目标方法发生异常时执行
6. @After
		最终通知:不管有没有异常,一定会执行。
7. @Around
		环绕通知:手动执行目标方法,完成各类通知的配置。