目录
一、list封装中模板参数Ref和Ptr的理解
对于反向迭代器,是我们在前面STL模拟实现中留下的一个问题。在之前的文章中,我们极大程度上的利用了模板,从而减少了许多的代码,如今我们的反向迭代器也是利用了封装+模板的思想,将正向迭代器包装成为了通用的反向迭代器。
首先我们来看看之前list模拟实现的代码
namespace hmy
{
template<class T>
struct list_node
{
T _data;
list_node<T>* _next;
list_node<T>* _prev;
list_node(const T& x = T())
:_data(x)
, _next(nullptr)
, _prev(nullptr)
{}
};
// T T& T*
// T cosnt T& const T*
template<class T, class Ref, class Ptr>
struct __list_iterator
{
typedef list_node<T> Node;
typedef __list_iterator<T, Ref, Ptr> self;
Node* _node;
__list_iterator(Node* node)
:_node(node)
{}
self& operator++()
{
_node = _node->_next;
return *this;
}
self& operator--()
{
_node = _node->_prev;
return *this;
}
self operator++(int)
{
self tmp(*this);
_node = _node->_next;
return tmp;
}
self operator--(int)
{
self tmp(*this);
_node = _node->_prev;
return tmp;
}
Ref operator*()
{
return _node->_data;
}
Ptr operator->()
{
return &_node->_data;
}
bool operator!=(const self& s)
{
return _node != s._node;
}
bool operator==(const self& s)
{
return _node == s._node;
}
};
template<class T>
class list
{
typedef list_node<T> Node;
public:
typedef __list_iterator<T, T&, T*> iterator;
typedef __list_iterator<T, const T&, const T*> const_iterator;
const_iterator begin() const
{
return const_iterator(_head->_next);
}
const_iterator end() const
{
return const_iterator(_head);
}
//这里是传值返回,是一个临时对象,而临时对象具有常性,在以后的使用中不能--,需要写成-1等
iterator begin()
{
return iterator(_head->_next);
//return _head->_next;
}
iterator end()
{
return iterator(_head);
//return _head;
}
void empty_init()
{
_head = new Node;
_head->_next = _head;
_head->_prev = _head;
_size = 0;
}
list()
{
empty_init();
}
// lt2(lt1)
list(const list<T>& lt)
{
empty_init();
for (auto e : lt)
{
push_back(e);
}
}
// lt3 = lt1
/*list<int>& operator=(const list<int>& lt)
{
if (this != <)
{
clear();
for (auto e : lt)
{
push_back(e);
}
}
return *this;
}*/
void swap(list<T>& lt)
{
std::swap(_head, lt._head);
std::swap(_size, lt._size);
}
// lt3 = lt1
list<int>& operator=(list<int> lt)
{
swap(lt);
return *this;
}
~list()
{
clear();
delete _head;
_head = nullptr;
}
void clear()
{
iterator it = begin();
while (it != end())
{
it = erase(it);
}
}
void push_back(const T& x)
{
insert(end(), x);
}
void push_front(const T& x)
{
insert(begin(), x);
}
void pop_front()
{
erase(begin());
}
void pop_back()
{
erase(--end());
}
iterator insert(iterator pos, const T& x)
{
Node* cur = pos._node;
Node* newnode = new Node(x);
Node* prev = cur->_prev;
// prev newnode cur
prev->_next = newnode;
newnode->_prev = prev;
newnode->_next = cur;
cur->_prev = newnode;
++_size;
return iterator(newnode);
}
iterator erase(iterator pos)
{
Node* cur = pos._node;
Node* prev = cur->_prev;
Node* next = cur->_next;
delete cur;
prev->_next = next;
next->_prev = prev;
--_size;
return iterator(next);
}
size_t size()
{
return _size;
}
private:
Node* _head;
size_t _size;
};
}之前我们的list模拟实现利用了list_node和__list_iterator以及list这三个类互相封装来实现代码,其中list_node是链表的节点结构体;__list_iterator是链表的迭代器的结构体;list是封装他们两个结构体的类,这样就构成了list的框架。其中list_node只需要封装节点的关键信息:数据和前后指针;__list_iterator则只需要封装迭代器的成员和相关函数(例如++和--还有*解引用等)。而他们的融合则产生了化学一般的反应----------各个类各司其职,结构分明的组成了一个更加完善更加方便的类----list。而list只需要做的就是把对外的成员函数写出即可(比如begin/end/构造/插入和删除等),至于其他底层的实现则交给了__list_iterator和list_node。这就是封装的力量!
关于模板参数Ref和Ptr的补充讲解:
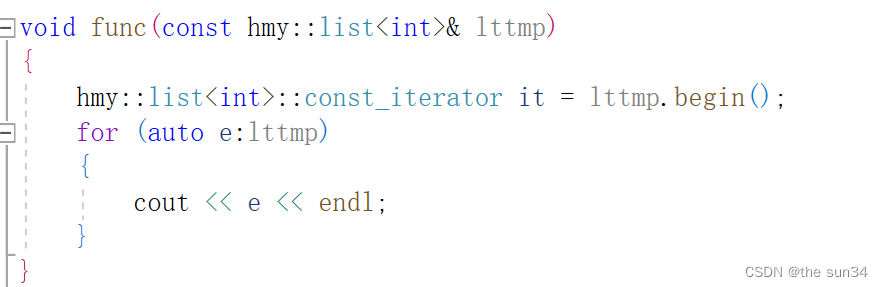
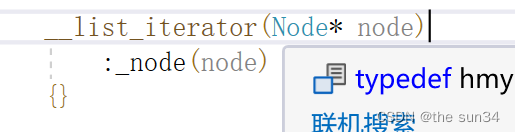
在实例化对象list1的时候就已经明确了他是const对象还是普通对象,然后在调用成员函数的时候,编译器会根据它的类型来确定是调用const修饰的成员函数还是调用普通函数,不论调用的是const修饰的函数还是普通函数,都会先走迭代器的构造函数这一关,(因为他们都是__list_iterator<T, Ref, Ptr>的特殊形式,所以走的都是同一个构造函数)他们在这里将_node赋值为了传入的node值,但是在这里他们已经确定了Ref和Ptr的区别,const_iterator传入的参数是T/const T&/const T*于是这里的Ref和Ptr就分别是const T&和const T*,所以他们在后续的使用中也会产生截然不同的效果
二、反向迭代器的实现
言归正传:
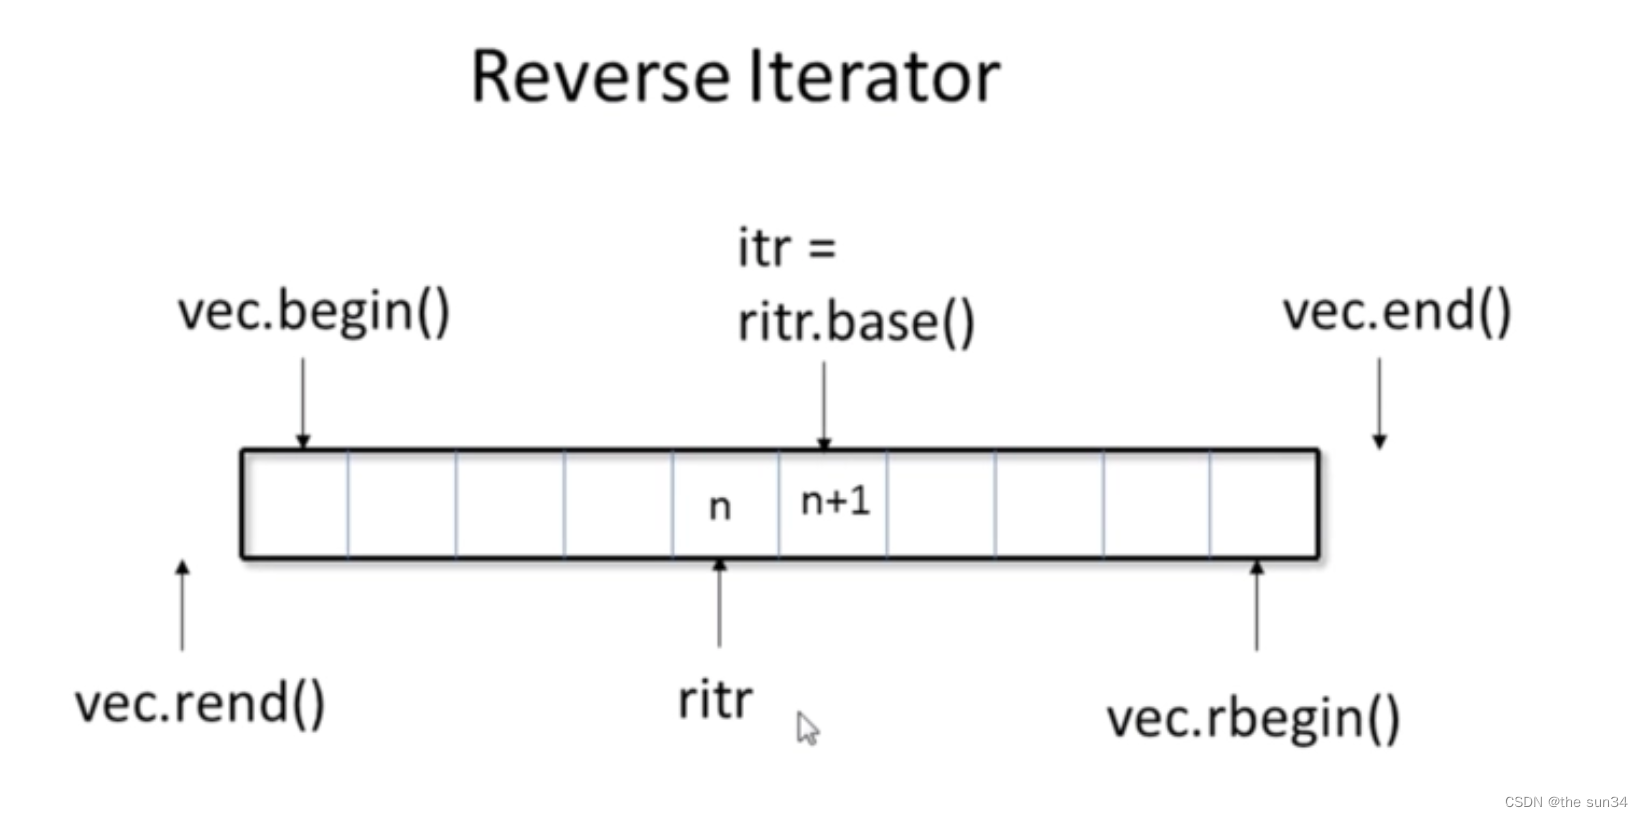
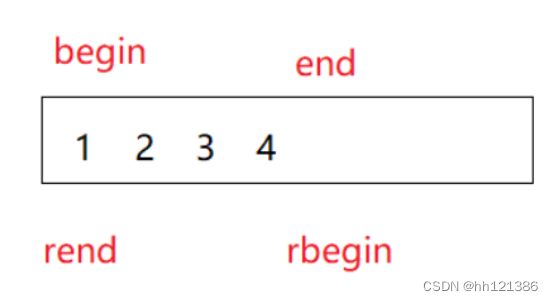
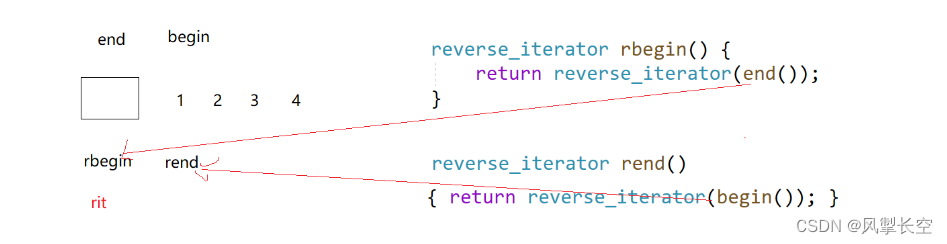
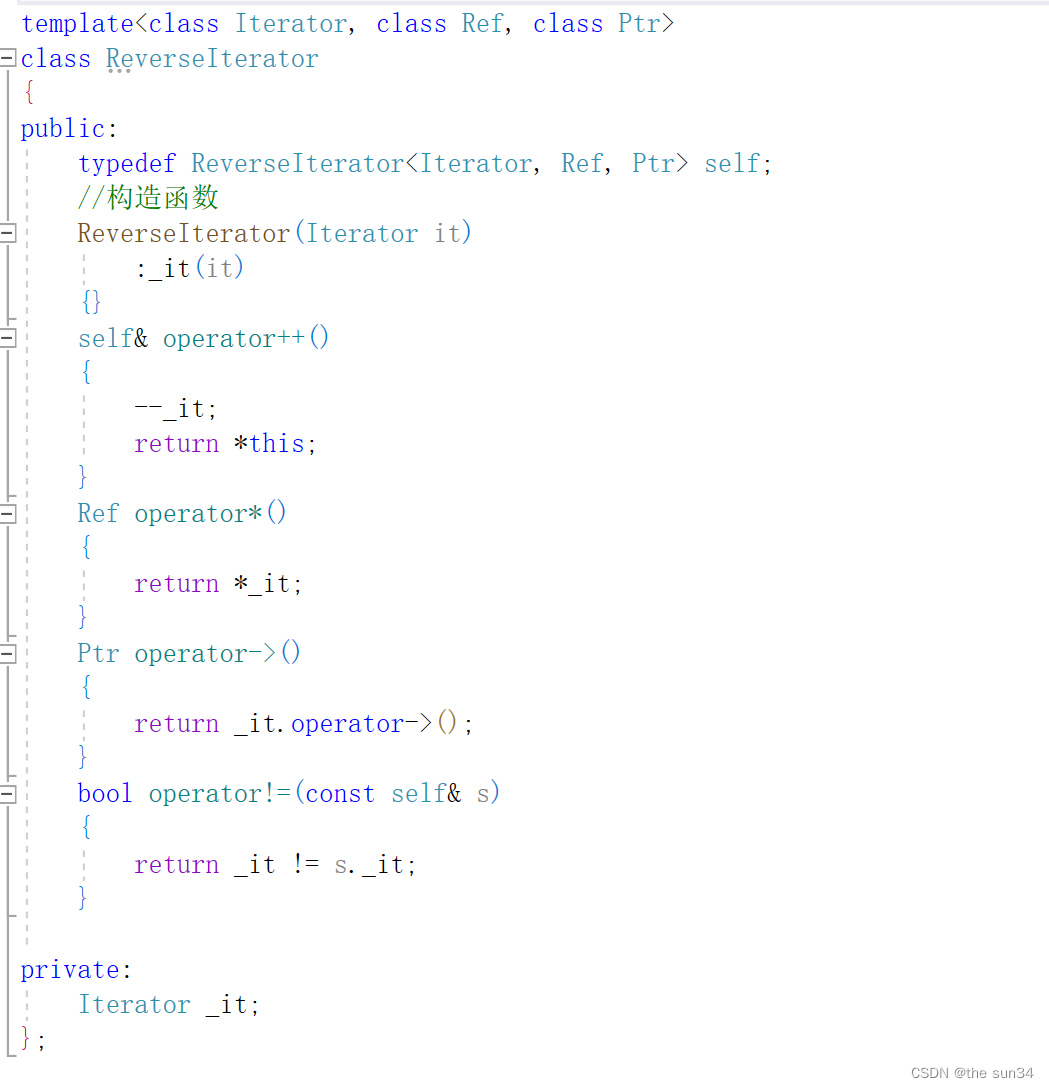
我们的反向迭代器也用到了封装这一核心思想。他为了代码层面的简略,将正向迭代器封装到其中,然后再利用正向迭代器的成员函数就能够轻而易举的实现反向迭代器了。(同样是使用了Ref和Ptr来区别const反向迭代器和普通迭代器)
于是我们只需要在list这个类中补充关于两个反向迭代器的声明和一些成员函数即可正常使用了
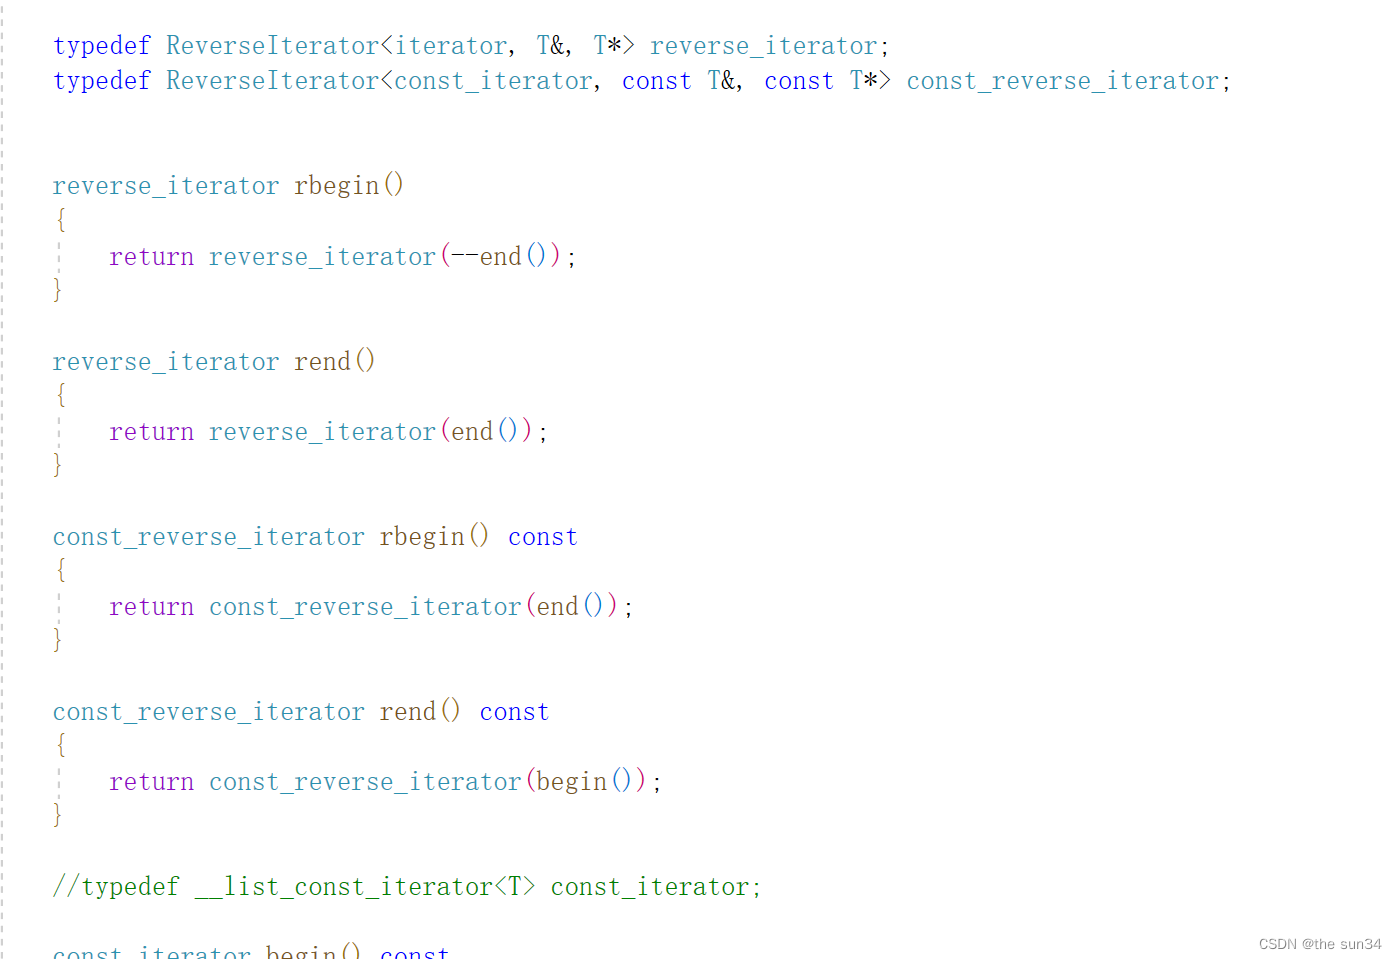
值得注意的是,反向迭代器中的第一个模板参数竟然是一个正向迭代器!!!这其实被我们称为适配器模式,他会跟着我们传入不同类型的迭代器而产生不一样的适配模式,如果传入的参数是list<int>::iterator那么他适配出来的就是list<int>的反向迭代器等等.......
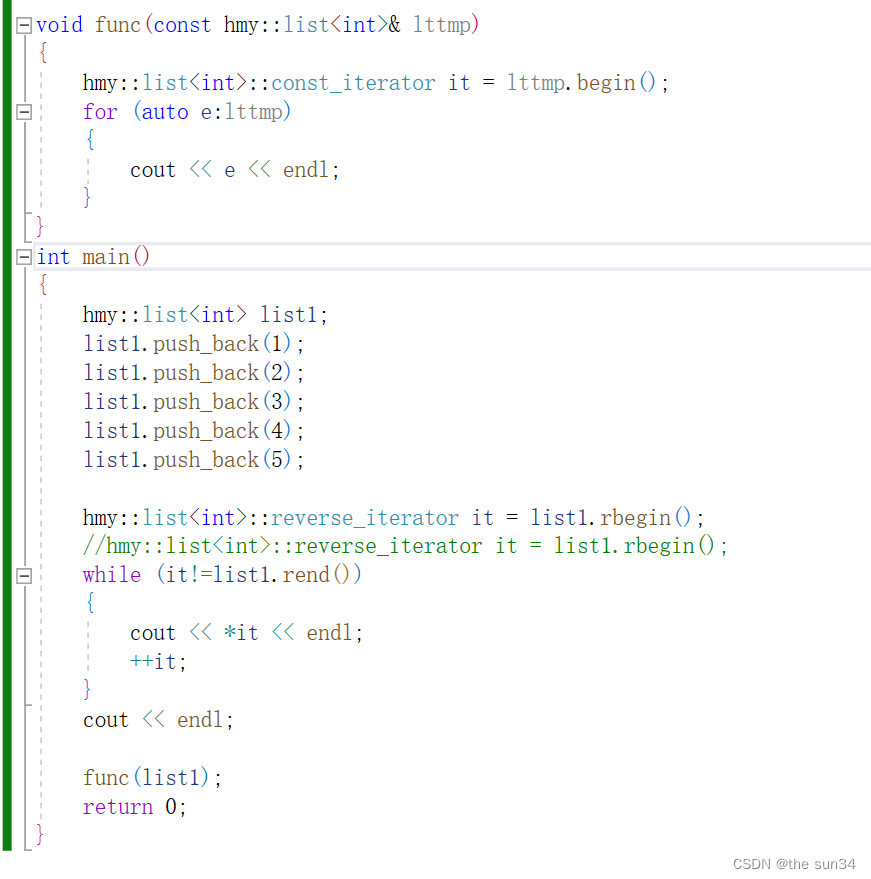
下面是测试代码: