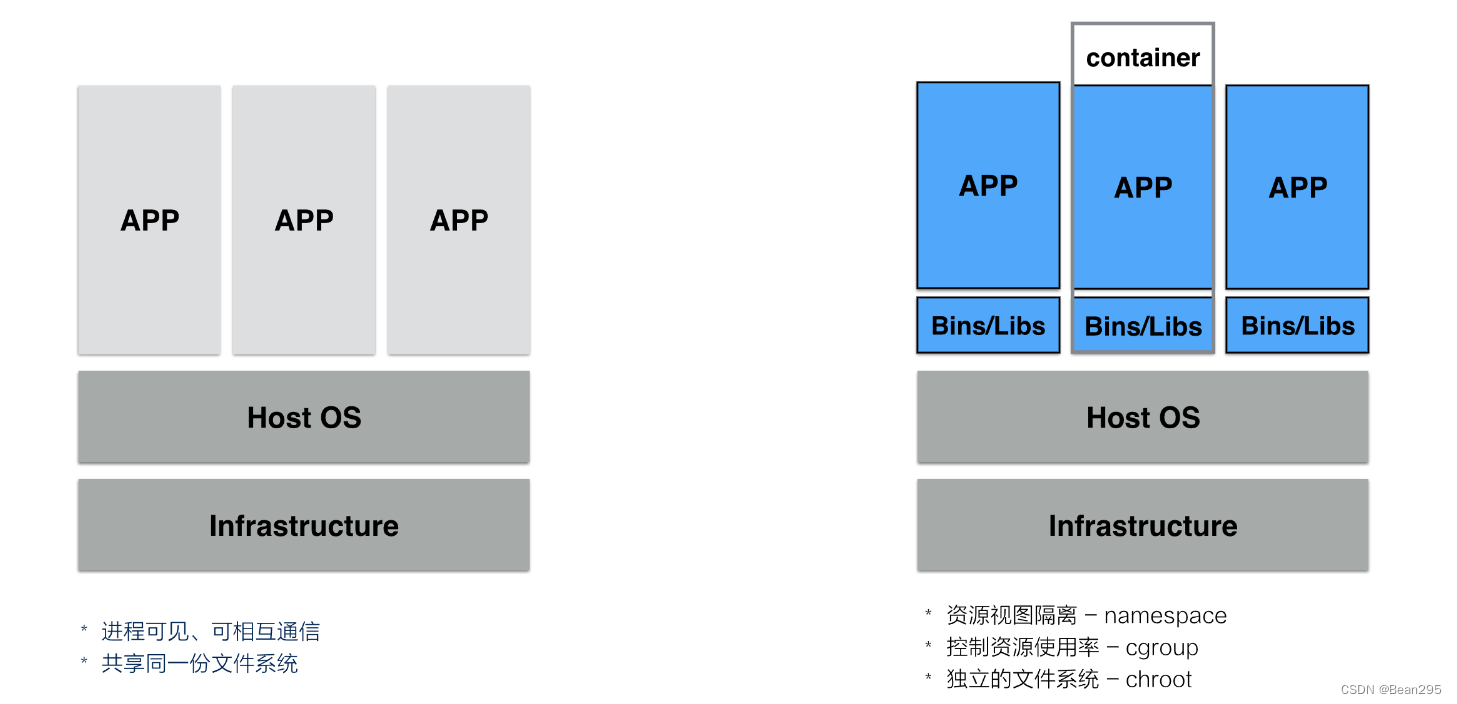
这是一个基于Tasmota的设备、用MQTT协议来通信控制的安卓应用程序。支持ON/OFF命令插座和基本的RGB LED控制。
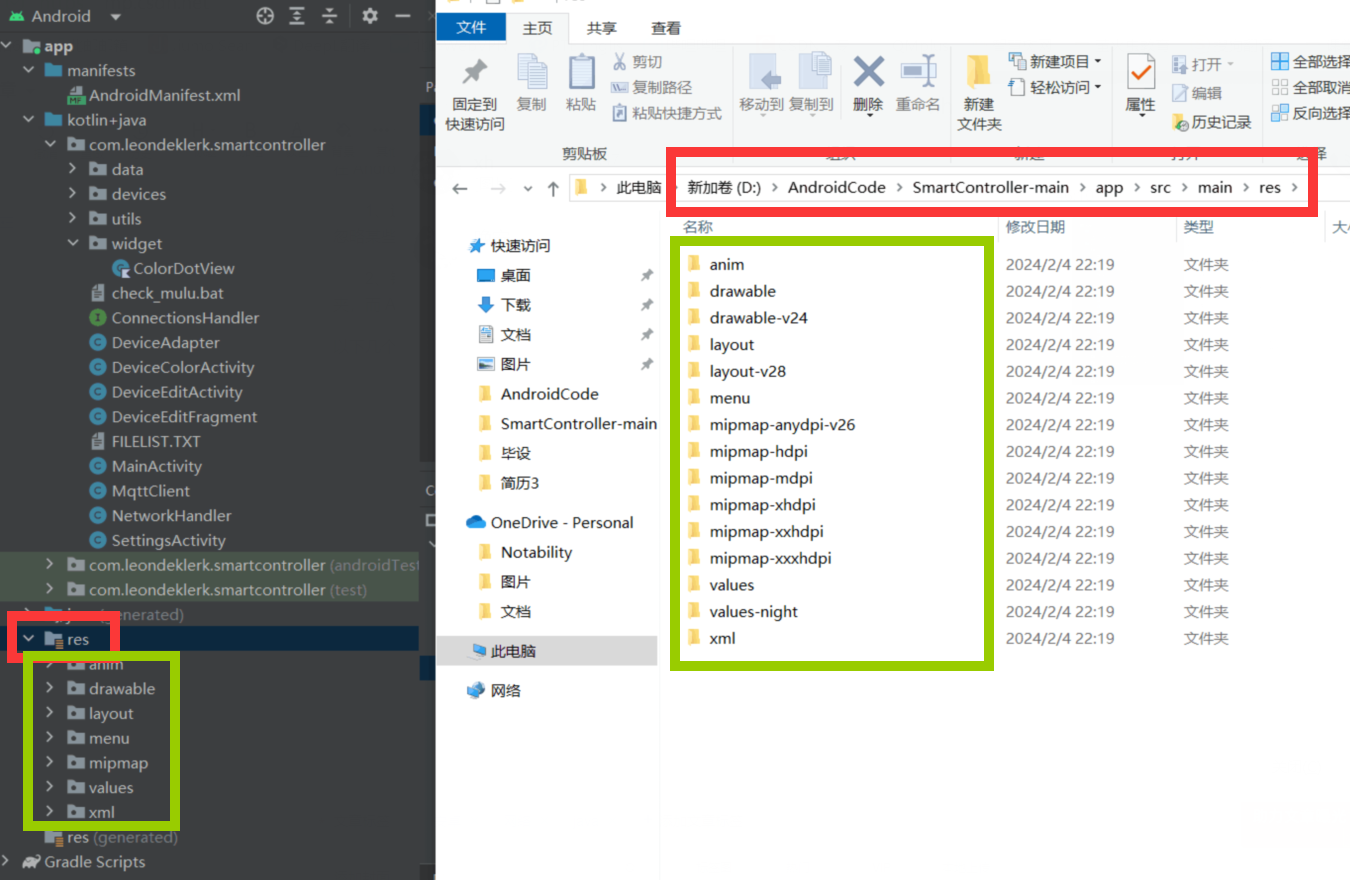
只需要关注SmartController-main\app\src的代码

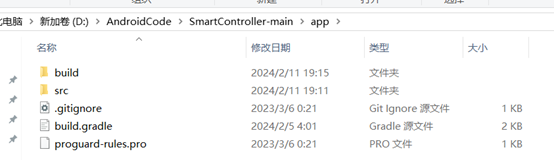
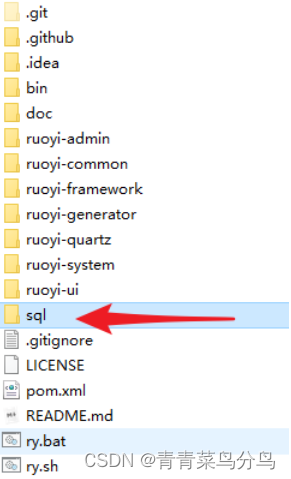
项目解压之后如图
只需要关注“app”文件夹里的东西即可,“gradle”是配置文件,和Android studio的安装环境有关,后续打算出一个讲这部分的
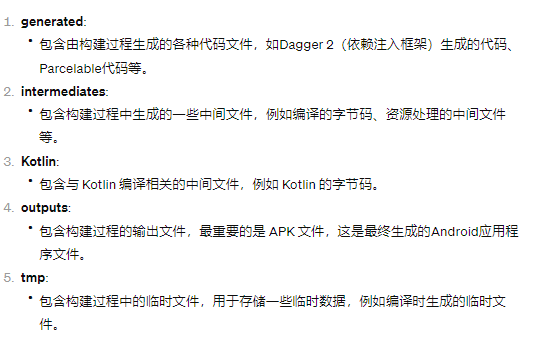
只需要关注“src”文件夹里的东西即可,“build”是 Android 应用构建过程中生成的临时文件和输出,主要涉及编译过程中生成的中间文件以及用于加速编译的临时数据,不需要修改
手动更改这些文件可能会导致构建错误或不稳定的行为。通常,Android Studio和构建工具会负责处理这些生成的文件,你只需专注于修改 D:\AndroidCode\SmartController-main\app\src 目录下的源代码和资源文件,以及适当地修改 build.gradle 等配置文件。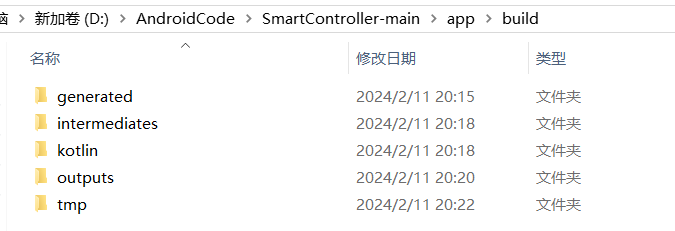
Android studio项目中看到的文件夹
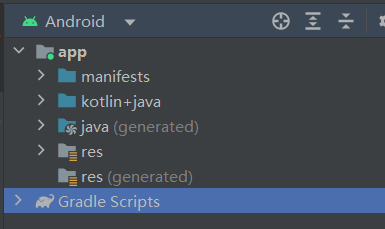
都来自于src文件,src 是 "source"(源代码)的缩写,用于存放应用程序的源代码
为什么在 Android Studio 中打开文件夹和实际文件系统中的文件夹看起来不一致:
1、过滤或忽略文件: Android Studio 可能会根据项目设置或 IDE 配置文件中的规则来过滤或忽略某些文件或文件类型,例如,临时文件、构建输出等。
2、链接文件或文件夹: 在文件系统中,可能存在符号链接或快捷方式指向其他文件或文件夹,而 Android Studio 可能会展示这些链接文件或文件夹的实际内容。
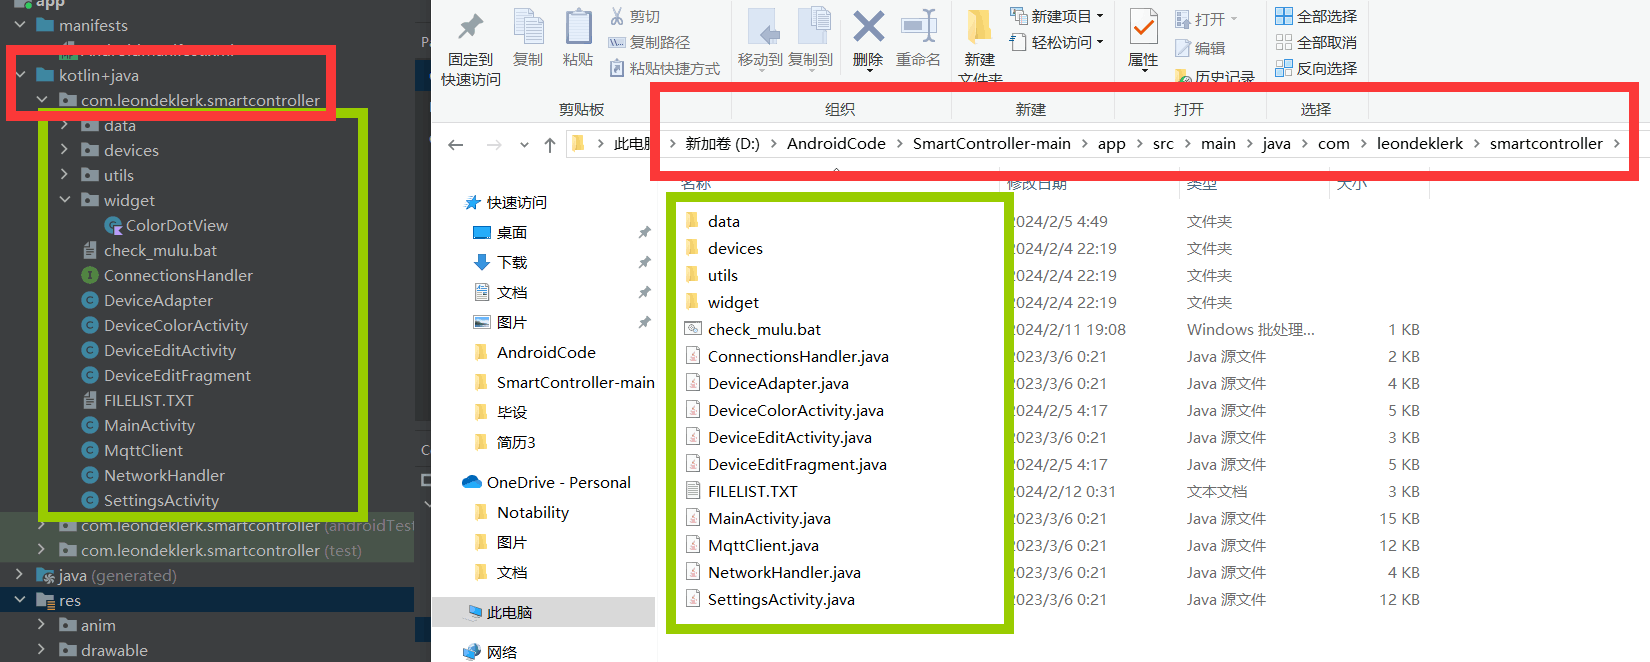
以下几个图示可以知道Android Studio里的项目的实际文件路径
AndroidManifest.xml

com.leondeklerk.smartcontroller

java代码+少数kotlin代码
xml代码
接下来就是针对上述4个模块的代码进行详细解释
AndroidManifest.xml
<?xml version="1.0" encoding="utf-8"?>
<!-- 定义 Android 清单文件 -->
<manifest xmlns:android="http://schemas.android.com/apk/res/android">

    <!-- 请求访问网络状态的权限 -->
    <uses-permission android:name="android.permission.ACCESS_NETWORK_STATE" />
    <!-- 请求访问互联网的权限 -->
    <uses-permission android:name="android.permission.INTERNET" />

    <!-- 定义应用程序的配置信息 -->
    <application
        android:allowBackup="true"
        android:icon="@mipmap/ic_launcher"
        android:label="@string/app_name"
        android:roundIcon="@mipmap/ic_launcher_round"
        android:supportsRtl="true"
        android:theme="@style/MyTheme.DayNight"
        android:usesCleartextTraffic="true">

        <!-- 定义设置界面的活动 -->
        <activity
            android:name=".SettingsActivity"
            android:label="@string/title_activity_settings" />

        <!-- 定义主界面的活动 -->
        <activity
            android:name=".MainActivity"
            android:exported="true">
            <intent-filter>
                <!-- 设置为主活动,应用启动时打开该活动 -->
                <action android:name="android.intent.action.MAIN" />
                <category android:name="android.intent.category.LAUNCHER" />
            </intent-filter>
        </activity>

        <!-- 定义设备编辑界面的活动 -->
        <activity
            android:name=".DeviceEditActivity"
            android:parentActivityName=".MainActivity"
            android:windowSoftInputMode="adjustPan" />

        <!-- 定义设备颜色选择界面的活动 -->
        <activity
            android:name=".DeviceColorActivity"
            android:parentActivityName=".MainActivity" />
    </application>
</manifest>
com.leondeklerk.smartcontroller
"com.leondeklerk.smartcontroller" 是一个应用程序的包名(Package Name),根据通常的Android应用命名规范。应用程序的包名是在开发应用时定义的唯一标识符,通常采用反转的域名形式(例如 com.example.myapp)。
其在实际文件夹中就是一个连续子文件夹

主要项目代码都在“main”里,另外两个只是双端简单的测试代码
“androidTest”是一个基本的Instrumented测试类,用于在Android设备上执行测试
/**
 * Instrumented test, which will execute on an Android device.
 * 仪器化测试,将在 Android 设备上执行。
 *
 * @see <a href="http://d.android.com/tools/testing">Testing documentation</a>
 * 参见测试文档链接
 */
@RunWith(AndroidJUnit4.class)
// 使用 AndroidJUnit4 运行器来执行测试
public class ExampleInstrumentedTest {

  @Test
  // 注解标识该方法是一个测试方法
  public void useAppContext() {
    // Context of the app under test.
    // 获取被测试应用的上下文对象
    Context appContext = InstrumentationRegistry.getInstrumentation().getTargetContext();

    // 断言被测试应用的包名是否符合预期值
    assertEquals("com.leondeklerk.smartcontroller", appContext.getPackageName());
  }
}
“test”是一个基本的JUnit Jupiter(JUnit 5)本地单元测试类,用于在开发机器(主机)上执行测试
/**
 * Example local unit test, which will execute on the development machine (host).
 * 示例本地单元测试,将在开发机器(主机)上执行。
 *
 * @see <a href="http://d.android.com/tools/testing">Testing documentation</a>
 * 参见测试文档链接
 */
public class ExampleUnitTest {

  @Test
  // 注解标识该方法是一个测试方法
  public void addition_isCorrect() {
    // 使用断言验证加法是否正确
    Assertions.assertEquals(4, 2 + 2);
  }
}
“main”里的java代码+少数kotlin代码
data 目录:
Command.java - 包含与设备通信的指令相关的类。
DeviceData.java - 包含设备数据的模型类。
Entry.java - 用于表示数据项的类。
devices 目录:
RGBLedController.java - 一个 RGB LED 控制器设备的实现类。
SmartDevice.java - 通用智能设备的实现类。
utils 目录:
DeviceStorageUtils.java - 包含用于设备数据存储的工具方法。
DiffUtilCallback.java - 是用于处理列表数据变更的回调类。
TextInputUtils.java - 包含处理文本输入的实用方法。
widget 目录:
ColorDotView.kt - 是一个用 Kotlin 编写的自定义颜色点视图,可能用于界面显示。(就这里用了kotlin)
其它:
ConnectionsHandler.java - 处理与设备的连接和通信的类。
DeviceAdapter.java - 设备列表的适配器类,用于在界面上显示设备列表。
DeviceColorActivity.java - 设备颜色控制的活动类。
DeviceEditActivity.java - 设备编辑界面的活动类。
DeviceEditFragment.java - 设备编辑界面的片段类。
MainActivity.java - 应用的主活动类。
MqttClient.java - MQTT(Message Queuing Telemetry Transport)客户端类,用于消息传递。
NetworkHandler.java - 处理网络连接的类。
SettingsActivity.java - 应用设置界面的活动类。
data 目录
Command.java
/**
 * A class that represents a new MQTT command. Contains a topic and message.
 * 表示一个新的MQTT命令的类。包含主题和消息。
 */
public class Command {
  private String topic;   // 存储消息将要发布的主题
  private String message; // 存储将要发布的消息内容
  /**
   * Class constructor.
   * 类的构造方法。
   *
   * @param topic   the topic that the message will be published on.
   *                消息将要发布的主题。
   * @param message the message that will be published.
   *                将要发布的消息。
   */
  public Command(String topic, String message) {
    this.topic = topic;
    this.message = message;
  }

  // 获取消息将要发布的主题
  public String getTopic() {
    return topic;
  }

  // 设置消息将要发布的主题
  public void setTopic(String topic) {
    this.topic = topic;
  }

  // 获取将要发布的消息内容
  public String getMessage() {
    return message;
  }

  // 设置将要发布的消息内容
  public void setMessage(String message) {
    this.message = message;
  }
}
DeviceData.java
/**
 * 表示与设备相关的所有数据的类。每个设备包含一组数据,这些数据在所有SmartDevices之间共享。此类扩展了BaseObservable以适应与UI的数据绑定。
 */
public class DeviceData extends BaseObservable {

  private final int id;        // 设备的唯一标识符
  private String name;         // 设备的名称
  private String status;       // 设备的状态
  private boolean enabled;     // 设备是否启用
  private final String type;   // 设备的类型
  private String topic;        // 设备将要监听的主题

  /**
   * Default constructor
   * 默认构造方法
   *
   * @param id     the id of this device
   *               此设备的唯一标识符
   * @param name   the name of the device
   *               设备的名称
   * @param status the status of the device
   *               设备的状态
   * @param enabled indicates if the device is enabled or not
   *                表示设备是否启用
   * @param type   the type of the device
   *               设备的类型
   * @param topic  the topic this device will listen to
   *               此设备将要监听的主题
   */
  public DeviceData(int id, String name, String status, boolean enabled, String type, String topic) {
    this.id = id;
    this.name = name;
    this.status = status;
    this.enabled = enabled;
    this.type = type;
    this.topic = topic;
  }

  @Override
  public boolean equals(Object o) {
    if (this == o) {
      return true;
    }
    if (o == null || getClass() != o.getClass()) {
      return false;
    }
    DeviceData that = (DeviceData) o;
    return id == that.id
            && enabled == that.enabled
            && Objects.equals(topic, that.topic)
            && Objects.equals(name, that.name)
            && Objects.equals(status, that.status);
  }

  public int getId() {
    return id;
  }

  public String getName() {
    return name;
  }

  /**
   * Set the name of the device
   * 设置设备的名称
   *
   * @param name the new name of the device
   *             设备的新名称
   * @return this
   */
  public DeviceData setName(String name) {
    this.name = name;
    notifyPropertyChanged(BR._all);
    return this;
  }

  public String getTopic() {
    return topic;
  }

  /**
   * Set the topic of this device.
   * 设置此设备的主题。
   *
   * @param topic the new topic.
   *              新的主题
   * @return this instance.
   */
  public DeviceData setTopic(String topic) {
    this.topic = topic;
    notifyPropertyChanged(BR._all);
    return this;
  }

  public String getStatus() {
    return status;
  }

  public void setStatus(String status) {
    this.status = status;
  }

  public boolean isEnabled() {
    return enabled;
  }

  public void setEnabled(boolean enabled) {
    this.enabled = enabled;
  }

  public String getType() {
    return type;
  }
}
Entry.java
/**
 * 表示设备存储数据结构中条目的类。包含一个 id 和设备的引用。id 表示设备在列表中的位置,而设备是实际存储的设备。
 */
public class Entry {
    private final int id;            // 设备在列表(例如MainActivity RecyclerView)中的位置
    private final SmartDevice device; // 实际存储的设备引用

    /**
     * Default constructor
     * 默认构造方法
     *
     * @param id     the id of the device in the list (MainActivity RecyclerView)
     *               设备在列表中(例如MainActivity RecyclerView)的位置
     * @param device the device itself.
     *               设备本身
     */
    public Entry(int id, SmartDevice device) {
        this.id = id;
        this.device = device;
    }

    // 获取设备在列表中的位置
    public int getId() {
        return id;
    }

    // 获取设备引用
    public SmartDevice getDevice() {
        return device;
    }
}
devices 目录
RGBLedController.java
// 表示这是一个LED控制器的SmartDevice的特定实例
public class RGBLedController extends SmartDevice {

  /**
   * 默认构造方法
   *
   * @param data the data that represents this device.
   *             表示此设备的数据。
   */
  public RGBLedController(DeviceData data) {
    super(data);
  }

  /**
   * 获取用于检查状态的命令。
   *
   * @return the color status Command
   */
  public Command getColor() {
    return new Command(super.getTopic("Color"), "?");
  }

  /**
   * 设置设备的颜色。
   *
   * @param red the value of red.
   *            红色通道的值。
   * @param green the value of green.
   *              绿色通道的值。
   * @param blue the value of blue.
   *             蓝色通道的值。
   * @return a new command that will be published on the MQTT client.
   *         将在MQTT客户端上发布的新命令。
   */
  @SuppressLint("DefaultLocale")
  public Command setColor(int red, int green, int blue) {
    return new Command(super.getTopic("Color2"), String.format("%d,%d,%d", red, green, blue));
  }
}
SmartDevice.java
/**
 * SmartDevice是所有支持的设备的基类。这包括封装基本数据,如id、名称、IP和可选凭证。该类还提供了一些基本命令,如检查电源状态、打开或关闭电源。其他设备可以从这个类扩展,以提供额外的功能,如LED的颜色控制。
 */
public class SmartDevice {

  private final DeviceData data; // 设备的基本数据

  /**
   * Default constructor to create a new SmartDevice, based on some given device data.
   * 根据给定的设备数据创建一个新的SmartDevice的默认构造方法。
   *
   * @param data the data for this device.
   *             此设备的数据。
   */
  public SmartDevice(DeviceData data) {
    this.data = data;
  }

  @Override
  public boolean equals(Object o) {
    if (this == o) {
      return true;
    }
    if (o == null || getClass() != o.getClass()) {
      return false;
    }
    return this.getData().equals(((SmartDevice) o).getData());
  }

  /**
   * 根据设备的数据和命令的类型获取要发布的主题。
   *
   * @param command the command that the device needs to execute.
   *                设备需要执行的命令。
   * @return the topic formatted with the device data topic.
   *         使用设备数据主题格式化的主题。
   */
  String getTopic(String command) {
    return "cmnd/" + data.getTopic() + "/" + command;
  }

  /**
   * 获取用于检查状态的命令。
   *
   * @return the power status Command
   */
  public Command getPowerStatus() {
    return new Command(getTopic("POWER"), "?");
  }

  /**
   * 获取打开或关闭电源的命令。
   *
   * @param on boolean indicating whether or not to turn the power the device on or off.
   *           布尔值,表示是否打开或关闭设备电源。
   * @return the command to turn the device on or off.
   *         打开或关闭设备的命令。
   */
  public Command setPower(boolean on) {
    return new Command(getTopic("POWER"), on ? "ON" : "OFF");
  }

  /**
   * 克隆一个设备并返回具有另一个内存地址的精确副本。
   *
   * @param other the device to clone.
   *              要克隆的设备。
   * @return a cloned instance of the other device.
   *         另一个设备的克隆实例。
   */
  public static SmartDevice clone(SmartDevice other) {
    DeviceData otherData = other.getData();
    return new SmartDevice(
            new DeviceData(
                    otherData.getId(),
                    otherData.getName(),
                    otherData.getStatus(),
                    otherData.isEnabled(),
                    otherData.getType(),
                    otherData.getTopic()));
  }

  public DeviceData getData() {
    return data;
  }
}
utils 目录
DeviceStorageUtils.java
// 一个用于处理在应用程序的SharedPreferences中存储和检索设备的类
public class DeviceStorageUtils {
  private SharedPreferences preferences; // SharedPreferences对象
  private Context context;               // 上下文对象

  /**
   * Basic constructor for the DeviceStorageUtils class.
   * DeviceStorageUtils类的基本构造方法。
   *
   * @param preferences the preferences to store and retrieve in/from.
   *                    用于存储和检索的SharedPreferences对象
   * @param context the context of the application.
   *                应用程序的上下文对象
   */
  public DeviceStorageUtils(SharedPreferences preferences, Context context) {
    this.preferences = preferences;
    this.context = context;
  }

  /**
   * 从SharedPreferences中的String使用GSON库检索所有SmartDevices的方法。
   *
   * @return a list of retrieved SmartDevices.
   *         检索到的SmartDevices列表。
   */
  public ArrayList<SmartDevice> getDevices() {
    String json = preferences.getString("deviceList", null);
    if (json != null) {
      Gson gson = new Gson();
      // Convert back to a Java Object
      Type type = new TypeToken<ArrayList<SmartDevice>>() {}.getType();
      return gson.fromJson(json, type);
    } else {
      return new ArrayList<>();
    }
  }

  /**
   * A method that converts a list of SmartDevices to a String and stores it in the
   * SharedPreferences specified by the class Object.
   * 将SmartDevices列表转换为String并将其存储在由类对象指定的SharedPreferences中的方法。
   *
   * @param devices the list of devices to store.
   *                要存储的设备列表。
   */
  public void storeDevices(ArrayList<SmartDevice> devices) {
    // Set the status to unknown (prevent the status from being stored)
    // 将状态设置为未知(防止状态被存储)
    for(SmartDevice device : devices) {
      device.getData().setStatus(context.getString(R.string.status_unknown));
    }

    Editor prefsEditor = preferences.edit();
    Gson gson = new Gson();
    // Convert the object to a String
    String json = gson.toJson(devices);
    // Store the string
    prefsEditor.putString("deviceList", json);
    prefsEditor.apply();
  }
}
DiffUtilCallback.java
/**
 * 一个处理两个ArrayList之间差异计算的类。用于更新RecyclerView及其相应的适配器。
 */
public class DiffUtilCallback extends Callback {

  private ArrayList<SmartDevice> oldList; // 旧列表
  private ArrayList<SmartDevice> newList; // 新列表

  /**
   * Default constructor, taking in the two lists that need to be compared.
   * 默认构造方法,接收需要进行比较的两个列表。
   *
   * @param oldList list one.
   *                列表一
   * @param newList list two.
   *                列表二
   */
  public DiffUtilCallback(ArrayList<SmartDevice> oldList, ArrayList<SmartDevice> newList) {
    this.oldList = oldList;
    this.newList = newList;
  }

  @Override
  public int getOldListSize() {
    return oldList.size();
  }

  @Override
  public int getNewListSize() {
    return newList.size();
  }

  @Override
  public boolean areItemsTheSame(int oldItemPosition, int newItemPosition) {
    return oldList.get(oldItemPosition).equals(newList.get(newItemPosition));
  }

  @Override
  public boolean areContentsTheSame(int oldItemPosition, int newItemPosition) {
    return oldList.get(oldItemPosition).getData().equals(newList.get(newItemPosition).getData());
  }
}
TextInputUtils.java
/**
 * 一组用于与TextInputLayouts交互的实用方法的集合。功能从设置监听器到检查错误和比较值等。
 */
public class TextInputUtils {
  public static final String DEV_TYPE_DEF = "DEFAULT_TYPE";
  public static final String DEV_TYPE_RGB = "RGB_CONTROLLER_TYPE";
  // An input type that is a field with a max length
  public static final String DEFAULT_TYPE = "DEFAULT_TYPE";

  /**
   * 检查布局列表中是否有任何错误,还检查是否为空的布局。
   *
   * @param layouts the ArrayList of TextInputLayouts to check.
   * @return true if there are errors, false if not.
   */
  public static boolean hasErrors(ArrayList<TextInputLayout> layouts) {
    // Check if one of the layouts is empty
    isEmpty(layouts);

    for (TextInputLayout layout : layouts) {
      if (layout.getError() != null) {
        // If a layout has an error, return true and request the focus on that one.
        layout.requestFocus();
        return true;
      }
    }
    return false;
  }

  /**
   * 检查TextInputLayouts的ArrayList是否有任何空字段。如果有一个字段为空,将设置正确的错误。
   *
   * @param layouts the list of layouts.
   */
  @SuppressWarnings("ConstantConditions")
  private static void isEmpty(ArrayList<TextInputLayout> layouts) {
    for (TextInputLayout layout : layouts) {
      // Get the text and resources from the layout
      String text = layout.getEditText().getText().toString();
      Resources resources = layout.getResources();
      if (TextUtils.isEmpty(text)) {
        // If empty, set an error
        layout.setError(resources.getString(R.string.error_input_required));
      }
    }
  }

  /**
   * 通过读取一个TextInputLayouts的ArrayList和一些附加信息,创建一个新的SmartDevice。基于这些值,将创建并返回一个新的SmartDevice。
   *
   * @param layouts the list of fields to read the data from.
   * @param nextId the id of this new device.
   * @return a new SmartDevice based on the read data.
   */
  @SuppressWarnings("ConstantConditions")
  public static SmartDevice readDevice(
      Context context, String type, ArrayList<TextInputLayout> layouts, int nextId) {
    ArrayList<String> inputs = new ArrayList<>();

    // Read each input and add it to the list of inputs
    for (TextInputLayout layout : layouts) {
      EditText editText = layout.getEditText();
      inputs.add(editText.getText().toString());
    }

    // Create a new device
    DeviceData data =
        new DeviceData(
            nextId,
            inputs.get(0),
            context.getString(R.string.status_unknown),
            false,
            type,
            inputs.get(1));

    // Return the type of device
    if (type.equals(DEV_TYPE_RGB)) {
      return new RGBLedController(data);
    }
    return new SmartDevice(data);
  }

  /**
   * 从TextInputLayout中检索字符串。
   *
   * @param layout the layout to retrieve the text from.
   * @return the input text.
   */
  @SuppressWarnings("ConstantConditions")
  public static String getText(TextInputLayout layout) {
    return layout.getEditText().getText().toString();
  }

  /**
   * 设置正确的过滤器和错误侦听器以处理用户输入中的错误。
   *
   * @param layout the layout to set the filter on.
   * @param type the type of input field, only option now is DEFAULT_TYPE.
   */
  @SuppressWarnings("ConstantConditions")
  public static void setListener(final TextInputLayout layout, String type) {
    if (DEFAULT_TYPE.equals(
        type)) { // The default type needs an error handler for surpassing the maximum length.
      layout
          .getEditText()
          .addTextChangedListener(
              new TextWatcher() {
                @Override
                public void beforeTextChanged(CharSequence s, int start, int count, int after) {}

                @Override
                public void onTextChanged(CharSequence s, int start, int before, int count) {}

                @Override
                public void afterTextChanged(Editable s) {
                  // If the length is too great, write an error
                  if (s.length() > layout.getCounterMaxLength()) {
                    Resources resources = layout.getResources();
                    layout.setError(resources.getString(R.string.error_input_length));
                  } else {
                    layout.setError(null);
                  }
                }
              });
    } else {
      Log.d("TextInputLayout type", type);
    }
  }
}
widget 目录
ColorDotView.kt
/*
 * 版权所有 2019 年 Android 开源项目
 *
 * 根据 Apache 许可证 2.0 版本(以下简称“许可证”)获得许可;
 * 您不得使用此文件,除非符合许可证的规定。
 * 您可以在以下网址获得许可证副本:
 *
 *     http://www.apache.org/licenses/LICENSE-2.0
 *
 * 除非适用法律要求或书面同意,否则按“原样”分发软件,
 * 无任何形式的明示或暗示的保证或条件。
 * 有关许可证下的特定语言,请参阅许可证。
 */

/**
 * 该项目代码简单绘制了带有描边的填充圆圈。
 */
class ColorDotView @JvmOverloads constructor(
  context: Context,
  attrs: AttributeSet? = null,
  defStyleAttr: Int = 0
) : View(context, attrs, defStyleAttr) {

  var fillColor: Int = Color.LTGRAY
    set(value) {
      paintFill.color = value
      field = value
      this.invalidate()
    }

  private val paintFill = Paint(Paint.ANTI_ALIAS_FLAG).apply {
    style = Paint.Style.FILL
    color = Color.RED
  }

  private var cx: Float = 0F
  private var cy: Float = 0F
  private var radius: Float = 0F

  init {
    // 从 XML 属性获取填充颜色
    val a = context.theme.obtainStyledAttributes(
      attrs,
      R.styleable.ColorDotView,
      defStyleAttr,
      0
    )
    fillColor = a.getColor(R.styleable.ColorDotView_colorFillColor, fillColor)
    a.recycle()
  }

  override fun onSizeChanged(w: Int, h: Int, oldw: Int, oldh: Int) {
    super.onSizeChanged(w, h, oldw, oldh)
    // 计算圆的位置和半径
    cx = w / 2F
    cy = h / 2F
    // 稍微减小我们圆的半径,以防止描边被裁剪。
    radius = (w / 2F) - 1F
  }

  override fun onDraw(canvas: Canvas) {
    // 在 Canvas 上绘制圆圈
    canvas.drawCircle(cx, cy, radius, paintFill)
  }
}
其它
ConnectionsHandler.java
//一个接口,用于处理所有需要得到适当处理的不同类型的连接。包含用于MQTT回调和NetworkHandler类的回调的方法。
public interface ConnectionsHandler {

  /**
   * 当"stat/+/RESULT"主题上的新MqttMessage到达时的回调。从这里开始,可以解析并相应地处理消息。
   *
   * @param topic 收到消息的主题。
   * @param message 收到的实际消息。
   */
  void onMqttMessage(String topic, MqttMessage message);

  void onMqttSubscribe();//当MqttClient成功订阅主题时的回调。用于通知活动客户端现在已完全设置并准备好。

  /**
   * 当客户端连接到服务器时使用的回调。尚未建立订阅。用于处理连接后需要设置的订阅和其他参数。
   * @param connected 指示客户端是否连接的标志。
   */
  void onMqttConnected(boolean connected);

  void onNetworkChange();//设备网络更改时的回调。用于在例如WiFi重新连接时适当处理状态更新。
}
DeviceAdapter.java
/**
 * 用于填充RecyclerView的SmartDevice实例的适配器,用于显示SmartDevice实例的卡片
 */
public class DeviceAdapter extends RecyclerView.Adapter<CardViewHolder> {

    private final ArrayList<SmartDevice> devices;
    private final Activity context;
    /**
     * RecyclerView中每个卡片的视图。
     */
    static class CardViewHolder extends RecyclerView.ViewHolder {

        ComponentCardsBinding binding;

        /**
         * 默认构造函数
         * @param binding 表示视图的绑定。
         */
        CardViewHolder(ComponentCardsBinding binding) {
            super(binding.getRoot());
            this.binding = binding;
        }

        /**
         * 将smartDevice绑定到布局。
         *
         * @param device 要绑定的设备。
         */
        public void bind(SmartDevice device) {
            binding.setDevice(device);
            binding.executePendingBindings();
        }
    }

    /**
     * 适配器的默认构造函数,接受上下文和设备列表。
     *
     * @param devices 用于创建此适配器的设备。
     * @param context 用于使用的应用程序上下文。
     */
    DeviceAdapter(ArrayList<SmartDevice> devices, Activity context) {
        this.devices = devices;
        this.context = context;
    }

    // 创建新视图(由布局管理器调用)
    @NotNull
    @Override
    public CardViewHolder onCreateViewHolder(ViewGroup parent, int viewType) {
        // 为此项创建一个新的MaterialCardView
        LayoutInflater inflater = LayoutInflater.from(parent.getContext());
        ComponentCardsBinding binding = ComponentCardsBinding.inflate(inflater, parent, false);
        return new CardViewHolder(binding);
    }

    // 替换视图的内容(由布局管理器调用)
    @Override
    public void onBindViewHolder(@NotNull CardViewHolder holder, final int pos) {
        final int position = holder.getAdapterPosition();
        final SmartDevice device = devices.get(position);
        holder.bind(device);
        ComponentCardsBinding binding = holder.binding;

        // 编辑Activity的按钮
        binding.deviceEdit.setOnClickListener(
                v -> {
                    Intent intent = new Intent(context, DeviceEditActivity.class);
                    intent.putExtra(DeviceEditActivity.EXTRA_SELECTED_DEV, position);
                    intent.putExtra(DeviceEditActivity.EXTRA_NUM_DEV, getItemCount());

                    context.startActivityForResult(intent, 0);
                });

        // 颜色Activity的按钮
        binding.deviceColor.setOnClickListener(
                v -> {
                    Intent intent = new Intent(context, DeviceColorActivity.class);
                    intent.putExtra(DeviceColorActivity.EXTRA_SELECTED_DEV, position);
                    context.startActivity(intent);
                });

        // 电源的开关
        binding.devicePower.setOnCheckedChangeListener(
                (buttonView, isChecked) -> {
                    // 检查是否由用户按下(而不是其他什么)
                    if (buttonView.isPressed()) {
                        MqttClient client = ((MainActivity) context).getMqttClient();
                        client.publish(device.setPower(isChecked));
                    }
                });
    }

    // 返回数据集的大小(由布局管理器调用)
    @Override
    public int getItemCount() {
        return devices.size();
    }
}
DeviceColorActivity.java
/**
 * 这个DeviceColorActivity用于处理显示和更新RGBLedController的颜色,它包括与MQTT客户端的交互和网络更改的响应。该活动使用相应的布局和UI元素来显示颜色信息,并在用户交互时执行相应的操作。
 */
public class DeviceColorActivity extends FragmentActivity
    implements View.OnClickListener, ConnectionsHandler {

  public static final String EXTRA_SELECTED_DEV = "com.leondeklerk.smartcontroller.SELECTED_DEV";
  private ActivityDeviceColorBinding binding;
  private RGBLedController device;
  private MqttClient client;

  @Override
  protected void onCreate(Bundle savedInstanceState) {
    super.onCreate(savedInstanceState);

    NetworkHandler handler = NetworkHandler.getHandler();
    handler.setCurrentHandler(this);

    binding = ActivityDeviceColorBinding.inflate(getLayoutInflater());
    View view = binding.getRoot();
    setContentView(view);

    binding.toolbar.setNavigationOnClickListener(
        new View.OnClickListener() {
          @Override
          public void onClick(View view) {
            onBackPressed();
          }
        });

    Intent intent = getIntent();
    int deviceNum = intent.getIntExtra(EXTRA_SELECTED_DEV, 0);

    // 设置MqttCient并注册正确的接收器。
    client = MqttClient.getInstance(getApplicationContext());
    client.registerHandler("DeviceColorActivity", this);
    client.setHandler("DeviceColorActivity");

    SharedPreferences preferences =
        this.getSharedPreferences(getString(R.string.dev_prefs), Context.MODE_PRIVATE);
    DeviceStorageUtils deviceStorageUtils = new DeviceStorageUtils(preferences, this);

    ArrayList<SmartDevice> devices = deviceStorageUtils.getDevices();
    device = new RGBLedController(devices.get(deviceNum).getData());

    client.publish(device.getColor());

    binding.colorInfo.setText(device.getData().getName());

    binding.colorCancel.setOnClickListener(this);
    binding.colorSet.setOnClickListener(this);
  }

  @Override
  public void onClick(View v) {
    int id = v.getId();
    if (id == R.id.color_cancel) {
      this.onBackPressed();
    } else if (id == R.id.color_set) {
      int red = (int) binding.sliderRed.getValue();
      int green = (int) binding.sliderGreen.getValue();
      int blue = (int) binding.sliderBlue.getValue();

      client.publish(device.setColor(red, green, blue));
    } else {
      Log.d("DeviceColorActivity@onClick", "Non-existent button clicked (color)");
    }

  }

  @Override
  protected void onDestroy() {
    super.onDestroy();
    client.setHandler("MainActivity");
  }

  @Override
  public void onMqttMessage(String topic, MqttMessage message) {
    parseResponse(message);
  }

  @Override
  public void onMqttSubscribe() {}

  @Override
  public void onMqttConnected(boolean connected) {}

  @Override
  public void onNetworkChange() {
    client = MqttClient.reconnect(this);
  }

  /**
   * 解析接收到的MQTT消息的响应并相应地更新布局。
   *
   * @param message 要解析的消息。
   */
  private void parseResponse(MqttMessage message) {
    String colorString = "";
    try {
      JSONObject obj = new JSONObject(message.toString());
      colorString = obj.getString("Color");
    } catch (JSONException e) {
      e.printStackTrace();
    }
    String[] colors = colorString.split(",");
    binding.sliderRed.setValue(Float.parseFloat(colors[0]));
    binding.sliderGreen.setValue(Float.parseFloat(colors[1]));
    binding.sliderBlue.setValue(Float.parseFloat(colors[2]));
  }
}
DeviceEditActivity.java
/** 这个DeviceEditActivity用于编辑设备数据,它包含一个ViewPager2,通过它可以左右滑动切换不同的DeviceEditFragment。DeviceEditFragmentAdapter是ViewPager2的适配器,负责管理所有的DeviceEditFragment。在onCreate方法中,根据传递的Intent设置ViewPager2和适配器,并指定当前显示的页面。 */
public class DeviceEditActivity extends FragmentActivity {

  public static final String EXTRA_SELECTED_DEV = "com.leondeklerk.smartcontroller.SELECTED_DEV";
  public static final String EXTRA_NUM_DEV = "com.leondeklerk.smartcontroller.NUM_DEV";
  private static int numOfDevices;
  static ActivityDeviceEditBinding binding;

  @Override
  protected void onCreate(Bundle savedInstanceState) {
    super.onCreate(savedInstanceState);

    binding = ActivityDeviceEditBinding.inflate(getLayoutInflater());
    View view = binding.getRoot();
    setContentView(view);

    binding.toolbar.setNavigationOnClickListener(
        new View.OnClickListener() {
          @Override
          public void onClick(View view) {
            onBackPressed();
          }
        });

    Intent intent = getIntent();
    numOfDevices = intent.getIntExtra(EXTRA_NUM_DEV, 0);

    ViewPager2 viewPager = binding.pager;
    FragmentStateAdapter pagerAdapter = new DeviceEditFragmentAdapter(this);

    viewPager.setAdapter(pagerAdapter);
    viewPager.setCurrentItem(intent.getIntExtra(EXTRA_SELECTED_DEV, 0));
  }

  /** 包含所有DeviceEditFragments的适配器。 */
  private static class DeviceEditFragmentAdapter extends FragmentStateAdapter {

    /**
     * 默认构造函数。
     *
     * @param fragmentActivity 与此片段相关的Activity。
     */
    DeviceEditFragmentAdapter(FragmentActivity fragmentActivity) {
      super(fragmentActivity);
    }

    @NotNull
    @Override
    public Fragment createFragment(int position) {
      Fragment fragment = new DeviceEditFragment();
      Bundle args = new Bundle();
      args.putInt(DeviceEditFragment.ARG_FRAG_NUM, position);
      fragment.setArguments(args);
      return fragment;
    }

    @Override
    public int getItemCount() {
      return numOfDevices;
    }
  }
}
DeviceEditFragment.java
/**
 * 代表设备编辑屏幕中的实际设备编辑界面的Fragment。包含设备的所有数据以及更改此数据的选项。
 */
public class DeviceEditFragment extends Fragment implements View.OnClickListener {

  static final String ARG_FRAG_NUM = "com.leondeklerk.smartcontroller.FRAG_NUM";
  private Activity context;
  private int devNum;
  private ArrayList<SmartDevice> devices;
  private DeviceStorageUtils deviceStorageUtils;
  private FragmentDeviceEditBinding binding;
  private SmartDevice device;
  private SmartDevice initial;
  private ArrayList<TextInputLayout> fragList;

  @Override
  public View onCreateView(
      @NotNull LayoutInflater inflater, ViewGroup container, Bundle savedInstanceState) {
    binding = FragmentDeviceEditBinding.inflate(inflater, container, false);
    context = getActivity();
    return binding.getRoot();
  }

  @Override
  public void onViewCreated(@NotNull View view, @Nullable Bundle savedInstanceState) {
    Bundle args = getArguments();
    if (args != null) {
      devNum = args.getInt(ARG_FRAG_NUM);
    } else {
      context.finish();
    }
    SharedPreferences preferences =
        context.getSharedPreferences(getString(R.string.dev_prefs), Context.MODE_PRIVATE);
    deviceStorageUtils = new DeviceStorageUtils(preferences, context);

    devices = deviceStorageUtils.getDevices();
    device = devices.get(devNum);

    // 设置对当前设备的引用
    initial = SmartDevice.clone(device);

    // 绑定数据类
    binding.setDevice(device);
    binding.executePendingBindings();

    // 设置按钮监听器
    binding.editDelete.setOnClickListener(this);
    binding.editUpdate.setOnClickListener(this);

    setUpUtilsFrag();
  }

  @Override
  public void onResume() {
    super.onResume();
    // 更改Activity的标题
    DeviceEditActivity.binding.toolbar.setTitle(device.getData().getName());
  }

  @Override
  public void onDestroyView() {
    super.onDestroyView();
    binding = null;
  }

  @SuppressLint("NonConstantResourceId")
  @Override
  public void onClick(View v) {
    int id = v.getId();
    if (id == R.id.edit_delete) {
      // 删除设备并存储
      devices.remove(devNum);
      deviceStorageUtils.storeDevices(devices);

      setResult(true);

      // 返回
      context.onBackPressed();
    } else if (id == R.id.edit_update) {
      if (!TextInputUtils.hasErrors(fragList)) {
        // 更新设备并返回
        updateDevice();
        context.onBackPressed();
      } else {
        setResult(false);
      }
    } else {
      Log.d("DeviceEditFragment@onClick", String.valueOf(id));
    }
  }

  /** 设置Fragment中的输入字段,添加它们的错误监听器。 */
  private void setUpUtilsFrag() {
    fragList = new ArrayList<>();

    // 将所有输入布局添加到列表中
    fragList.add(binding.editName);
    fragList.add(binding.editTopic);

    // 设置错误监听器
    TextInputUtils.setListener(binding.editName, TextInputUtils.DEFAULT_TYPE);
    TextInputUtils.setListener(binding.editTopic, TextInputUtils.DEFAULT_TYPE);
  }

  /**
   * 设置父Activity的结果Intent,将在MainActivity重新进入时进行检查。
   *
   * @param removed 如果设备已删除,则为true;否则为false
   */
  private void setResult(boolean removed) {
    // 创建一个新的Intent
    Intent resultIntent = new Intent();
    if (removed) {
      // 如果设备已删除,则标记此项
      resultIntent.putExtra(MainActivity.EXTRA_DEV_REMOVED, devNum);
    } else {
      if (!initial.equals(device)) {
        // 如果设备已编辑,则标记此项
        resultIntent.putExtra(MainActivity.EXTRA_DEV_CHANGED, devNum);
      }
    }
    context.setResult(Activity.RESULT_OK, resultIntent);
  }

  /** 更新并存储当前设备。 */
  private void updateDevice() {
    // 更新设备数据
    device
        .getData()
        .setName(TextInputUtils.getText(binding.editName))
        .setTopic(TextInputUtils.getText(binding.editTopic));
    setResult(false);

    // 存储新的设备数据
    deviceStorageUtils.storeDevices(devices);
  }
}
MainActivity.java
这个类包含了许多与Android应用相关的功能,包括RecyclerView的使用、对话框的创建、与MQTT服务器的通信、偏好设置的处理等。
import内容
import android.content.Context; // 导入Android上下文相关的类,用于获取应用程序的上下文信息
import android.content.DialogInterface; // 导入Android对话框相关的类,用于创建对话框
import android.content.Intent; // 导入Android意图相关的类,用于启动其他组件或应用
import android.content.SharedPreferences; // 导入Android共享首选项相关的类,用于存储和获取应用程序的配置信息
import android.os.Bundle; // 导入Android包相关的类,用于处理应用程序的状态和数据
import android.util.Log; // 导入Android日志类,用于输出调试和信息日志
import android.util.Pair; // 导入Android Pair类,用于保存一对对象
import android.view.LayoutInflater; // 导入Android布局加载相关的类,用于动态加载布局
import android.view.MenuItem; // 导入Android菜单项相关的类,用于处理菜单项的点击事件
import android.view.View; // 导入Android视图相关的类,用于构建用户界面
import android.widget.Button; // 导入Android按钮相关的类,用于创建按钮
import android.widget.Toast; // 导入Android Toast类,用于显示短暂的提示消息

import androidx.appcompat.app.AlertDialog; // 导入Android支持库中的对话框类,用于创建更灵活的对话框
import androidx.appcompat.app.AppCompatActivity; // 导入Android支持库中的AppCompatActivity类,用于创建兼容旧版Android的活动
import androidx.appcompat.widget.Toolbar; // 导入Android支持库中的工具栏类,用于创建应用程序的工具栏
import androidx.recyclerview.widget.DiffUtil; // 导入Android支持库中的DiffUtil类,用于计算列表差异
import androidx.recyclerview.widget.DiffUtil.DiffResult; // 导入DiffUtil的DiffResult类,表示计算差异的结果
import androidx.recyclerview.widget.LinearLayoutManager; // 导入Android支持库中的LinearLayoutManager类,用于设置RecyclerView的布局管理器
import androidx.recyclerview.widget.RecyclerView; // 导入Android支持库中的RecyclerView类,用于显示列表数据
import androidx.swiperefreshlayout.widget.SwipeRefreshLayout; // 导入Android支持库中的SwipeRefreshLayout类,用于添加下拉刷新功能

import com.google.android.material.dialog.MaterialAlertDialogBuilder; // 导入Material Design库中的AlertDialogBuilder类,用于创建Material风格的对话框
import com.google.android.material.textfield.TextInputLayout; // 导入Material Design库中的TextInputLayout类,用于创建包含文本输入字段的布局
import com.leondeklerk.smartcontroller.data.Entry; // 导入自定义数据类Entry,用于封装设备条目信息
import com.leondeklerk.smartcontroller.databinding.ActivityMainBinding; // 导入自动生成的ActivityMainBinding类,用于绑定MainActivity的布局
import com.leondeklerk.smartcontroller.databinding.DeviceDialogBinding; // 导入自动生成的DeviceDialogBinding类,用于绑定设备对话框的布局
import com.leondeklerk.smartcontroller.devices.SmartDevice; // 导入自定义SmartDevice类,用于表示智能设备的数据和操作
import com.leondeklerk.smartcontroller.utils.DeviceStorageUtils; // 导入自定义DeviceStorageUtils类,用于设备数据的存储和检索
import com.leondeklerk.smartcontroller.utils.DiffUtilCallback; // 导入自定义DiffUtilCallback类,用于计算两个列表之间的差异
import com.leondeklerk.smartcontroller.utils.TextInputUtils; // 导入自定义TextInputUtils类,用于处理文本输入相关的实用方法

import org.eclipse.paho.client.mqttv3.MqttMessage; // 导入MQTT库中的MqttMessage类,用于表示MQTT消息
import org.json.JSONException; // 导入JSON库中的JSONException类,用于处理JSON解析异常
import org.json.JSONObject; // 导入JSON库中的JSONObject类,用于处理JSON对象

import java.util.ArrayList; // 导入Java集合框架中的ArrayList类,用于存储设备列表
import java.util.HashMap; // 导入Java集合框架中的HashMap类,用于存储设备映射
import java.util.Map; // 导入Java集合框架中的Map接口,用于表示键值对的映射关系
/**
 * 应用的主要活动。包含设置和帮助页面的基本导航。其主要布局包含一个带有所有设备卡的RecyclerView。实时显示所有设备的状态,考虑到网络和偏好更改。还包含一个FAB和用于添加新设备的逻辑。
 */
public class MainActivity extends AppCompatActivity
    implements View.OnClickListener,
        SwipeRefreshLayout.OnRefreshListener,
        Toolbar.OnMenuItemClickListener,
        ConnectionsHandler {

  static final String EXTRA_DEV_REMOVED = "com.leondeklerk.smartcontroller.DEV_REMOVED";
  static final String EXTRA_DEV_CHANGED = "com.leondeklerk.smartcontroller.DEV_CHANGED";
  static final String EXTRA_PREFS_CHANGED = "com.leondeklerk.smartcontroller.PREFS_CHANGED";
  private DeviceDialogBinding dialogBinding;
  private DeviceStorageUtils deviceStorageUtils;
  private ArrayList<TextInputLayout> layouts;
  private Map<String, Entry> deviceMap;
  private MqttClient mqttClient;
  private NetworkHandler networkHandler;
  private boolean connected;
  DeviceAdapter deviceAdapter;
  Context context;
  ArrayList<SmartDevice> devices;
  AlertDialog addDeviceDialog;
  SharedPreferences preferences;
  SwipeRefreshLayout refreshLayout;

  @Override
  protected void onCreate(Bundle savedInstanceState) {
    super.onCreate(savedInstanceState);

    // 注册网络更改处理程序
    networkHandler = NetworkHandler.getHandler();
    networkHandler.register(this);
    networkHandler.setCurrentHandler(this);

    // 绑定MainActivity布局文件
    com.leondeklerk.smartcontroller.databinding.ActivityMainBinding binding =
        ActivityMainBinding.inflate(getLayoutInflater());
    View view = binding.getRoot();
    setContentView(view);

    context = this;
    preferences = this.getSharedPreferences(getString(R.string.dev_prefs), Context.MODE_PRIVATE);

    // 获取MQTT客户端。
    mqttClient = MqttClient.getInstance(this);

    deviceStorageUtils = new DeviceStorageUtils(preferences, context);
    deviceMap = new HashMap<>();

    devices = deviceStorageUtils.getDevices();

    buildDeviceMap();

    // 为deviceCards创建一个RecyclerView
    RecyclerView recyclerView = binding.deviceList;
    recyclerView.setHasFixedSize(true);

    RecyclerView.LayoutManager layoutManager = new LinearLayoutManager(this);
    recyclerView.setLayoutManager(layoutManager);

    deviceAdapter = new DeviceAdapter(devices, this);
    recyclerView.setAdapter(deviceAdapter);

    // 设置刷新布局
    refreshLayout = binding.deviceListRefresh;
    refreshLayout.setOnRefreshListener(this);

    binding.toolbar.setOnMenuItemClickListener(this);

    // 为设备创建的FAB监听器
    binding.fab.setOnClickListener(
            v -> {
              addDeviceDialog = createDeviceDialog();
              addDeviceDialog.show();
              Button button = addDeviceDialog.getButton(DialogInterface.BUTTON_POSITIVE);
              button.setOnClickListener((View.OnClickListener) context);
            });
  }

  @Override
  public void onDestroy() {
    super.onDestroy();

    // 注销处理程序
    if (networkHandler != null) {
      Log.d("MainActivity@onDestroy#handler", "unregistered");
      networkHandler.unregister(this);
    }

    // 删除MQTT客户端
    if (mqttClient != null) {
      Log.d("MainActivity@onDestroy#client", "unregistered");
      mqttClient.destroy();
    }
  }

  @Override
  public void onResume() {
    super.onResume();
    networkHandler.setCurrentHandler(this);
    if (mqttClient.getCurrentHandler() != this) {
      Log.d("MainActivity@onResume#notThis", "not the current handler");
      mqttClient.setHandler("MainActivity");
    }

    if(!mqttClient.isConnected()) {
      connected = false;
      mqttClient = MqttClient.reconnect(this);
    }

    pingStatus(-1);
  }

  @Override
  public void onClick(View v) {
    // 检查是否有任何输入字段出现错误
    if (!TextInputUtils.hasErrors(layouts)) {
      // 取消所有任务并关闭对话框
      addDeviceDialog.dismiss();

      // 获取SmartDevice的类型
      int typeId = dialogBinding.newType.getCheckedButtonId();
      String type = TextInputUtils.DEV_TYPE_DEF;
      if (typeId == dialogBinding.typeController.getId()) {
        type = TextInputUtils.DEV_TYPE_RGB;
      }

      // 创建新设备并添加
      SmartDevice device = TextInputUtils.readDevice(context, type, layouts, devices.size());
      ArrayList<SmartDevice> newList = new ArrayList<>(devices);
      newList.add(device);

      updateAdapter(devices, newList);

      // (重新)构建设备映射
      buildDeviceMap();

      // 存储新的设备列表
      deviceStorageUtils.storeDevices(devices);

      // 查询新设备的状态
      pingStatus(devices.size() - 1);
    }
  }

  @Override
  public void onActivityResult(int requestCode, int resultCode, Intent data) {
    super.onActivityResult(requestCode, resultCode, data);

    if (requestCode == 0) {
      // 如果活动正常关闭
      if (resultCode == RESULT_OK) {
        int removed = data.getIntExtra(EXTRA_DEV_REMOVED, -1);
        if (removed >= 0) {
          updateAdapter(devices, deviceStorageUtils.getDevices());
          pingStatus(-1);
        }

        int changed = data.getIntExtra(EXTRA_DEV_CHANGED, -1);
        if (changed >= 0) {
          updateAdapter(devices, deviceStorageUtils.getDevices());
          pingStatus(changed);
        }
      }
    } else if (requestCode == 1) {
      // 如果PreferenceActivity正常关闭。
      if (resultCode == RESULT_OK) {
        if (data.getBooleanExtra(EXTRA_PREFS_CHANGED, false)) {
          // 如果首选项更改了,则MqttClient需要重新连接到服务器。
          connected = false;
          mqttClient = MqttClient.reconnect(this);
        }
      }
    }
  }

  @Override
  public boolean onMenuItemClick(MenuItem item) {
    int itemId = item.getItemId();
    if (itemId == R.id.settings) {// 打开设置屏幕。
      Intent intent = new Intent(context, SettingsActivity.class);
      //noinspection deprecation
      startActivityForResult(intent, 1);
      return true;
    } else if (itemId == R.id.help) {
      Log.d("MainActivity@onMenuItemClick#help", "Reached help");
      return true;
    }
    return false;
  }

  @Override
  public void onRefresh() {
    Log.d("MainActivity@onRefresh", "refreshed");
    // 查询所有设备
    pingStatus(-1);
  }

  @Override
  public void onMqttMessage(String topic, MqttMessage message) {
    Log.d("MainActivity@onMqttMessage", "Messaged arrived: " + message.toString());
    Pair<String, Boolean> parsedTopic = getTopic(topic);
    if (parsedTopic.second) {
      Entry entry = deviceMap.get(parsedTopic.first);
      if (entry != null) {
        parseResponse(message, entry);
      }
    }
  }

  @Override
  public void onMqttSubscribe() {
    Log.d("MainActivity@onMqttSubscribe", "subscribed");

    // 设置connected为true并注册处理程序。
    connected = true;
    mqttClient.registerHandler("MainActivity", this);
    mqttClient.setHandler("MainActivity");

    // 查询所有设备的状态
    pingStatus(-1);
  }

  @Override
  public void onMqttConnected(boolean connected) {
    Log.d("MainActivity@onMqttConnected", String.valueOf(connected));
    // 如果无法建立连接,则通知用户。
    if (!connected) {
      Toast.makeText(
              context,
              "No connection to the MQTT server (change your preferences?)",
              Toast.LENGTH_SHORT)
          .show();
      pingStatus(-1);
    }
  }

  @Override
  public void onNetworkChange() {
    Log.d("MainActivity@onNetworkChange", "changed");
    // 如果网络更改。更改所有设备状态并尝试重新连接MqttClient。
    resetStatus();
    connected = false;
    mqttClient = MqttClient.reconnect(this);
  }

  /**
   * 创建一个对话框,询问用户输入,并为对话框UI注册相关监听器。
   *
   * @return 用于创建新设备的AlertDialog。
   */
  public AlertDialog createDeviceDialog() {
    // 根据device_dialog布局创建绑定
    dialogBinding = DeviceDialogBinding.inflate(LayoutInflater.from(context));

    // 创建对话框
    AlertDialog dialog =
        new MaterialAlertDialogBuilder(context, R.style.MaterialAlertDialog_FilledButtonDialog)
            .setTitle(getString(R.string.add_device_title))
            .setView(dialogBinding.getRoot())
            .setPositiveButton(getString(R.string.add_button_confirm), null)
            .setNegativeButton(getString(android.R.string.cancel), null)
            .create();

    // 将所有TextInputLayout添加到用于错误检查的列表中
    layouts = new ArrayList<>();
    layouts.add(dialogBinding.newName);
    layouts.add(dialogBinding.newTopic);

    // 注册错误监听器
    TextInputUtils.setListener(dialogBinding.newName, TextInputUtils.DEFAULT_TYPE);
    TextInputUtils.setListener(dialogBinding.newTopic, TextInputUtils.DEFAULT_TYPE);

    return dialog;
  }

  /**
   * 查询设备的状态,如果提供了-1,则将查询所有设备。
   *
   * @param id 要查询的设备的ID。
   */
  public void pingStatus(int id) {
    if (connected) {
      Log.d("MainActivity@pingStatus#if", "connected");
      if (id >= 0) {
        devices.get(id).getData().setStatus(getString(R.string.status_unknown));
        mqttClient.publish(devices.get(id).getPowerStatus());
      } else {
        // 查询所有设备
        for (int i = 0; i < devices.size(); i++) {
          devices.get(i).getData().setStatus(getString(R.string.status_unknown));
          mqttClient.publish(devices.get(i).getPowerStatus());
        }
      }
    } else {
      Log.d("MainActivity@pingStatus#else", "not connected");
      resetStatus();
      refreshLayout.setRefreshing(false);
    }
  }

  /**
   * 计算两个设备列表之间的差异,并将其分发给DeviceAdapter以更新RecyclerView的内容。
   *
   * @param oldList RecyclerView的当前列表。
   * @param newList 与之计算差异的新列表。
   */
  public void updateAdapter(ArrayList<SmartDevice> oldList, ArrayList<SmartDevice> newList) {
    // 计算差异
    DiffUtilCallback diffUtilCallback = new DiffUtilCallback(oldList, newList);
    DiffResult diff = DiffUtil.calculateDiff(diffUtilCallback);

    // 设置设备列表为最新状态
    devices.clear();
    devices.addAll(newList);

    buildDeviceMap();

    diff.dispatchUpdatesTo(deviceAdapter);
  }

  public MqttClient getMqttClient() {
    return mqttClient;
  }

  /**
   * 从可用设备列表构建设备映射,以主题作为键。
   */
  private void buildDeviceMap() {
    // 重置当前映射
    deviceMap.clear();

    // 用所有条目填充它
    for (int i = 0; i < devices.size(); i++) {
      deviceMap.put(devices.get(i).getData().getTopic(), new Entry(i, devices.get(i)));
    }
  }

  /**
   * 从消息主题的到达消息中提取设备主题。提取的主题用于标识与此消息关联的id和设备。
   *
   * @param input 消息主题
   * @return 一个带有设备主题和一个布尔值的对,指示主题是否有效
   */
  private Pair<String, Boolean> getTopic(String input) {
    String[] split = input.split("/");
    if (split.length > 2) {
      int start = split[0].length() + 1;
      int end = input.length() - split[split.length - 1].length() - 1;
      return new Pair<>(input.substring(start, end), true);
    } else {
      return new Pair<>(null, false);
    }
  }

  /**
   * 解析消息并处理结果。
   *
   * @param message 要解析的消息。
   * @param entry 根据消息更改的条目。
   */
  private void parseResponse(MqttMessage message, Entry entry) {
    String statusString;
    try {
      JSONObject obj = new JSONObject(message.toString());
      statusString = obj.getString("POWER");
    } catch (JSONException e) {
      Log.d("MainActivity@parseErsponse#catch", "not parsable", e);
      entry.getDevice().getData().setStatus(getString(R.string.status_unknown));
      e.printStackTrace();
      return;
    }
    // 根据响应设置值
    if (statusString.equals("ON")) {
      entry.getDevice().getData().setStatus(getString(R.string.status_on));
    } else {
      entry.getDevice().getData().setStatus(getString(R.string.status_off));
    }

    refreshLayout.setRefreshing(false);
    // 更新RecyclerView
    deviceAdapter.notifyItemChanged(entry.getId());
  }

  /** 重置所有设备的状态。 */
  private void resetStatus() {
    for (SmartDevice device : devices) {
      device.getData().setStatus(getString(R.string.status_unknown));
    }
  }
}
MqttClient.java
/**
 * 该类创建一个新的MQTT客户端,并处理与此相关的所有连接和回调。将建立与MQTT服务器的连接,可以选择使用SSL。
 */
public class MqttClient implements MqttCallback {

    private static MqttClient INSTANCE;

    private final MqttAndroidClient client;

    String serverUri;
    final String subscriptionTopic = "stat/+/RESULT";

    private final Map<String, ConnectionsHandler> registeredHandlers;
    private ConnectionsHandler currentHandler;
    private final SharedPreferences preferences;
    private final boolean enableSSL;

    public ConnectionsHandler getCurrentHandler() {
        return currentHandler;
    }

    /**
     * 私有构造函数,用于创建Mqtt客户端的实例。只能通过单例方法进行实例化。
     *
     * @param context 客户端将在其中运行的上下文。
     */
    private MqttClient(Context context) {
        preferences = PreferenceManager.getDefaultSharedPreferences(context);

        // 检查SSL是否打开,并调整URL格式。
        enableSSL = preferences.getBoolean("mqtt_ssl", false);
        String urlTemplate = "tcp://%s:%s";
        if (enableSSL) {
            urlTemplate = "ssl://%s:%s";
        }

        serverUri =
                String.format(
                        urlTemplate,
                        preferences.getString("mqtt_ip", "localhost"),
                        Integer.parseInt(preferences.getString("mqtt_port", "8883")));

        // 创建一个新的客户端
        client =
                new MqttAndroidClient(
                        context, serverUri, org.eclipse.paho.client.mqttv3.MqttClient.generateClientId());
        registeredHandlers = new HashMap<>();

        currentHandler = (ConnectionsHandler) context;

        connect();
    }

    /**
     * 设置连接选项,注册处理程序和缓冲选项,然后进行连接。
     */
    private void connect() {
        // 创建连接选项
        MqttConnectOptions mqttConnectOptions = new MqttConnectOptions();
        mqttConnectOptions.setAutomaticReconnect(false);
        mqttConnectOptions.setCleanSession(false);
        mqttConnectOptions.setUserName(preferences.getString("mqtt_username", "admin"));
        mqttConnectOptions.setPassword(preferences.getString("mqtt_password", "admin").toCharArray());

        // 如果SSL设置已启用,请确保设置了自定义CA文件(如果适用)。
        if (enableSSL) {
            setSSLOption(mqttConnectOptions);
        }

        try {
            client.connect(
                    mqttConnectOptions,
                    null,
                    new IMqttActionListener() {
                        @Override
                        public void onSuccess(IMqttToken asyncActionToken) {
                            Log.d("MqttClient@connect#onSuccess", "Connected to: " + serverUri);
                            DisconnectedBufferOptions disconnectedBufferOptions = new DisconnectedBufferOptions();
                            disconnectedBufferOptions.setBufferEnabled(false);
                            disconnectedBufferOptions.setBufferSize(100);
                            disconnectedBufferOptions.setPersistBuffer(false);
                            disconnectedBufferOptions.setDeleteOldestMessages(false);
                            client.setBufferOpts(disconnectedBufferOptions);
                            currentHandler.onMqttConnected(true);
                            subscribeToTopic();
                        }

                        @Override
                        public void onFailure(IMqttToken asyncActionToken, Throwable exception) {
                            Log.d("MqttClient@connect#onFailure",
                                    "Failed to connect to: " + serverUri + exception.toString(), exception);
                            currentHandler.onMqttConnected(false);
                        }
                    });
        } catch (Exception ex) {
            Log.d("MqttClient@connect#catch2", "Error while connecting", ex);
        }
    }

    /**
     * 注册将处理客户端发出的不同操作的处理程序。
     *
     * @param key 要使用的处理程序的键。
     */
    public void setHandler(String key) {
        ConnectionsHandler handler = registeredHandlers.get(key);
        if (handler != null) {
            Log.d("MqttClient@setHandler#notNull", key);
            currentHandler = handler;
        }
    }

    /**
     * 设置客户端的回调。
     */
    public void setCallback() {
        client.setCallback(this);
    }

    /**
     * 如果在设置中启用了SSL,请确保如果添加了证书,则将其添加到Android密钥库中。如果未设置SSL证书,将使用默认的Android证书验证连接。
     *
     * @param options 添加SSL工厂的选项。
     */
    private void setSSLOption(MqttConnectOptions options) {
        try {
            CertificateFactory cf = CertificateFactory.getInstance("X.509");

            String certString = preferences.getString("mqtt_cert", null);
            if (certString == null) return;
            InputStream caInput = new ByteArrayInputStream(certString.getBytes());
            Certificate ca;

            try {
                ca = cf.generateCertificate(caInput);
            } catch (CertificateException ex) {
                Log.d("MqttClient@setSSLOption#generateCertifcate#catch", "Incorrect certificate format", ex);
                return;
            } finally {
                caInput.close();
            }

            // 创建包含我们受信任CA的KeyStore
            String keyStoreType = KeyStore.getDefaultType();
            KeyStore keyStore = KeyStore.getInstance(keyStoreType);
            keyStore.load(null, null);
            keyStore.setCertificateEntry("ca", ca);

            // 创建信任我们KeyStore中CA的TrustManager
            String tmfAlgorithm = TrustManagerFactory.getDefaultAlgorithm();
            TrustManagerFactory tmf = TrustManagerFactory.getInstance(tmfAlgorithm);
            tmf.init(keyStore);

            // 创建使用我们的TrustManager的SSLContext
            SSLContext sslContext = SSLContext.getInstance("TLS");
            sslContext.init(null, tmf.getTrustManagers(), null);
            options.setSocketFactory(sslContext.getSocketFactory());

        } catch (Exception ex) {
            Log.d("MqttClient@connect#catch", "Error while setting the certificate", ex);
        }
    }

    /**
     * 订阅MQTT主题并注册处理程序。
     */
    private void subscribeToTopic() {
        try {
            client.subscribe(
                    subscriptionTopic,
                    0,
                    null,
                    new IMqttActionListener() {
                        @Override
                        public void onSuccess(IMqttToken asyncActionToken) {
                            Log.d("MqttClient@subscribeToTopic#onSuccess", "Subscribed!");
                            setCallback();
                            currentHandler.onMqttSubscribe();
                        }

                        @Override
                        public void onFailure(IMqttToken asyncActionToken, Throwable exception) {
                            Log.d("MqttClient@subscribeToTopic#onFailure", "Subscribed fail", exception);
                        }
                    });

        } catch (Exception ex) {
            Log.d("MqttClient@subscribeToTopic#catch", "Error while subscribing", ex);
        }
    }

    /**
     * 销毁MqttClient并确保它断开连接。
     */
    public void destroy() {
        try {
            if (client != null) {
                if (client.isConnected()) {
                    client.disconnect();
                }
            }
            Log.d("MqttClient@destroy#try", "Client destroyed");
        } catch (Exception e) {
            Log.d("MqttClient@destroy#catch", "Error while destroying", e);
        }
    }

    /**
     * 发布命令到MQTT代理
     *
     * @param command 包含主题和值的要发布的命令。
     */
    public void publish(Command command) {
        try {
            MqttMessage message = new MqttMessage();
            message.setPayload(command.getMessage().getBytes());
            client.publish(command.getTopic(), message);
            Log.d("MqttClient@publish#try", command.getMessage());
        } catch (Exception e) {
            Log.d("MqttClient@publish#catch", "Error while publishing", e);
        }
    }

    /**
     * 注册客户端可以切换到的新的ConnectionsHandler。
     *
     * @param key        用于标识处理程序的键。
     * @param newHandler 需要注册的新处理程序。
     */
    public void registerHandler(String key, ConnectionsHandler newHandler) {
        Log.d("MqttClient@registerHandler", key);
        registeredHandlers.put(key, newHandler);
    }

    /**
     * 获取客户端的(新)实例。
     *
     * @param context 需要注册的上下文。
     * @return MqttClient的(新)实例
     */
    public static MqttClient getInstance(Context context) {
        if (INSTANCE == null) {
            Log.d("MqttClient@getInstance", "null");
            INSTANCE = new MqttClient(context);
        }
        return INSTANCE;
    }

    public static MqttClient reconnect(Context context) {
        Log.d("MqttClient@reconnect", "Reconnecting");
        INSTANCE.destroy();
        INSTANCE = null;
        return getInstance(context);
    }

    @Override
    public void connectionLost(Throwable cause) {
        Log.d("MqttClient@connectionLost", "Connection lost", cause);
    }

    @Override
    public void messageArrived(String topic, MqttMessage message) {
        Log.d("MqttClient@messageArrived", message.toString());
        currentHandler.onMqttMessage(topic, message);
    }

    @Override
    public void deliveryComplete(IMqttDeliveryToken token) {
        Log.d("MqttClient@deliveryComplete", "Delivered");
    }

    public boolean isConnected() {
        return client.isConnected();
    }
}
NetworkHandler.java
/**
 * 处理网络变化的类。如果设备连接到新的网络,将使用OnAvailable方法,结合ConnectionsHandler,对状态变化进行操作。
 */
public class NetworkHandler extends NetworkCallback {

  private static NetworkHandler INSTANCE;
  private static int count = 0;
  private ConnectionsHandler currentHandler;

  /**
   * 私有构造函数。
   */
  private NetworkHandler() {
  }

  public ConnectionsHandler getCurrentHandler() {
    return currentHandler;
  }

  public void setCurrentHandler(ConnectionsHandler currentHandler) {
    this.currentHandler = currentHandler;
  }

  @Override
  public void onAvailable(@NotNull Network network) {
    // 确保第一次网络变化不做任何事情(应用程序启动)
    if (count > 1) {
      Log.d("NetworkHandler@onAvailable#if", "Bigger");
      // 在此执行所需的操作
      if (currentHandler != null) {
        currentHandler.onNetworkChange();
      } else {
        Log.d("NetworkHandler@onAvailable#if#else", "no handler");
      }
    } else {
      Log.d("NetworkHandler@onAvailable#else", "smaller");
    }
    count++;
  }

  /**
   * 为该应用程序注册NetworkHandler。
   *
   * @param context 从中检索ConnectivityManager的上下文。
   */
  public void register(Context context) {
    NetworkRequest request =
        new NetworkRequest.Builder()
            .addTransportType(NetworkCapabilities.TRANSPORT_CELLULAR)
            .addTransportType(NetworkCapabilities.TRANSPORT_WIFI)
            .build();

    ConnectivityManager connectivityManager =
        (ConnectivityManager) context.getSystemService(Context.CONNECTIVITY_SERVICE);

    if (connectivityManager != null) {
      connectivityManager.registerNetworkCallback(request, this);
      Log.d("NetworkHandler@register#notNull", "callback registered");
    } else {
      Log.d("NetworkHandler@register#null", "Manager null");
    }
  }

  /**
   * 为该应用程序取消注册处理程序。
   *
   * @param context 从中检索ConnectivityManager的上下文。
   */
  public void unregister(Context context) {
    ConnectivityManager connectivityManager =
        (ConnectivityManager) context.getSystemService(Context.CONNECTIVITY_SERVICE);

    if (connectivityManager != null) {
      Log.d("NetworkHandler@unregister#notNull", "callback unregistered");
      connectivityManager.unregisterNetworkCallback(this);
    } else {
      Log.d("NetworkHandler@unregister#null", "callback not unregistered");
    }
  }

  /**
   * 获取NetworkHandler的实例,如果尚未存在,则创建一个新实例。
   *
   * @return 处理程序的实例。
   */
  public static NetworkHandler getHandler() {
    Log.d("NetworkHandler@getHandler", "Handler requested");
    if (INSTANCE == null) {
      INSTANCE = new NetworkHandler();
    }
    return INSTANCE;
  }
}
SettingsActivity.java
/**
 * 包含应用程序所有设置的活动。主要用于MQTT服务器设置。
 */
public class SettingsActivity extends AppCompatActivity implements
        OnSharedPreferenceChangeListener {

    private Intent result;

    @Override
    protected void onCreate(Bundle savedInstanceState) {
        super.onCreate(savedInstanceState);

        // Inflate the view binding.
        SettingsActivityBinding binding = SettingsActivityBinding.inflate(getLayoutInflater());
        View view = binding.getRoot();
        setContentView(view);

        getSupportFragmentManager()
                .beginTransaction()
                .replace(R.id.settings, new SettingsFragment(this))
                .commit();

        // 设置工具栏
        binding.toolbar.setTitle(getString(R.string.title_activity_settings));
        binding.toolbar.setNavigationOnClickListener(
                view1 -> onBackPressed());

        PreferenceManager.getDefaultSharedPreferences(getApplicationContext())
                .registerOnSharedPreferenceChangeListener(this);
    }

    @Override
    public void onDestroy() {
        super.onDestroy();
        if (result == null) {
            result = new Intent();
            result.putExtra(MainActivity.EXTRA_PREFS_CHANGED, false);
            setResult(Activity.RESULT_OK, result);
        }
    }

    @Override
    public void onSharedPreferenceChanged(SharedPreferences sharedPreferences, String key) {
        // 如果偏好发生变化,通知调用的Activity。
        result = new Intent();
        result.putExtra(MainActivity.EXTRA_PREFS_CHANGED, true);
        setResult(Activity.RESULT_OK, result);
    }

    /**
     * 实际偏好的片段。
     */
    public static class SettingsFragment extends PreferenceFragmentCompat implements
            OnPreferenceClickListener {

        private SharedPreferences preferences;
        private final static int OPEN_FILE_PICKER = 1;
        private Preference filePickerPreference;
        private final Context context;

        /**
         * 默认构造函数,用于接收上下文。
         *
         * @param context 应用程序的上下文
         */
        SettingsFragment(Context context) {
            this.context = context;
        }

        @SuppressLint("ClickableViewAccessibility")
        @Override
        public void onCreatePreferences(Bundle savedInstanceState, String rootKey) {
            preferences = PreferenceManager.getDefaultSharedPreferences(context);
            setPreferencesFromResource(R.xml.root_preferences, rootKey);

            // 查找文件选择器偏好并设置摘要和单击侦听器。
            filePickerPreference = findPreference("filePicker");

            if (filePickerPreference != null) {
                filePickerPreference.setOnPreferenceClickListener(this);
                filePickerPreference.setSummary(preferences.getString("mqtt_file_picker_summary", ""));
            }


            final EditTextPreference preference = findPreference("mqtt_password");

            // 用星号替换密码字段的值,以增强安全性。
            // 基于: https://stackoverflow.com/a/59072162/8298898
            if (preference != null) {
                preference.setSummaryProvider(preference12 -> {

                    // 检查是否有值
                    String getPassword = PreferenceManager.getDefaultSharedPreferences(requireContext()).getString("mqtt_password", "Not set");

                    // 返回“not set”否则返回带星号的密码
                    if (getPassword.equals("not set")) {
                        return getPassword;
                    } else {
                        return (setAsterisks(getPassword.length()));
                    }
                });

                // 将密码字段的值替换为星号,并将摘要设置为带星号的新密码
                preference.setOnBindEditTextListener(
                        editText -> {
                            editText.setInputType(InputType.TYPE_CLASS_TEXT | InputType.TYPE_TEXT_VARIATION_PASSWORD);
                            Drawable visibilityDrawable = ContextCompat.getDrawable(context, R.drawable.baseline_visibility_24);
                            editText.setCompoundDrawablesWithIntrinsicBounds(null, null, visibilityDrawable, null);

                            editText.setOnTouchListener((view, motionEvent) -> {
                                if (motionEvent.getAction() == MotionEvent.ACTION_UP) {
                                    if (motionEvent.getRawX() >= (editText.getRight() - editText.getCompoundDrawables()[2].getBounds().width())) {
                                        if (editText.getInputType() == (InputType.TYPE_CLASS_TEXT | InputType.TYPE_TEXT_VARIATION_PASSWORD)) {
                                            editText.setInputType(InputType.TYPE_CLASS_TEXT);
                                            Drawable draw = ContextCompat.getDrawable(context, R.drawable.baseline_visibility_off_24);
                                            editText.setCompoundDrawablesWithIntrinsicBounds(null, null, draw, null);
                                        } else {
                                            editText.setInputType(InputType.TYPE_CLASS_TEXT | InputType.TYPE_TEXT_VARIATION_PASSWORD);
                                            Drawable draw = ContextCompat.getDrawable(context, R.drawable.baseline_visibility_24);
                                            editText.setCompoundDrawablesWithIntrinsicBounds(null, null, draw, null);
                                        }
                                        return true;
                                    }
                                }
                                return false;
                            });

                            preference.setSummaryProvider(preference1 -> setAsterisks(editText.getText().toString().length()));
                        });
            }

        }

        /**
         * 根据长度创建一串星号。
         *
         * @param length 输入字符串的长度
         * @return 星号字符串
         */
        private String setAsterisks(int length) {
            StringBuilder sb = new StringBuilder();
            for (int s = 0; s < length; s++) {
                sb.append("*");
            }
            return sb.toString();
        }

        @Override
        public boolean onPreferenceClick(@NonNull Preference preference) {
            // 创建一个打开文件选择器的意图
            Intent intent = new Intent(Intent.ACTION_OPEN_DOCUMENT);
            intent.addCategory(Intent.CATEGORY_OPENABLE);
            intent.setType("*/*");
            String[] mimetypes = {"application/x-pem-file", "application/x-x509-ca-cert", "application/pkix-cert"};
            intent.putExtra(Intent.EXTRA_MIME_TYPES, mimetypes);

            // 启动文件选择器
            //noinspection deprecation
            startActivityForResult(intent, OPEN_FILE_PICKER);
            return true;
        }

        @SuppressWarnings("deprecation")
        @Override
        public void onActivityResult(int requestCode, int resultCode,
                                     Intent resultData) {
            // 完成文件选择器后
            if (requestCode == OPEN_FILE_PICKER && resultCode == Activity.RESULT_OK) {
                if (resultData != null) {
                    // 所选文件的URI
                    Uri uri = resultData.getData();

                    // 获取文件的名称
                    Cursor cursor = requireContext().getContentResolver().query(uri, null, null, null, null);
                    int nameIndex = cursor.getColumnIndex(OpenableColumns.DISPLAY_NAME);
                    cursor.moveToFirst();
                    String fileName = cursor.getString(nameIndex);
                    cursor.close();

                    // 将文件的名称设置为摘要并保存
                    preferences.edit().putString("mqtt_file_picker_summary", fileName).apply();
                    filePickerPreference.setSummary(fileName);

                    // 根据URI读取文件
                    try {
                        String text = readTextFromUri(uri);

                        // 粗略证书验证
                        if (text.startsWith("-----BEGIN CERTIFICATE-----") && text.endsWith("-----END CERTIFICATE-----\n")) {
                            preferences.edit().putString("mqtt_cert", text).apply();
                        } else {
                            Toast.makeText(getContext(), "Invalid file", Toast.LENGTH_SHORT).show();
                        }
                    } catch (IOException e) {
                        Log.d("SettingsActiviy@onActivityResult#catch", "Reading failed", e);
                    }
                }
            } else {
                Toast.makeText(getContext(), "No file selected", Toast.LENGTH_SHORT).show();
            }
        }

        /**
         * 根据URI读取文件。
         *
         * @param uri 要查找文件的内容URI
         * @return 文件内的文本
         * @throws IOException 在读取文件时抛出的错误。
         */
        private String readTextFromUri(Uri uri) throws IOException {
            StringBuilder stringBuilder = new StringBuilder();
            try (
                    // 打开URI
                    InputStream inputStream = requireContext().getContentResolver().openInputStream(uri);
                    // 从输入流创建读取器
                    BufferedReader reader = new BufferedReader(new InputStreamReader(Objects.requireNonNull(inputStream)))
            ) {
                int charInt;
                // 当有字符要读取时
                while ((charInt = reader.read()) != -1) {
                    char character = (char) charInt;
                    // 过滤掉潜在有害的字符(不应出现在证书中)
                    if (character == '(' || character == '{') {
                        continue;
                    }
                    stringBuilder.append((char) charInt);
                }
            }
            return stringBuilder.toString();
        }
    }
}
“main/res”里的xml代码
关于res:在 Android 开发中,res 文件夹是 "resources"(资源)的缩写,它是 Android 应用项目中存放各种资源文件的目录之一。这个目录主要包含了应用在运行时使用的非代码资源,例如图像、布局文件、字符串、颜色等。res 文件夹通常在应用的 app 模块下,是 Android 项目的标准结构之一。
anim: 包含动画资源文件,用于定义应用中的动画效果。
drawable: 存放应用图标、图片等可绘制资源。(就是一些矢量图)
layout: 包含应用中的布局文件,用于定义用户界面的结构和外观。
menu:在这个项目中定义应用右上角的弹出菜单。
mipmap: 存放应用图标的不同分辨率版本,用于适配不同屏幕密度的设备。
values: 包含了资源文件,如字符串、颜色、尺寸等,这些资源可以在应用的代码和布局文件中引用。
xml: 用于存放一些 XML 格式的资源文件,如菜单文件、布局文件引用等。(在这个项目中存放了用于配置MQTT的相关参数)
另外如果后续有需要的话还有raw,raw存放原始资源文件,例如音频或视频文件,这些文件在运行时不会被编译成资源 ID。


![[FFmpeg学习]从视频中获取图片](https://img-blog.csdnimg.cn/direct/6d95f233414e4d8e88e3f4447946d1cb.png)