概述
如果需要通过 Webhook 端口从交易伙伴处接收数据,但该交易伙伴可能对于安全性有着较高的要求,而不仅仅是用于验证入站 Webhook 要求的基本身份验证用户名/密码,或者用户可能只想在入站 Webhook 消息上增加额外的安全层。
使用 Webhook 端口的自定义响应功能,用户实际上可以创建自己的 HTTP 签名身份验证逻辑,通过使用分配给请求标头的 HMAC 签名值,对入站 Webhook 请求执行一些额外的身份验证。
扩展阅读:GitHub中的操作示例
脚本
以下是在知行之桥EDI系统Webhook端口的事件选项卡下的响应中编写的脚本:
<!-- setting the secret key value to be available globally -->
<arc:set attr="secret.key" value="test" />

<!-- specifying the HMAC format, key value, algorithm, bits and output to result in HMACSHA256 -->
<arc:set attr="encIn.format" value="HMAC" />
<arc:set attr="encIn.hmackey" value="[secret.key]" />
<arc:set attr="encIn.hmacalgorithm" value="SHA" />
<arc:set attr="encIn.hmacbits" value="256" />
<arc:set attr="encIn.outformat" value="HEX" />
<!-- setting the data that should be included in order to create the hash. this is the body of the request -->
<arc:set attr="encIn.data">[_message.body]</arc:set>

<!-- generating signature HMAC hex digest hash -->
<arc:call op="encEncode" in="encIn" out="encOut">
  <arc:set attr="calculated.signature" value="sha256=[encOut.encodeddata]" />
  <!-- comparing the signature on the request to the signature calcuated above -->
  <arc:if exp="[_httpheaders.X-Hub-Signature-256 | equals([calculated.signature | tolower()])]">
    <arc:set attr="_response.write"><Status>Success!</Status></arc:set>
    <arc:set attr="_response.statuscode" value="200" />
    <arc:set attr="_response.statusdescription" value="OK" />
    <arc:else>
      <arc:set attr="_response.write"><Status>The signature provided in the request did not match the expected signature. The expected value is [calculated.signature | tolower()]</Status></arc:set>
      <arc:set attr="_response.statuscode" value="401" />
      <arc:set attr="_response.statusdescription" value="Unauthorized: Signature Mismatch" />
      <arc:throw code="500" desc="The signature provided in the request did not match the expected signature. The expected value is [calculated.signature | tolower()]" />
    </arc:else>
  </arc:if>
下面提供了有关与此脚本关联的部分的进一步说明,但上面脚本的每个主要部分都包含一个注释,概述了该脚本部分正在执行的操作。此处使用的主要 ArcScript 操作为:encEncode
实现
GitHub 的 webhook 请求的工作方式是,每次我的一个存储库发生推送事件时,它都会向配置的 API 端点(在本例中为 知行之桥EDI系统 的 Webhook 端口)发送 POST 请求。这只是特定于 GitHub,但这里的想法可以转移到任何其他自动化系统,甚至是能够发送 REST 请求的自定义实现。
出于测试的目的,密码仅设置为一个简单的测试字符串。
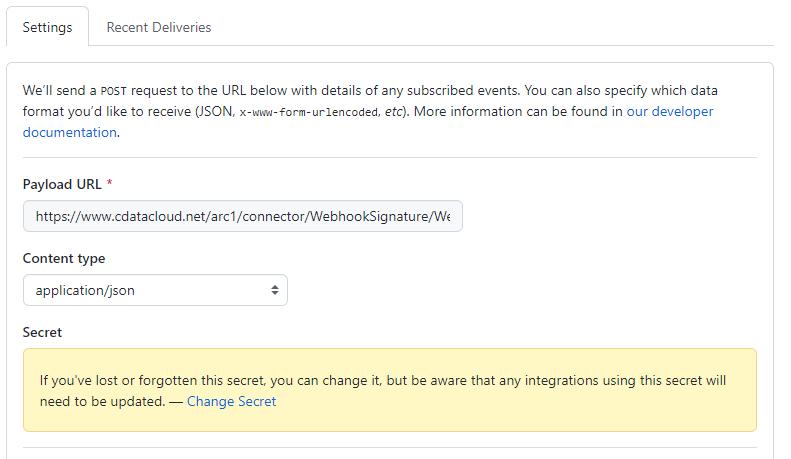
推送事件发生后,GitHub 会向 URL 发送一个包含一些 JSON 数据的 POST。GitHub 使用 POST 的密钥和主体计算 HMAC 十六进制摘要,并将其作为标头 (X-Hub-Signature-256) 包含在内。
此请求到达 Webhook 端口后,自定义脚本实际上会使用传入请求的密钥和截获的正文生成相同的 HMAC 十六进制摘要,将其与 X-Hub-Signature-256 标头中包含的内容进行比较,然后根据结果创建适当的响应。
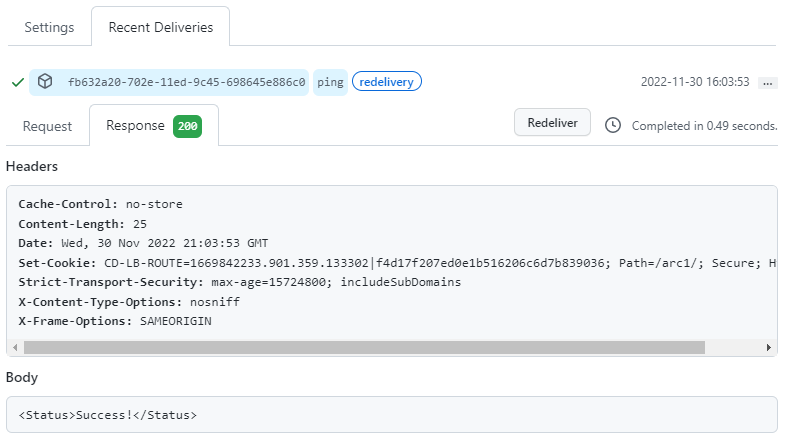
如果签名匹配,则接受请求,并将 200 OK 返回给 GitHub(即客户端):
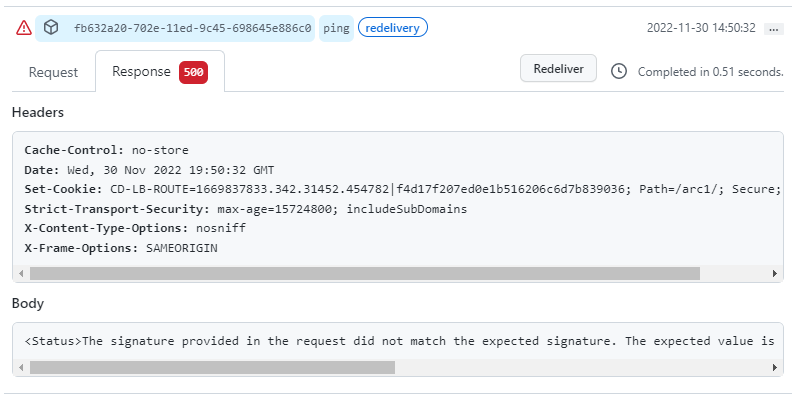
如果签名不匹配,则请求在 Webhook 端口的“输出”选项卡中显示为“错误”,并在返回给客户端 (GitHub) 的响应中显示为 500 错误:
成功的请求在知行之桥EDI系统中显示为“成功”。此外,对于失败的请求,可以直接在日志文件中看到 arc:throw 引发的自定义错误:
[2022-11-30T19:47:57.468] [Error] The signature provided in the request did not match the expected signature. The expected value is sha256=26bf09c078ddcf555a6a7cbd362c70e18e7233d0e4cfb056d2e00bc3ba8ee5e4
[2022-11-30T19:47:57.468][错误]请求中提供的签名与预期的签名不匹配。预期值为 sha256=26bf09c078ddcf555a6a7cbd362c70e18e7233d0e4cfb056d2e00bc3ba8ee5e4
用户可以根据实际需求对上述示例进行自定义的修改,有关Webhook端口的响应事件的详细信息,可以参考此文档。
扩展阅读:Webhook端口示例
EDI是什么?