1、编译安装pybind11
下载源代码:https://github.com/pybind/pybind11,
文档:https://pybind11.readthedocs.io/en/stable/compiling.html
解压后进入到命令行,如果有conda环境,就先进入想要的conda环境,再运行下面的指令
mkdir build
cd build
cmake ..
make -j8
sudo make install
2 编译动态链接库
新建CMakeLists.txt,如下,需要安装opencv,安装教程参考Ubuntu 18.04 安装opencv4.2.0,如果遇到IPPICV问题参考解决编译opencv时,卡在IPPICV
cmake_minimum_required(VERSION 3.4...3.18)
project(test LANGUAGES CXX)

set(CMAKE_CXX_STANDARD 11)

#使用这个命令的前提是pybind11, make install过
find_package(pybind11 REQUIRED)
find_package(OpenCV)

#添加头文件,CMAKE_SOURCE_DIR是CMakeLists.txt所在的位置
include_directories(${CMAKE_SOURCE_DIR}/ ${OpenCV_INCLUDE_DIRS})

#添加CPP文件, PROJECT_NAME = test
pybind11_add_module(${PROJECT_NAME} ${CMAKE_SOURCE_DIR}/test.cpp)

#指定动态链接库的位置
# link_directories(/home/hnty/SDK/iRaySDK/dev/bin)

#指定编译依赖库,PUBLIC是必须的参数,也可以换成其他关键字
target_link_libraries(${PROJECT_NAME} PUBLIC pthread ${OpenCV_LIBS})

#指定安装位置,表示编译的结果安装在 ${CMAKE_INSTALL_PREFIX}/site-packages 目录下,能够直接在python代码中导入
#make install 命令先编译后安装,一步到位
# set(CMAKE_INSTALL_PREFIX /home/hnty/miniconda3/envs/dev/lib/python3.7/)
# install(TARGETS ${PROJECT_NAME} DESTINATION site-packages)
新建test.cpp如下:
#include <opencv2/opencv.hpp>
#include <pybind11/numpy.h>
#include <pybind11/pybind11.h>

namespace py = pybind11;
using namespace cv;

typedef struct test
{
    /* data */
    int ages;
    std::string name;
    cv::Mat pic;
} Person;

Person handle;

void setData(int ages, std::string &name, py::array_t<uint8_t>& img)
{
    handle.ages = ages;
    handle.name = name;
    //np.ndarray -> opencv mat
    auto rows = img.shape(0);
    auto cols = img.shape(1);
    auto channels = img.shape(2);
    auto type = CV_8UC3;
    handle.pic = cv::Mat(rows, cols, type, (unsigned char*)img.data());
}

py::dict getData()
{
    // 在cpp中可以直接使用python内置的数据类型,还是很方便的
    py::dict pydata;
    pydata["name"] = handle.name;
    pydata["ages"] = handle.ages;

    auto rows = handle.pic.rows;
    auto cols = handle.pic.cols;
    auto channels = handle.pic.channels();
    //opencv mat -> np.ndarray
    py::array_t<uint8_t> output_img(py::buffer_info(handle.pic.data, sizeof(uint8_t), //itemsize
                                    py::format_descriptor<uint8_t>::format(), 3, // ndim
                                    std::vector<size_t> {rows, cols , channels}, // shape
                                    std::vector<size_t> {cols * sizeof(uint8_t)*3, sizeof(uint8_t)*3, sizeof(uint8_t)} // strides
                                ));
    pydata["pic"] = output_img;

    return pydata;
}

PYBIND11_MODULE(test, m) {
    m.doc() = "pybind11 example plugin"; // optional module docstring
    m.def("getData", &getData, "A function which adds two numbers");
    m.def("setData", &setData, "test func");
}
新建test.py:
from build import test

import cv2
import numpy as np

img = cv2.imread("oil-bin-1.png") #换成你自己的图片
ages = 23
name = "kitty"

test.setData(ages, name, img)

res = test.getData()
print(res['name'], res['ages'])
cv2.imwrite("output.png", res["pic"])
3、测试
将上述3个文件放到同一个目录,然后在命令行中进入到改目录,依次运行。会生成output.png
mkdir build
cd build
cmake ..
make
cd ..
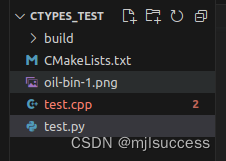
python test.py文件夹格式如下:
4、总结
使用pybind11相比ctypes方法ctypes实现python和c之间的数据交互-CSDN博客,更加简单、易用。但ctypes的优势在于不用额外配置库,python内置了。