第一章 Django 基本使用
第二章 Django URL路由系统
第三章 Django 视图系统
第四章 Django 模板系统
第五章 Django 数据模型系统(基本使用)
第六章 Django 数据模型系统(多表操作)
第七章 Django 用户认证与会话技术
第八章 Django CSRF防护
文章目录
模板系统
模板是什么
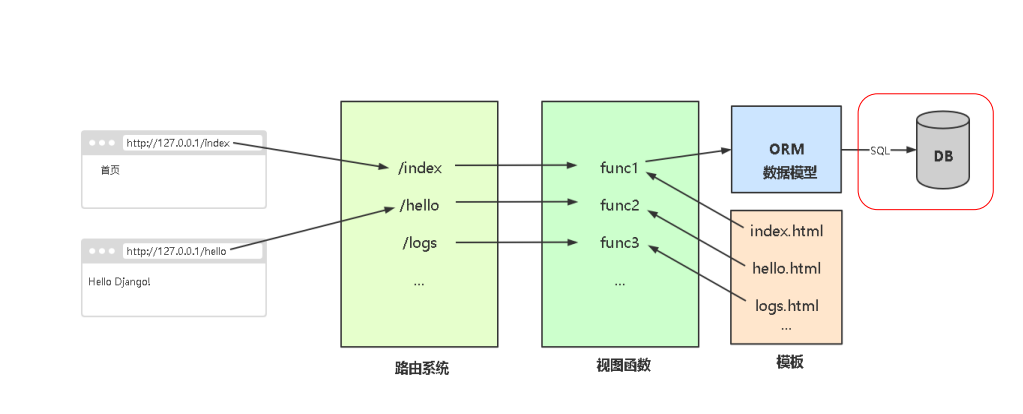
Django模板系统:用于自动渲染一个文本文件,一般用于HTML页面。模板引擎渲染的最终HTML内容返回给客户端浏览器
模板文件有两部分组成:
静态部分,例如html\css\js
动态部分,django模板语言,类似jinja语法
变量
变量定义:再函数视图render中的context传入,类似于字典对象
变量再模板中引用,格式:{ { key }}
路由
# devops/urls.py
from django.urls import path
from myapp import views

urlpatterns = [
    re_path('templates/$',views.templates)
]
视图
# myapp/views.py
from django.shortcuts import render,HttpResponse,redirect
import os
from django.http import StreamingHttpResponse,FileResponse
from django.http import JsonResponse
def templates(request):
    user = {
   'user':'wang','LA':{
    'age': '22','sex':'go'}}
    return render(request,'templates.html',{
    'user' : user })
网页
# templates/templates.html
<!DOCTYPE html>
<html lang="en">
<head>
<meta charset="UTF-8">
<title>文件列表</title>
</head>
<body>
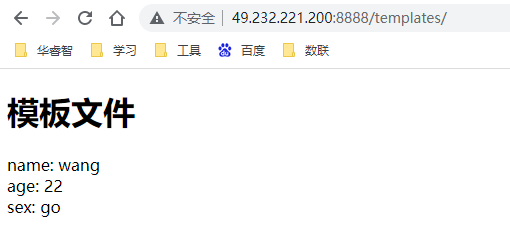
<h1>模板文件</h1>
name: {
{
user.user }}<br>
age: {
{
user.LA.age }}<br>
sex: {
{
user.LA.sex }}
</body>
</html>
验证
http://49.232.221.200:8888/templates/
设置全局变量
示例:设置全局变量
1.再项目中创建contexts.py文件
def user(request):
    username = request.session.get('username')
    return {
   'username':username}
2.在settings.py文件中添加你的上下文处理器
contexts文件创建
# devops/contexts.py
def users(request):
    username = 'wang'
    return {
   'username':username}
配置文件
# devops/settings.py
TEMPLATES = [
    {

        'BACKEND': 'django.template.backends.django.DjangoTemplates',
        'DIRS': [os.path.join(BASE_DIR, 'templates')],
        'APP_DIRS': True,
        'OPTIONS': {

            'context_processors': [
                'django.template.context_processors.debug',
                'django.template.context_processors.request',
                'django.contrib.auth.context_processors.auth',
                'django.contrib.messages.context_processors.messages',
                'devops.contexts.users', ## 增加这一行
            ],
        },
    },
]
网页
# templates/templates.html
<!DOCTYPE html>
<html lang="en">
<head>
<meta charset="UTF-8">
<title>文件列表</title>
</head>
<body>
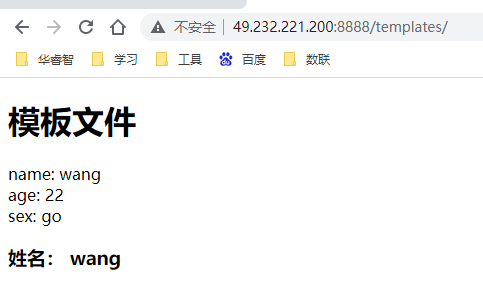
<h1>模板文件</h1>
name: {
{
user.user }}<br>
age: {
{
user.LA.age }}<br>
sex: {
{
user.LA.sex }}
<h3>姓名: {
{
username }}</h3>
</body>
</html>
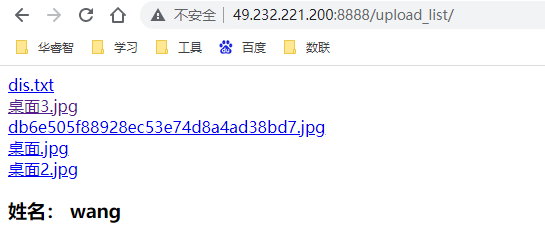
# templates/upload_list.html
<!DOCTYPE html>
<html lang="en">
    <head>
        <meta charset="UTF-8">
        <title>文件列表</title>
    </head>
    <body>
        {
   % for i in file_list %}
        <a href="{% url 'download' i %}">{
   {
    i }}</a><br>
        {
   % endfor %}
        <h3>姓名: {
   {
    username }}</h3>
    </body>
</html>
验证
两个访问路径都可以看到 姓名:wang
http://49.232.221.200:8888/templates/
http://49.232.221.200:8888/upload_list/
流程控制:条件和循环
标签:条件判断
if条件判断:判定给定的条件是否满足(True或False),根据判断的结果决定执行的语句
语法:
{% if <表达式> %}
<内容块>
{% elif <表达式> %}
<内容块>
{% else %}
<内容块>
{% endif %}
视图
# myapp/views.py
from django.shortcuts import render,HttpResponse,redirect
import os
from django.http import StreamingHttpResponse,FileResponse
from django.http import JsonResponse
def templates(request):
    user = {
   'A':{
    'user':'wang', 'age': '22','sex':'go'},
            'B':{
    'user':'xing', 'age': '23','sex':'baby'},
            'C':{
    'user':'zhang','age': '24','sex':'tian'},
            }
    return render(request,'templates.html',{
    'user' : user })
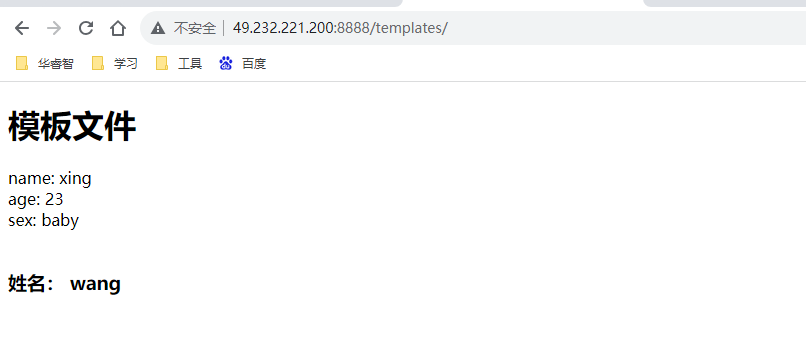
网页
# templates/templates.html
<!DOCTYPE html>
<html lang="en">
    <head>
        <meta charset="UTF-8">
        <title>文件列表</title>
    </head>
    <body>
        <h1>模板文件</h1>
        {
   % if user.B.age == '43' %}
            name: {
   {
    user.B.user }}<br>
            age: {
   {
    user.B.age }}<br>
            sex: {
   {
    user.B.sex }}<br>
        {
   % else %}
            {
   {
    user.B.user }} 不等于 23
        {
   % endif %}<br>
        <h3>姓名: {
   {
    username }}</h3>
    </body>
</html>
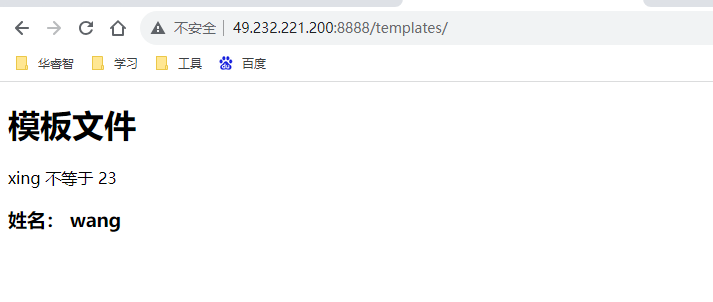
验证
网页
# templates/templates.html
<!DOCTYPE html>
<html lang="en">
    <head>
        <meta charset="UTF-8">
        <title>文件列表</title>
    </head>
    <body>
        <h1>模板文件</h1>
        {
   % if user.B.age == '23' %}
            name: {
   {
    user.B.user }}<br>
            age: {
   {
    user.B.age }}<br>
            sex: {
   {
    user.B.sex }}<br>
        {
   % else %}
            {
   {
    user.B.user }} 不等于 23
        {
   % endif %}<br>
        <h3>姓名: {
   {
    username }}</h3>
    </body>
</html>
验证
标签:循环
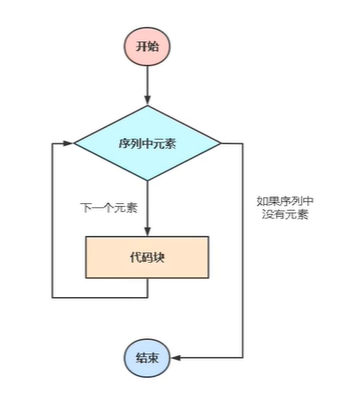
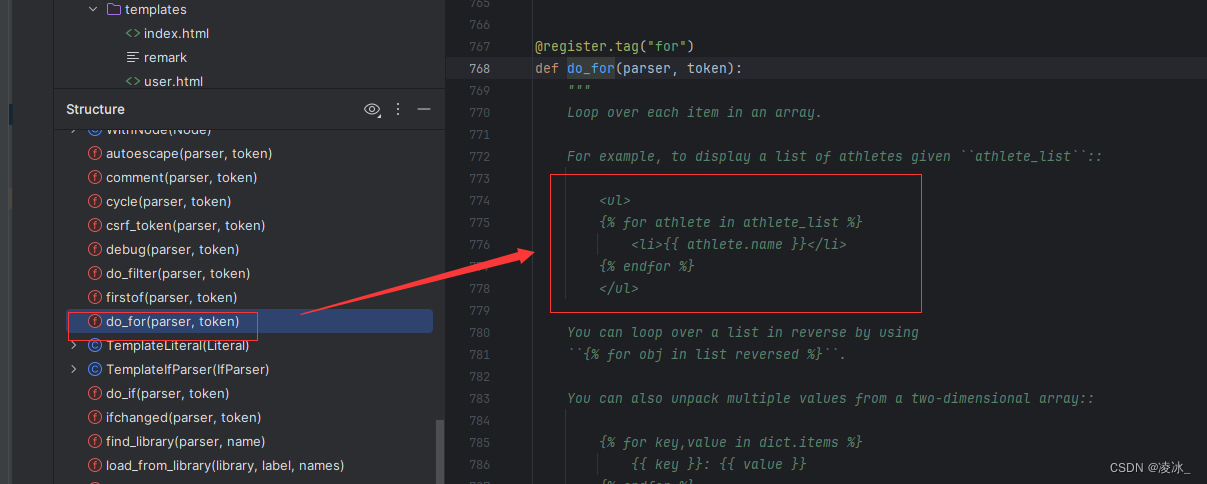
for循环:一般用于遍历数据类型的元素进行处理,例如列表。
语法:
{% for <变量> in <序列> %}
<内容块>
{% endfor %}
视图
# myapp/views.py
from django.shortcuts import render,HttpResponse,redirect
import os
from django.http import StreamingHttpResponse,FileResponse
from django.http import JsonResponse
def templates(request):
    user = {
   'A':{
    'user':'wang', 'age': '22','sex':'go'},
            'B':{
    'user':'xing', 'age': '23','sex':'baby'},
            'C':{
    'user':'zhang','age': '24','sex':'tian'},
            }
    return render(request,'templates.html',{
    'user' : user })
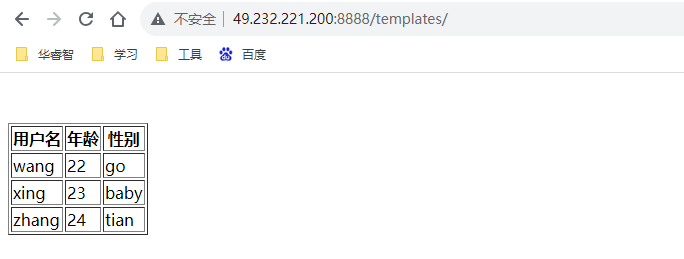
网页
# templates/templates.html
<!DOCTYPE html>
<html lang="en">
    <head>
        <meta charset="UTF-8">
        <title>文件列表</title>
    </head>
    <body>
        <table border="1">
            <thead>
                <tr>
                    <th>用户名</th>
                    <th>年龄</th>
                    <th>性别</th>
                </tr>
            </thead>
            <thead>
            <br><br>
                {
   % for k, v in user.items %}
                <tr>
                    <td>{
   {
    v.user }}</td>
                    <td>{
   {
    v.age }}</td>
                    <td>{
   {
    v.sex }}</td>
                </tr>
            {
   % endfor %}
            </thead>
        </table>
    </body>
</html>
验证
http://49.232.221.200:8888/templates/
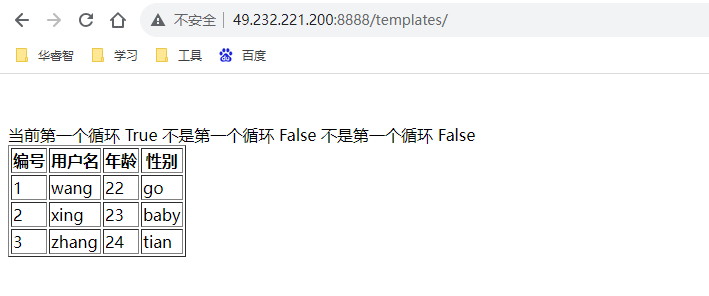
标签:forloop变量
在Django模板中,forloop是一个特殊的变量,它包含了当前循环的相关信息。这个变量是在{% for %}标签中生成的,用于获取当前循环进展的信息
变量描述forloop.counter循环计数器,当前循环的索引从1开始forloop.counter0循环计数器,当前循环的索引从0开始forloop.revcounter当前
| 变量 | 描述 |
|---|---|
| forloop.counter | 循环计数器,当前循环的索引从1开始 |
| forloop.counter0 | 循环计数器,当前循环的索引从0开始 |
| forloop.revcounter | 当前循环倒数计数,最后一次循环为1,反向计数 |
| forloop.revcounter0 | 当前循环倒数计数,最后一次循环为0,反向计数 |
| forloop.first | 当前循环为第一个循环时,该变量为True |
| forloop.last | 当前循环为最后一个循环时,该变量为True |
| forloop.parentloop | 再嵌套循环中,指向当前循环的上级循环 |
视图
# myapp/views.py
from django.shortcuts import render,HttpResponse,redirect
import os
from django.http import StreamingHttpResponse,FileResponse
from django.http import JsonResponse
def templates(request):
    user = {
   'A':{
    'user':'wang', 'age': '22','sex':'go'},
            'B':{
    'user':'xing', 'age': '23','sex':'baby'},
            'C':{
    'user':'zhang','age': '24','sex':'tian'},
            }
    return render(request,'templates.html',{
    'user' : user })
网页
# templates/templates.html
<!DOCTYPE html>
<html lang="en">
    <head>
        <meta charset="UTF-8">
        <title>文件列表</title>
    </head>
    <body>
        <table border="1">
            <thead>
                <tr>
                    <th>编号</th>
                    <th>用户名</th>
                    <th>年龄</th>
                    <th>性别</th>
                </tr>
            </thead>
            <thead>
            <br><br>
                {
   % for k, v in user.items %}
                <tr>
                    {
   % if forloop.first %}
                        当前第一个循环
                    {
   % else %}
                        不是第一个循环
                    {
   % endif %}
                    {
   {
    forloop.first}}
                    <td>{
   {
    forloop.counter }}</td>
                    <td>{
   {
    v.user }}</td>
                    <td>{
   {
    v.age }}</td>
                    <td>{
   {
    v.sex }}</td>
                </tr>
            {
   % endfor %}
            </thead>
        </table>
    </body>
</html>
验证
http://49.232.221.200:8888/templates/
操作符
| 变量 | 描述 |
|---|---|
| 比较操作符 | == 等于 != 不等于 >大于 < 小于 >= 大于等于 <= 小于等于 |
| 逻辑操作符 | and 与or 或 |
| 成员操作符 | not 逻辑否定 in 包含在内 |
过滤器:在变量被显示前修改值的一种方法。
语法:{ { value | 过滤器:参数 }}
| 过滤器 | 说明 | 示例 |
|---|---|---|
| add | 将两个值转换为整数相加 | { { 11 | add:“6” }} 结果 17 |
| cut | 切除字符。从给定字符串中删除arg的所有值。 | { { “hello world” | cut:“w” }} 结果 hello orld |
| default | 如果值的计算结果为 False,则使用给定的默认值。否则,使用该值。 | { { “” | default:“hello world” }} 结果 hello world |
| first | 返回第一个元素 | { “hello world” | first }} 结果 h |
| last | 返回最后一个元素 | { “hello world” | last }} 结果 d |
| join | 使用字符串连接列表,如Python的 str.join(list) | { abc | join:“,” }} 结果 1,2,3 # abc = [1,2,3] |
| length | 返回值的长度。这适用于字符串和列表 | { { “hello world” | length }} 结果 11 |
| lower | 将字 符串转换为小写 | { “AAA” | lower }} 结果 aaa |
| upper | 将字符串转换为大写 | { “aaa” | upper }} 结果 AAA |
| slice | 切片, 类似于Python中的切片操作。 | { “hello world” | slice:“2:” }} 结果 llo world |
| title | 所有单词首字母大写 | { “aaa” | title }} 结果 Aaa |
| truncatechars | 如果长度大于指定的字符数,则截断字符串。截断的字符串将以可翻译的省略号序列(“…”)结束 | { { “hello world” | truncatechars:2 }} 结果 h… |
| filesizeformat | 将该值格式化为“人类可读”文件大小(即 ‘13 KB‘,‘4.1 MB‘,‘102 bytes‘ 等)。 | { { 10000 | filesizeformat }} 结果 9.8 KB |
| floatformat | 当不带参数时,将一个浮点数舍入到小数点后一位,但前提是要显示一个小数部分。 | { { 1.33333333 | floatformat }} 结果 1.3floatformat:2 指定保留的小数位数 |
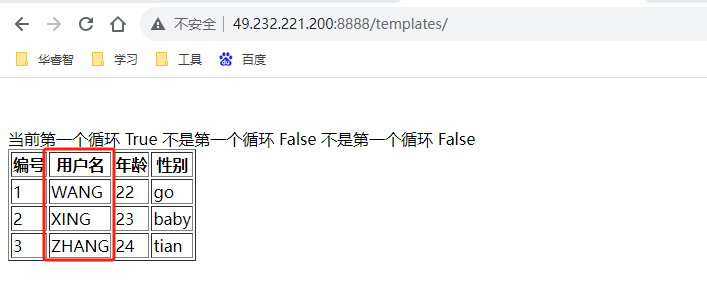
举例:首字母大写
视图
# myapp/views.py
from django.shortcuts import render,HttpResponse,redirect
import os
from django.http import StreamingHttpResponse,FileResponse
from django.http import JsonResponse
def templates(request):
    user = {
   'A':{
    'user':'wang', 'age': '22','sex':'go'},
            'B':{
    'user':'xing', 'age': '23','sex':'baby'},
            'C':{
    'user':'zhang','age': '24','sex':'tian'},
            }
    return render(request,'templates.html',{
    'user' : user })
网页
# templates/templates.html
<!DOCTYPE html>
<html lang="en">
    <head>
        <meta charset="UTF-8">
        <title>文件列表</title>
    </head>
    <body>
        <table border="1">
            <thead>
                <tr>
                    <th>编号</th>
                    <th>用户名</th>
                    <th>年龄</th>
                    <th>性别</th>
                </tr>
            </thead>
            <thead>
            <br><br>
                {
   % for k, v in user.items %}
                <tr>
                    {
   % if forloop.first %}
                        当前第一个循环
                    {
   % else %}
                        不是第一个循环
                    {
   % endif %}
                    {
   {
    forloop.first}}
                    <td>{
   {
    forloop.counter }}</td>
                    <td>{
   {
    v.user | upper  }}</td>
                    <td>{
   {
    v.age }}</td>
                    <td>{
   {
    v.sex }}</td>
                </tr>
            {
   % endfor %}
            </thead>
        </table>
    </body>
</html>
验证
http://49.232.221.200:8888/templates/
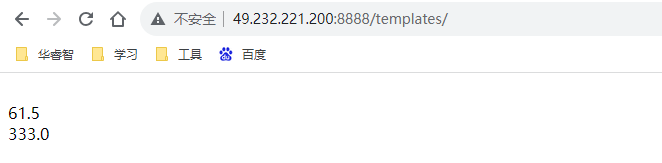
自定义过滤器
1、在app下创建templatetags目录
2、自定义过滤器函数
from django.template import Library
register = Library() # 注册过滤器对象
@register.filter # 通过装饰注册自定义过滤器
def func(n):
return n / 2
3、在模板中使用
{% load filters %}
{ { 123 | func }}
# devops/settings.py
INSTALLED_APPS = [
    'django.contrib.admin',
    'django.contrib.auth',
    'django.contrib.contenttypes',
    'django.contrib.sessions',
    'django.contrib.messages',
    'django.contrib.staticfiles',
    "myapp",   # 增加这一行
]
自定义
# myapp/templatetags/custom.py
from django.template import Library
register = Library() # 注册过滤器对象
@register.filter # 通过装饰注册自定义过滤器
def func(n):
    return n / 2
网页
# templates/templates.html
<!DOCTYPE html>
<html lang="en">
    <head>
        <meta charset="UTF-8">
        <title>文件列表</title>
        {
   % load custom %} # 引用自定义模块
    </head>
    <body>
    <br>
    {
   {
    123 | func }}<br>
    {
   {
    666 | func }}
    </br>
    </body>
</html>
验证
http://49.232.221.200:8888/templates/
注释
模板中注释语法:
{# 注释内容 #}
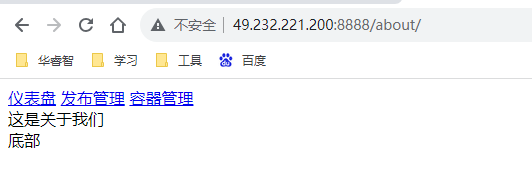
模板继承
模板继承主要是为了提高代码重用,减轻开发人员的工作量。
典型应用:网站的头部、尾部信息。
1、定义一个基础模板,也称为母板,这个页面存放整个网站共用的内容
templates/base.html
2、在子模板继承这个母版
{% extends ‘base.html’ %}
3、在基础模板预留子模板差异化内容
{% block 名称 %} 预留区域 {% endblock %}
4、在子模板里同样语法引用并填充预留区域内容
路由
# devops/urls.py
from django.urls import path,re_path
from myapp import views

urlpatterns = [
    re_path('about/$',views.about),
    re_path('news/$',views.news)
]
视图
# myapp/views.py
from django.shortcuts import render,HttpResponse,redirect

def about(request):
    return render(request, 'about.html')

def news(request):
    return  render(request, 'news.html')
网页
# templates/base.html
<!DOCTYPE html>
<html lang="en">
<head>
    <meta charset="UTF-8">
    <title>{
   % block title %}{
   % endblock %}</title>
    {
   % block style %} {
   % endblock %}
</head>
<body>
<nav class="nav">
    <a href="#">仪表盘</a>
    <a href="#">发布管理</a>
    <a href="#">容器管理</a>
</nav>
<div class="context">
    {
   % block context %} 预留区域 {
   % endblock %}
</div>
<footer class="footer">
    底部
</footer>
</body>
</html>
# templates/about.html
{
   % extends 'base.html' %}
{
   % block title %}关于我们{
   % endblock %}
{
   % load static %}
{
   % block style %}
{
   % endblock %}
{
   % block context %}
    这是关于我们
{
   % endblock %}
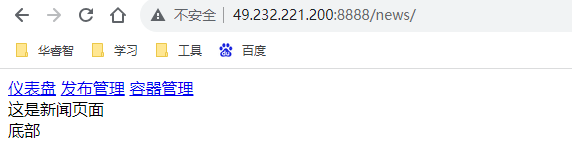
# templates/news.html
{
   % extends 'base.html' %}
{
   % block title %}新闻{
   % endblock %}
{
   % block context %}
    这是新闻页面
{
   % endblock %}
验证
http://49.232.221.200:8888/about/
http://49.232.221.200:8888/news/
模板导入
模板导入:导入一个模板(一般是某个网页功能)到当前模板
接着模板继承的写
路由、视图都不变
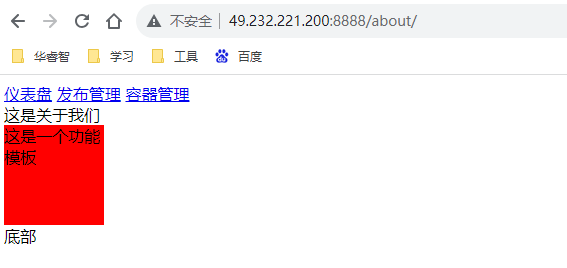
网页
# templates/htllo.html
<div style="background-color: red;width: 100px;height: 100px">
    这是一个功能模板
</div>
# templates/about.html
{
   % extends 'base.html' %}
{
   % block title %}关于我们{
   % endblock %}
{
   % load static %}
{
   % block style %}
{
   % endblock %}
{
   % block context %}
    这是关于我们
{
   % include 'hello.html' %}
{
   % endblock %}
# templates/news.html
{
   % extends 'base.html' %}
{
   % block title %}新闻{
   % endblock %}
{
   % block context %}
    这是新闻页面
{
   % include 'hello.html' %}
{
   % endblock %}
验证
http://49.232.221.200:8888/about/
http://49.232.221.200:8888/news/

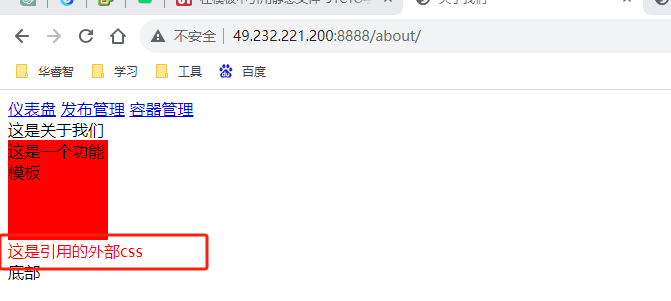
引入静态文件
• STATICFILES_DIRS:告诉Django哪个目录是“静态文件的文件夹”
• STATIC_ROOT:指出浏览器访问静态文件“根路径”
1、在settings.py配置
BASE_DIR = os.path.dirname(os.path.dirname(os.path.abspath(file)))
STATICFILES_DIRS = (
os.path.join(BASE_DIR, ‘static’),
)
STATIC_URL = ‘/static/’
2、在模板文件引用静态文件
<link rel=“stylesheet” href=“/static/main.css”>
或者
<link rel=“stylesheet” href="{% static ‘main.css’ %}
# devops/settings.py
# 最下边新增
# BASE_DIR = os.path.dirname(os.path.dirname(os.path.abspath(file))) 这一个里边默认就用,可以确认下,没有的话添加
STATICFILES_DIRS = (
    os.path.join(BASE_DIR, 'static'),
)
创建css
# myapp/static/main.css
.test {

    color: red;
}
网页
# templates/about.html
{
   % extends 'base.html' %}
{
   % block title %}关于我们{
   % endblock %}
{
   % load static %}
{
   % block style %}
    <link rel="stylesheet" href="{% static 'main.css' %}">
{
   % endblock %}
{
   % block context %}
    这是关于我们
{
   % include 'hello.html' %}

<div class="test">
    这是引用的外部css
</div>
{
   % endblock %}
验证
http://49.232.221.200:8888/about/