目录
准备工作:web服务器搭建
第一步:挂载
[root@localhost node1]# mount /dev/sr0 /mnt/
第二步:编辑配置文件
[root@localhost node1]# vim /etc/yum.repos.d/web.repo[BaseOS]
name=BaseOS
baseurl=file:///mnt/BaseOS
gpgcheck=0
[AppStream]
name=AppStream
baseurl=file:///mnt/AppStream
gpgcheck=0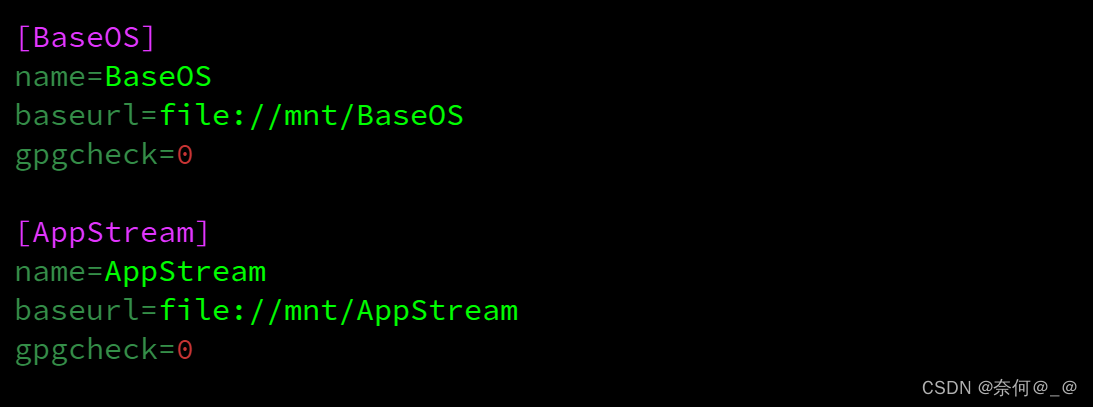
第三步:安装软件包
[root@localhost node1]# dnf install httpd -y
[root@localhost ~]# rpm -ql httpd
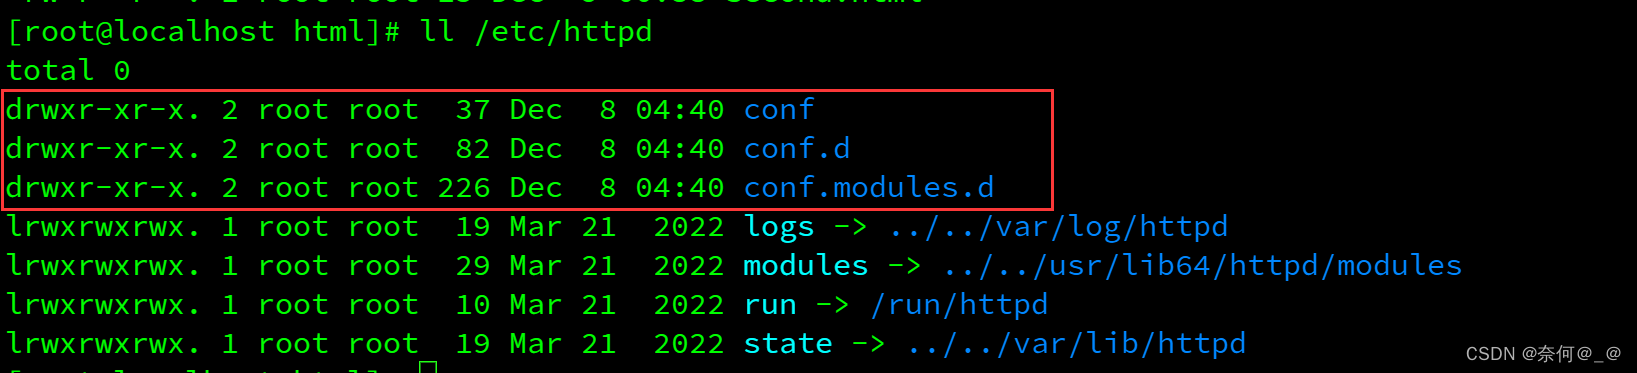
[root@localhost httpd]# tree /etc/httpd
/etc/httpd
├── conf
│ ├── httpd.conf
│ └── magic
├── conf.d
│ ├── autoindex.conf
│ ├── README
│ ├── userdir.conf
│ └── welcome.conf
├── conf.modules.d
│ ├── 00-base.conf
│ ├── 00-dav.conf
│ ├── 00-lua.conf
│ ├── 00-mpm.conf
│ ├── 00-proxy.conf
│ ├── 00-systemd.conf
│ └── 01-cgi.conf
├── logs -> ../../var/log/httpd
├── modules -> ../../usr/lib64/httpd/modules
└──
run -> /run/httpd
第四步:启动httpd
[root@localhost node1]# systemctl start httpd.service
注:
	1、启动用start,再次启动用restart,
    2、.service后缀可加可不加
查看配置文件:
[root@localhost node1]# rpm -ql httpd | grep etc
第五步:设置防火墙状态:
[root@localhost ~]# systemctl status firewalld
[root@localhost ~]#systemctl stop firewalld

#可不用
[root@localhost ~]#systemctl disable firewalld
注意: systemctl start/restart/enable/disable/stop/status/reload 的区别
重启服务:
[root@localhost ~]# systemctl restart httpd查看状态:
查看是否启动成功:
[root@localhost node1]# systemctl is-active httpd
active

##测试状态代码
[root@localhost node1]# systemctl stop httpd.service
[root@localhost node1]# systemctl is-active httpd
inactive
第六步:测试
- 在客户端:curl http://ip地址, curl -I 可以查看http报文信息
- 通过浏览器访问http://ip地址

第一步、启动httpd
[root@localhost node1]# systemctl start httpd.service
注:
    1、启动用start,再次启动用restart,
    2、.service后缀可加可不加
第二步、设置防火墙状态:
[root@localhost ~]# systemctl status firewalld
[root@localhost ~]#systemctl stop firewalld
##也可以使用以下命令
[root@localhost ~]#systemctl disable firewalld注意: systemctl start/restart/enable/disable/stop/status/reload 的区别
1、默认防火墙建立22端口连接
2、关闭文件访问权限——SeLinux
[root@localhost html]# setenforce 0
注:临时生效命令
3、进入默认网站资源界面路径:
[root@localhost node1]# cd /var/www/html配置文件路径:
第三步,添加两个ip地址
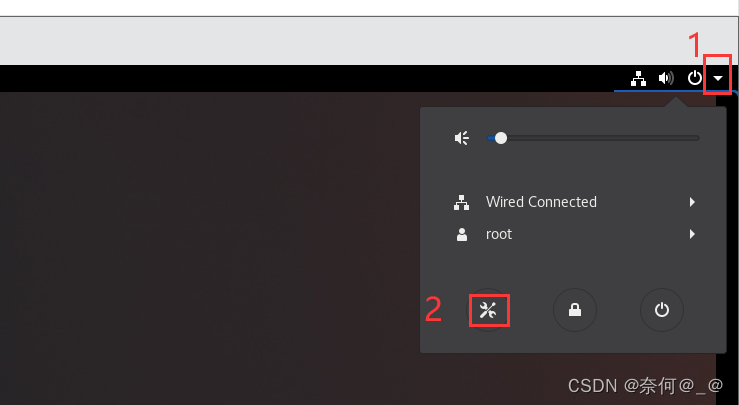
方法一:图形界面直接添加

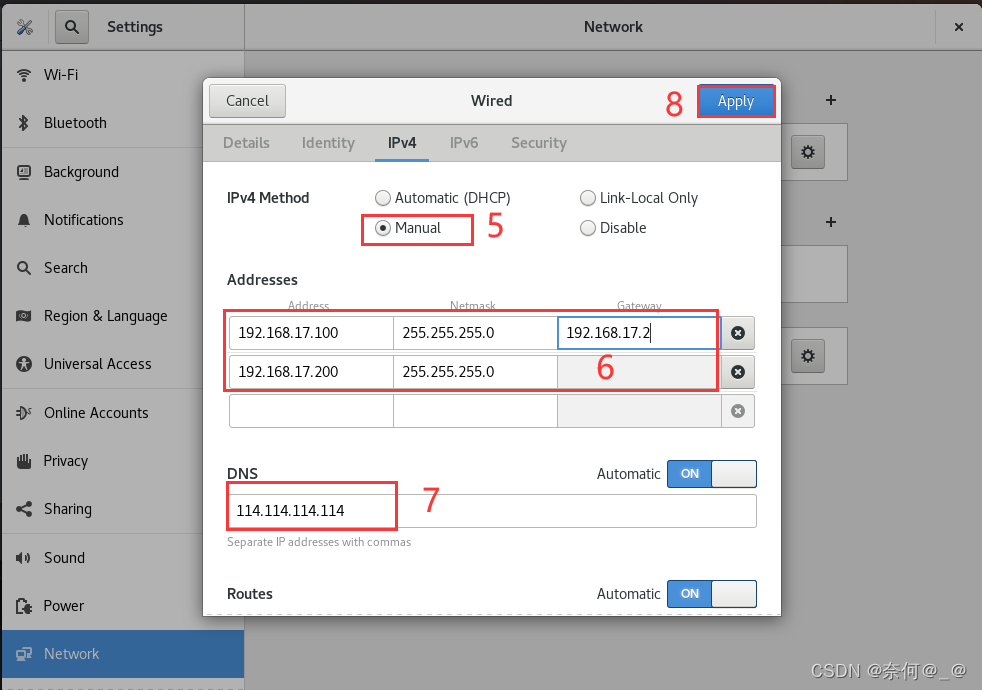
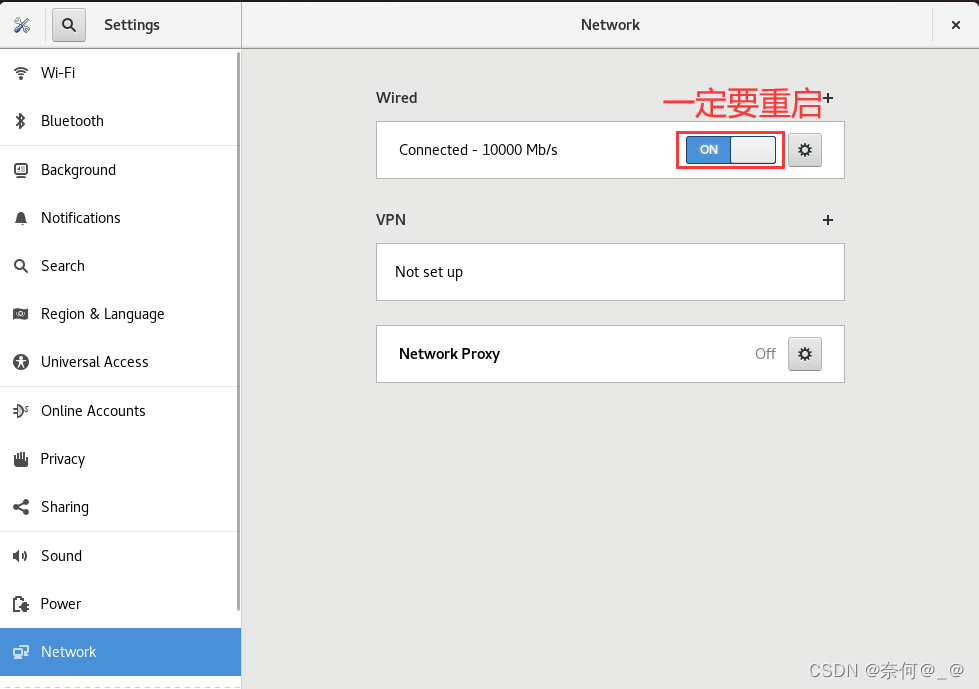
添加成功

方法二:nmcli添加多个地址
[root@localhost ~]# nmcli connection modify ens160 ipv4.method manual ipv4.addresses 192.168.17.100/24 +ipv4.addresses 192.168.17.200/24 ipv4.gateway 192.168.17.2 ipv4.dns 114.114.114.114 connection.autoconnect yes [root@localhost ~]# nmcli connection up ens160
Connection successfully activated (D-Bus active path: /org/freedesktop/NetworkManager/ActiveConnection/3)第四步、创建两个网页文件根目录,并定义网页内容
1、创建两个网页文件根目录
[root@localhost ~]# mkdir -pv /www/ip/{100,200}
2、定义网页内容
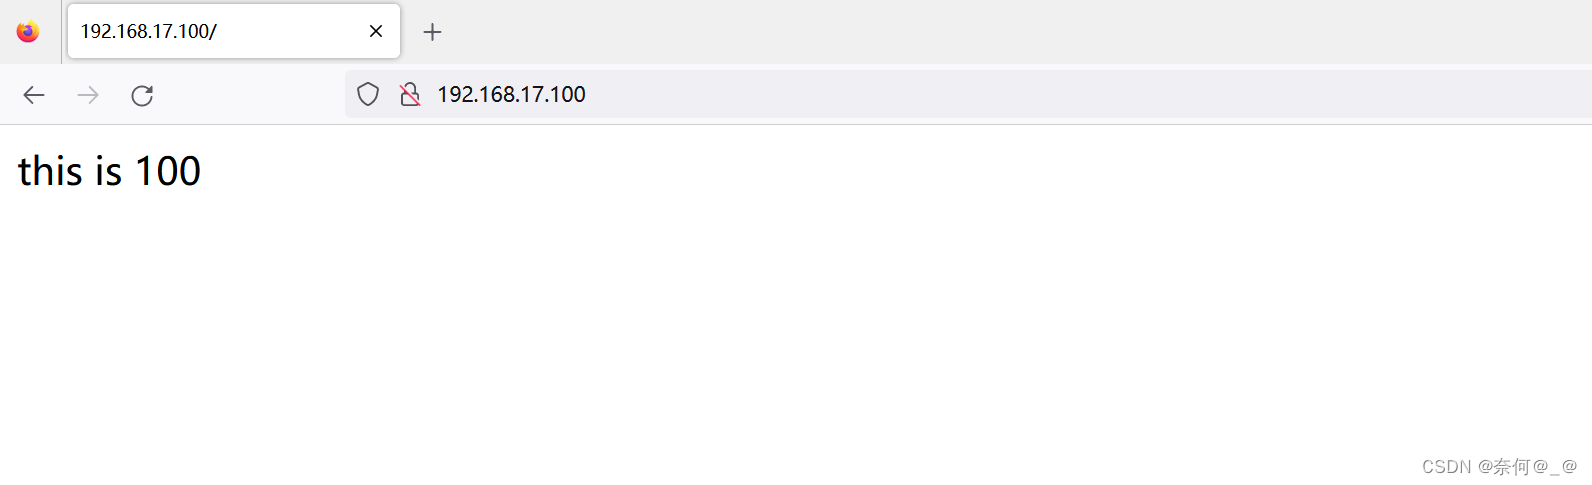
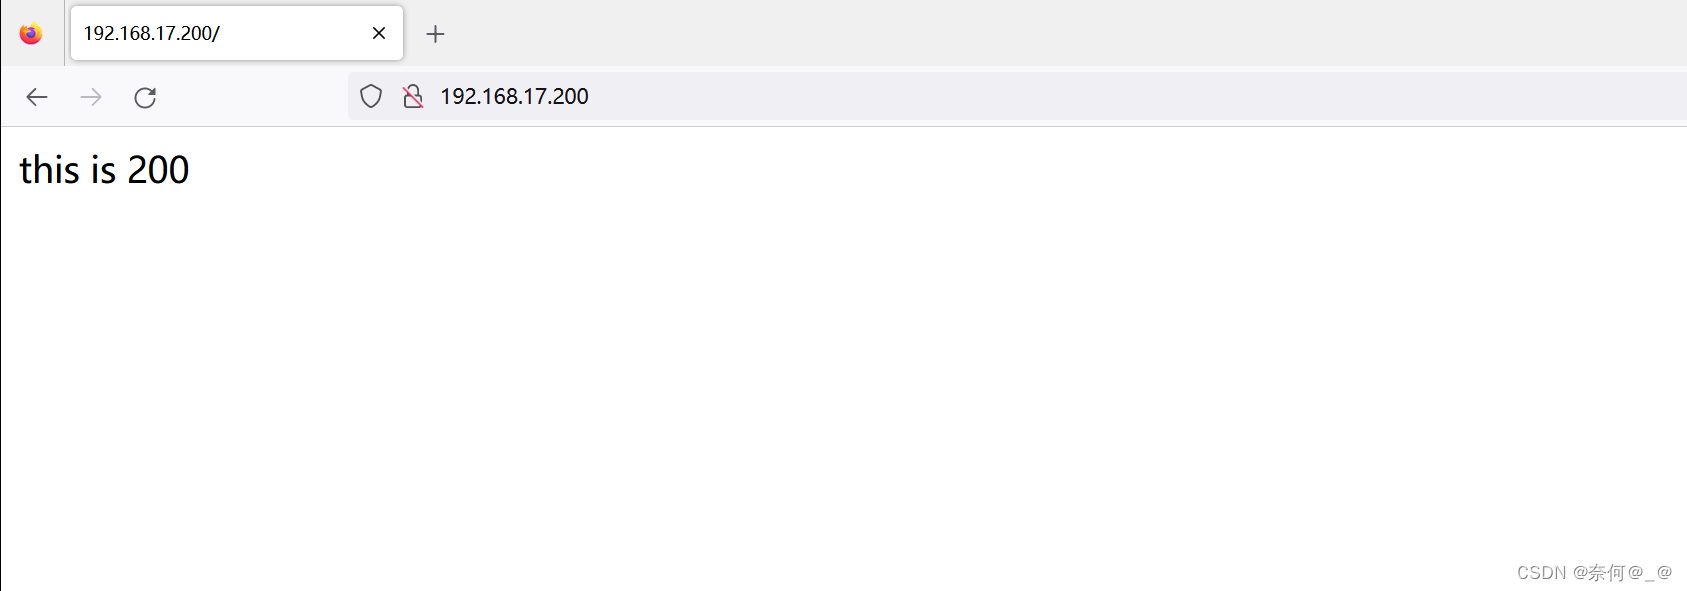
[root@localhost ~]# echo this is 100 > /www/ip/100/index.html
[root@localhost ~]# echo this is 200 > /www/ip/200/index.html
3、重启服务:
[root@localhost ~]# systemctl restart httpd4、关闭防火墙+SELinux
[root@server html]# setenforce 0
[root@server html]# getenforce
Permissive
第五步,定义基于不同ip地址来访问网站的配置文件
查看示例文件:
[root@localhost node1]# rpm -ql httpd | grep vhosts.conf
/usr/share/doc/httpd/httpd-vhosts.conf
[root@localhost node1]# vim /usr/share/doc/httpd/httpd-vhosts.conf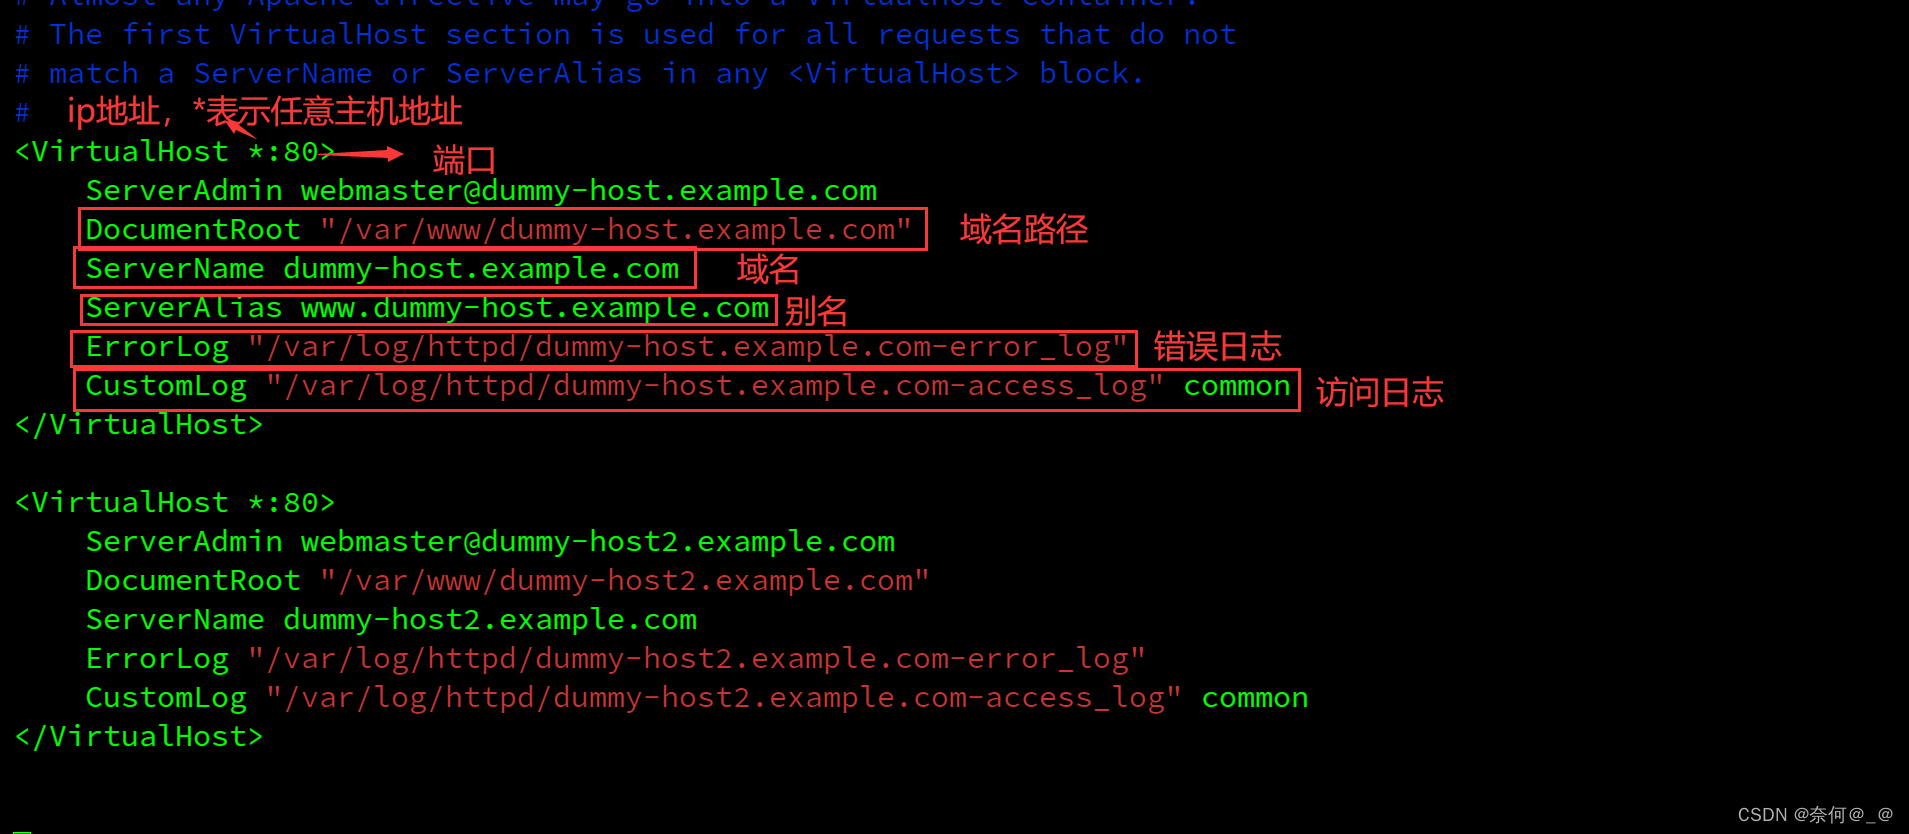
[root@localhost node1]# vim /etc/httpd/conf.d/httpd-vhosts.conf<VirtualHost 192.168.17.100:80>
ServerName 192.168.17.100
DocumentRoot /www/ip/100
</VirtualHost>
<Directory /www>
AllowOverride none
Require all granted
</Directory>
<VirtualHost 192.168.17.200:80>
ServerName 192.168.17.200
DocumentRoot /www/ip/200
</VirtualHost>
第六步:测试
[root@localhost ~]# systemctl restart httpd
[root@localhost ~]# curl 192.168.126.200
this is 200
[root@localhost ~]# curl 192.168.126.100
this is 100
如果访问时显示的是apache默认的欢迎界面,则需要做如下操作:
[root@localhost ~]# setenforce 0